

DIY Drip Irrigation System for Garden
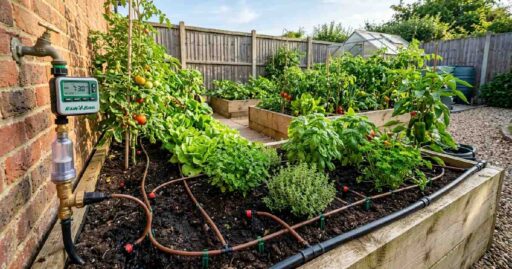
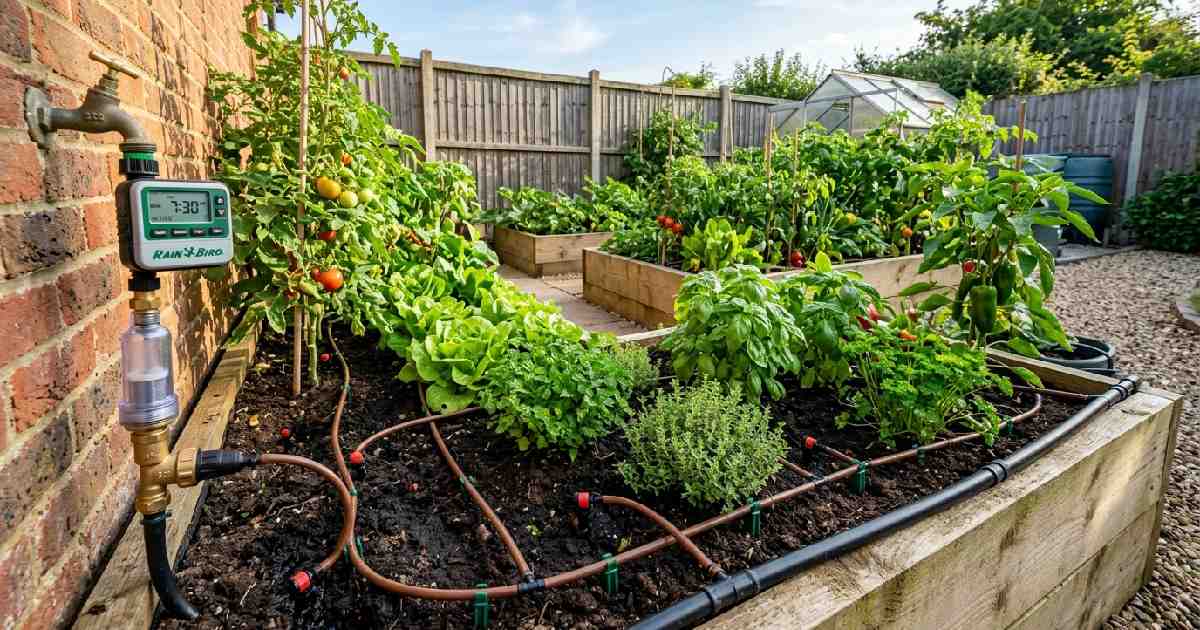
Building a DIY drip irrigation system for garden is one of the smartest ways to save water and time. It delivers water directly to plant roots instead of wasting it through spraying. With simple materials like pipes, tubing, and emitters, anyone can build this system easily.
This guide covers everything from materials needed to step-by-step setup instructions for beginners. Whether you have a small garden or a large yard, a drip system works well. Learn how to build an efficient watering setup that keeps your garden healthy without constant manual effort.
What is a Drip Irrigation System?
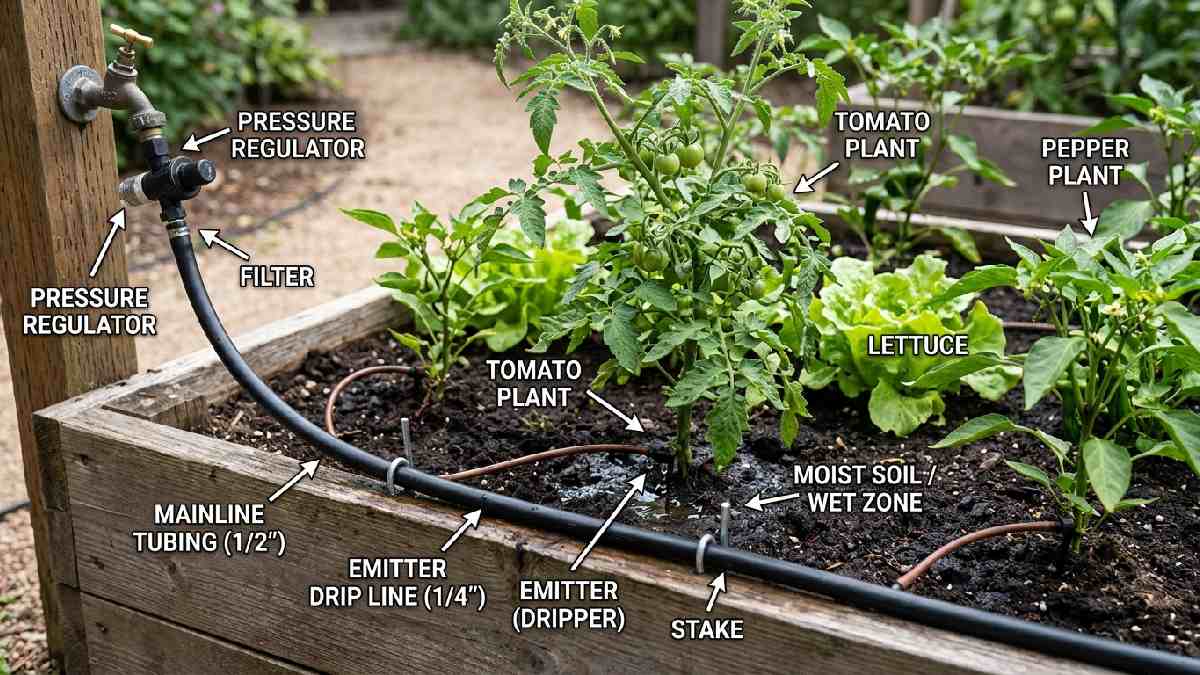
A DIY drip irrigation system for garden delivers water slowly and directly to plant roots. This method uses tubing, pipes, and small emitters to control water flow precisely. Unlike sprinklers, drip systems reduce water waste by targeting only the root zone. The system can be customized to fit any garden size or plant arrangement.
Understanding how this setup works helps beginners build an efficient watering solution at home. With basic materials and simple planning, anyone can create a functional drip irrigation setup for their garden.
Basic definition of drip irrigation
Drip irrigation is a watering method that delivers water slowly through tubes and emitters. It targets the base of each plant instead of spraying water broadly. This technique minimizes water loss from evaporation and runoff during watering sessions.
Drip systems can be simple, using basic tubing, or more advanced with timers. The method works well for vegetable gardens, flower beds, and potted plants alike. Understanding this basic definition helps gardeners appreciate why drip irrigation saves resources effectively.
How drip irrigation works
Drip irrigation works by slowly releasing water through small emitters placed near plant roots. Water travels through a main pipe or hose connected to a water source. Emitters or small holes along the tubing release water drop by drop steadily.
This slow, consistent delivery allows soil to absorb water without runoff or waste. Pressure regulators and filters can improve system performance and prevent clogging issues. This simple mechanism makes drip irrigation efficient for gardens of any size.
Why is it useful for home gardens
A DIY drip irrigation system for garden offers many practical advantages for home gardeners. It reduces water waste significantly compared to traditional hose or sprinkler watering methods. This system also saves time since it can be automated with simple timers.
Plants receive consistent moisture, leading to healthier growth and fewer watering-related problems. The setup works well for vegetable gardens, flower beds, and container plants equally. These benefits make drip irrigation a valuable addition to any home garden.
Benefits of a DIY Drip Irrigation System
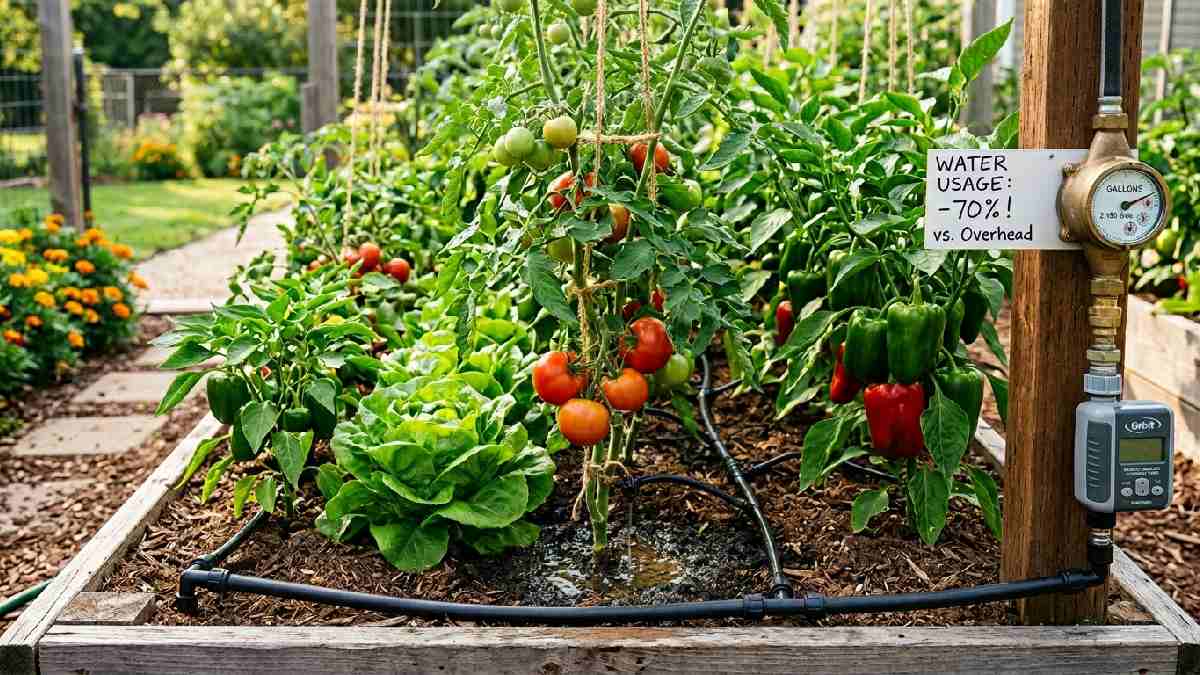
A DIY drip irrigation system for garden offers numerous benefits for plants and gardeners alike. It saves water efficiently by delivering moisture directly to where plants need it most. This system also improves plant growth through consistent, controlled watering throughout the season.
Drip irrigation reduces manual watering effort, freeing up time for other gardening tasks. Building this system is a low-cost solution compared to professional installation services. These combined advantages explain why more home gardeners are choosing to build their own drip irrigation setups today.
Saves water efficiently
A DIY drip irrigation system for garden significantly reduces water waste compared to traditional methods. Water goes directly to plant roots instead of evaporating or running off elsewhere. This targeted delivery means less water is needed to achieve the same results.
Drip systems can reduce water usage by a significant percentage compared to sprinklers. Over time, these savings can lower water bills for larger garden setups. This efficiency makes drip irrigation an environmentally responsible watering choice for gardens.
Improves plant growth
A DIY drip irrigation system for garden supports healthier and more consistent plant growth overall. Plants receive steady moisture levels instead of irregular watering from manual methods. This consistency helps prevent both overwatering and underwatering-related plant stress problems.
Roots develop more efficiently when water is delivered directly to the root zone. Healthier roots lead to stronger plants with better resistance to disease and pests. This improved growth makes drip irrigation valuable for serious home gardeners.
Reduces manual watering effort
A DIY drip irrigation system for garden significantly reduces the time spent on manual watering tasks. Once installed, the system can run automatically with minimal daily attention required. This frees up time for other important gardening activities like pruning or harvesting.
Gardeners no longer need to drag hoses or watering cans across large areas. Timers can be added to automate the entire watering process further. This convenience makes drip irrigation especially appealing for busy home gardeners.
Low-cost gardening solution
Building a DIY drip irrigation system for garden costs significantly less than professional installation services. Basic materials like tubing, connectors, and emitters are widely available and affordable. Many gardeners use recycled materials like plastic bottles to reduce costs further.
This budget-friendly approach makes efficient watering accessible to gardeners with limited funds. The long-term water savings also help offset the initial setup investment quickly. This affordability makes drip irrigation a smart choice for budget-conscious gardeners.
Materials Needed for DIY Drip Irrigation System
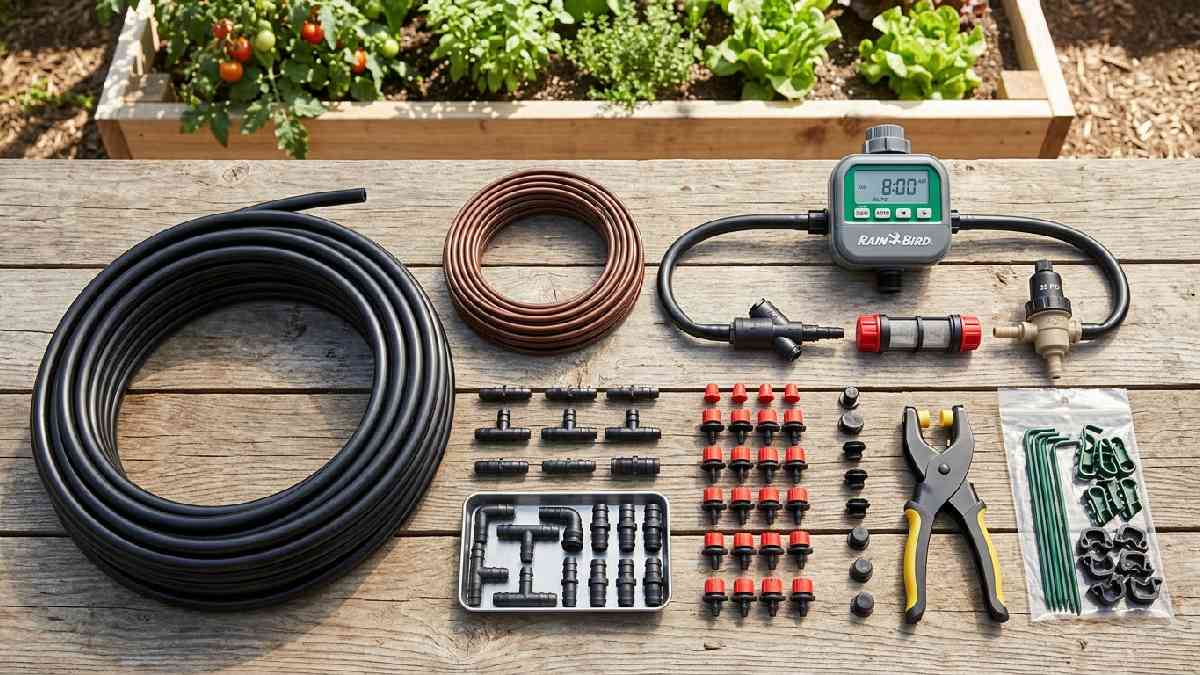
Building a DIY drip irrigation system for garden requires just a few simple, affordable materials. A water source like a tap or bucket provides the necessary water supply. Pipes or tubing carry water from the source to individual plants throughout the garden. Emitters or small holes release water slowly and directly near each plant’s roots.
Connectors and joints link different sections of tubing together for a complete system. A filter system, while optional, helps prevent clogging and keeps the setup running smoothly for longer periods of consistent use.
Water source (tap or bucket)
A reliable water source is essential for any DIY drip irrigation system for garden setup. A garden tap provides consistent pressure for larger, more extensive irrigation systems. A simple bucket works well for smaller gardens or gravity-fed drip setups instead.
Elevating the bucket creates enough pressure for water to flow through the tubing. Choosing the right water source depends on your garden size and available resources. This foundational element determines how your entire drip system will function.
Pipes or tubing
Pipes or tubing form the backbone of any DIY drip irrigation system for garden project. These carry water from the source to various points throughout the garden. Flexible plastic tubing is commonly used due to its affordability and ease of use.
The tubing should be durable enough to withstand outdoor weather conditions over time. Proper sizing ensures adequate water flow to all connected plants and emitters. Choosing quality tubing ensures your irrigation system lasts for multiple growing seasons.
Emitters or small holes
Emitters or small holes are crucial components in any DIY drip irrigation system for garden setup. These release water slowly and directly at the base of each plant. Emitters can be purchased specifically for this purpose or created using small holes.
Spacing and hole size affect how much water each plant receives daily. Properly placed emitters ensure even water distribution throughout your entire garden space. This component directly impacts how effectively your system delivers water to plants.
Connectors and joints
Connectors and joints are essential parts of any DIY drip irrigation system for garden setup. These pieces link different sections of tubing together to form a complete network. T-joints and elbow connectors allow you to branch tubing toward multiple plants.
Quality connectors prevent leaks and ensure consistent water pressure throughout the system. Choosing the right connectors makes installation easier and more reliable overall. These small components play a significant role in your system’s overall functionality.
Filter system (optional but recommended)
A filter system, while optional, is highly recommended for any DIY drip irrigation system for garden setup. Filters remove debris and sediment that could clog small emitters or tubing. This addition extends the lifespan of your entire irrigation system significantly.
Filters are especially important if using water from natural sources like rain barrels. A simple mesh filter can prevent many common clogging problems effectively. This small investment helps maintain consistent performance throughout your drip system’s lifespan.
Step-by-Step Guide to Build a DIY Drip Irrigation System
Building a DIY drip irrigation system for garden involves several straightforward steps for any beginner. First, plan your garden layout to determine where tubing and emitters should go. Next, lay the main pipe along the planned route through your garden space. Install drip points near each plant to ensure targeted, efficient watering coverage.
Connect your water source to complete the system’s main water supply line. Finally, test the system thoroughly before relying on it for regular garden watering needs. Following these steps makes the entire process manageable for gardeners of any experience level.
Step 1: Plan your garden layout
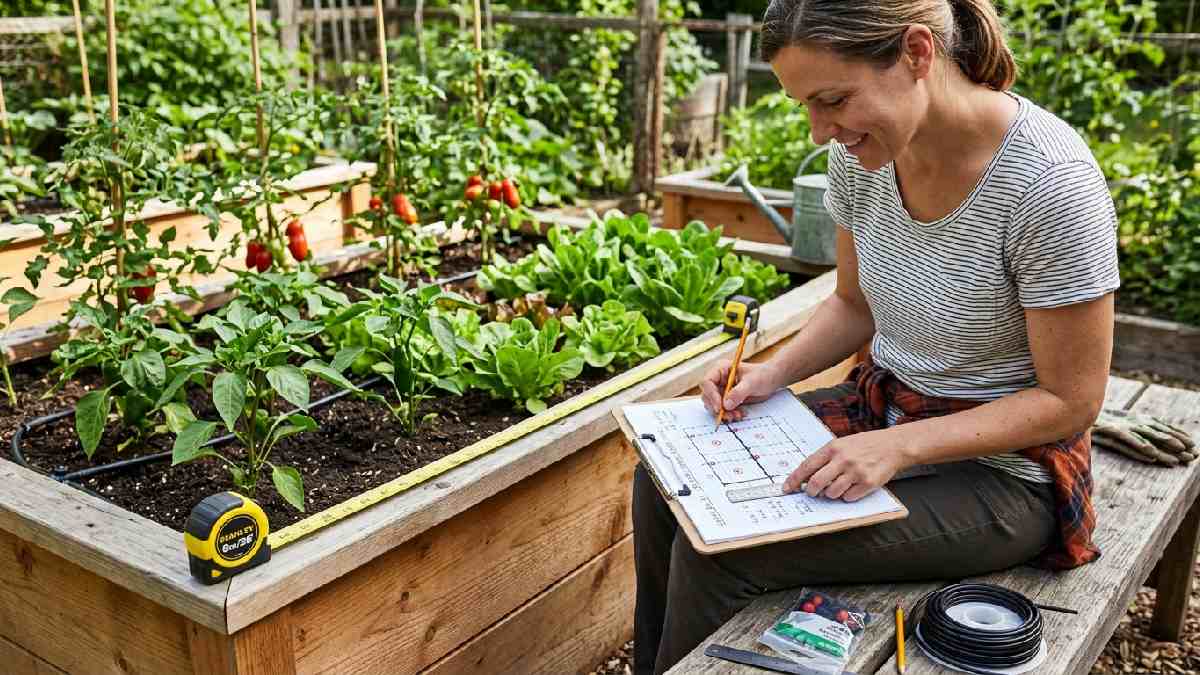
Planning your garden layout is the first step in building a DIY drip irrigation system for garden. Sketch out where each plant is located and how water needs to travel. Consider plant spacing and water requirements when designing your tubing pathway carefully.
This planning stage helps determine how much tubing and how many emitters you need. A well-thought-out layout prevents wasted materials and ensures efficient water distribution. Taking time here saves effort during the actual installation process later.
Step 2: Lay the main pipe
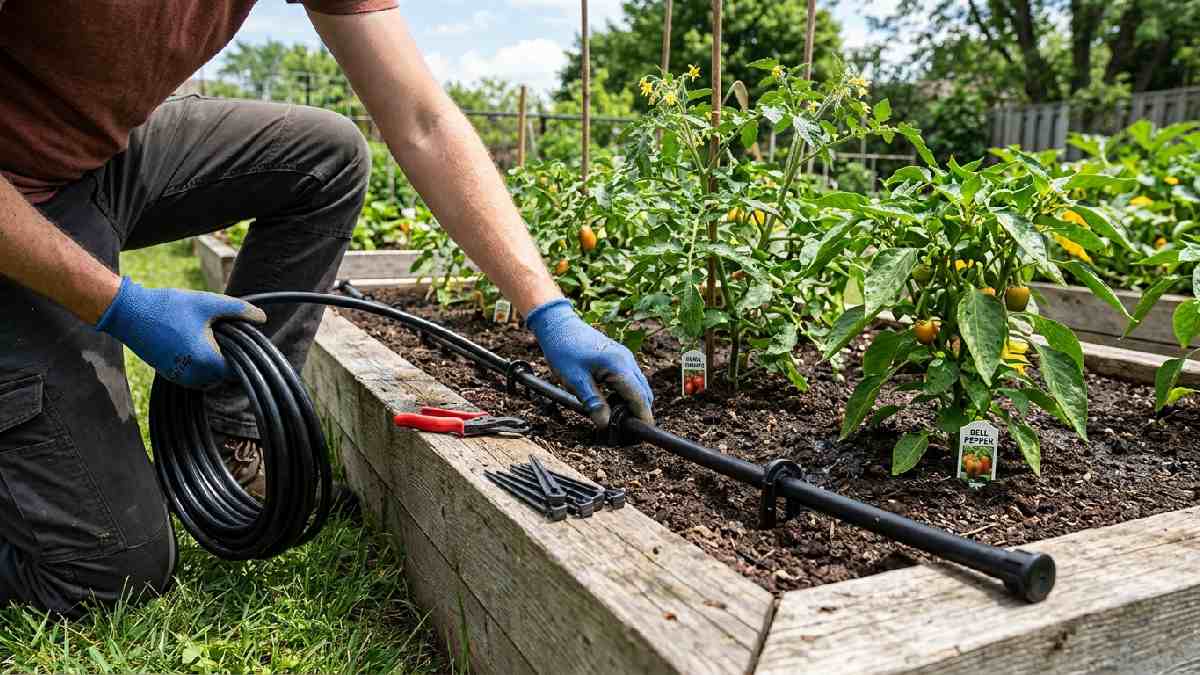
Laying the main pipe is the second step in your DIY drip irrigation system for garden project. This pipe carries water from your source throughout the entire garden area. Position the main line along the most direct path to all planting areas.
Secure the pipe with stakes or clips to keep it in place properly. Ensure the pipe is buried slightly or hidden if appearance matters to you. This main line forms the foundation for all subsequent system connections.
Step 3: Install drip points near plants
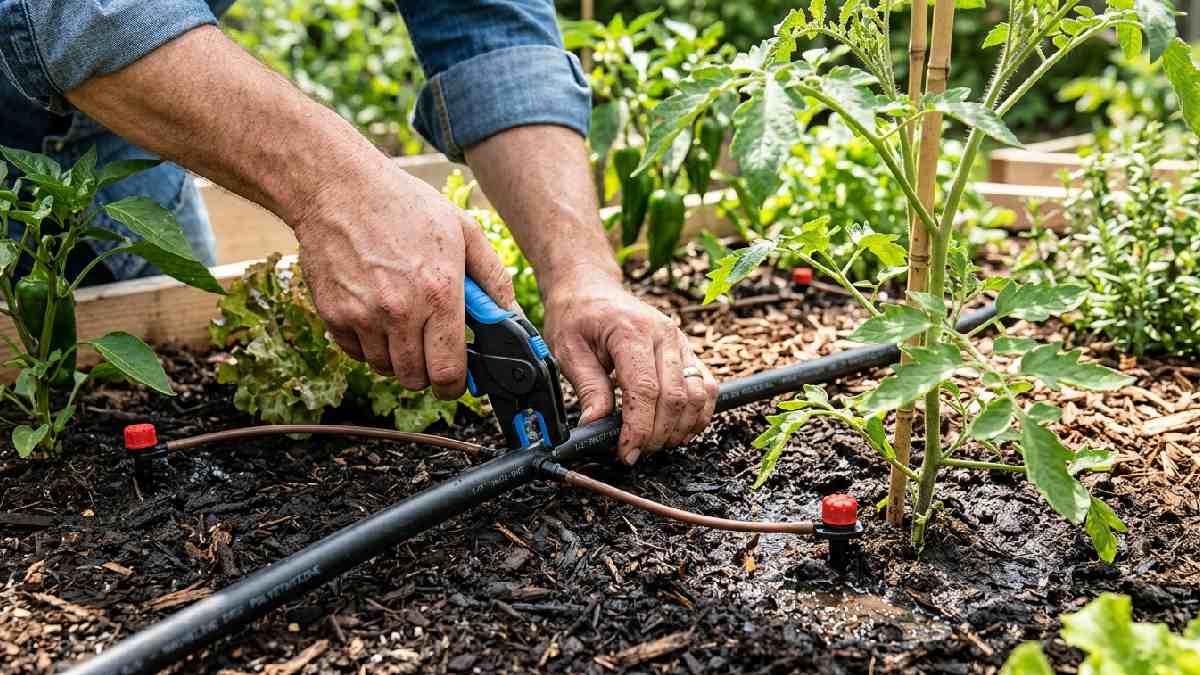
Installing drip points near plants is a crucial step in your DIY drip irrigation system for garden. Attach emitters or create small holes at each plant’s base along the tubing. Ensure consistent spacing so every plant receives adequate water during each cycle.
Adjust emitter flow rates based on different plants’ specific water requirements if needed. Proper placement ensures water reaches the root zone where it matters most. This step directly determines how effectively your system serves each plant.
Step 4: Connect the water source
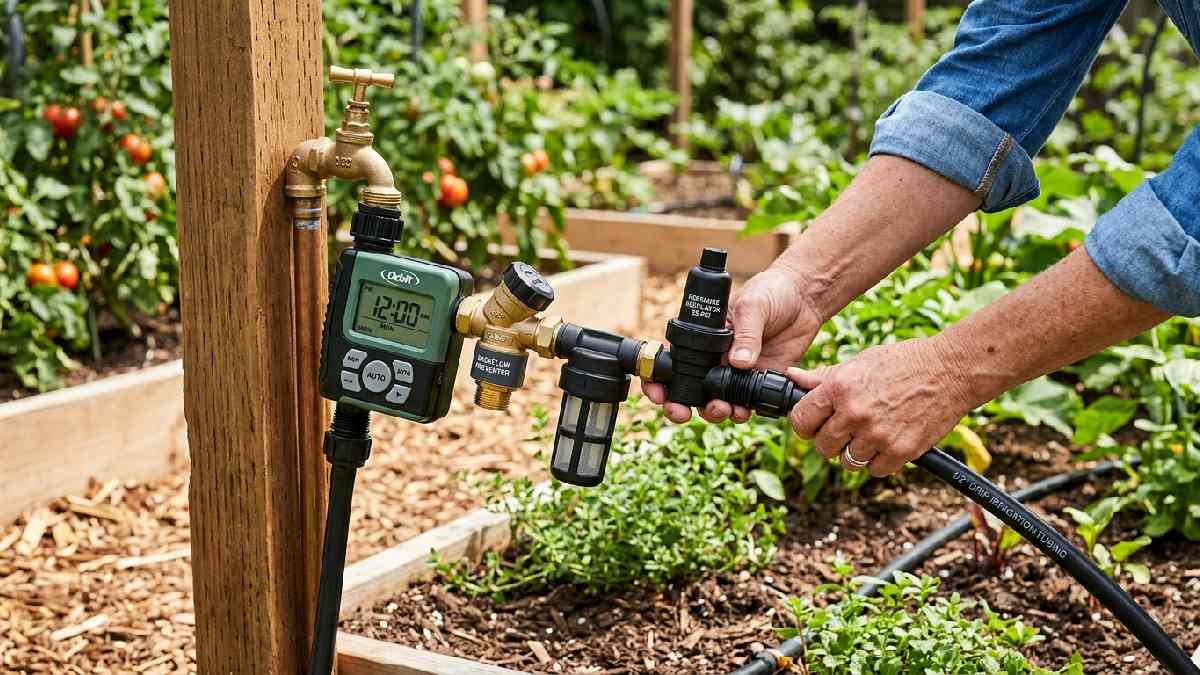
Connecting your water source completes the main setup of your DIY drip irrigation system for garden. Attach the main pipe or tubing to your tap or elevated bucket. Use appropriate connectors and fittings to ensure a secure, leak-free connection point.
If using a tap, consider adding a pressure regulator to prevent damage to tubing. For bucket systems, ensure adequate height for proper gravity-fed water flow. This connection brings your entire system together into a functional whole.
Step 5: Test the system
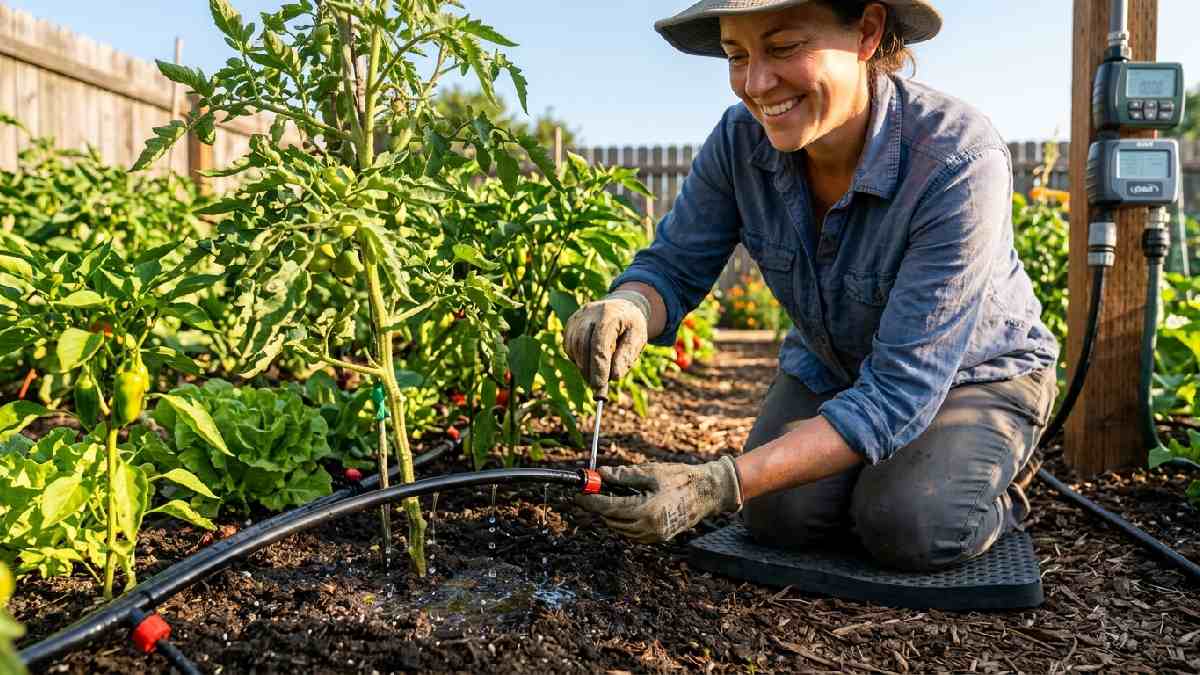
Testing the system is the final step before relying on your DIY drip irrigation system for garden. Turn on the water source and observe how it flows through the tubing. Check for leaks at connectors, joints, and emitters throughout the entire setup.
Verify that each plant is receiving adequate water flow from nearby emitters. Make adjustments to flow rates or emitter placement based on your observations. This testing phase ensures your system works reliably before regular daily use.
Different DIY Drip Irrigation Methods
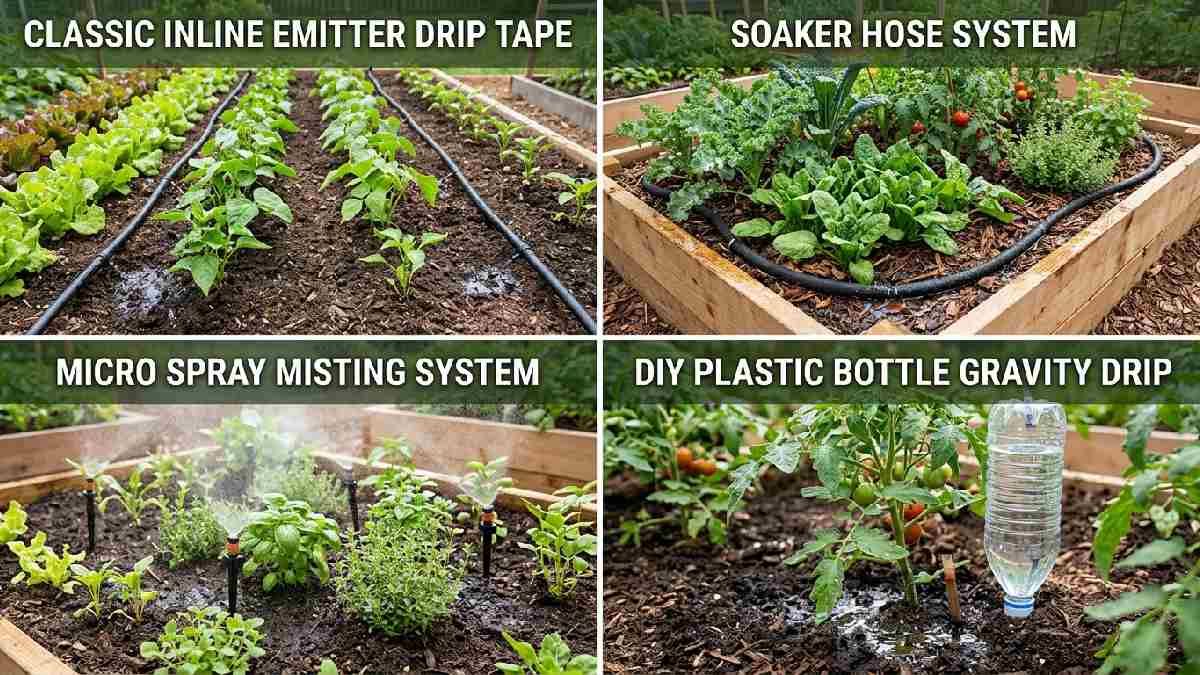
There are several creative methods for building a DIY drip irrigation system for garden setups. The plastic bottle drip system uses recycled bottles as simple, affordable water reservoirs. The bucket gravity system relies on elevation to create natural water pressure for flow.
Pipe-based irrigation systems use more structured tubing networks for larger garden areas. Each method offers unique advantages depending on garden size, budget, and available materials. Choosing the right method ensures your drip system works effectively for your specific gardening needs and circumstances.
Plastic bottle drip system
The plastic bottle drip system is one of the cheapest DIY drip irrigation system for garden methods. Simply puncture small holes in a plastic bottle and bury it near plant roots. Fill the bottle with water, which slowly seeps out through the holes.
This method works well for individual plants or small container gardens easily. It requires no tubing or connectors, making it extremely simple to set up. This budget-friendly approach is perfect for beginners testing drip irrigation concepts.
Bucket gravity system
The bucket gravity system is a popular DIY drip irrigation system for garden method using elevation. Elevate a water-filled bucket above your garden to create natural water pressure. Connect tubing from the bucket to emitters placed near your plants’ roots.
Gravity pulls water through the tubing without requiring any electrical pumps or taps. This method works well for gardens without easy access to a water tap. This simple, low-tech approach makes irrigation accessible in various garden settings.
Pipe-based irrigation system
The pipe-based irrigation system is a more structured DIY drip irrigation system for garden method overall. This approach uses connected pipes and tubing throughout the entire garden layout. It works particularly well for larger gardens with many plants requiring consistent watering.
Connectors and joints allow customization for complex, branching garden designs easily. This method requires more planning but offers excellent long-term reliability and coverage. Pipe-based systems are ideal for gardeners seeking a more permanent watering solution.
Common Mistakes to Avoid
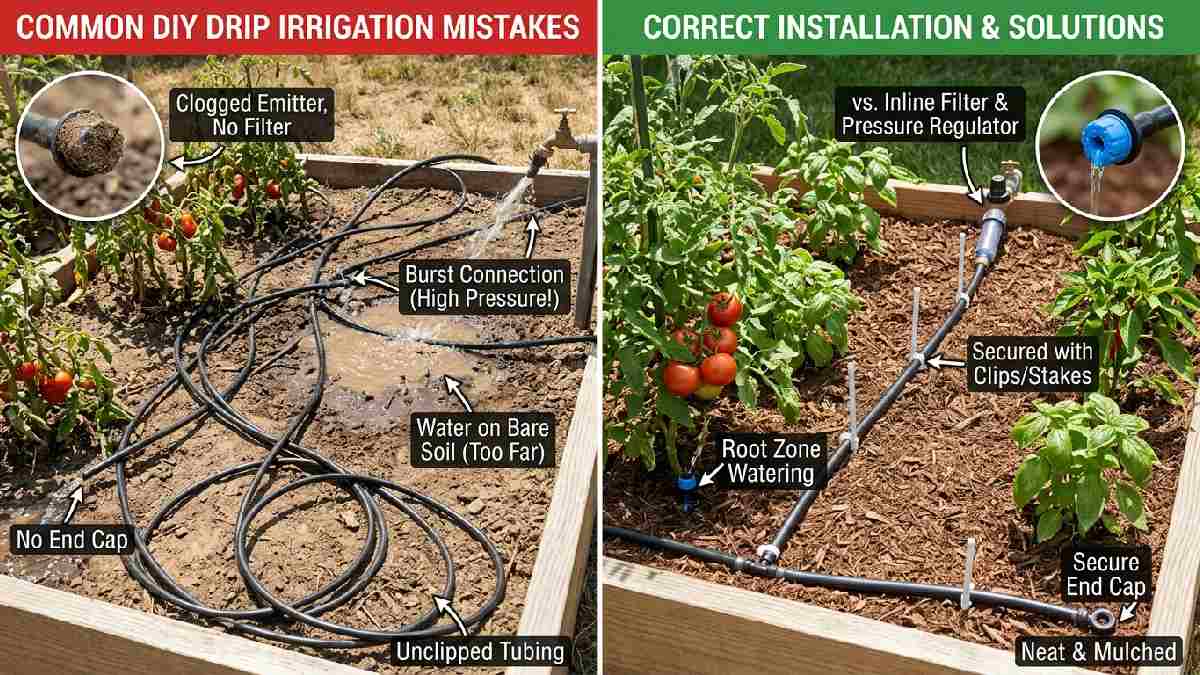
Avoiding common mistakes improves success when building a DIY drip irrigation system for garden setups. Not using a filter leads to clogged emitters and reduced system performance over time. Uneven water distribution results in some plants receiving too much or too little water.
Too many holes in the pipe can reduce water pressure throughout the system significantly. Ignoring plant water needs means some plants may not receive adequate moisture levels. Recognizing these pitfalls early ensures your drip irrigation system functions efficiently and reliably for every plant in your garden.
Not using a filter
Not using a filter is a common mistake when building a DIY drip irrigation system for garden. Debris and sediment can clog small emitters, reducing water flow significantly over time. This often leads to uneven watering and potential damage to your irrigation system.
Adding even a simple mesh filter can prevent most common clogging problems. This small addition significantly improves the long-term reliability of your entire setup. Avoiding this mistake from the start saves maintenance headaches later on.
Uneven water distribution
Uneven water distribution is a frequent issue in DIY drip irrigation system for garden setups. This happens when emitters are spaced incorrectly or have inconsistent flow rates. Some plants may receive too much water, while others receive too little.
Testing your system regularly helps identify and correct these distribution problems quickly. Adjusting emitter placement and flow rates ensures more balanced watering throughout the garden. Correcting this issue significantly improves overall plant health and growth consistency.
Too many holes in the pipe
Having too many holes in the pipe is a mistake in a DIY drip irrigation system for garden builds. This can significantly reduce water pressure throughout the entire tubing network. Reduced pressure means water may not reach plants located farther from the source.
Carefully planning hole placement and spacing prevents this common pressure problem. Using appropriate emitters instead of random holes provides more consistent water flow. Avoiding this mistake ensures every plant receives adequate water pressure and volume.
Ignoring plant water needs
Ignoring plant water needs is a common oversight in DIY drip irrigation system for garden setups. Different plants require different amounts of water based on their specific needs. Using the same emitter flow rate for all plants can lead to problems.
Research each plant’s water requirements before finalizing your system’s emitter placement. Adjustable emitters allow customization based on individual plant needs within the garden. Considering these differences ensures every plant thrives under your irrigation system.
FAQs
What is a drip irrigation system?
A drip irrigation system delivers water slowly and directly to plant roots through tubing and small emitters, reducing waste significantly.
Can I make a drip irrigation system at home?
Yes, a DIY drip irrigation system for garden can be built using simple materials like tubing, connectors, and emitters easily.
Is drip irrigation better than sprinklers?
Yes, drip irrigation wastes less water than sprinklers since it targets plant roots directly instead of spraying water broadly.
How much water does drip irrigation save?
Drip irrigation can save significant amounts of water compared to sprinklers by reducing evaporation, runoff, and overspray waste.
What materials are required for a DIY system?
Basic materials include tubing, emitters, connectors, a water source, and optionally a filter to prevent clogging issues.
Conclusion
Building a DIY drip irrigation system for garden is a practical, affordable way to keep plants healthy. It saves water, reduces manual effort, and improves overall plant growth significantly over time. With simple materials and basic planning, anyone can successfully build this watering system at home.
Avoiding common mistakes like poor filtration or uneven distribution ensures reliable, long-term performance. This system benefits both your garden and your daily gardening routine simultaneously and effectively. Start building your own drip irrigation setup today and enjoy a healthier, more efficient garden for years to come.