

Microgreen Harvester: The Complete Guide to Choosing and Using the Right Tool
A microgreen harvester is the single most important tool for anyone growing microgreens at home or commercially, since it determines how clean, fresh, and long-lasting every harvest turns out to be. Choosing the wrong microgreen harvester leads to bruised stems, uneven cuts, and greens that wilt faster than they should.
This guide explains exactly what a microgreen harvester is, why the right one matters so much, and how it fits into every stage of growing. You will learn the different types available, how to select the best microgreen harvester for your scale, correct harvesting methods, common mistakes to avoid, and simple maintenance steps that keep your tool working well for years.
Introduction
A microgreen harvester is a specialized cutting tool designed to trim young microgreens quickly and cleanly, without bruising their delicate stems. Whether you grow a few trays at home or manage a commercial farm, the right harvesting tool directly affects freshness, shelf life, and presentation.
Using dull scissors or the wrong knife often crushes stems and shortens how long your greens stay crisp. This guide covers the main types of microgreen harvesters, their real benefits, how to pick the right one, correct harvesting steps, maintenance routines, and mistakes growers commonly make that reduce harvest quality and profit.
What Is a Microgreen Harvester?
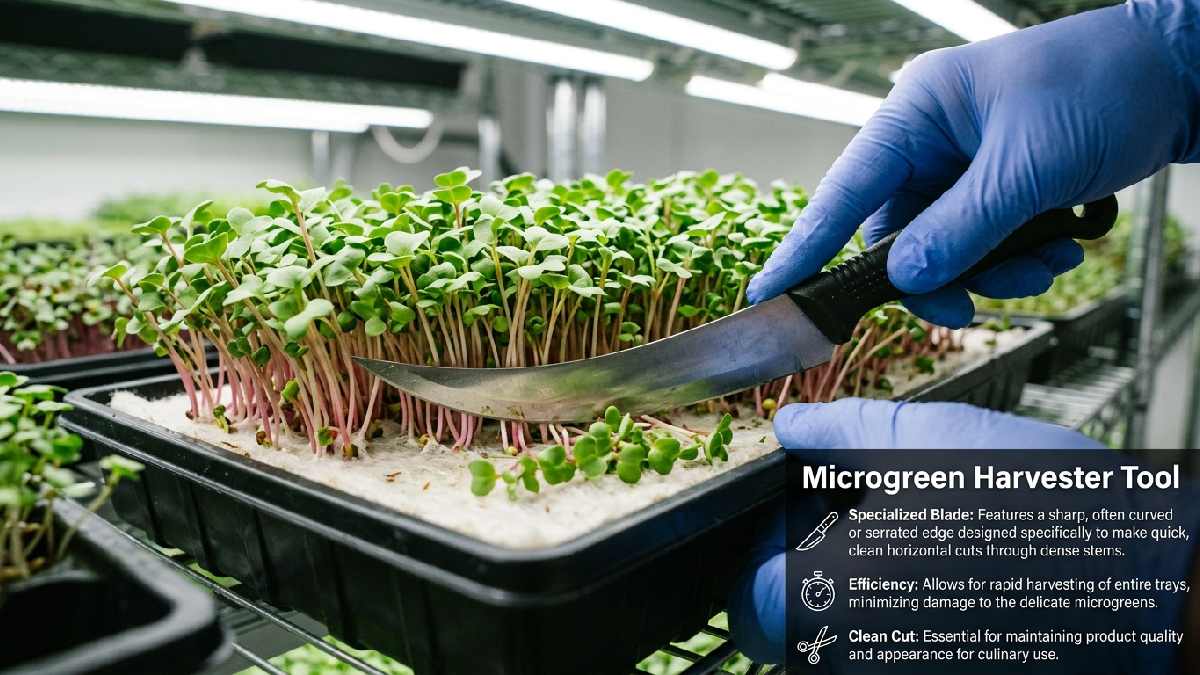
A microgreen harvester is any manual or electric tool built specifically to cut young microgreens at the base without crushing their thin stems. Compared to regular kitchen scissors, these tools use thinner, razor-sharp blades and ergonomic handles designed for fragile plants.
A good harvester reduces bruising, speeds up cutting time, and keeps every tray looking uniform and market-ready. Growers who understand how a microgreen harvester works, and who truly needs one, avoid wasting money on tools that don’t match their actual harvesting volume or growing setup.
Definition and Purpose
A microgreen harvester is a purpose-built cutting tool made to slice tender stems in one smooth pass instead of multiple rough cuts. Its main job is reducing bruising, preventing tearing, and producing a uniform cut across an entire 10×20 tray.
This matters most for sellers, since buyers expect clean, evenly cut greens with minimal blemishes. A single ragged cut can lower shelf life by a full day or two compared to a clean one.
How a Microgreen Harvester Works
Most harvesters use a thin, razor-sharp blade held just above the soil or growing mat, moving horizontally to separate greens from roots in one pass. Manual tools require the grower to guide the blade steadily by hand across the tray.
Electric microgreen harvesters automate this motion with a motorized blade, keeping pressure and speed consistent across dozens of trays. This consistency matters for commercial growers processing 50 or more trays in a single session.
Who Should Use a Microgreen Harvester?
Home growers cutting two or three trays weekly, restaurants prepping daily garnishes, and farms processing hundreds of trays all benefit from owning a dedicated microgreen harvester.
If you currently use kitchen scissors and notice bruised, uneven edges or greens wilting faster than expected, upgrading is worth it. Anyone selling microgreens commercially should invest in one, since buyers judge quality by how clean and fresh the cut edges look on arrival.
Benefits of Using a Microgreen Harvester
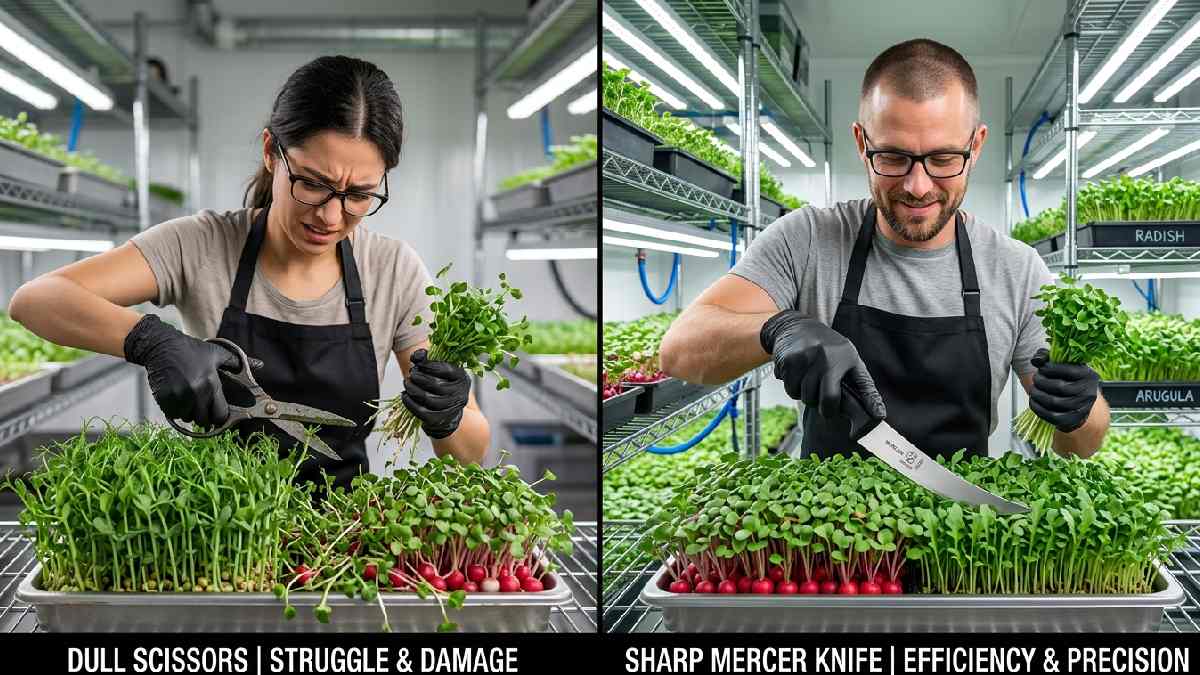
Switching from scissors or kitchen knives to a dedicated microgreen harvester brings real improvements in speed, precision, and shelf life. These gains matter more as your operation grows, since even small inefficiencies add up across dozens of trays weekly.
A quality harvester typically pays for itself within a few months through reduced labor time, less wasted product, and fewer customer complaints about bruised or wilted greens arriving at delivery or point of sale.
Faster Harvesting
A dedicated microgreen harvester can cut a full 10×20 tray in under 15 seconds, compared to two or three minutes using scissors. For commercial growers processing 50 to 100 trays daily, this speed difference can save several hours of labor each week.
Faster harvesting also means greens reach cold storage sooner after cutting, which directly slows wilting and helps preserve both texture and flavor for longer.
Cleaner and More Precise Cuts
Sharp, purpose-built blades create smooth, even cuts that noticeably reduce browning and bruising right at the stem base. This precision keeps microgreens looking vibrant for two to three extra days compared to greens cut with dull tools.
Unlike improvised scissors, a proper microgreen harvester ensures every stem is trimmed evenly, which directly boosts visual appeal and helps commercial batches pass quality checks before reaching customers or retail shelves.
Less Damage to Delicate Microgreens
Microgreen stems are often thinner than a toothpick, so they crush easily under improper tools like blunt scissors. A dedicated harvester is engineered for this fragile structure, cutting cleanly instead of pinching or tearing stems during collection.
This gentler handling preserves the plant’s natural crunch and appearance, resulting in a higher-quality harvest that survives packaging, transport, and several days of refrigerated storage without noticeable texture loss.
Better Harvest Quality
Clean cuts made with a proper microgreen harvester reduce oxidation at the wound site, slowing down spoilage significantly. As a result, microgreens stay crisp, colorful, and appealing for a longer stretch, often three to five extra days when paired with proper storage.
This improved quality matters most for commercial growers, since restaurants and retailers frequently reject shipments showing early signs of wilting, sliminess, or browning at the cut edges.
Increased Efficiency for Growers
For commercial operations, a good microgreen harvester cuts labor hours per harvest cycle by roughly 40 to 60 percent compared to manual scissors. Staff can process more trays in less time without sacrificing cut quality, freeing them up for packaging, delivery prep, or restarting new trays.
Over a full growing season, this efficiency gain often translates into meaningful savings on labor costs and noticeably higher weekly output per employee.
Types of Microgreen Harvesters
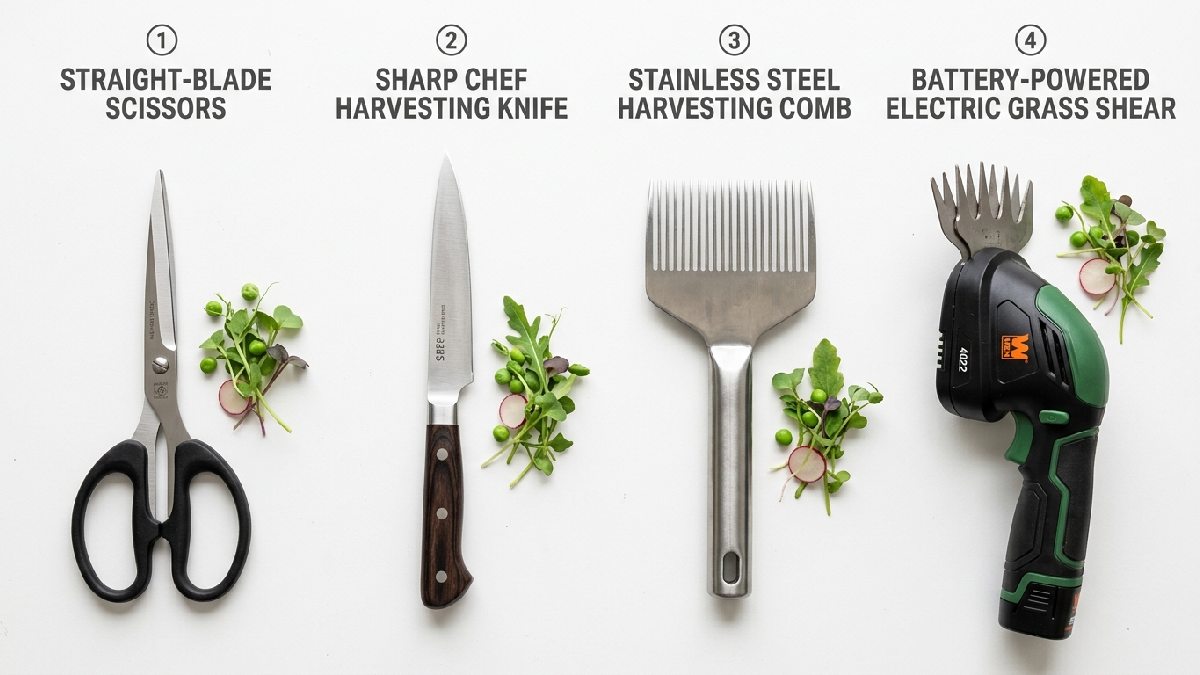
Not every microgreen harvester works the same way, and the right choice depends heavily on your daily harvest volume. Options range from simple handheld scissors suited to hobbyists, up to fully automated commercial machines built for large operations.
Picking the wrong type either wastes money on unnecessary equipment or leaves you stuck with a slow tool that can’t keep pace with growing demand from wholesale buyers, restaurants, or farmers market customers.
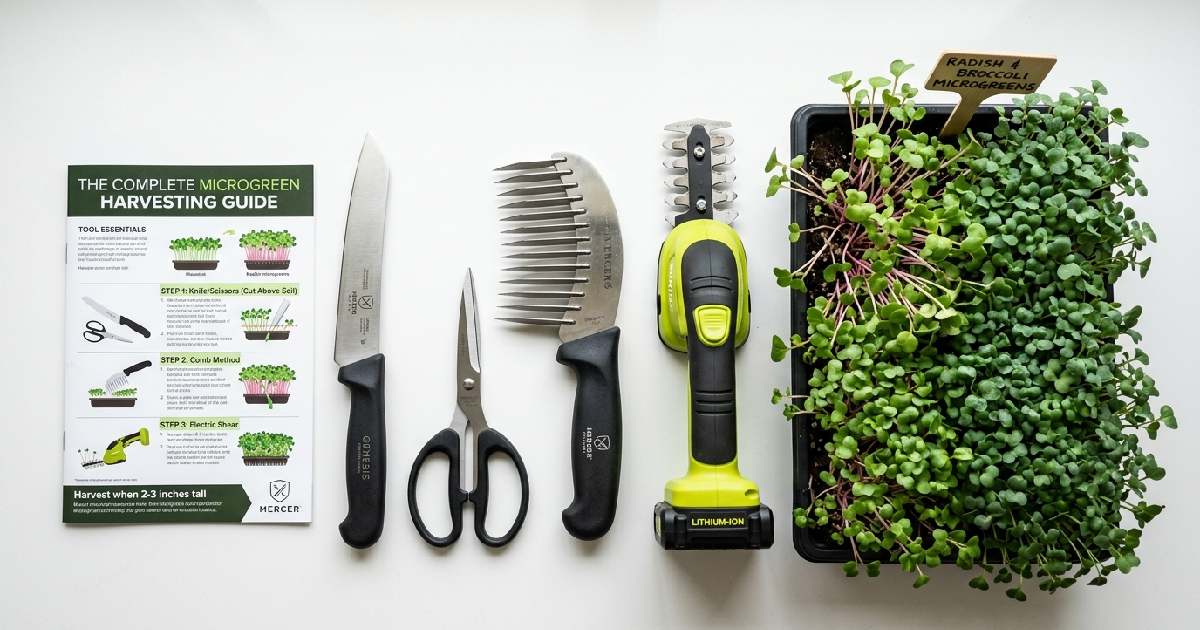
Harvesting Scissors
Microgreen harvesting scissors are lightweight, inexpensive, usually under 20 dollars, and easy to control for small-batch growers. Their compact blades allow precise cutting around delicate stems without crushing them, ideal for one to five trays weekly.
However, scissors become tiring and slow once daily volume grows past ten trays, since each cut requires repeated hand squeezing that adds up quickly during longer commercial harvesting sessions.
Harvesting Knives
Flat, wide-bladed harvesting knives let growers cut across an entire tray in one sweeping motion, roughly three times faster than scissors. This makes them popular for medium operations harvesting 10 to 30 trays daily without investing in electric equipment.
Knives do require a steady hand and practiced technique, since an uneven angle or inconsistent pressure can leave jagged, bruised edges across the tray.
Electric Microgreen Harvesters
Electric microgreen harvesters use a motorized blade to cut trays in seconds while eliminating hand fatigue during long sessions. These typically cost between 150 and 500 dollars but pay off quickly for growers processing 30 or more trays daily.
Consistent motor-driven pressure means every tray gets the same clean cut, removing the human error that often creeps into manual harvesting after an hour of repetitive cutting.
Commercial Microgreen Harvesting Machines
Large farms often use conveyor-based harvesting machines that combine cutting, rinsing, and packaging into one continuous line. These machines can process several hundred trays per hour, dramatically cutting labor costs for operations producing thousands of trays weekly.
Prices typically start around several thousand dollars, making them worthwhile mainly for established commercial farms rather than small growers just starting to sell microgreens locally.
How to Choose the Best Microgreen Harvester
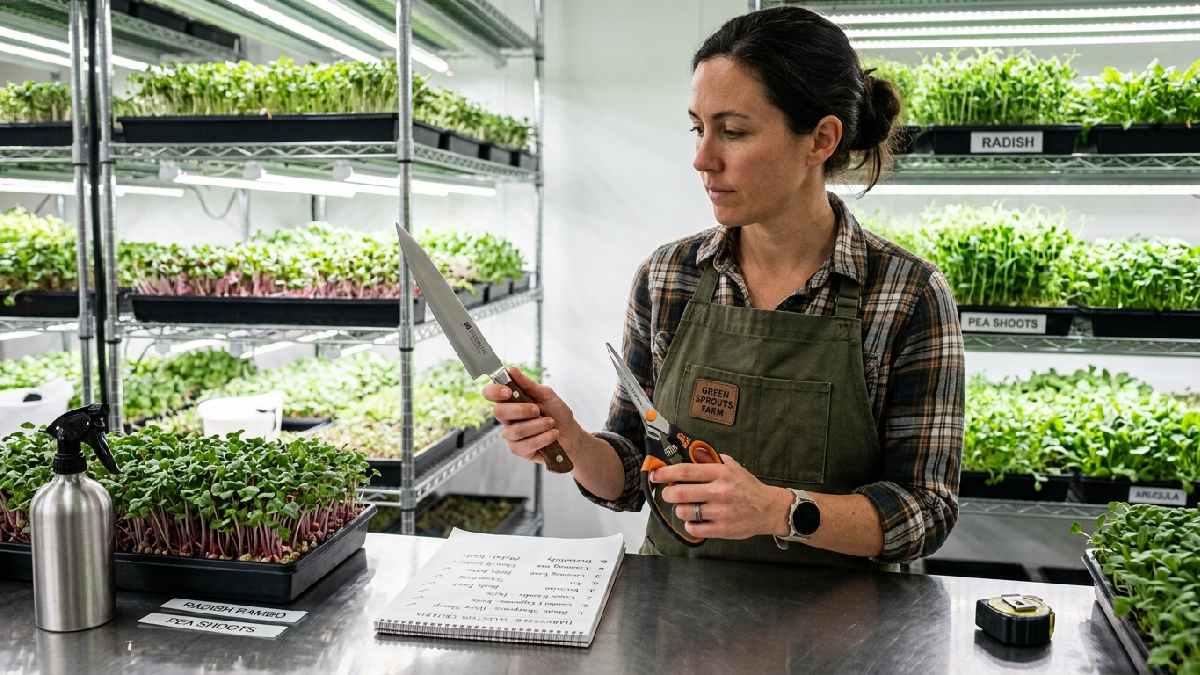
Picking the right microgreen harvester depends on your growing scale, weekly harvest volume, and available budget. A tool perfect for a home grower cutting three trays weekly is completely inadequate for a farm processing 200 trays.
Before buying, calculate your average weekly tray count and expected growth over the next year, since this single number determines whether scissors, knives, or an electric harvester will actually save you time and money long-term.
Consider Your Growing Scale
Growers cutting fewer than five trays weekly can rely comfortably on simple scissors without needing anything more advanced. Once you cross 15 to 20 trays weekly, a knife or entry-level electric harvester starts saving meaningful time.
Farms processing 50 or more trays should strongly consider a full electric model, since manual tools at that volume quickly become a bottleneck limiting how much product you can harvest each day.
Blade Material and Sharpness
Stainless steel blades resist rust, hold an edge longer, and deliver the clean cuts needed for high-quality microgreens. A dull or low-grade blade crushes stems rather than slicing them, causing faster spoilage within a day or two.
Always check whether replacement blades are available before buying, since sharpening or swapping a worn blade costs far less than replacing an entire microgreen harvester every few months.
Comfortable Grip and Design
An ergonomic handle significantly reduces hand strain during sessions lasting 30 minutes or longer, especially for growers cutting many trays back-to-back. Poorly designed grips cause fatigue and shaky control, leading to uneven or jagged cuts by the end of a long harvest day.
Testing the grip in person, or checking verified buyer reviews mentioning comfort, helps avoid purchasing a tool that looks good but performs poorly.
Easy Cleaning and Maintenance
Pick a microgreen harvester with removable or dishwasher-safe parts to prevent bacterial buildup between harvests, which matters for food safety. Tools that are hard to fully disassemble often trap plant residue in hinges or motor housings over time.
Easy-to-clean designs also extend blade life, since dried sap and moisture left on metal surfaces speed up corrosion and dulling far faster than proper daily maintenance would allow.
Budget and Long-Term Value
Electric microgreen harvesters cost more upfront, often 150 to 500 dollars, but can pay for themselves within two to four months for growers harvesting 30-plus trays weekly through labor savings alone.
Manual tools under 30 dollars remain the smarter choice for smaller operations. Compare your current weekly labor cost against a tool’s price and expected time savings before deciding which option delivers better long-term value.
How to Harvest Microgreens Correctly
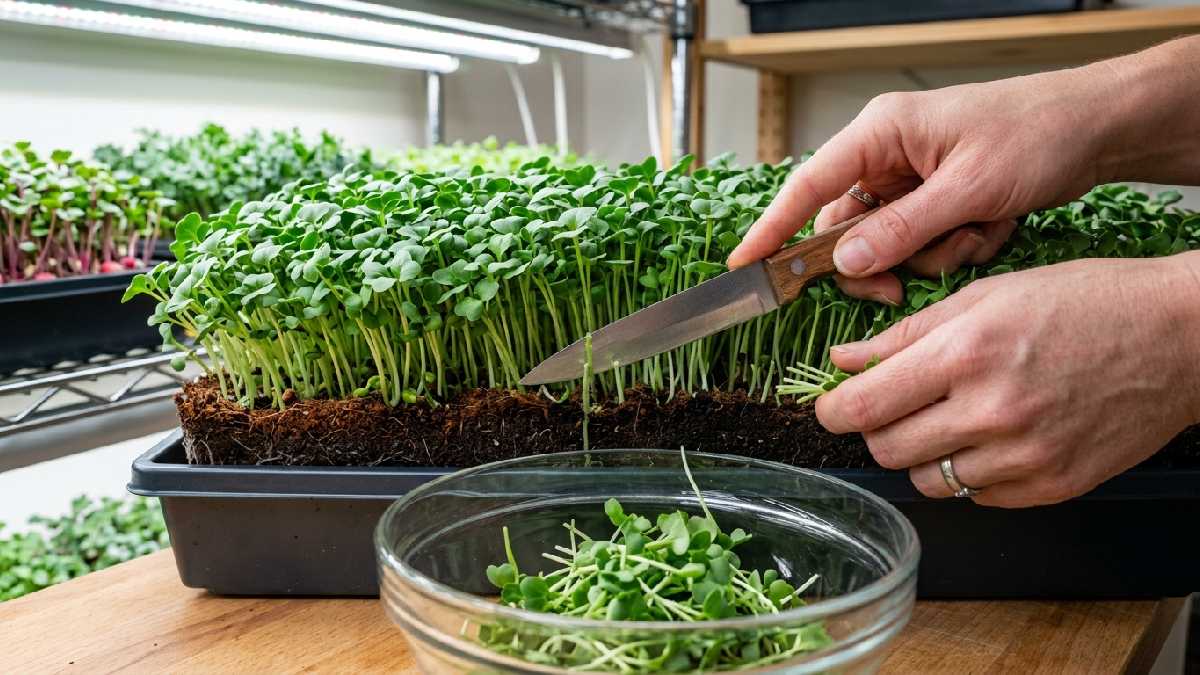
Even the best microgreen harvester won’t produce great results without following proper technique. Timing, tool sanitation, cutting angle, and post-harvest handling all directly affect how long your greens stay fresh.
Growers who rush through harvesting, skip sanitizing, or cut too early or late consistently end up with shorter shelf life and lower-quality product, even when using premium equipment. Following a consistent, careful routine every single harvest session prevents most avoidable quality problems.
Harvest at the Right Growth Stage
Most microgreens reach peak readiness between 7 and 14 days after germination, once the first true leaves start to appear above the cotyledons.
Sunflower and pea shoots often need slightly longer, closer to 10 to 14 days, while radish and broccoli mature faster, around 7 to 10 days. Checking daily once your greens near this window, and cutting right at peak maturity, delivers the best flavor and texture.
Sanitize Your Harvesting Tool
Always clean your microgreen harvester with a food-safe sanitizer, like a diluted vinegar solution or approved produce wash, before every use.
Skipping this step can introduce bacteria onto fresh-cut stems, shortening shelf life by a day or more and creating food safety risks for anyone selling commercially. This sanitizing step takes under two minutes but meaningfully protects both the safety and longevity of every single tray you harvest.
Cut Just Above the Soil Line
Position your harvester’s blade roughly a quarter inch above the growing medium to avoid picking up soil, hulls, or debris during cutting. Cutting too close risks contaminating the greens, while cutting too high wastes usable stem length and reduces yield.
This precise cutting height also improves presentation, reducing how much post-harvest washing and sorting is needed before the greens are ready for packaging or sale.
Handle Microgreens Gently
After cutting, avoid squeezing, stacking heavily, or pressing down on harvested greens, since thin stems bruise within minutes under pressure. Use a wide, shallow container to transfer greens instead of piling them into a deep bin.
Gentle handling throughout collection and packaging keeps the fresh, crisp appearance intact, since rough handling after a perfectly clean cut can still ruin the final look and texture of your harvest.
Store Harvested Microgreens Properly
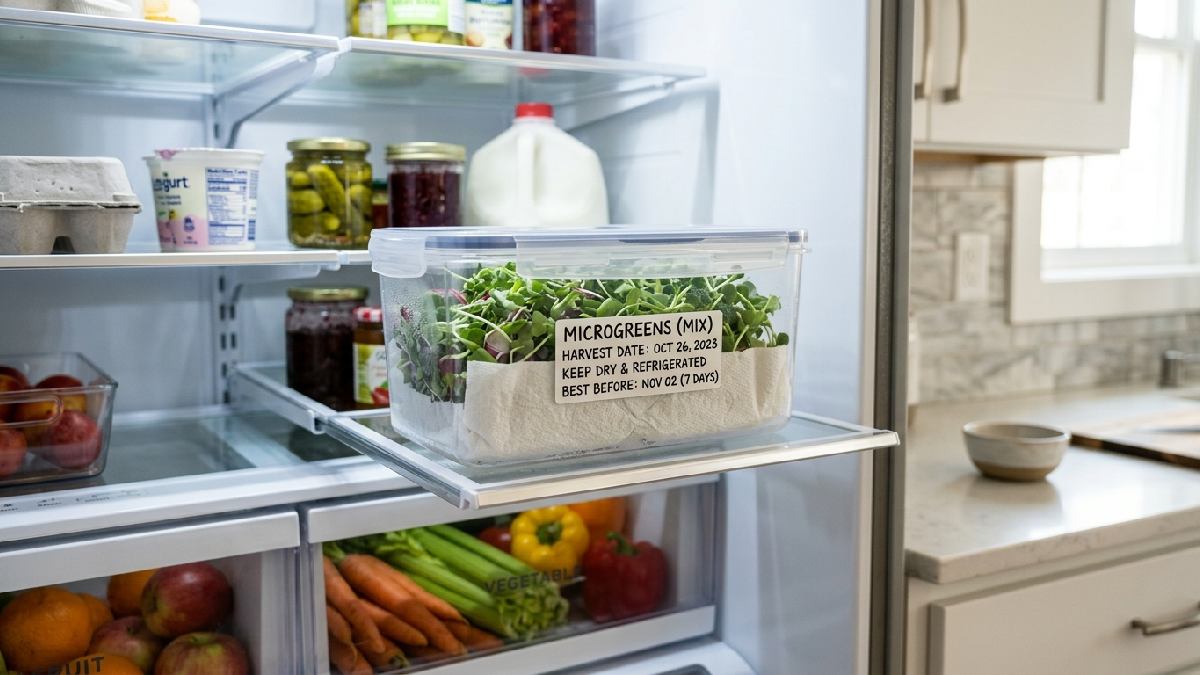
Place freshly cut microgreens into a breathable container lined with a dry paper towel, then refrigerate immediately at around 34 to 38°F. Proper storage at this temperature can extend shelf life to 7 to 10 days for most varieties, compared to just 2 to 3 days at room temperature.
Avoid sealed plastic bags without ventilation, since trapped moisture accelerates sliminess and spoilage within a day or two.
Common Mistakes to Avoid
Even experienced growers make small, avoidable errors that quietly reduce harvest quality and shorten shelf life. These mistakes usually stem from rushing the process, skipping tool maintenance, or misjudging harvest timing by even a day or two.
Recognizing these common pitfalls ahead of time helps protect your crop investment and consistently produce fresher, better-looking microgreens, whether you’re growing for personal use or selling commercially to restaurants and retail buyers.
Harvesting Too Early
Cutting microgreens before their first true leaves fully develop results in weaker flavor, thinner texture, and noticeably lower nutritional density.
Many beginners harvest just five or six days in, eager to see results, but waiting the full 7 to 14 days makes a measurable difference. Checking a few sample stems daily near the expected harvest window helps you time the cut for the best possible quality.
Waiting Too Long to Harvest
Letting microgreens overgrow past their ideal window leads to tougher, more bitter-tasting stems and a noticeably fibrous texture. Delayed harvesting also raises the risk of mold, especially in humid environments where trays sit longer than 14 to 16 days.
Checking your trays daily once they approach the typical harvest window prevents this costly mistake, which can force you to discard an entire tray of overgrown greens.
Using Dull or Dirty Blades
A dull or unsanitized microgreen harvester crushes stems rather than slicing them cleanly, causing faster spoilage and visibly bruised edges. Dirty blades can also transfer bacteria from previous harvests onto fresh greens, creating food safety concerns for commercial sellers.
Sharpening blades every few weeks, depending on usage frequency, and sanitizing before each session prevents these two avoidable problems from affecting your entire harvest batch.
Damaging the Stems
Rough handling during or right after cutting bruises delicate stems within minutes, shortening shelf life by a day or two even after a clean cut. Even the sharpest microgreen harvester can’t compensate for careless post-harvest handling like tossing greens into a deep, crowded bin.
Taking extra care when transferring cut greens into shallow, wide containers preserves their crisp texture and overall market-ready appearance for longer.
Improper Storage After Harvest
Skipping refrigeration, or sealing greens in airtight bags without airflow, traps moisture and accelerates spoilage within 24 to 48 hours after cutting.
This single mistake can undo every benefit gained from using a quality microgreen harvester and correct cutting technique earlier in the process.
Always store harvested greens in breathable, refrigerated containers at 34 to 38°F to maximize freshness and extend usable shelf life significantly.
Manual vs. Electric Microgreen Harvesters
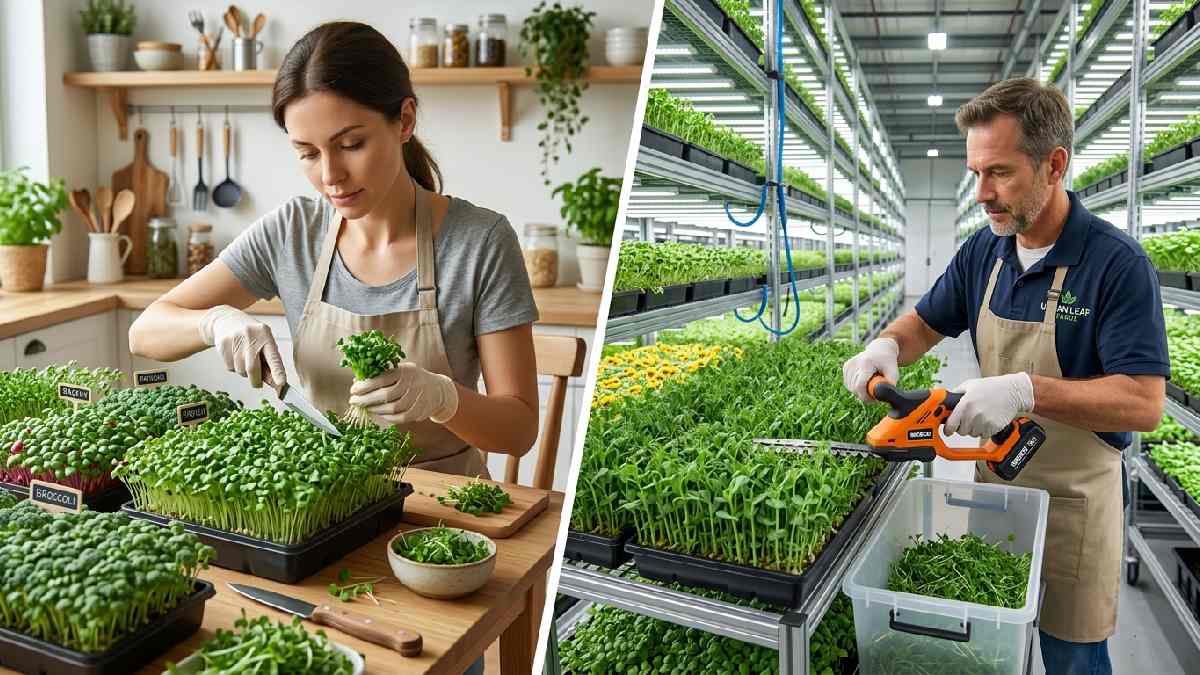
Choosing between manual and electric microgreen harvesters depends on your harvest volume, budget, and how much time you want to spend per session. Manual tools suit growers cutting fewer than 15 trays weekly, while electric options become worthwhile past that threshold.
Both categories have genuine strengths depending on your specific setup, so understanding these tradeoffs helps you avoid overspending on equipment that doesn’t match your actual weekly harvesting needs.
Advantages of Manual Harvesters
Manual microgreen harvesters typically cost under 30 dollars, require no charging or electricity, and give growers complete control over cutting pressure and angle. They’re also easier to clean thoroughly, since there’s no motor housing or electrical components to avoid getting wet.
For home growers or those harvesting fewer than 15 trays weekly, manual tools often provide the best balance of affordability, simplicity, and reliable performance.
Advantages of Electric Harvesters
Electric microgreen harvesters process large volumes significantly faster, cutting a full tray in seconds rather than minutes, while eliminating hand fatigue during long sessions. These tools maintain consistent cut quality across 50 or more trays in a single sitting.
Though pricier upfront, typically 150 to 500 dollars, the time savings often justify the investment for commercial growers harvesting large quantities multiple times each week.
Which Option Is Right for You?
Home and small-scale growers harvesting under 15 trays weekly typically do fine with manual microgreen harvesters, given their lower cost and simplicity. Commercial operations processing 30 or more trays weekly benefit far more from the speed and consistency electric harvesters provide.
Calculating your current weekly tray count against each tool’s price helps determine the most practical and cost-effective choice for your specific situation.
Cleaning and Maintaining Your Microgreen Harvester
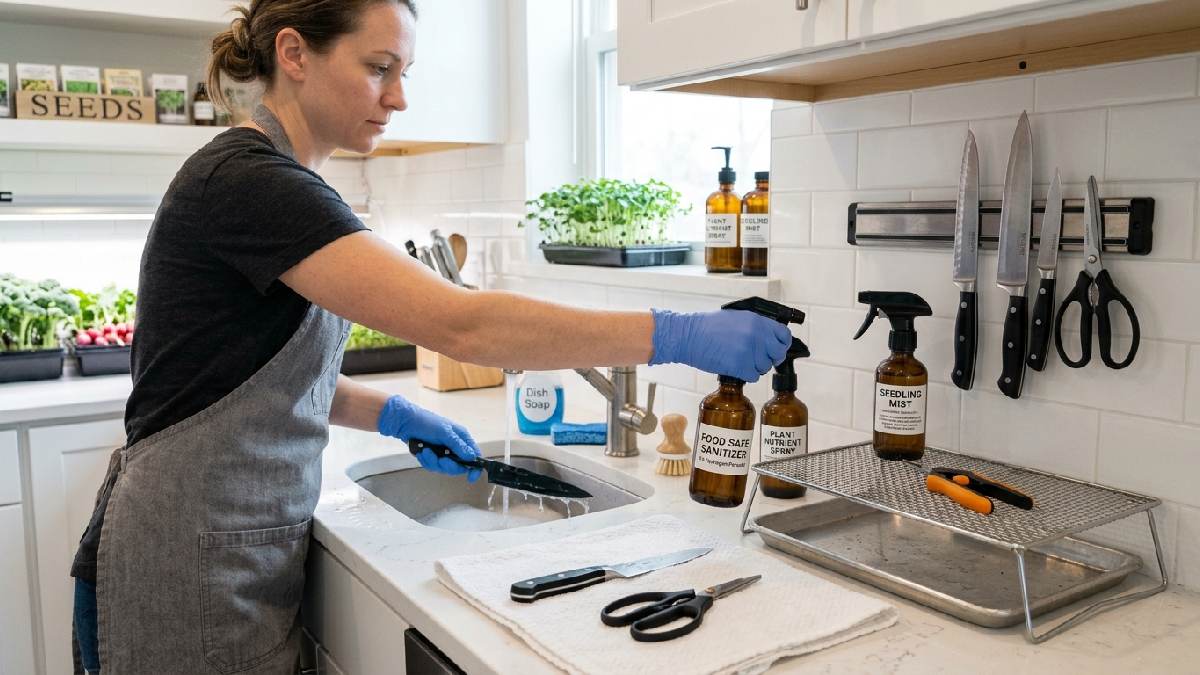
Regular cleaning and proper maintenance keep your microgreen harvester performing reliably while significantly extending its usable lifespan. Neglecting these routine tasks leads to dull blades, rust buildup, and even contamination risks for your harvested greens.
A well-maintained tool can last several years, while a neglected one often needs replacing within just a single growing season due to preventable rust or blade damage.
Clean After Every Harvest
Wash your microgreen harvester immediately after each use with warm, soapy water to remove plant residue before it dries onto the blade. Skipping this step even once allows bacteria and dried sap to build up, which can contaminate future harvests and dull the cutting edge faster.
Consistent cleaning after every session takes only a minute or two but protects both tool longevity and food safety.
Keep the Blade Sharp
Regular sharpening, roughly every two to four weeks depending on usage, ensures your microgreen harvester continues delivering clean, precise cuts without crushing stems.
A dulling blade requires more pressure to cut through, increasing bruising and slowing down your harvesting speed noticeably. Using a simple honing stone or replacement blade kit keeps your tool performing at its best across every harvesting session throughout the season.
Prevent Rust and Corrosion
After washing, thoroughly dry your microgreen harvester’s blade with a clean cloth before storing it, since leftover moisture causes rust within days. Rust weakens the blade’s edge and can eventually make the tool unusable for clean cutting.
Applying a small drop of food-safe mineral oil to the blade occasionally also helps prevent corrosion, especially in humid growing environments where moisture exposure is harder to avoid.
Store Your Tool Safely
Keep your microgreen harvester in a protective sheath, dedicated drawer, or wall-mounted holder to prevent accidental blade damage or injury between uses. Loose storage in a drawer with other tools often dulls or nicks the blade over time.
Proper storage also keeps the tool clean and immediately ready for your next harvesting session, avoiding delays caused by searching for or repairing a damaged blade.
Frequently Asked Questions
No schema found.Conclusion
Choosing the right microgreen harvester makes a real difference in harvest speed, cut quality, and how long your greens stay fresh. Whether you pick simple scissors for a few home trays or an electric harvester for 50-plus trays weekly, matching the tool to your actual volume matters most.
Combined with proper timing, sanitizing, and cold storage at 34 to 38°F, a quality microgreen harvester can reliably serve growers for years, consistently delivering clean cuts and longer-lasting, better-quality microgreens.