
How to Grow Your Own Microgreens at Home (Complete Beginner’s Guide)
I started growing microgreens at home with almost no idea, just a small tray and some seeds. First attempt looked messy, overwatered, uneven growth, but still edible. Then I learned simple routine works best. Clean tray, right moisture, steady light, that’s enough. Seeds sprout quickly, sometimes in a few days, and the kitchen starts to feel different.
I keep checking them daily, and small changes are always visible. No garden needed, just corner space. Harvest feels quick, almost satisfying every time. Beginners don’t need a perfect setup, just patience and consistency. Once you try it, growing becomes part of your daily habit.
What Are Microgreens?
Microgreens are young vegetable greens harvested very early, just after sprouting. I first saw them as tiny plants, small but full of life. They usually grow about 1 to 3 inches tall before cutting. Not fully grown, not just seeds either, something in between. They come from vegetables like broccoli, radish, sunflower, and peas.
People grow them indoors in trays with soil or mats. I noticed they grow quickly and don’t need much space. Flavor feels stronger than regular greens. Even beginners can grow them easily at home. Small size, fast growth, fresh taste, that’s what makes microgreens special.
Definition of Microgreens
Microgreens are young vegetable greens harvested early, usually when they reach 1 to 3 inches in height. I see them as baby plants, small but already developed with tiny leaves. They grow in soil or hydro mats and need light to grow properly.
Only stems and leaves are eaten; roots stay behind. They are not sprouts and not full vegetables either. I noticed they grow fast and look fresh. Simple to grow indoors, they bring color, taste, and freshness to everyday meals easily.
Microgreens vs Sprouts vs Baby Greens
I used to mix all three, but they grow in very different ways. Sprouts are the fastest, just water and a few days, eaten whole with roots. Microgreens take a bit longer, need light and a medium, and only stems and leaves are used. Baby greens grow even further, almost into small plants, and need more space and time.
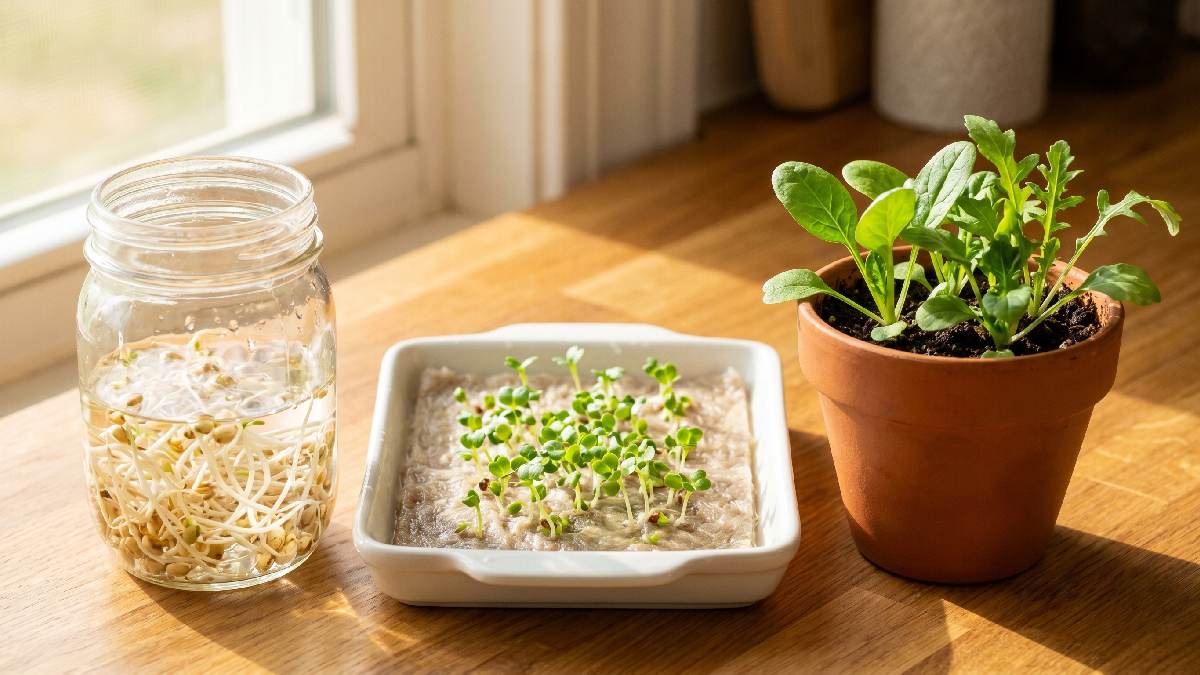
Taste changes too; sprouts feel mild, microgreens stronger, baby greens more like regular vegetables. Beginners usually start with sprouts, then move to microgreens. Each stage feels different, a simple progression from seed to fuller plant growth
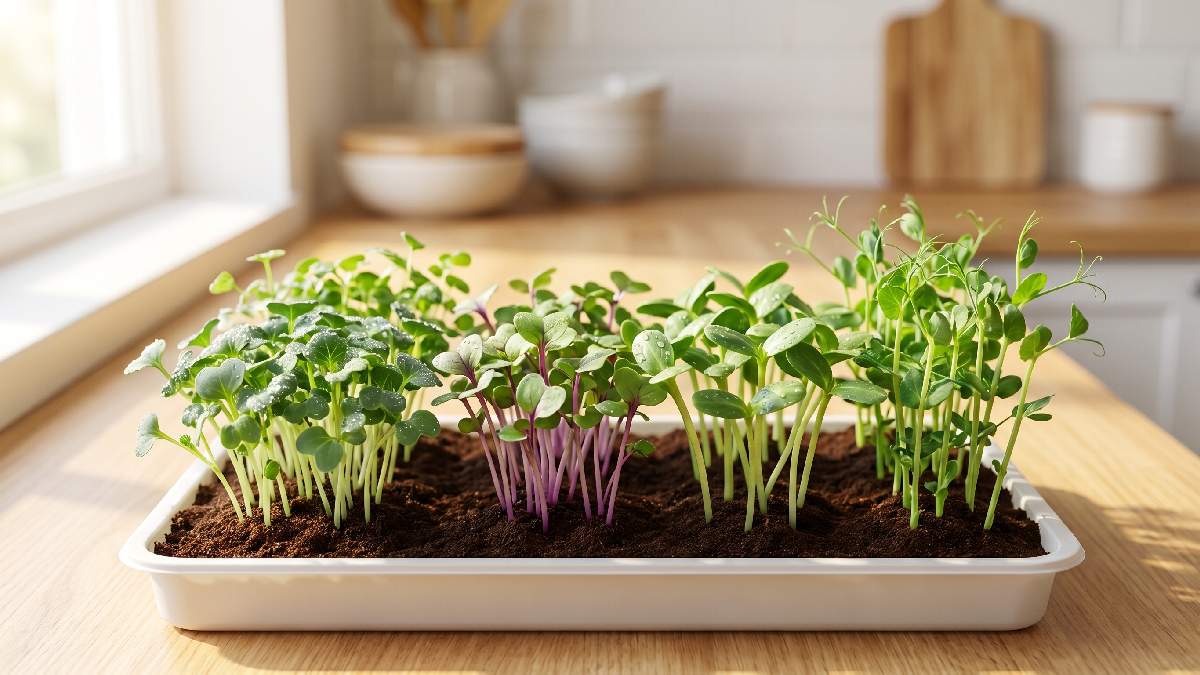
Popular Types of Microgreens
Some microgreens grow better than others, especially for beginners. I often use radish because it grows fast and looks strong. Broccoli is also easy, with very steady growth every time. Sunflowers give thick shoots, a crunchy texture, feels satisfying to eat.
Pea shoots grow tall and soft, with a slightly sweet taste. Each type behaves differently in the tray. I noticed beginners enjoy radish and broccoli first because they don’t fail easily. These varieties give quick results and help build confidence in growing microgreens at home.
Benefits of Growing Your Own Microgreens
Growing microgreens at home feels simple and useful. I started just to try something new, but it became part of my routine. They grow fast, don’t need much space, and taste fresher than store greens. I noticed money savings over time, no need to buy expensive small packs. You control everything, no chemicals, no long storage.
Even a small tray gives a fresh harvest regularly. It feels satisfying to cut your own greens. Beginners like it because it’s easy and low effort. Fast growth and simple setup make it perfect for daily use. Small trays, big benefit, that’s what makes it worth it.
High Nutritional Value
Microgreens may look small, but they carry strong nutrition inside. I noticed they contain vitamins like A, C, and K along with antioxidants. Even a small handful feels enough to improve meals. They are more concentrated than mature vegetables sometimes. I started adding them to eggs, salads, and sandwiches.
Fresh taste and nutrients both increase. Beginners like this because health improves without effort. Small greens, but powerful inside. Regular use adds natural nutrition to a daily diet without needing big changes or complicated meal planning.
Saves Money Over Time
Buying microgreens from the store feels expensive after some time. I noticed small boxes cost a lot compared to growing at home. Seeds are cheap and last for many cycles. One tray gives enough greens for multiple meals.
The setup cost is low, and reuse is easy. Over time, savings become clear. Beginners don’t realize this at first, but it adds up. Growing at home gives a fresh supply without repeated spending. Simple investment, long-term benefit, that’s how I see it now.
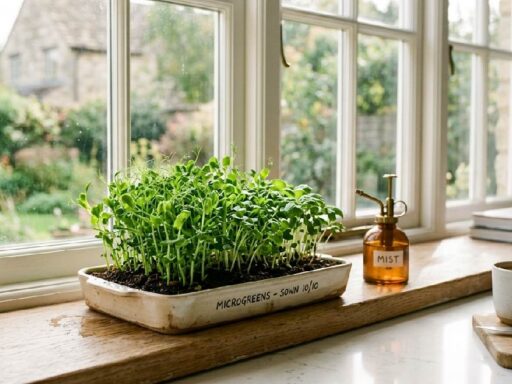
Ideal for Small Spaces
Microgreens fit easily into small homes. I grow them on a kitchen shelf, no garden needed. Even apartments work perfectly fine. A single tray doesn’t take much space. I once placed trays on the window ledge, worked great. Beginners in cities find this very helpful.
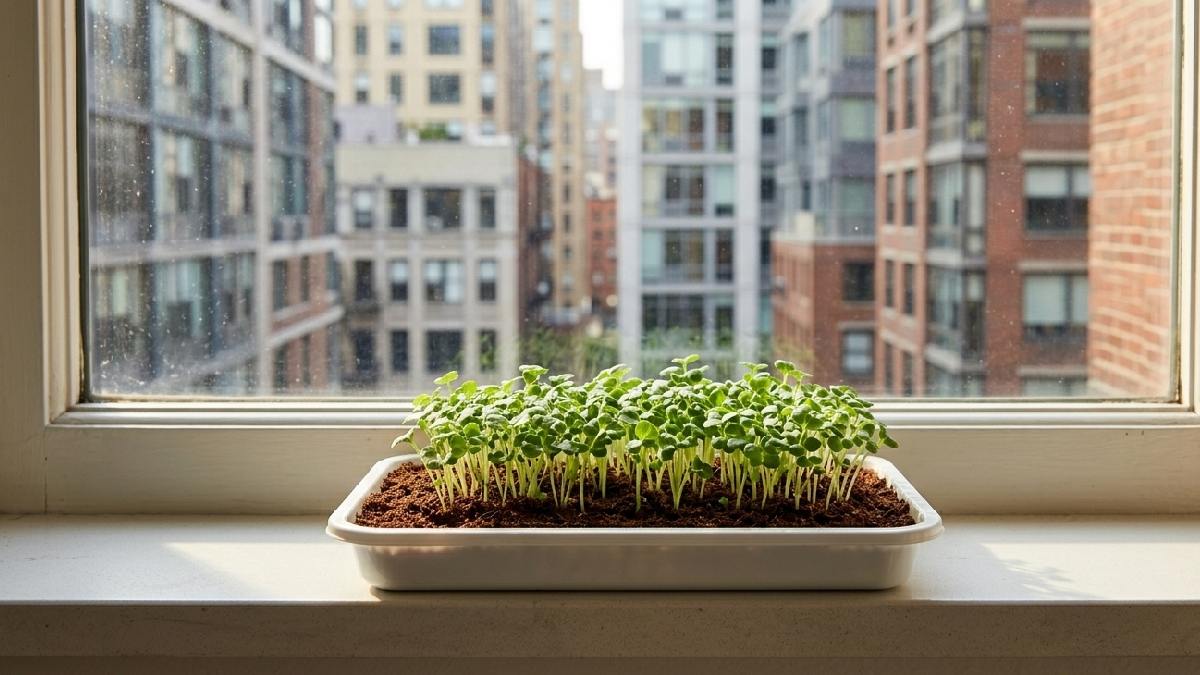
No outdoor area required. The setup stays clean and compact. I noticed even tight spaces can produce fresh greens. Small corners become productive without effort. That makes microgreens perfect for urban living.
Fast Growth Cycle
Microgreens grow fast, that’s what keeps it interesting. I usually see sprouts within a few days. Full growth happens in about 7 to 14 days. Compared to normal plants, this feels very quick. I noticed daily changes, small but visible.
Beginners enjoy this fast progress. No long waiting, no patience stress. You plant seeds and eat the results within days. This short cycle makes growing addictive. Quick effort, quick reward, that’s what makes microgreens fun to grow at home.
What You Need to Grow Microgreens
Starting microgreens doesn’t require complicated tools. I began with a tray, seeds, and a spray bottle. Over time, I improved the setup, but the basics stayed the same. Seeds decide growth quality, trays hold everything together. Soil or a hydro mat supports roots. Light from the window or LED helps leaves grow strong.
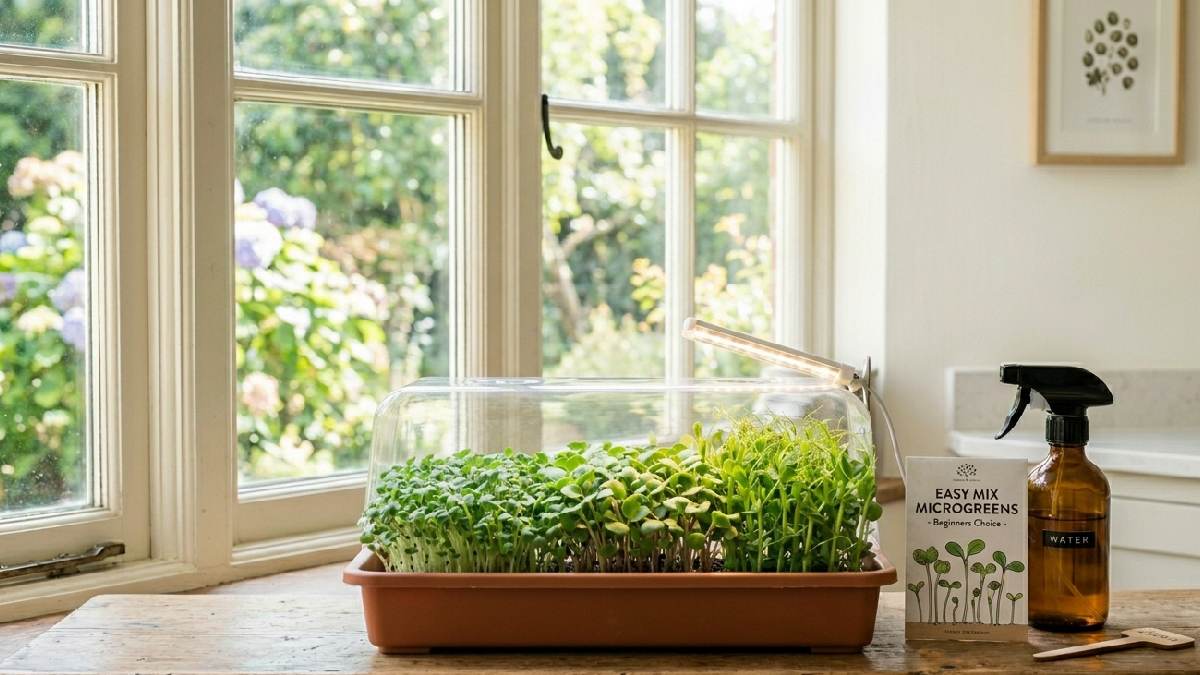
Water keeps everything balanced. I noticed simple setups work best for beginners. No need for expensive equipment. Everything fits in a small space. With a few basic items, anyone can start growing microgreens easily at home without stress or confusion.
Choosing the Right Seeds
Seed choice is very important for microgreens. I always use organic and untreated seeds now. Treated seeds sometimes don’t grow properly indoors. Fresh seeds sprout faster and more evenly. I prefer radish, broccoli, and mustard for beginners.
I once used old seeds; the results were poor. Good seeds improve the whole process. Beginners should not ignore this step. A simple choice here saves effort later. Reliable seeds give better growth, better taste, and a smoother experience overall.
Containers or Trays
A shallow tray is enough for growing microgreens. I use plastic trays mostly, easy and reusable. Even DIY containers work fine if they’re clean. Depth should be low, just enough for roots. I once used deep containers, water stayed uneven.
Flat trays give better results. They fit easily on shelves or counters. Beginners don’t need fancy trays. Simple setup works well. I noticed clean container helps avoid problems later. Small tray, simple use, effective results.
Growing Medium (Soil vs Hydroponic)
Microgreens can grow in soil or hydro mats. I tried both methods. Soil feels more natural and holds nutrients well. Hydroponic mats feel cleaner and easier to manage. Soil sometimes gets messy, but mats stay neat. Both work fine if the moisture is balanced.

Beginners can start with the soil first. I noticed the hydro method needs more attention to water. Choice depends on preference. Both methods give good results when done properly. Simple medium, steady care, healthy growth.
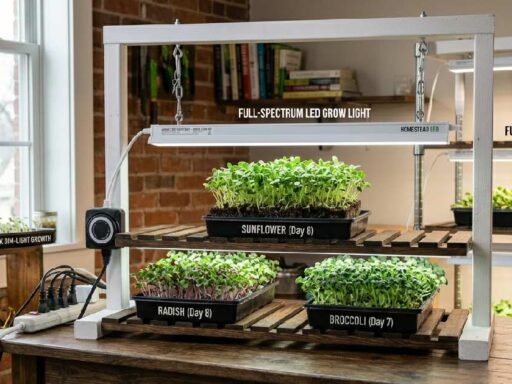
Lighting Requirements
Light is very important for microgreens’ growth. I use the indoor sunlight most of the time. When light is weak, I switch to LED grow lights. Plants respond quickly to proper lighting. Too little light makes stems weak and long.
Good light keeps leaves green and strong. Beginners should place trays near the window. I noticed consistent light improves quality. The simple lighting setup works fine. No need for complex systems, just steady brightness daily.
Watering Tools
Watering microgreens needs control, not too much. I use a spray bottle mostly. It keeps moisture balanced without flooding the tray. Later, I sometimes use the bottom watering method. It keeps roots hydrated without wetting leaves too much.
I learned that overwatering causes mold issues. Beginners should keep watering lightly and consistently. Simple tools work best. A spray bottle is enough for most setups. Controlled watering keeps plants healthy and fresh.
Step: by: Step Guide to Growing Microgreens
Growing microgreens feels simple once you start doing it regularly. I usually begin with a tray, soil or mat, and fresh seeds ready nearby. Everything happens in small steps; nothing is complicated if you follow a rhythm. Seeds go down, moisture stays balanced, and light comes at the right time.
The first few days feel quiet, then suddenly green starts showing everywhere. I check trays daily, and small changes guide the process. Mistakes happen, but plants adjust quickly. Within a week or two, growth becomes visible and satisfying. It’s a short cycle, easy to repeat again and again at home.
Step 1:Prepare the Tray
I start with a cle, a shallow tray, which matters more than I thought earlier. Any old dirt or residue can affect growth later. Then I add soil or a growing mat, spread it evenly across the surface. I press it gently so it sits flat, not uneven.
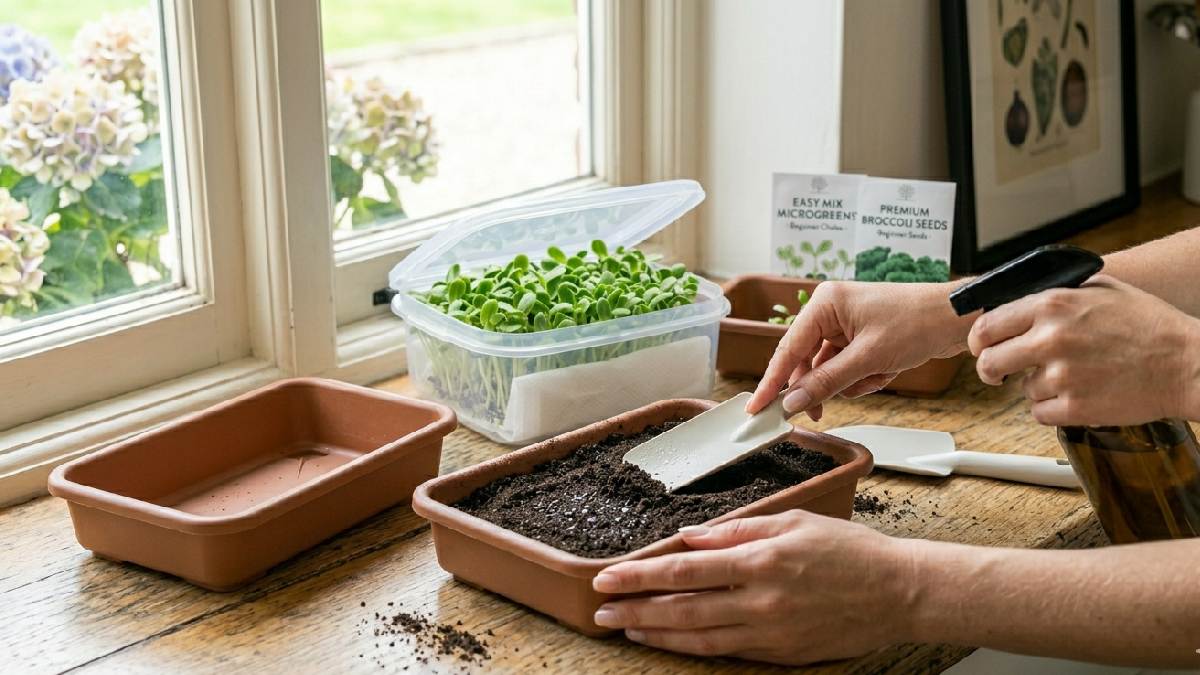
Water comes next, just enough to make it moist, not soaked. I once rushed this part; the tray didn’t perform well. Now I take time here, the setup feels stable. Beginners should keep this step simple but careful; it sets the base for everything that follows later.
Step 2:Sow Seeds Properly
I take seeds and spread them slowly across the surface. Not too crowded, not too sparse, finding that balance took me time. The first trays were messy because I rushed this step. Now I keep even spacing, which helps the shoots grow properly. I press seeds lightly so they stay in place.
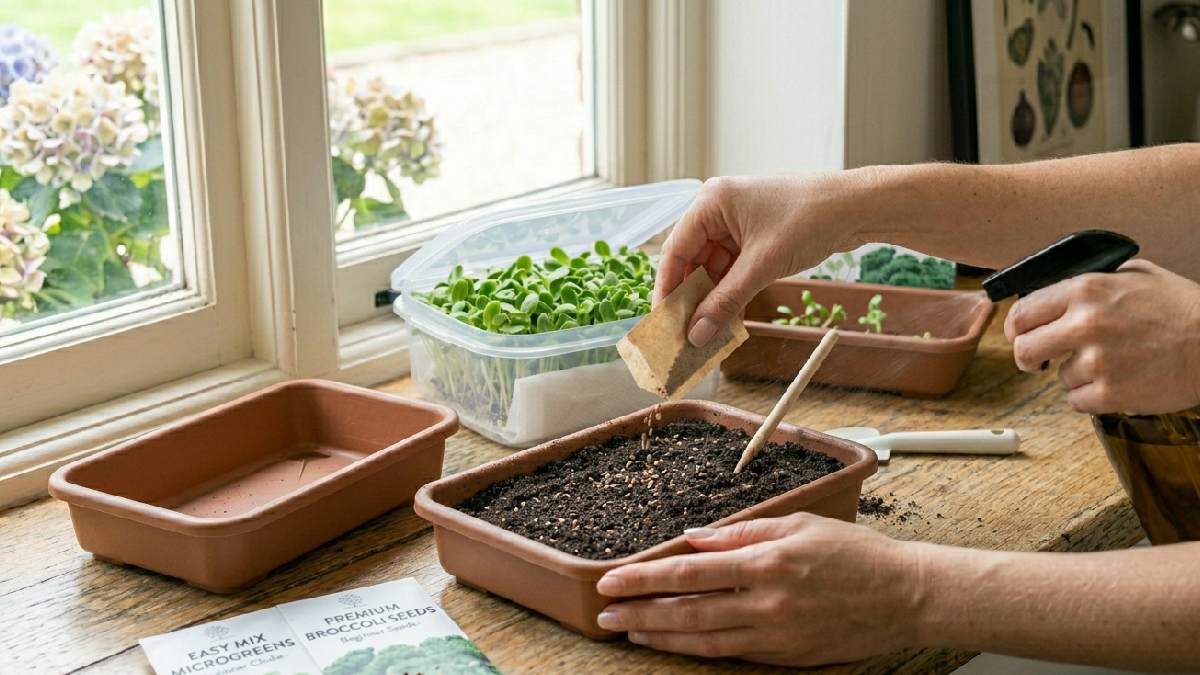
No need to bury them deep, just surface contact works fine. A light mist follows, keeping everything settled. Beginners often overthink this, but slow and even spreading gives the best results. Clean sowing leads to strong, uniform growth later in the tray.
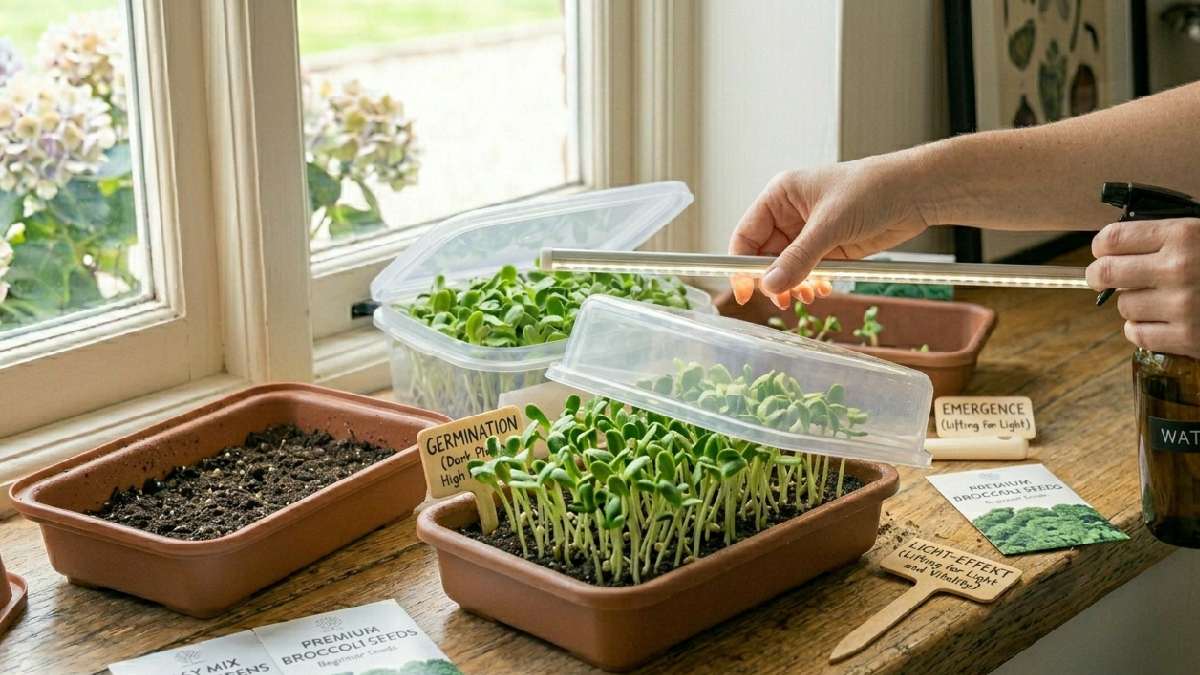
Step 3:Germination Process
After sowing, I cover the tray for a few days. Darkness helps seeds start properly. I noticed better results this way. I use a lid or another tray on top, nothing complicated. Moisture stays inside, seeds swell, and roots begin forming.
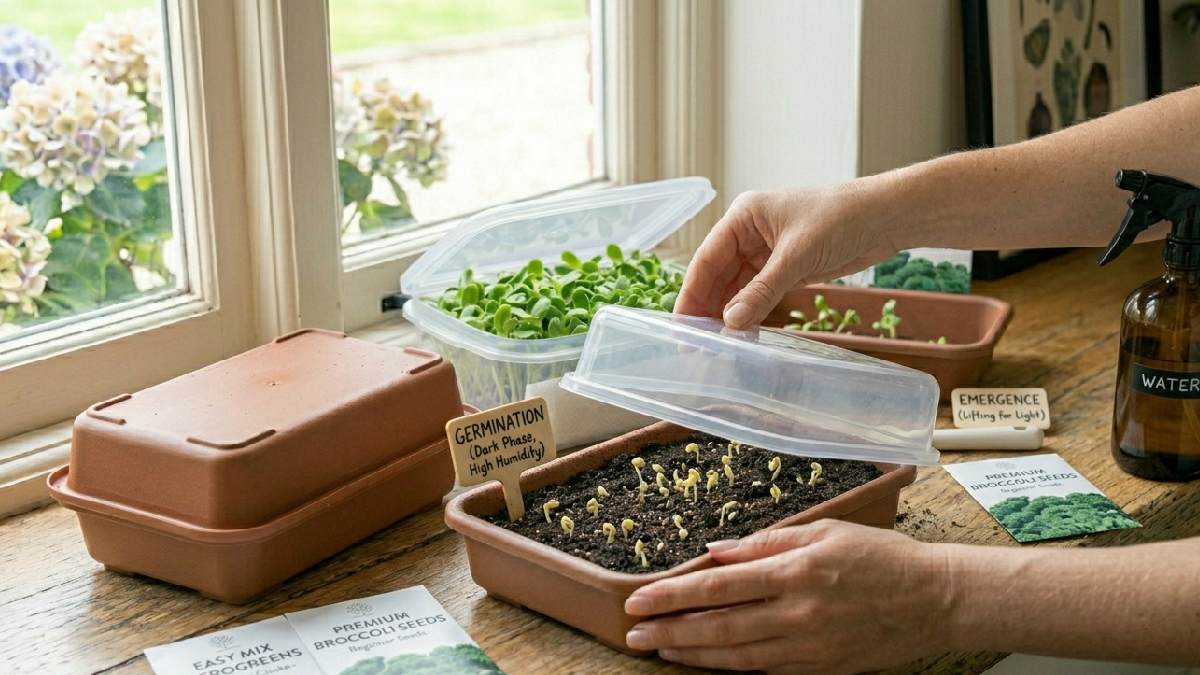
Not much is visible above, but growth is happening below. I check once daily, just light mist if needed. If I skip this step, germination feels uneven. Beginners often get impatient here, but this quiet phase matters. Once sprouts push up, you know the process is working well.
Step 4:Provide Light
Once sprouts appear, I move the tray into the light. The window works fine; sometimes I use a small LED. Light makes leaves turn green quickly, and growth feels more alive. If light is weak, stems stretch and fall over. I adjust the tray position slowly, not all at once.
Each day shows small changes, and plants respond fast. Beginners usually notice this stage the most. Balanced light keeps stems firm and color strong. I don’t overthink setup now, just steady light every day works better than anything complicated.
Step 5:Watering the Right Way.
Watering is where I made most mistakes early on. Too much water made the soil soggy, roots struggled badly. Too little slowed growth; the shoots looked weak. Now I keep it simple, just light misting daily. I check the surface with my fingers; if it feels dry, I spray a bit.

No heavy pouring anymore. Balance is everything here. Microgreens react quickly, so changes show fast. Beginners should stay consistent, not perfect. Small daily care works better than overdoing it once. Healthy moisture keeps growth smooth and steady.
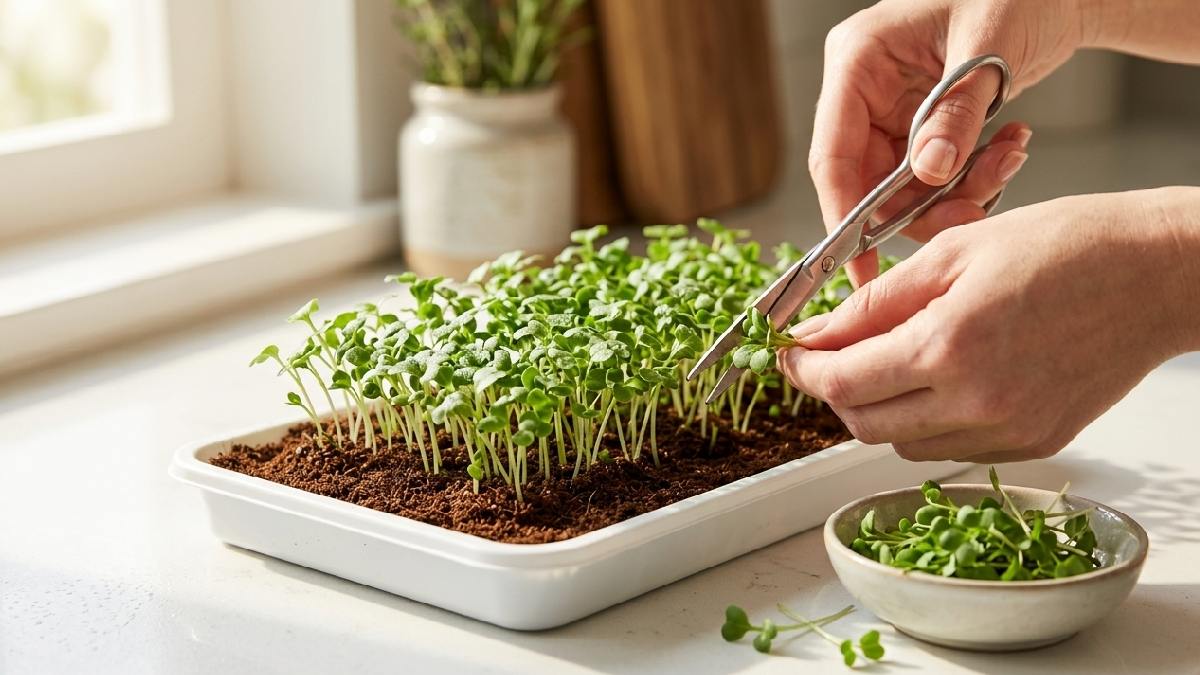
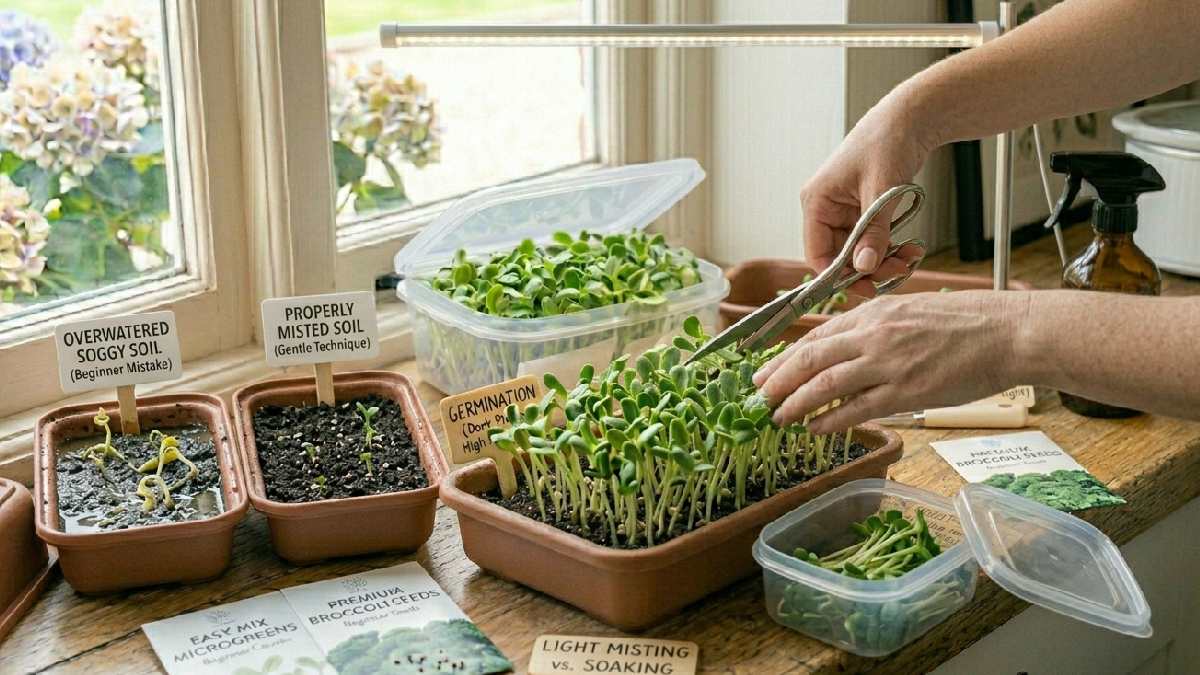
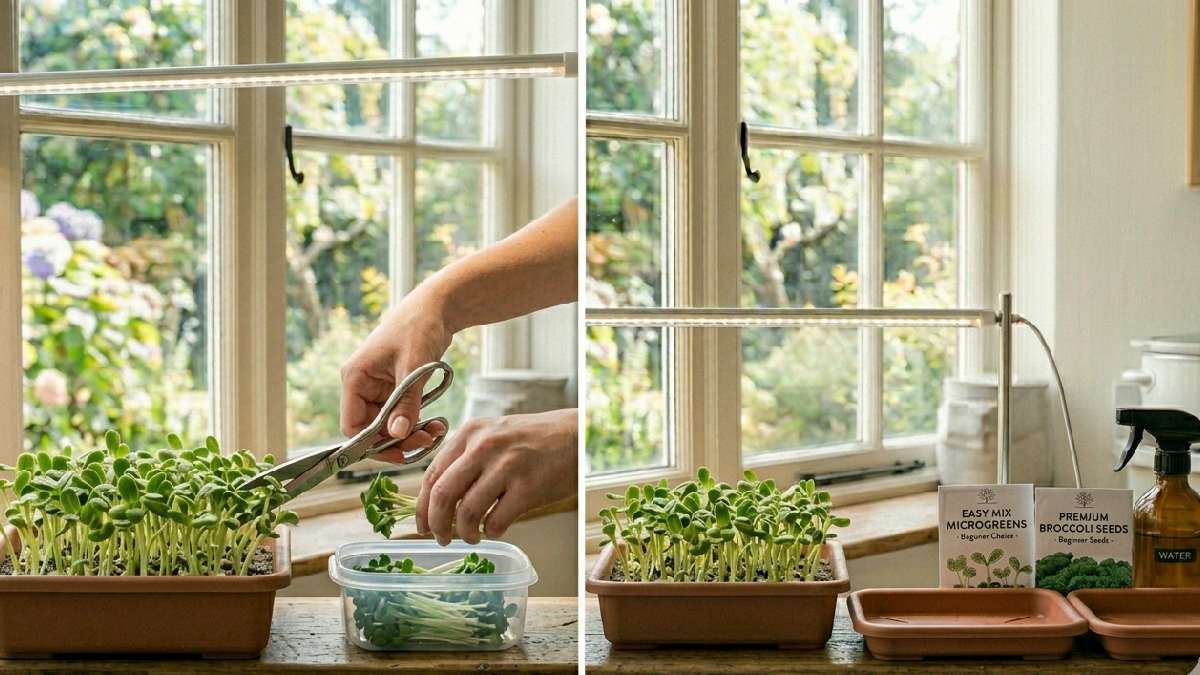
Step 6:Harvesting Microgreens
Harvesting feels like the best part, honestly. I wait until the first true leaves appear, stems look firm and ready. Usually it takes about one to two weeks. I use scissors and cut above the soil, quickly and cleanly. Pulling roots makes a mess; I avoid that now.
Flavor feels fresh, stronger than expected. If I wait too long, the taste changes slightly. Timing matters more than size. Beginners often delay harvest, but earlier is better. Each tray teaches something new, and cutting fresh greens always feels satisfying.
Best Microgreens for Beginners
Starting with the right microgreens makes everything easier. I didn’t realize this at first, tried random seeds, results were mixed. Some grew fast, others struggled for no clear reason. Now I stick to beginner-friendly types; they feel more predictable. Radish, broccoli, and pea shoots usually perform well indoors.

Growth looks even, with less stress during the early stages. Beginners need quick results to stay motivated; these varieties help with that. They respond well to simple care, no complicated setup required. Small trays fill up nicely, and green looks clean and fresh. Choosing easy types builds confidence before trying anything advanced later.
Easiest Microgreens to Grow
I always suggest radish to beginners; it rarely disappoints. Seeds sprout fast, and growth feels strong from day one. Broccoli is another easy option, steady and calm, no sudden issues. Pea shoots also work well, though they take a bit more space. I tried mustard once, slightly tricky but still manageable.
These types don’t need special care, just basic watering and light. Mistakes happen, but they recover quickly. Beginners feel less pressure with these varieties. Simple seeds, simple routine, better results. Starting easy makes the whole process enjoyable instead of frustrating.
Fastest Growing Varieties
Some microgreens grow so fast that it feels surprising. Radish is the quickest I’ve seen; sprouts appear in just a few days. Mustard also grows rapidly, leaves open fast with a sharp flavor. Arugula follows closely, with thin stems but quick results. I remember checking the tray daily, and growth was visible almost every morning.
These fast types keep beginners interested, no long waiting. Short cycles mean more harvests in less time. Even a small effort shows a quick reward. It’s a good way to learn without losing patience early. Fast growers make indoor gardening feel active and exciting.
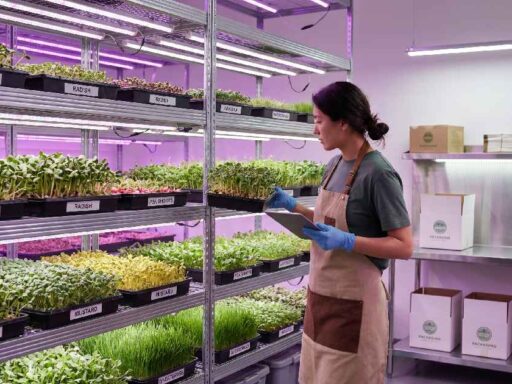
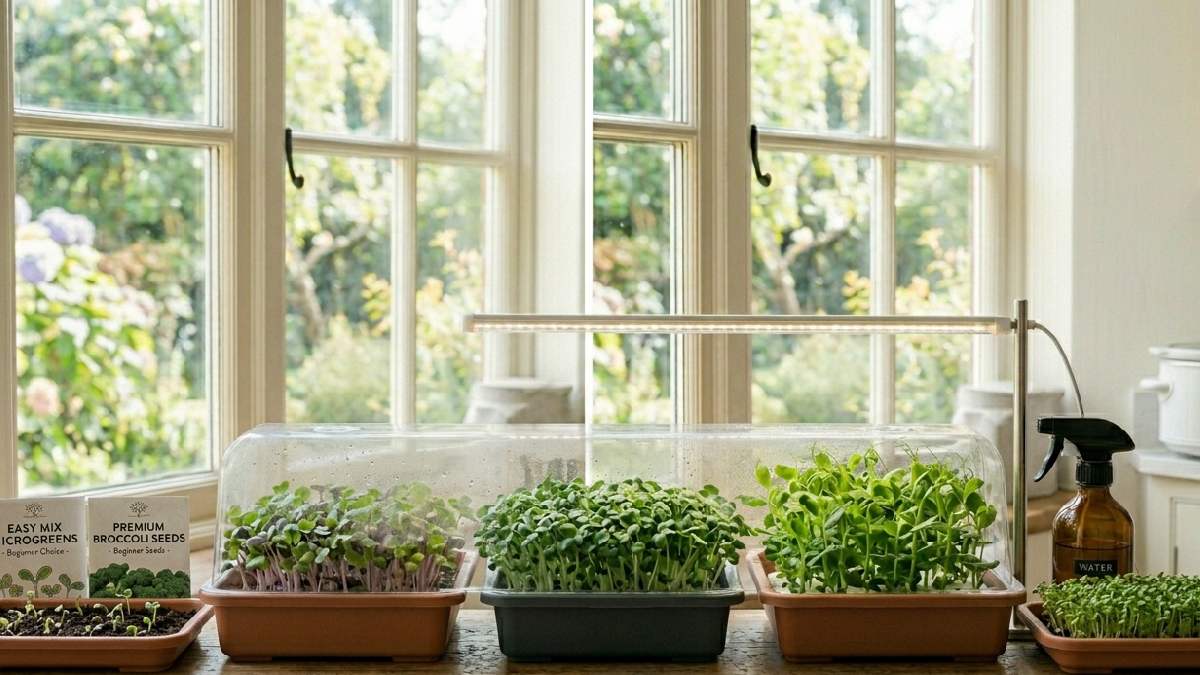
Best for Indoor Growing
Indoor growing needs microgreens that adjust easily. I found broccoli works best, steady under both sunlight and LED. Radish also performs well, doesn’t demand perfect conditions. Kale grows more slowly but stays strong indoors, very reliable. Pea shoots need a bit more space, but still manageable inside.
I keep trays near the window or under a small light; other setups work. These varieties don’t react badly to small mistakes. Beginners feel more relaxed growing them. Indoor environment stays controlled, so plants behave better. Choosing the right types makes the indoor setup simple and consistent.
Common Mistakes to Avoid
I made plenty of mistakes when growing sunflower microgreens for the first time, most of them small but visible later. Overwatering was the biggest one; the tray stayed too wet, roots struggled, and growth slowed down. Lighting mistakes also show quickly; weak light makes stems stretch and fall. I once added too many seeds; the tray looked full, but plants fought for space, and nothing grew strong.
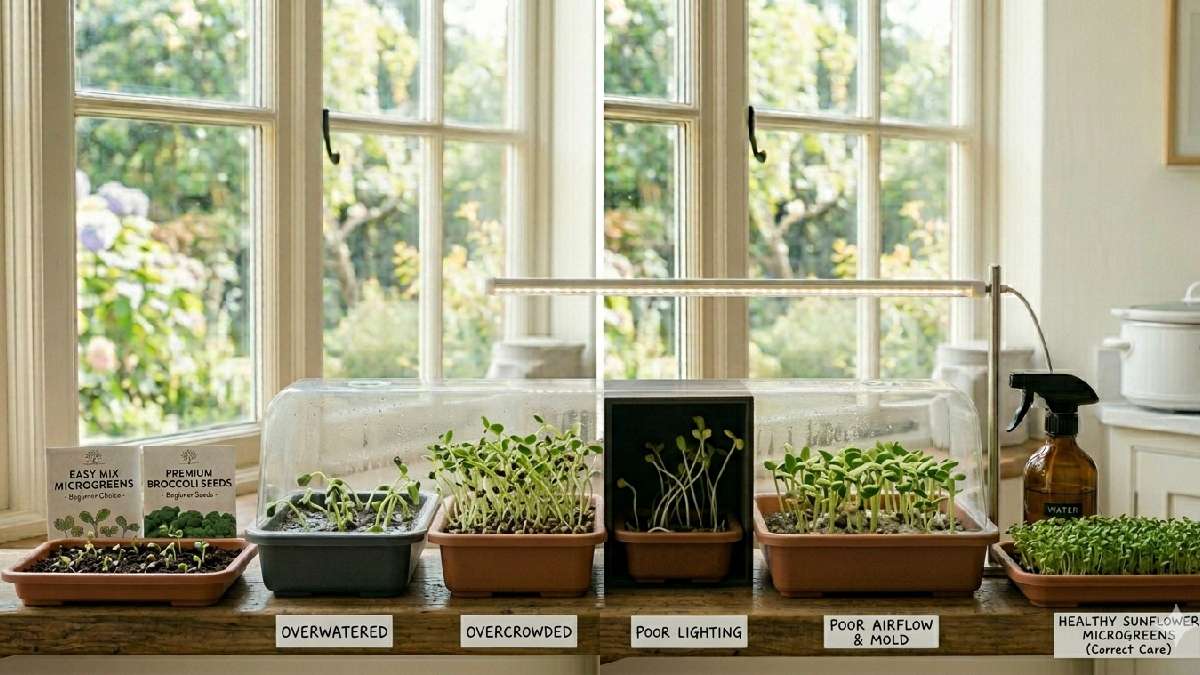
Airflow is another thing beginners ignore; still, air makes everything feel damp and heavy. Dirty trays also cause issues. I learned that after seeing mold spots. Small habits fix most problems. Clean setup, balanced water, proper light, everything improves. Mistakes happen, but each attempt teaches something useful.
Overwatering and Mold Growth
I used to think more water means better growth, but it caused problems fast. The mat stayed soaked, seeds couldn’t breathe properly. After a few days, white, fuzzy mold began to appear on the surface. Smell changed too, not fresh anymore. I had to throw one whole tray once, which felt frustrating.
Now I keep moisture balanced, just damp, not dripping. I check daily with fingers, a simple habit. Airflow also helps reduce mold. Beginners panic when they see mold, but it’s mostly due to excess water. Small control keeps the tray clean and healthy.
Poor Lighting Conditions
I once kept my tray in a dim corner, thinking it would still grow fine. The shots came out weak, stretched too much, and almost fell over. The leaves looked pale, not the bright green I expected. That’s when I realized light matters more than I thought. Now I place trays near a window or under an LED.
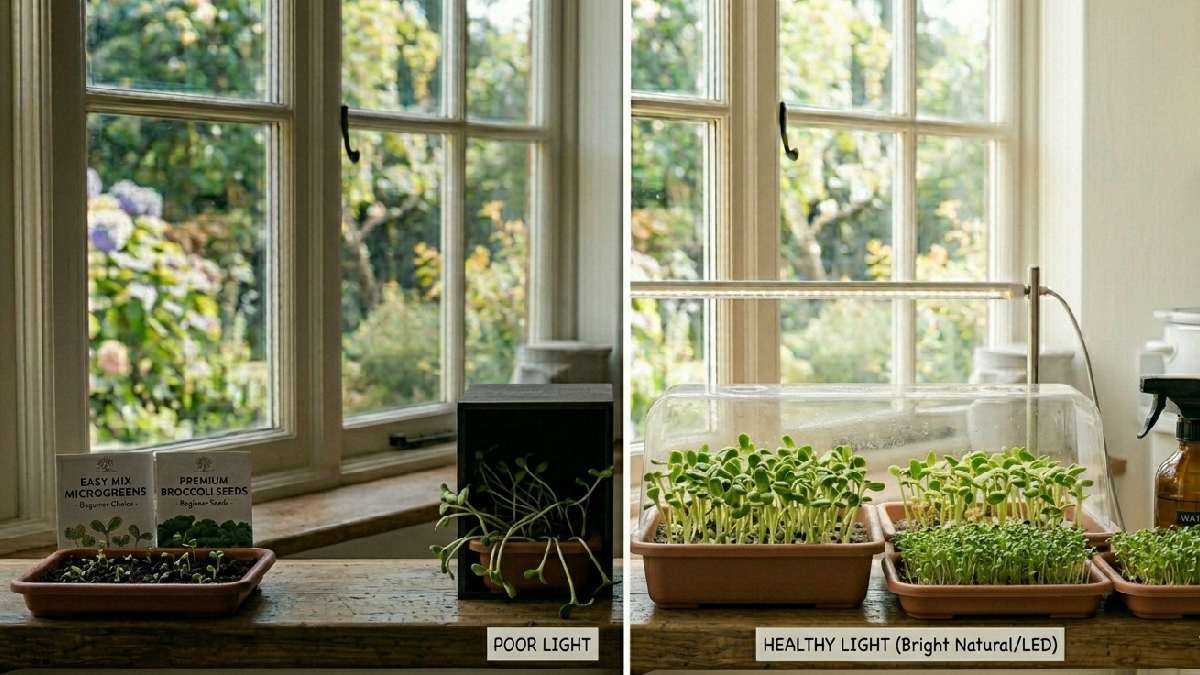
Consistent light makes stems firm and upright. Too little light slows everything down. Beginners often ignore this part, but plants show it clearly. Good lighting keeps growth balanced, color strong, and overall quality much better.
Overcrowding Seeds
At first, I spread seeds too thick, thinking more seeds meant more harvest. It didn’t work that way. Seeds competed for space, roots tangled, shoots grew uneven. Some stayed weak, others stopped growing completely. Air couldn’t move between them, and moisture got trapped.
The tray looked messy instead of full. Now I spread seeds evenly, leaving small gaps. It may look less impressive at first, but the results come out better. Beginners often rush this step. Balanced spacing gives stronger plants, a cleaner harvest, and better overall growth in the tray.
Lack of Air Circulation
I didn’t pay attention to airflow at first, and it showed quickly. Trays felt damp all the time, and leaves looked soft and tired. Mold started forming in corners where air didn’t move. I added a small fan later, nothing strong, just gentle airflow. That changed everything.
Leaves stood firmer, surface stayed fresher. Too much wind can dry plants, so balance matters. Beginners usually skip this part, but it’s important. Good air circulation keeps microgreens healthy, reduces moisture buildup, and helps maintain steady, clean growth indoors.
How to Harvest and Store Microgreens
I always feel harvesting is the most satisfying part. Plants you watched daily are finally ready to eat. Timing matters here, too early flavor weak, too late taste becomes bitter. I usually check height, leaf stage, and color before cutting.
Scissors make clean cuts, no pulling needed. After harvest, handling gently keeps them fresh longer. I store them carefully in the fridge; a small container works fine. Moisture control is important, too; wet spoils fast. Simple steps keep microgreens crisp and fresh for days.
When to Harvest
I usually harvest microgreens when the first true leaves fully appear. Stems look firm, color becomes deep green, not pale anymore. If I wait too long, the taste turns slightly bitter. Too early,t the flavor feels weak. Radish is usually ready fast, around 7 days.
Sunflowers take a bit longer, closer to 10–12 days. I check them daily, just a quick look in the morning. Height and leaf shape guide me more than strict timing. Every tray behaves slightly differently, so observation matters more than the calendar.
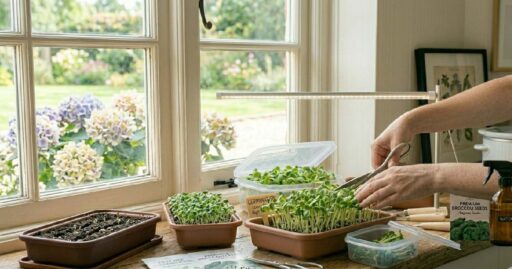
Best Harvesting Method
I use a simple pair of clean scissors for harvesting. I cut just above the growing medium, never pulling roots out. Pulling makes a mess and shortens shelf life. Cutting keeps microgreens clean and ready for storage. I harvest in small batches sometimes, not the whole tray at once.
This helps keep freshness longer in the fridge. Hands stay dry, trays stay stable during cutting. I avoid squeezing or crushing leaves. Gentle handling keeps the texture crisp and the flavor intact. Simple method, but the results feel much better every time.
Storage Tips
After harvesting, I store microgreens in a clean container with a paper towel. It absorbs extra moisture and keeps leaves fresh longer. Fridge temperature should be stable, not too cold or freezing. I avoid washing before storing, only rinse before use.
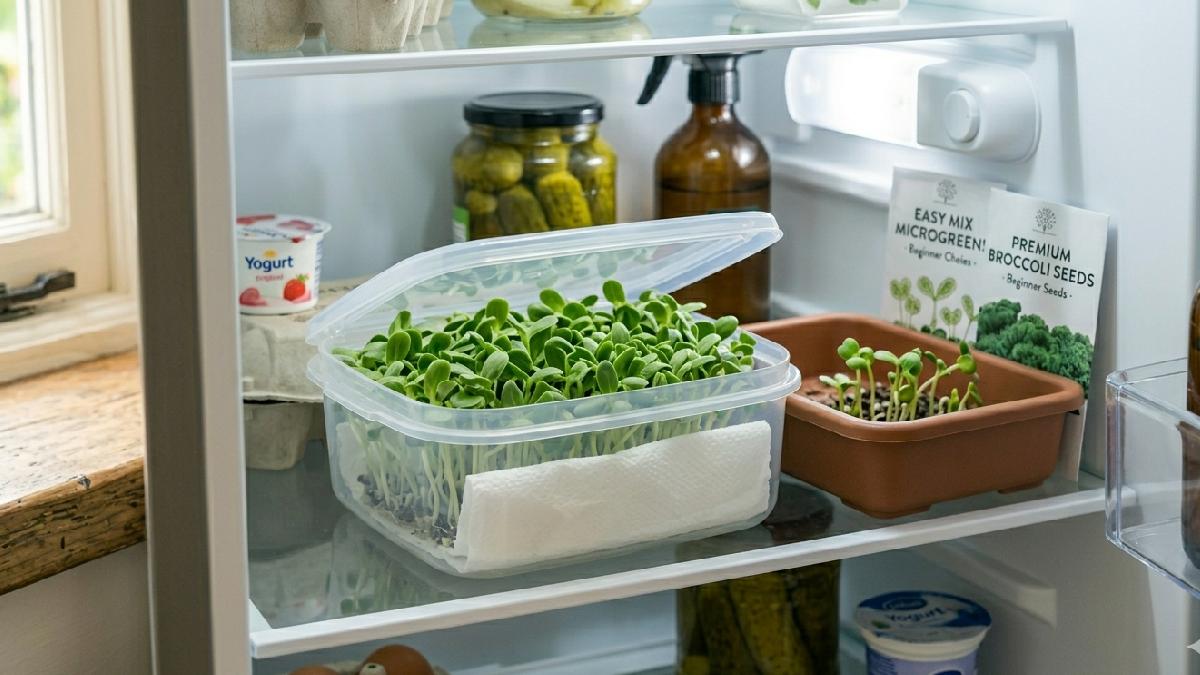
Too much water causes quick spoilage. The container should not be fully sealed; slight airflow helps. I check them daily and remove any soft leaves if needed. Proper storage keeps them fresh for around 4to 7 days. Simple care makes a big difference in quality and taste.
FAQs About Growing Microgreens
How long do microgreens take to grow?
Microgreens grow in 7 to 14 days, depending on type, light, and moisture conditions.
Can microgreens regrow after cutting?
No, most microgreens do not regrow after cutting; you need to replant seeds again.
Do microgreens need sunlight?
Yes, they need light. Sunlight or LED grow lights both work for healthy growth.
Can I grow microgreens without soil?
Yes, hydroponic mats or coco coir can be used instead of soil easily.
Conclusion
Growing microgreens at home feels simple once you start. I began with a basic setup and learned step by step. They don’t need a big space or expensive tools. Just seeds, a tray, water, and light. Growth is fast and satisfying. Fresh taste makes meals better. Mistakes happen, but easy to fix.
Beginners can start anytime without stress. Microgreens bring fresh food into small spaces. Simple effort gives healthy results. It becomes part of the daily routine naturally. Small greens, big impact, that’s how I see it now after growing them regularly at home.