
Growing Microgreens at Home (Beginner Guide)
Didn’t think much of it in the beginning. Just a tray sitting near the window, someone said you can grow your own greens in days. Sounded off, but still gave it a try. After a few days, tiny leaves started pushing up, uneven, a bit messy, but alive. That’s when it kind of clicks.
Microgreens are basically young plants, cut early before they fully grow. Small in size, but the taste feels stronger than normal greens. Some come out a little spicy, some soft and fresh. It depends on what you grow, and sometimes even that changes slightly. Not everything turns out the same every time.
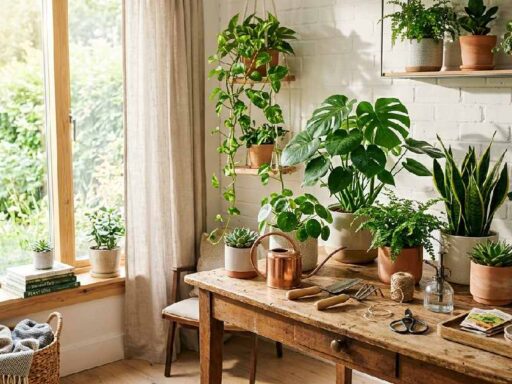
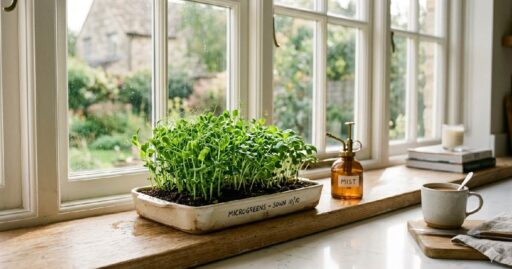
You don’t need a proper setup for this. A simple tray, some soil, seeds, and a place with light. That’s enough to start. People try to make it perfect in the beginning, but it doesn’t really work like that. A basic window spot works fine, even if sunlight isn’t hitting all day.
Seeds matter more than expected. Some grow fast, some take their time. Radish and pea shoots usually come up quickly, so it keeps things interesting. You spread them on the soil, not too perfect, just enough space. Press them a little so they don’t move around. Water lightly, not too much, or it gets messy.
For the first few days, keep them covered. Then suddenly you see small shoots coming out, not all at once. Remove the cover, give them light, and just watch. Watering feels confusing at the start. Sometimes too dry, sometimes too wet. You kind of learn without thinking too much about it.
Around a week or maybe a bit more, they’re ready. You cut them, hold them in your hand, fresh and real. Taste hits different, especially when you grew them yourself. Not every batch looks perfect; some parts grow unevenly, and some seeds don’t show up. Still works. Next time comes out better without trying too hard.
Introduction
What if you could grow fresh greens at home in just a few days? Not something complicated, not something that needs land or farming skills. Just a small setup, and it starts working quietly in the corner of your room.
Buying fresh organic greens outside is getting expensive. Sometimes the price feels too high for small quantities. Quality is not always the same either. One day it looks fresh, the next day it feels average. That uncertainty stays.
Space is another issue. Not everyone has a garden or open area. Most people live in small homes or apartments where growing plants feels difficult. Even keeping pots sometimes becomes a problem.
Microgreens solve this simply. A small tray, some soil, basic seeds, that’s enough. You don’t need experience or special tools. It grows inside the home without much attention. Within a few days, small green shoots appear, and you can eat them. Nothing fancy, just a practical way to get fresh greens at home.
What Are Microgreens?
Microgreens are just young vegetable plants. Not fully grown, just in the early stage after sprouting. You cut them small, use the leaves and soft stem, that’s it. Even in this small form, they have a strong taste and a fresh feel when you eat them.
Broccoli is one common type, with a very light taste. Radish grows quickly and has a bit of spice in it. Sunflower is slightly thicker and feels crunchy when you bite it.
People usually start with these because they are easy and don’t fail much.
Sprouts and microgreens are not the same thing. Sprouts grow in water, and you eat everything, seed and root included. Microgreens grow in soil or some medium, and they need light. You only take the green part, the stem, and the leaves. They take a bit more time than sprouts, but taste and texture feel more proper and full.
Why Grow Your Own Microgreens?
Growing microgreens at home is one of those simple things that doesn’t look like much at first, but it starts making sense once you try it. You put a few seeds in a tray, and in a short time, green shoots appear. No long waiting, no complicated process.
They grow fast, usually in 7 to 14 days. That quick cycle is what makes people stick with it. You don’t feel like you are waiting forever; something is always happening in the tray. Even in small quantities, they carry good nutrition. People use them in salads, sandwiches, or just as a topping. Nothing fancy, just an easy way to add something fresh to daily food.
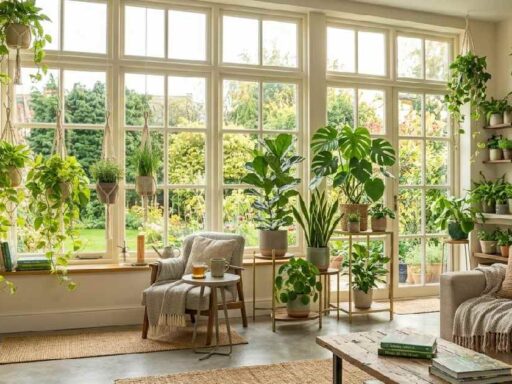
Space is not a problem here. A small tray on a table or near a window is enough. No garden, no backyard, still works fine. That makes it practical for apartments or small homes. It also saves money over time. Instead of buying small packs of greens again and again, you grow them yourself at home. Basic setup once, and you keep using it.
Another simple thing, they are fresh. No long transport, no storage time. You cut them and use them directly. That also means no chemicals or extra handling, just clean greens from your own space.
What You Need to Start Growing Microgreens
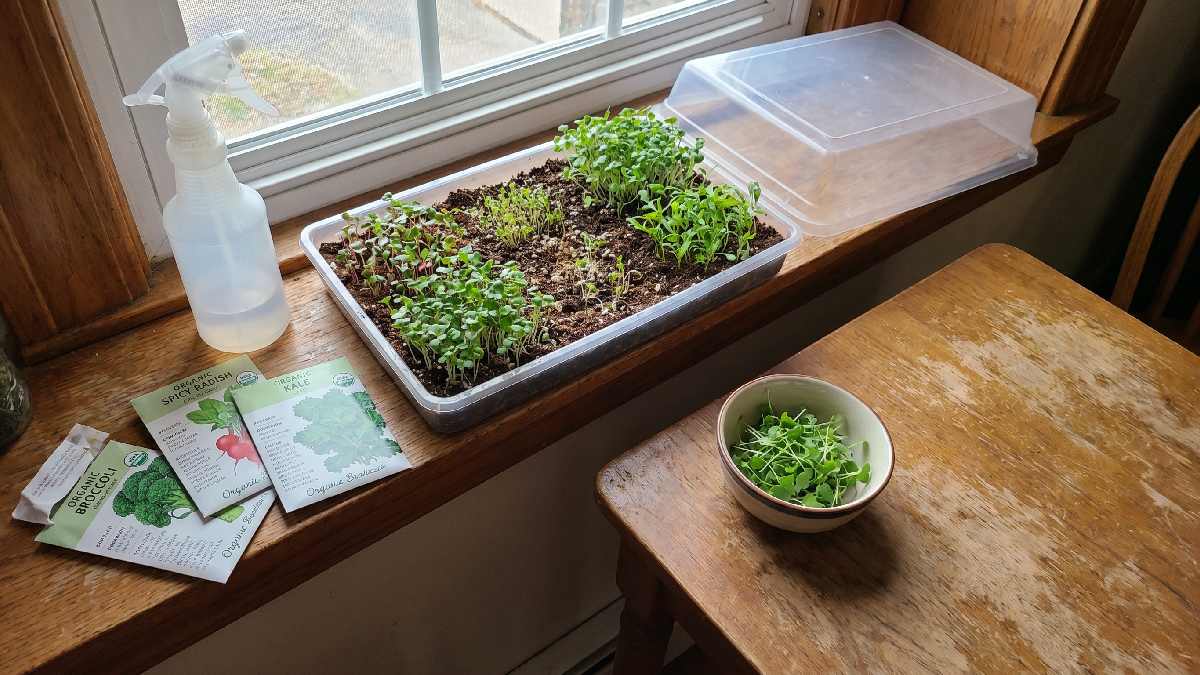
To start growing microgreens at home, you only need a few basic things that are easy to find and simple to use. A shallow tray or container is used to hold the soil and seeds properly. Good quality seeds like broccoli, radish, sunflower, or peas are important for healthy growth.
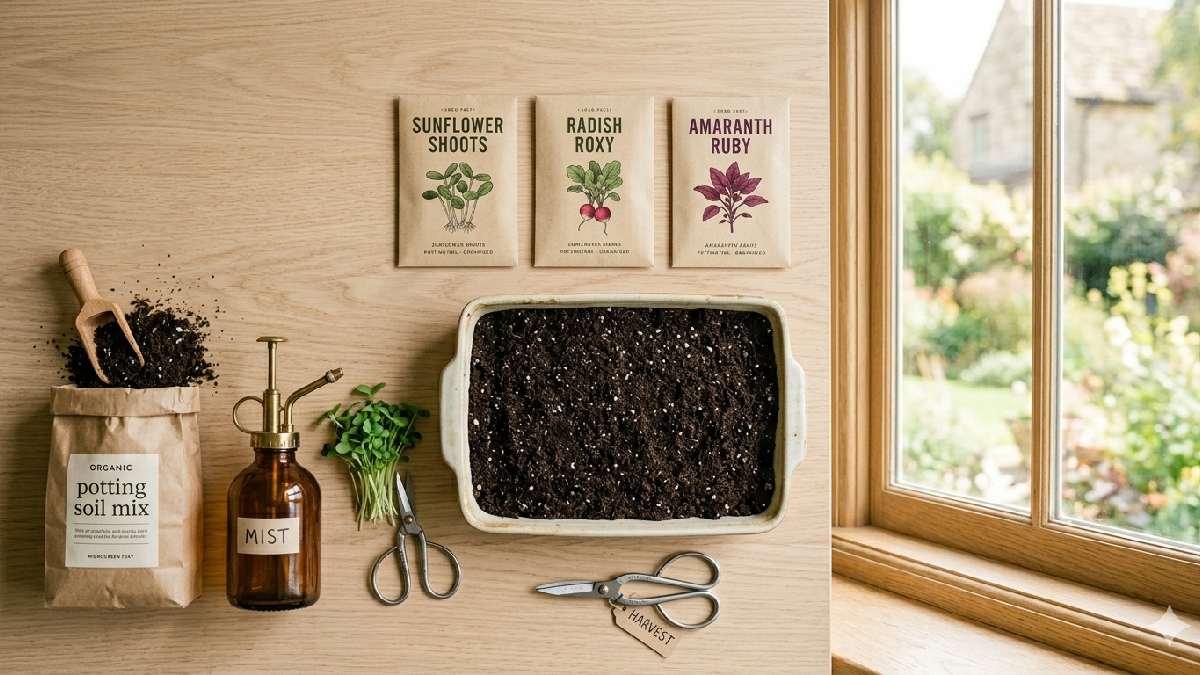
Soil or a growing medium such as coco peat helps support the seeds and roots. Water is needed in small amounts to keep the soil slightly moist, and a light source like sunlight or a grow light is required for proper development.
Container or Tray
A shallow tray is used to grow microgreens. It can be a simple plastic box or any flat container. It only works as a base to hold soil and seeds. Nothing fancy is needed.
Seeds
Seeds are the main starting point. Common seeds like broccoli, radish, sunflower, and peas work well. They grow fast and are easy for beginners. Good seeds help in better and healthier growth.
Soil or Growing Medium
Normal potting soil is enough for microgreens. Some people also use coconut peat. It supports the seeds and helps the roots grow properly. The medium should be light and easy to handle.
Water
Water is needed in a small amount. Soil should stay slightly moist, not wet. Too much water can damage growth. A light spray is enough to keep the balance.
Light Source (Sunlight or Grow Light)
Light is important for growth. A window with sunlight is usually enough. If sunlight is not available, a grow light can be used. It keeps plants green and healthy.
How to Grow Your Own Microgreens (Step, by, Step)
Growing microgreens at home is a simple process that anyone can follow. It doesn’t need a big space or expensive tools. Just small steps done properly can give fresh greens in a short time. Once you understand the method, it becomes an easy routine.
Step 1: Prepare the Growing Medium
Take a shallow tray and fill it with soil or growing medium. Spread it evenly so the surface looks smooth and flat.
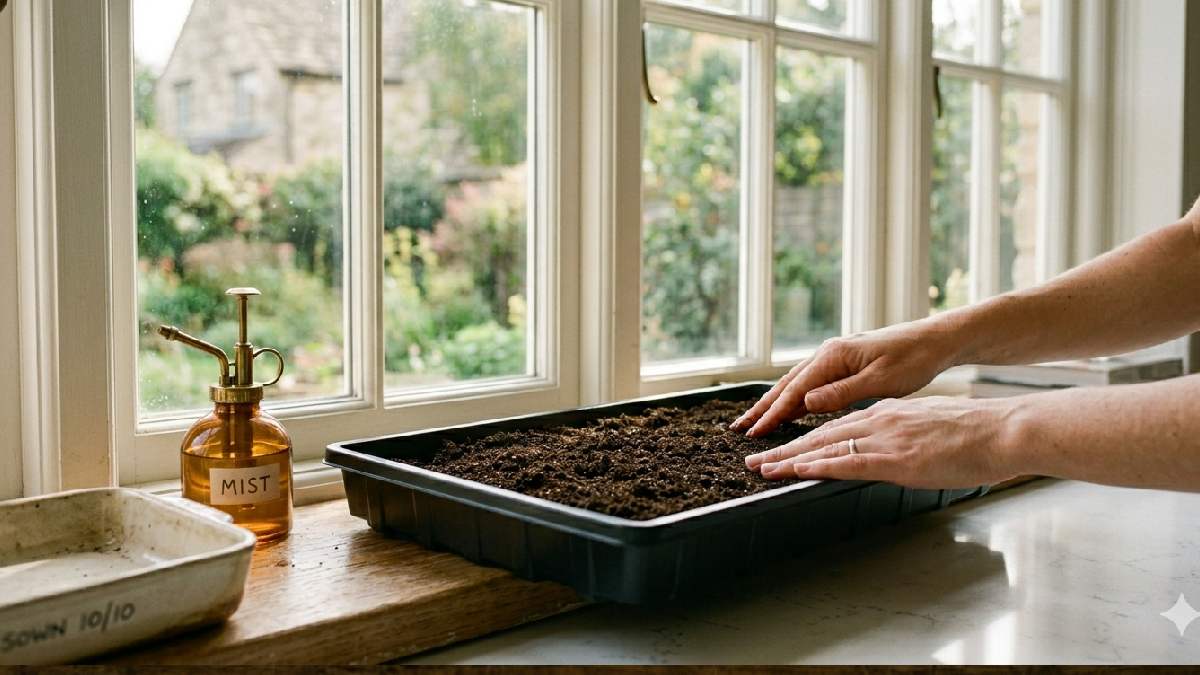
This helps seeds sit properly and grow in a balanced way. Uneven soil can cause uneven growth. Make sure the layer is not too thick or too thin.
Step 2: Sow Seeds
Spread the seeds evenly over the soil surface. Try not to dump them in one area or corner. Give them enough space so each seed has room to grow. Overcrowding can affect airflow and growth quality. Lightly press them so they stay in place.
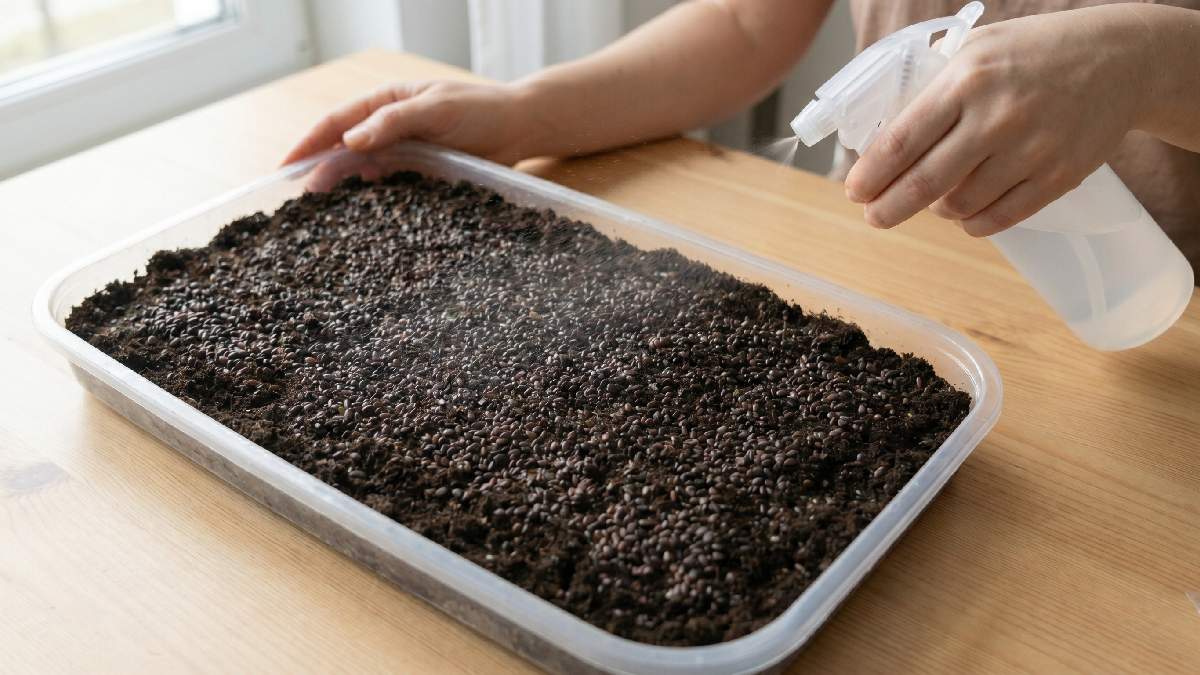
Step 3: Water Gently
Use a spray bottle to water the soil lightly. The goal is to keep it moist, not soaked or muddy. Too much water can damage the seeds or slow down growth. Check the soil daily and adjust water if needed. Balance is important at this stage.
Step 4: Cover for Germination
Cover the tray after sowing seeds. This helps keep moisture and warmth inside. It creates a better environment for seeds to sprout faster. The cover should not press on the soil. Keep it for a few days until sprouting starts.
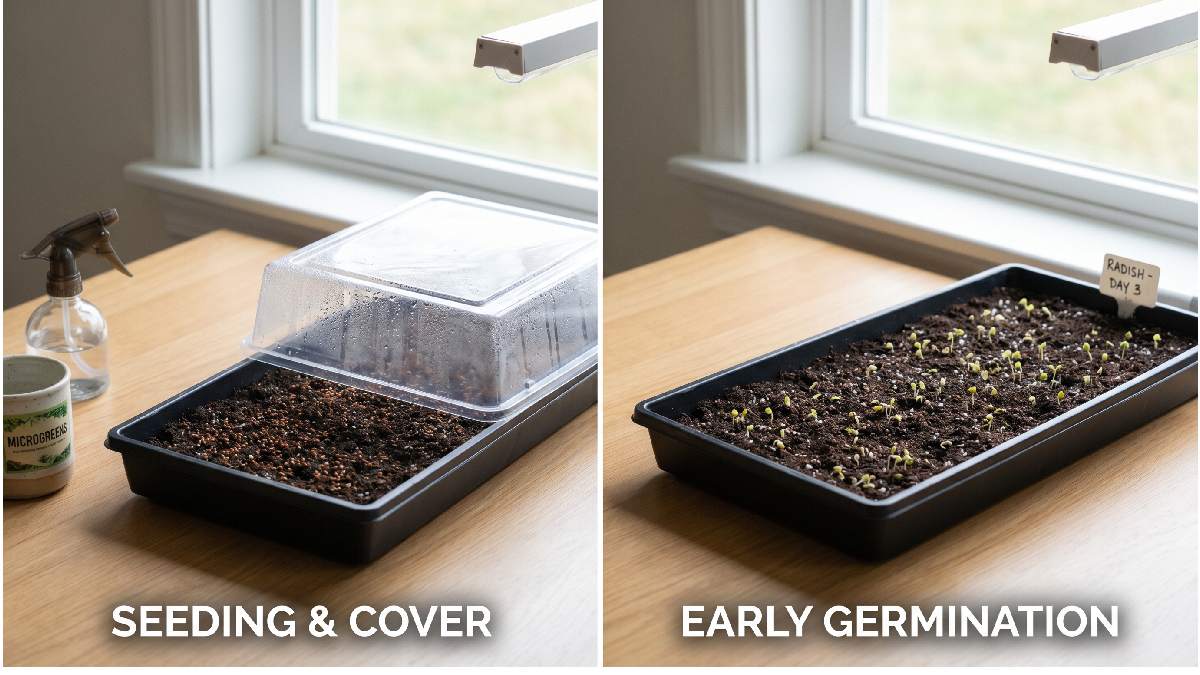
Step 5: Provide Light
Once seeds start sprouting, remove the cover. Place the tray near a window or any light source. Natural sunlight works best in most cases. Light helps the greens turn healthy and green. Without light, growth becomes weak and pale.
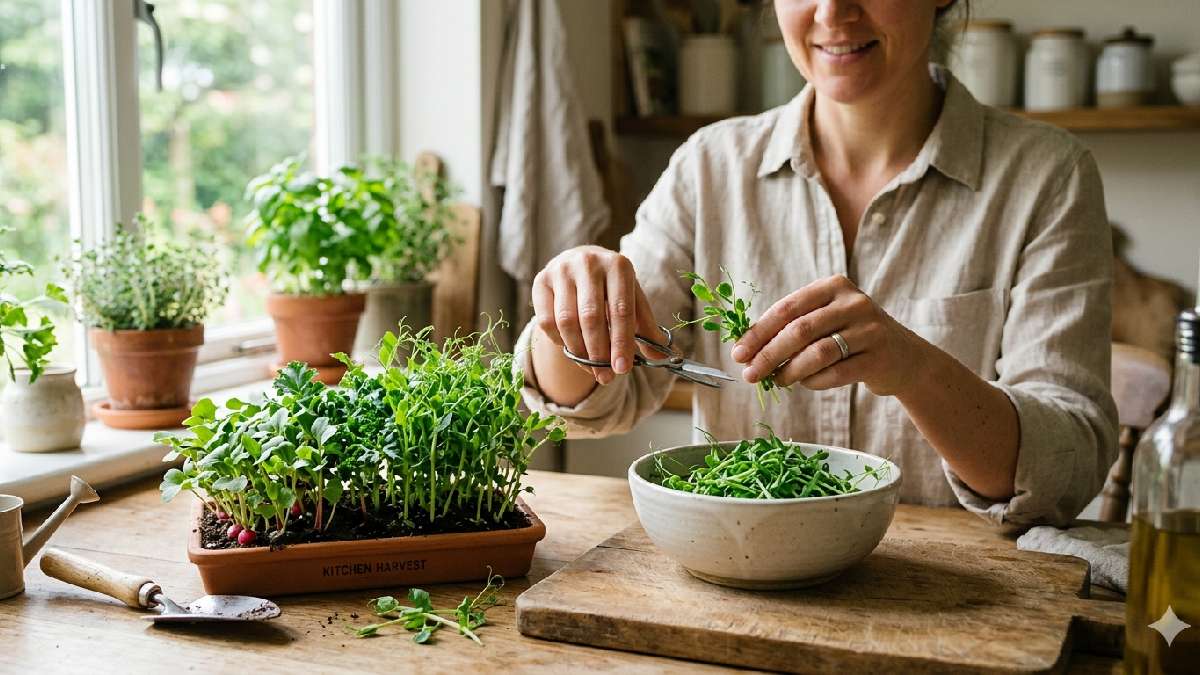
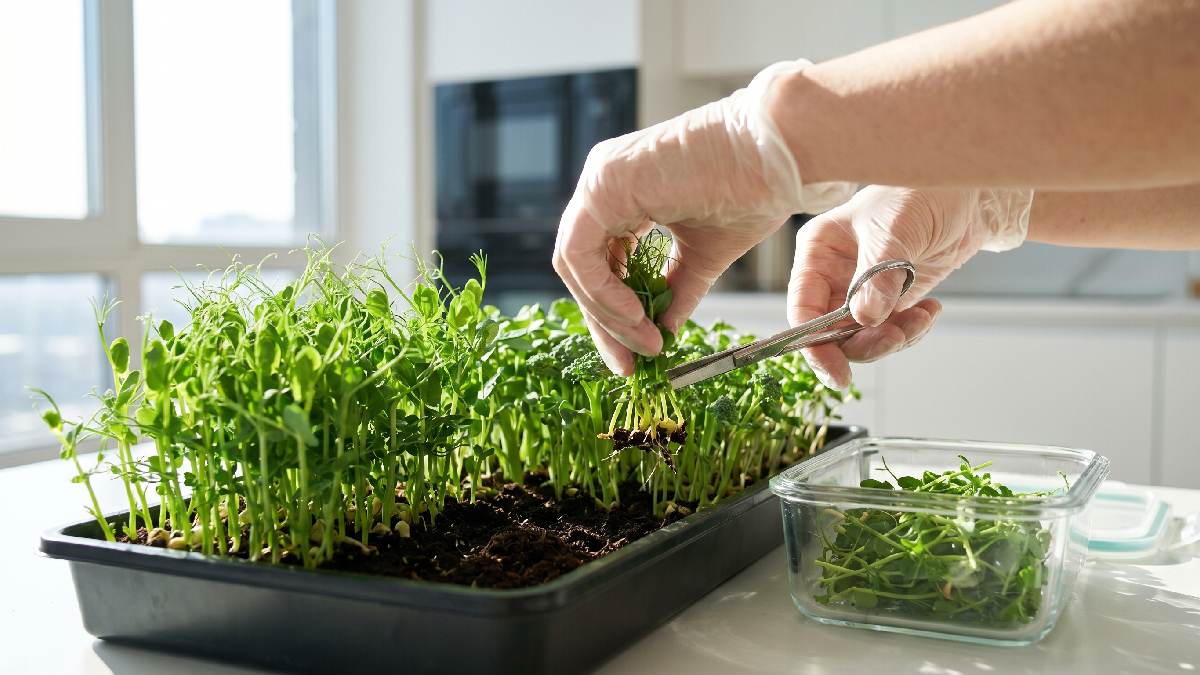
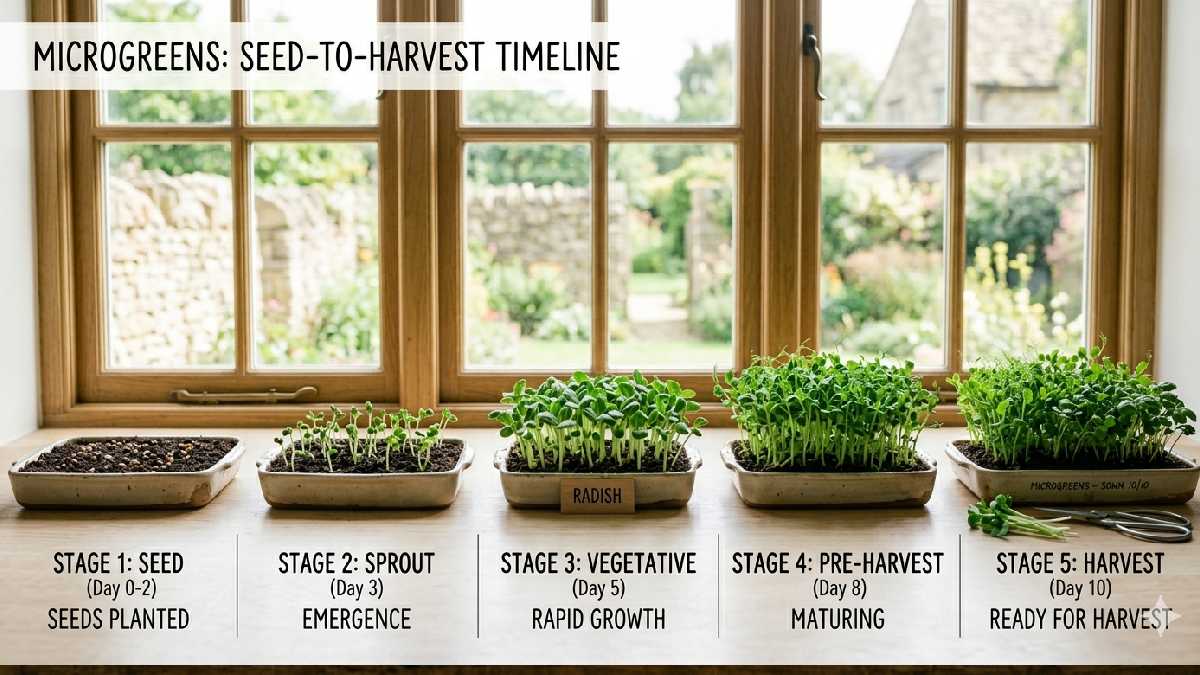
Step 6: Harvest
Microgreens are ready when they reach 1 to 3 inches in height. Use clean scissors to cut them just above the soil level. Harvesting at the right time gives better taste and texture. They are fresh and ready to use immediately.
Best Microgreens for Beginners
Starting microgreens at home becomes easier when you choose the right ones. Some grow fast, some are simple to manage, and some give better results even with basic care.
These are good options for beginners.
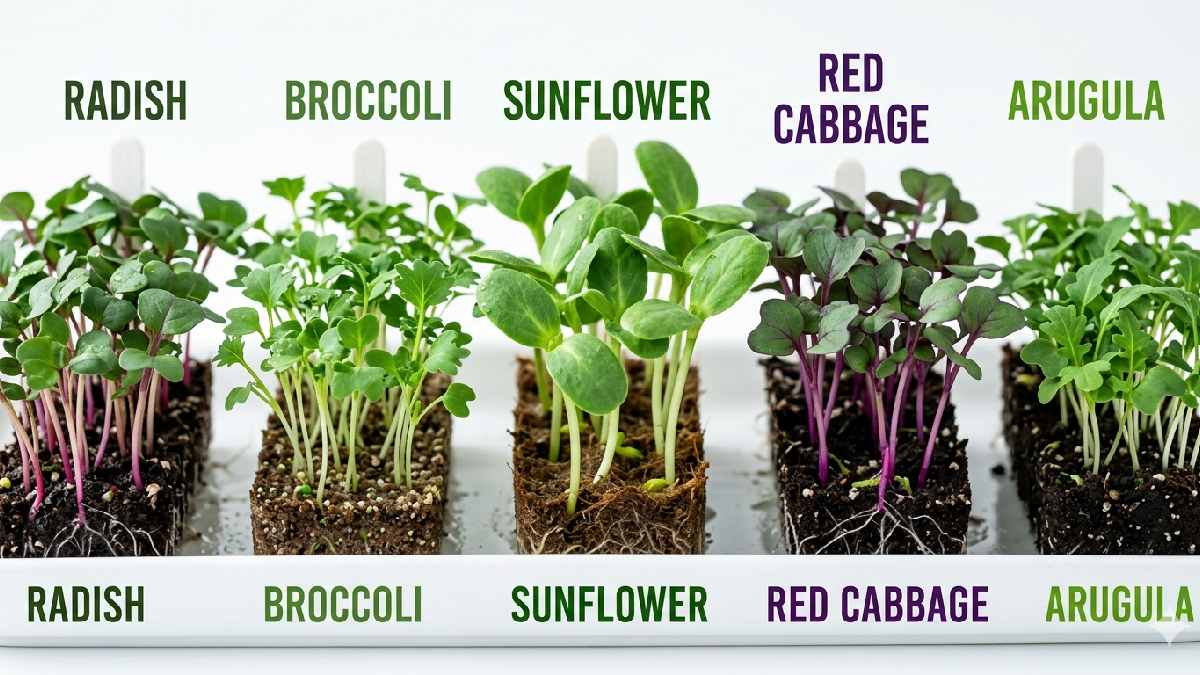
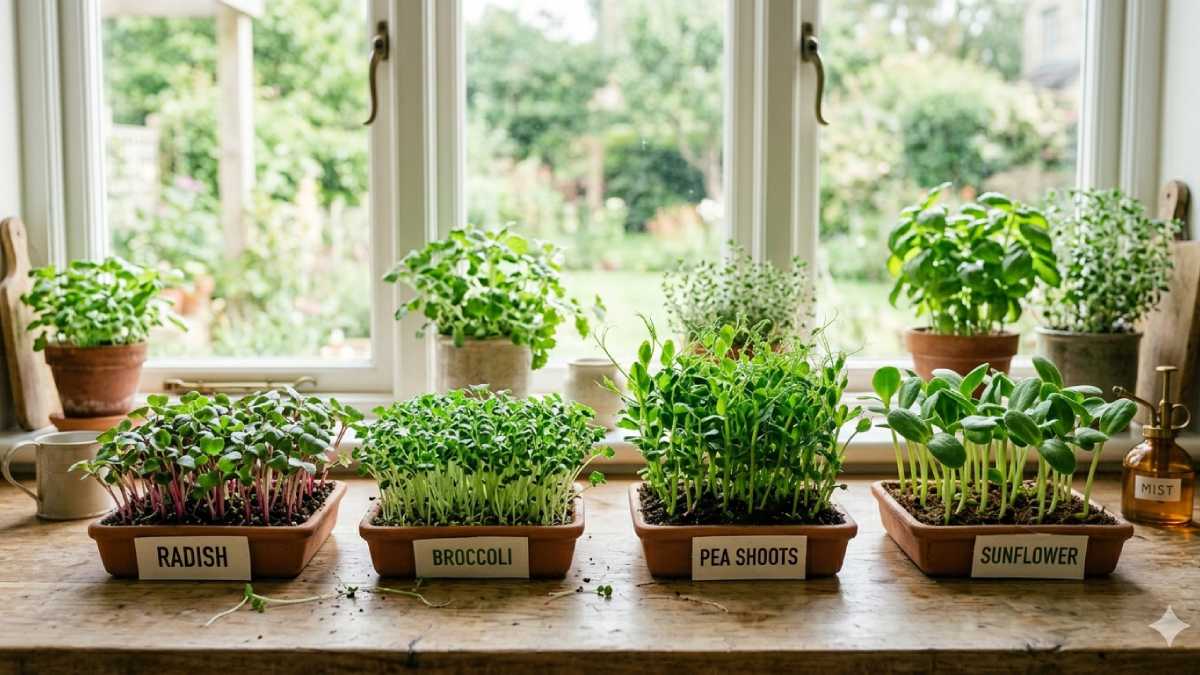
Radish (fast-growing)
Radish microgreens grow very quickly, usually in a short time. They have a light, spicy taste that adds flavor to food. Even beginners can handle them without difficulty. They don’t need much care and still give good results. This makes them a popular starting choice.
Broccoli (nutritious)
Broccoli microgreens are known for their strong nutritional value. The taste is mild, so they fit easily in different meals. They grow steadily and simply. Beginners find them easy to manage at home. They are often used as a healthy daily option.
Pea Shoots (easy)
Pea shoots are very easy to grow and beginner-friendly. They grow tall and look fresh and green. The taste is soft and slightly sweet. They don’t require much attention during growth. Even a basic setup gives good results.
Sunflower (popular)
Sunflower microgreens are thick and slightly crunchy. They are liked because of their texture and fresh taste. They grow well in simple trays at home. With basic care, they become healthy and strong. Many people use them in salads and light meals.
Common Mistakes to Avoid
Growing microgreens at home looks simple, but small mistakes can ruin the whole tray. Most beginners face the same issues at the start.
Once you understand them, the results become much better and more stable.
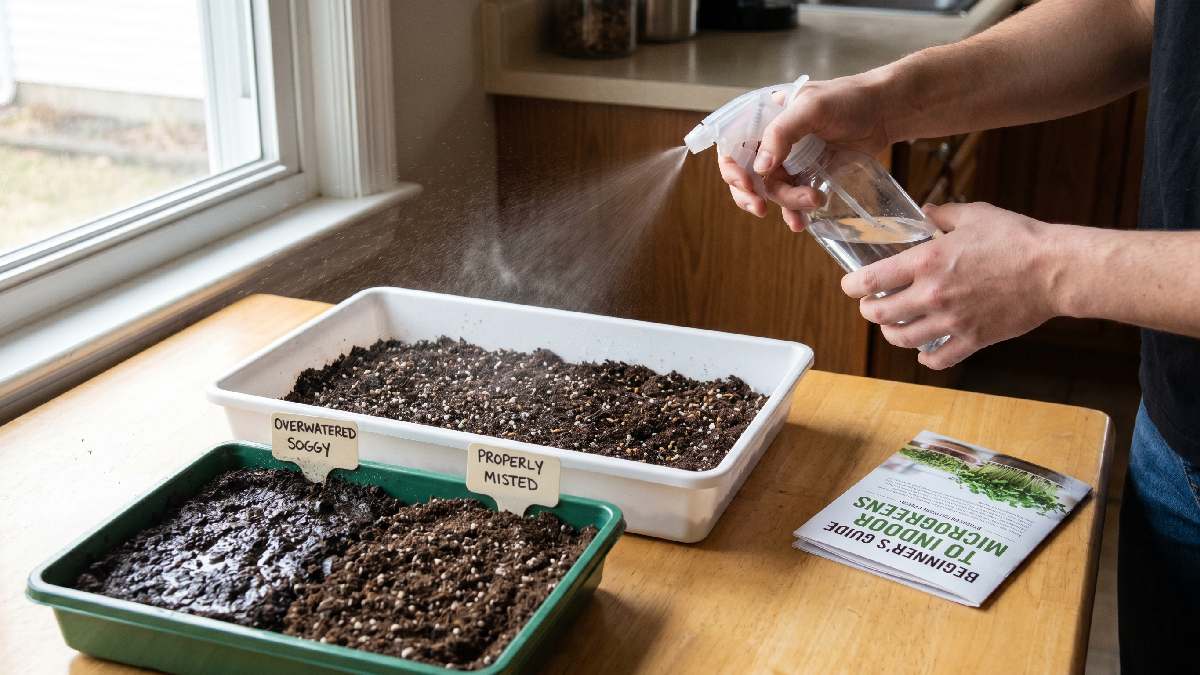
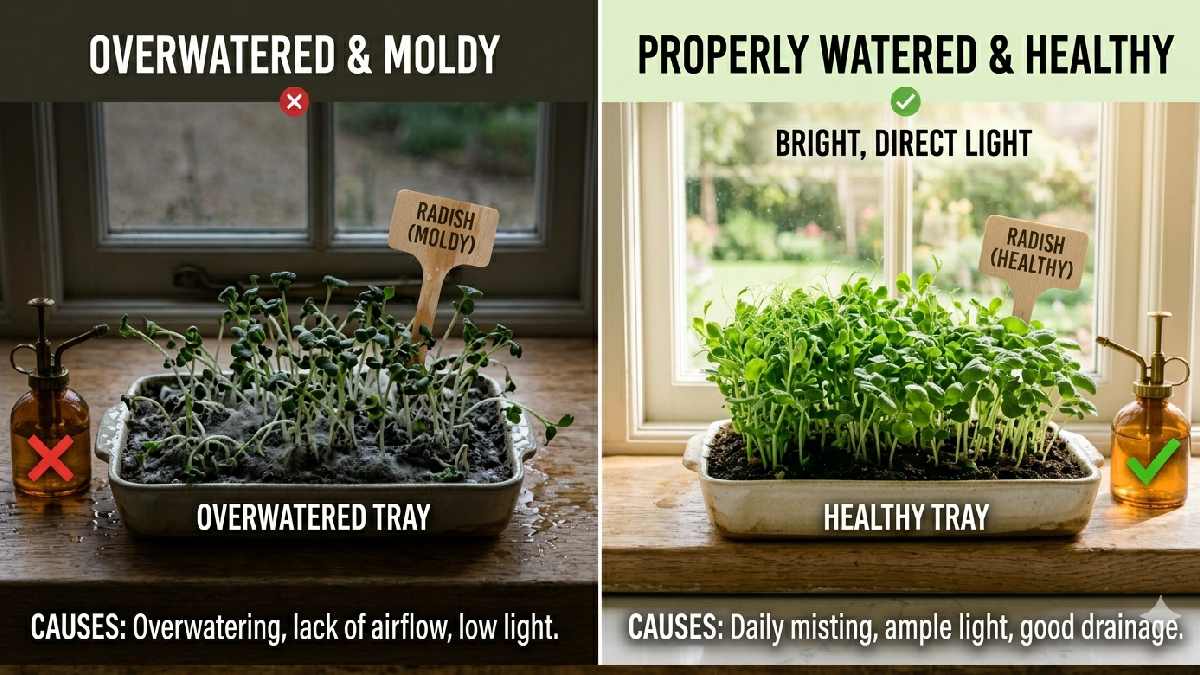
Overwatering → mold
Overwatering is one of the most common mistakes. When the soil stays too wet, mold starts growing quickly. It also damages seeds and stops proper growth. Microgreens only need light moisture, not soaked soil. A gentle spray is usually enough.
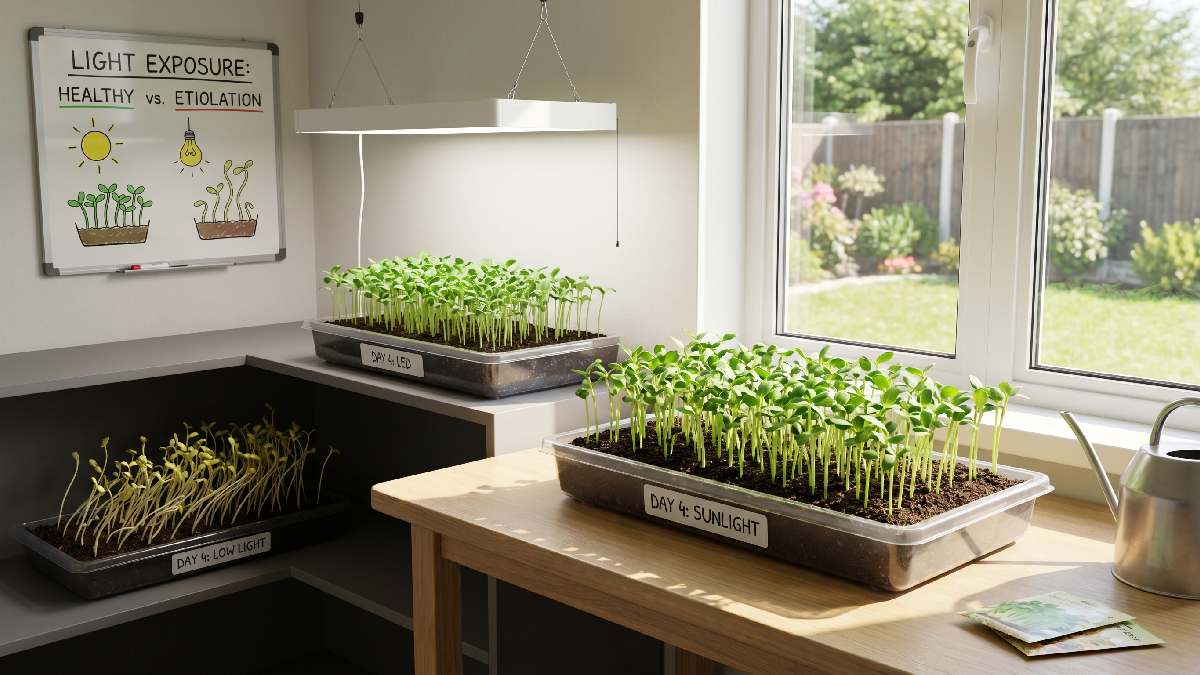
Too little light → weak plants
Light plays a big role in healthy growth. If plants don’t get enough light, they become weak and pale. They may also stretch too much and lose strength. A simple window with sunlight is usually enough for good growth.
Overcrowding seeds
Putting too many seeds in one tray creates problems. Plants don’t get enough space to grow properly. They start competing for light and nutrients. This leads to uneven and weak growth. Seeds should always be spread with proper spacing.
Poor airflow
Airflow is also important for healthy microgreens. Without fresh air, moisture stays trapped in the tray. This can cause mold and slow development. Keeping the tray in a well-ventilated area helps a lot. Good airflow keeps plants fresh and strong.
How Long Do Microgreens Take to Grow?
Growing microgreens is a quick process and doesn’t require long waiting like normal vegetables.
Most people like them because results appear in a short time, and you can see changes almost every day.
Average Time: 7–14 Days
On average, microgreens take around 7 to 14 days to fully grow. Some varieties may be ready earlier, while a few take a little longer. This short growth cycle makes them easy and practical for home use.
Depends on Seed Type
The growth time also depends on the type of seed used. Radish usually grows very fast, while sunflower or pea shoots may take a bit more time. Every seed has its own speed and behavior during growth.
Faster Than Most Vegetables
Compared to regular vegetables, microgreens grow much faster. You don’t need to wait for full plant development or the fruiting stage. They are harvested early, which saves time and gives quick, fresh greens at home.
Growing Microgreens Indoors vs Outdoors
Microgreens can be grown both indoors and outdoors, and both methods can give good results if done properly. The main difference is the environment and level of control you have during the growing process.
Some people prefer indoor setups because they are easier to manage, while others like outdoor spaces because of natural sunlight and air.
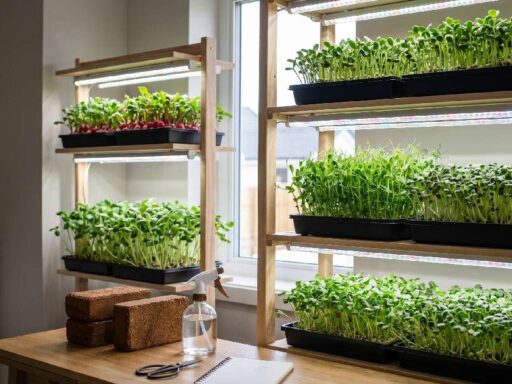
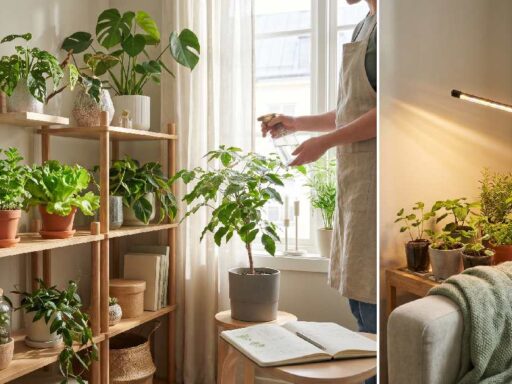
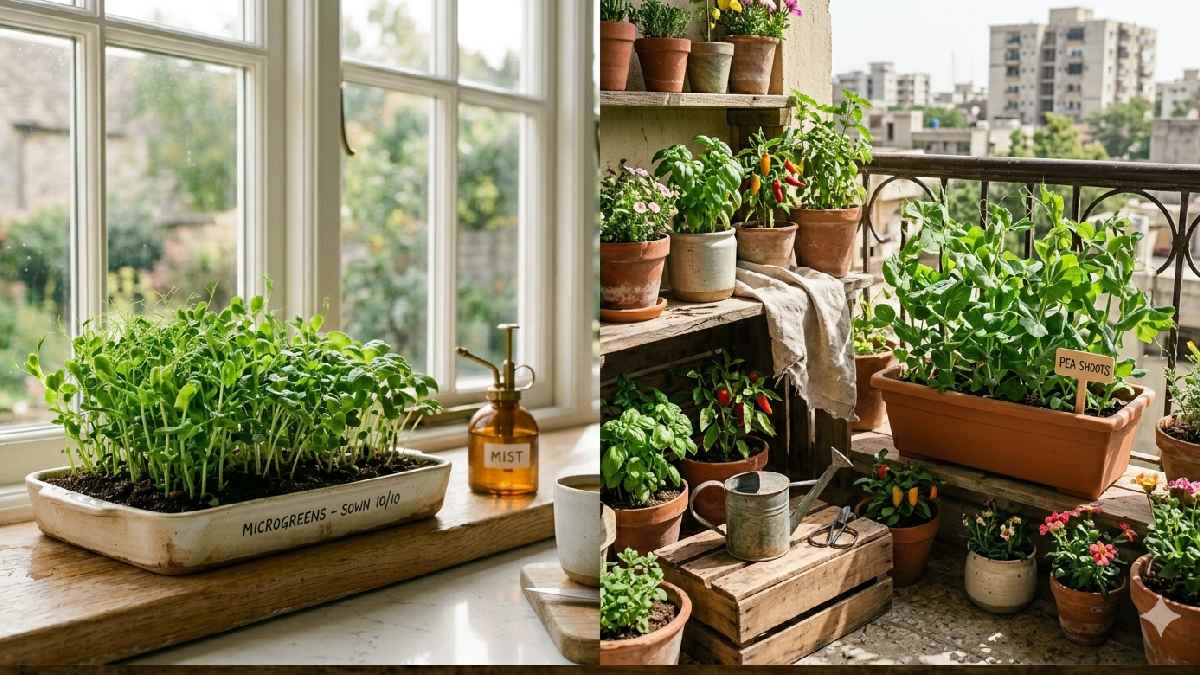
Indoors Growing
Indoor growing is more controlled and stable. You can keep trays in a kitchen corner, near a window, or on a small shelf. If natural sunlight is not enough, a simple grow light can also be used. The temperature and moisture stay more consistent indoors, which helps the seeds grow in a steady way. Plants are also protected from insects, dust, and sudden weather changes. This method is often more comfortable for beginners because everything is easier to monitor and manage step by step.
Outdoors Growing
Outdoor growing uses natural sunlight and fresh air, which can help microgreens grow in a natural way. You can use rooftops, balconies, gardens, or any open space available. In good weather conditions, plants often grow well and look healthy. However, outdoor growing is not always stable. Wind, insects, dust, and changing weather conditions can affect growth. Because of this, outdoor trays usually need more attention, especially in watering and protection.
Which is Better?
Both indoor and outdoor methods can produce healthy microgreens, and neither is wrong. Indoor growing is usually better for beginners because it offers more control and fewer risks. Outdoor growing can also work very well when the environment is stable and clean. The final choice depends on your available space, daily routine, and how much time you can give to care for the plants.
How Much Does It Cost to Grow Microgreens?
Growing microgreens at home is not expensive. Most of the things are basic and can be used again and again.
Once you set up everything, the running cost stays very low compared to buying them from stores.
Initial Setup Cost
At the start, you need a simple tray, soil or growing medium, and basic tools like a spray bottle. These are one-time items and don’t need frequent replacement. The cost is usually low because nothing fancy or advanced is required. Even a simple home setup works fine for beginners.
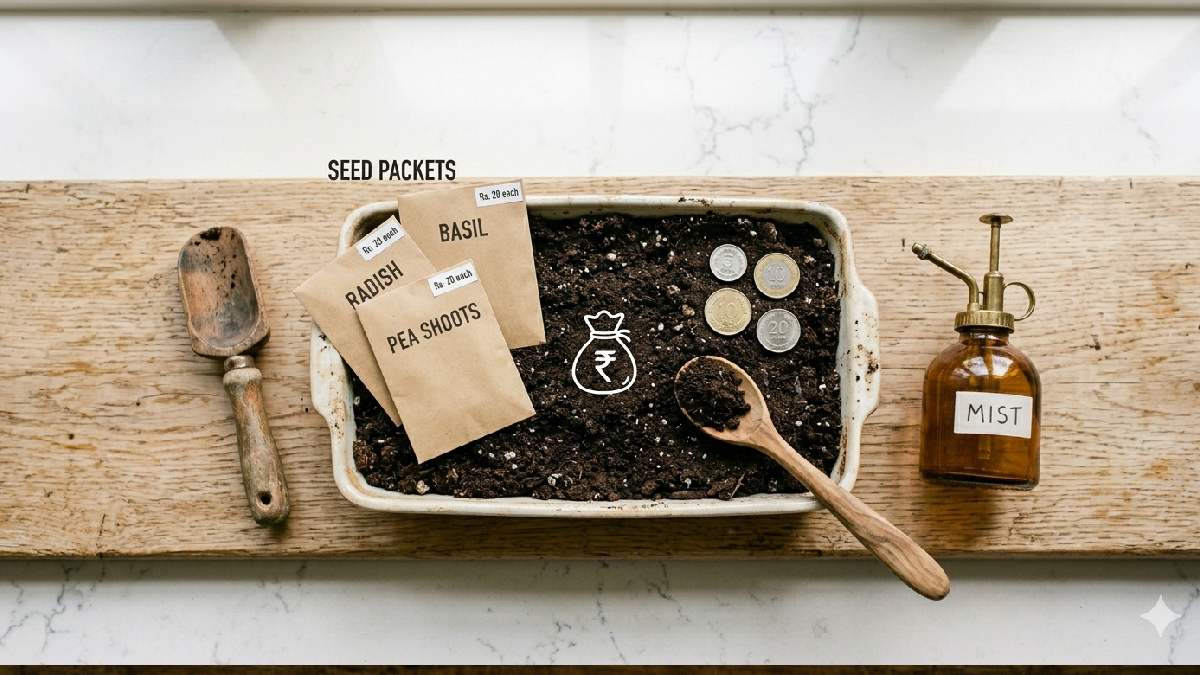
Ongoing Seed Cost
The main regular cost comes from seeds. You need fresh seeds for every new batch you grow. But even then, the quantity used is small, so the cost stays low. One packet of seeds can often be used for multiple trays, depending on size and usage.
Savings vs Store-Bought
Buying microgreens from the store is usually more expensive over time. Home growing reduces that cost significantly. You get fresh greens whenever you want without paying again and again. After initial setup, growing at home becomes a much more cost-effective option in the long run.
FAQs
Are microgreens easy to grow at home?
Yes, microgreens are very easy to grow at home. They don’t need a big space or complicated steps. Even beginners can start and get results in a few days. Just basic care is enough.
Do I need special equipment?
No special equipment is required. A simple tray, seeds, soil, water, and light are enough. Most things are already available at home or easy to find. Nothing expensive is needed.
Can I grow microgreens without soil?
Yes, microgreens can also be grown without soil. You can use alternatives like coco peat or other growing mats. The main purpose is to support seeds and help them grow properly.
How often should I water microgreens?
Microgreens should be watered lightly every day or when the soil feels dry. The soil should stay slightly moist, not wet. Overwatering should be avoided because it can damage growth.
Can I regrow microgreens after cutting?
No, microgreens usually do not regrow after cutting. Once harvested, they complete their growth cycle. For a fresh supply, you need to start a new batch of seeds.
Conclusion
Growing microgreens at home is one of the simplest things you can start without stress. It doesn’t need a big space, expensive tools, or a long waiting time. You just follow a basic routine, and it starts giving results in a few days.
It is fast, usually ready within a week or two, depending on the seeds. That quick growth makes it practical for daily use and keeps the process interesting. You don’t feel like you are waiting forever for results.
It is also healthy, adding fresh greens to your meals in a simple way. Small effort, but useful impact on food and nutrition. Overall, microgreens are easy to grow, fast to harvest, and a healthy addition to home life.