How to Grow Sunflower Microgreens at Home Guide
I started sunflower microgreens thinking they would be difficult, but they turned out surprisingly simple. Seeds look big, almost heavy in hand, very different from tiny ones like broccoli. I soak them first, for a few hours in water, which helps them wake up faster. Then I spread them on a moist tray, not too crowded, they need space.
First day’s stay covered, darkness helps roots settle strong. Soon thick shoots push up, leaves open wide, bright and fresh. They need good light after that; stems grow firm, not floppy. Water stays balanced, not too much, not too dry. In about 8to 12 days, they feel ready, crunchy, and full. Cutting them feels satisfying, like a real harvest at home.
What Are Sunflower Microgreens?
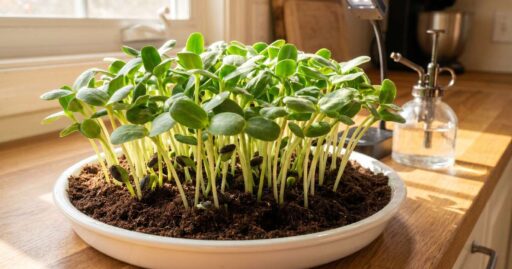
Sunflower microgreens are young shoots from sunflower seeds, harvested early. I remember the first time seeing them, thick stems, wide leaves, almost like tiny plants already. They grow bigger than most microgreens and feel crunchy when eaten. Flavor is mild, slightly nutty, not too sharp like mustard or radish.
I usually grow them in trays, soil, or a hydro mat; both work fine. They take around 8 to 12 days, a bit longer than fast types. Leaves open fully before harvest, that’s when they feel ready. Beginners like them because they look strong, not delicate. Simple to grow, satisfying to cut, and has a fresh taste every time.
What Makes Sunflower Microgreens Special?
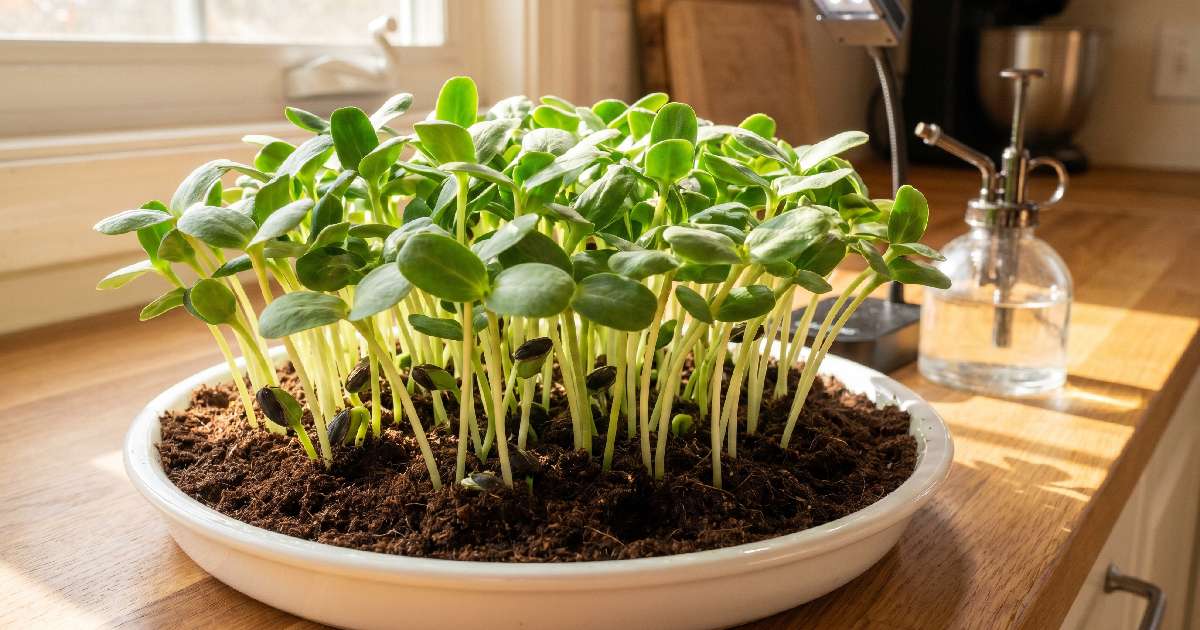
Sunflower microgreens feel different from other greens I’ve grown. They grow thick, not delicate, which makes them easier to handle. I noticed their stems are crunchy, almost like small vegetable bites. Leaves open wide, giving a fuller look compared to tiny microgreens like broccoli.
Taste is mild, slightly nutty, not overpowering at all. They also hold shape well after harvest, and don’t wilt quickly. Beginners like them because mistakes don’t ruin the whole tray easily. Even if care is slightly off, they still grow strong. That balance of strength and simple growth makes them special in my experience.
Nutritional Benefits of Sunflower Microgreens
Sunflower microgreens surprised me with how much nutrition they carry. Even a small handful feels filling and fresh. They contain vitamins, minerals, and natural plant energy packed in tiny leaves. I started adding them to simple meals and noticed better freshness overall. They are rich in protein compared to many other microgreens I tried.
Antioxidants are also present, though I don’t think about numbers much; I just feel the difference. Beginners like them because nutrition comes without effort. Easy to grow, easy to eat, still powerful inside. Small greens, but strong nutritional value in every bite.
Why Grow Sunflower Microgreens at Home?
I started growing sunflower microgreens just to try something new, and I didn’t expect much. Then I saw how thick and crunchy they get, and they felt different from other greens. Taste is mild, a little nutty, and easy to add to meals without overpowering. They grow strong, not fragile; beginners don’t struggle much with them.

No big space needed, just a tray on the counter works fine. I noticed store-bought ones spoil fast, homegrown ones stay fresher. Cost also drops over time; seeds last many cycles. Watching them grow feels satisfying, almost like a mini crop at home. Simple setup, steady growth, fresh food always within reach.
Fast Growth and Easy Maintenance
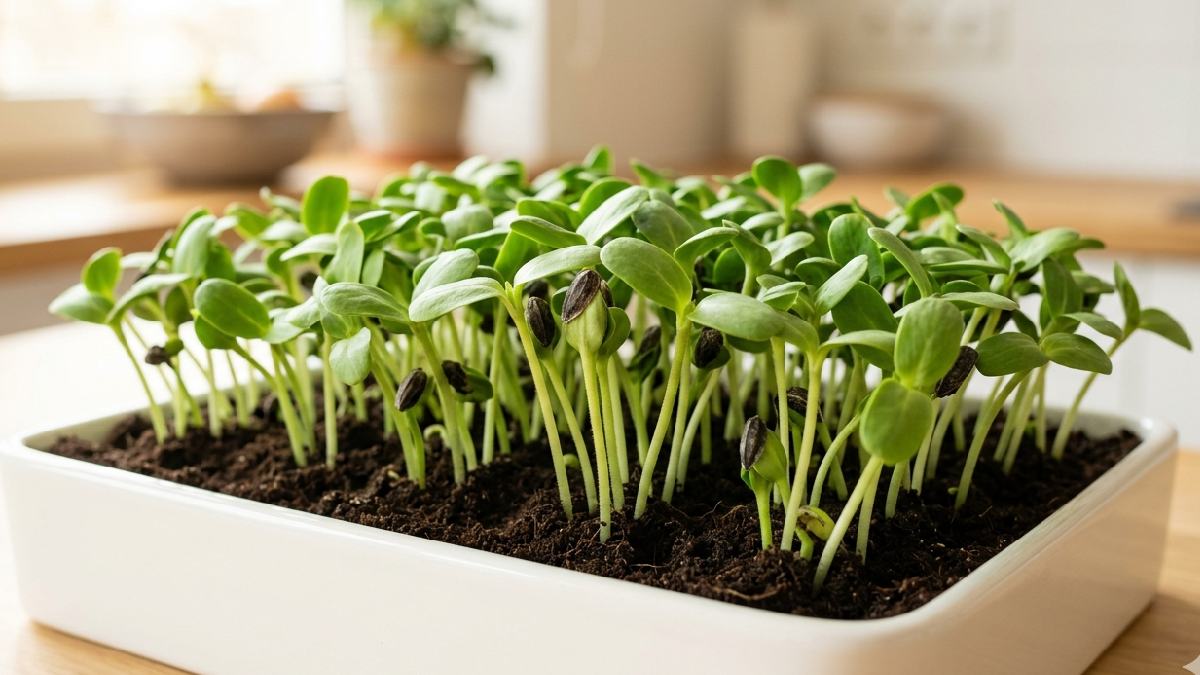
Sunflower microgreens grow faster than I expected the first time. Within a few days, shoots start pushing up, thick and strong. There is no long waiting like traditional plants; everything moves quickly. Maintenance also stays simple, just light misting and checking moisture. I don’t spend much time daily, but still, the growth looks healthy.
Even if small mistakes happen, plants adjust easily. Beginners like this part, less stress, more visible results. Routine becomes natural after a few trays. Fast cycle keeps interest alive, and each harvest feels rewarding without much effort or complicated care.
High Nutrition and Great Taste
I didn’t think taste would stand out this much, but sunflower microgreens surprised me. They feel crunchy, fresh, slightly nutty, not too strong. I started adding them to simple meals, and everything felt upgraded. Nutrition is packed inside those small leaves; even a handful feels enough.
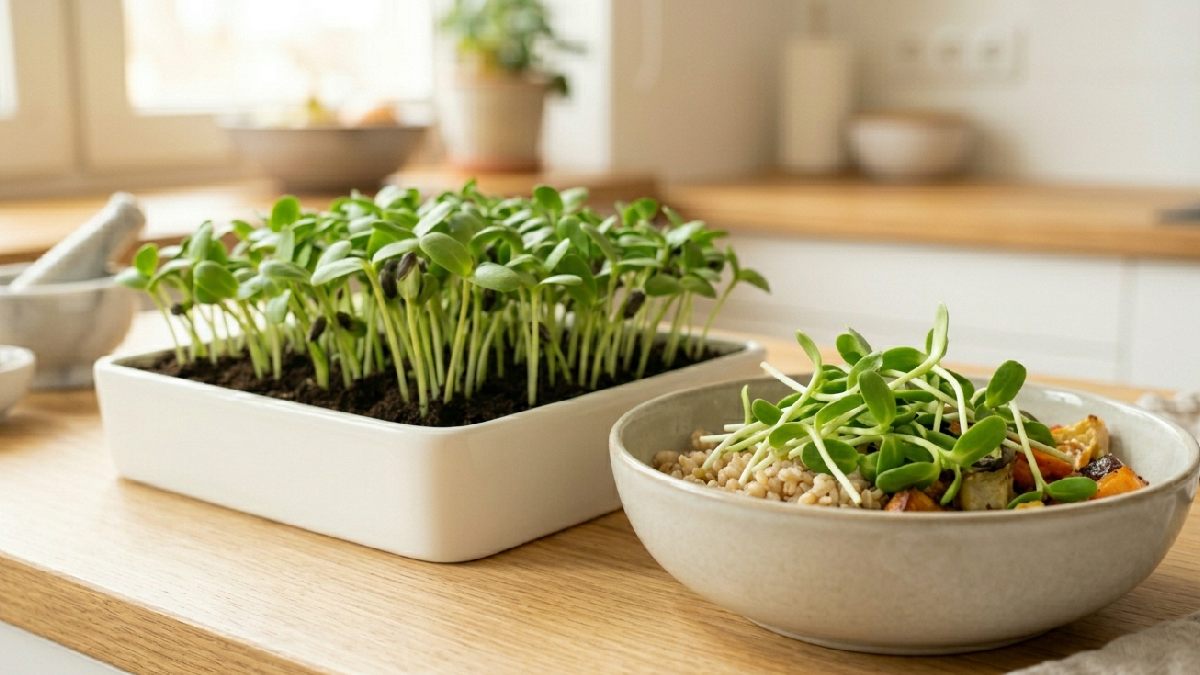
They don’t taste bitter when harvested at the right time. Beginners enjoy this balance, easy to eat with many dishes. I noticed store greens don’t feel the same; freshness drops quickly. Homegrown ones feel alive, more flavorful. A small portion adds both taste and nutrition without much effort.
Perfect for Small Spaces
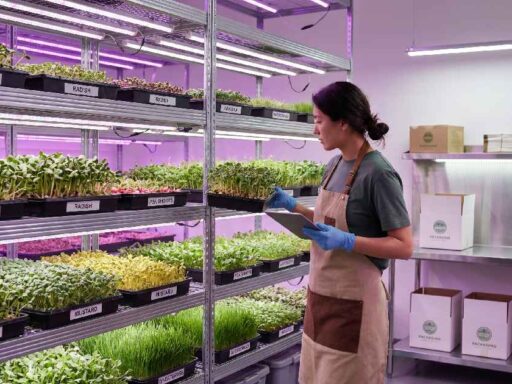
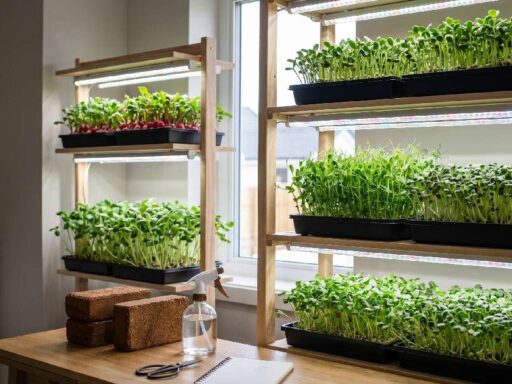
I grow sunflower microgreens in a small kitchen corner; space never became an issue. A single tray fits easily on a shelf or near a window. No garden needed, no outdoor setup required. Even apartments work perfectly for this. I tried stacking trays once, and saved even more space.
Beginners in cities find this very useful, no need to rearrange the whole room. The setup stays compact and clean. You can move trays anytime, very flexible. A small area turns into a growing spot without effort. Fresh greens come out of very limited space, which feels quite satisfying.
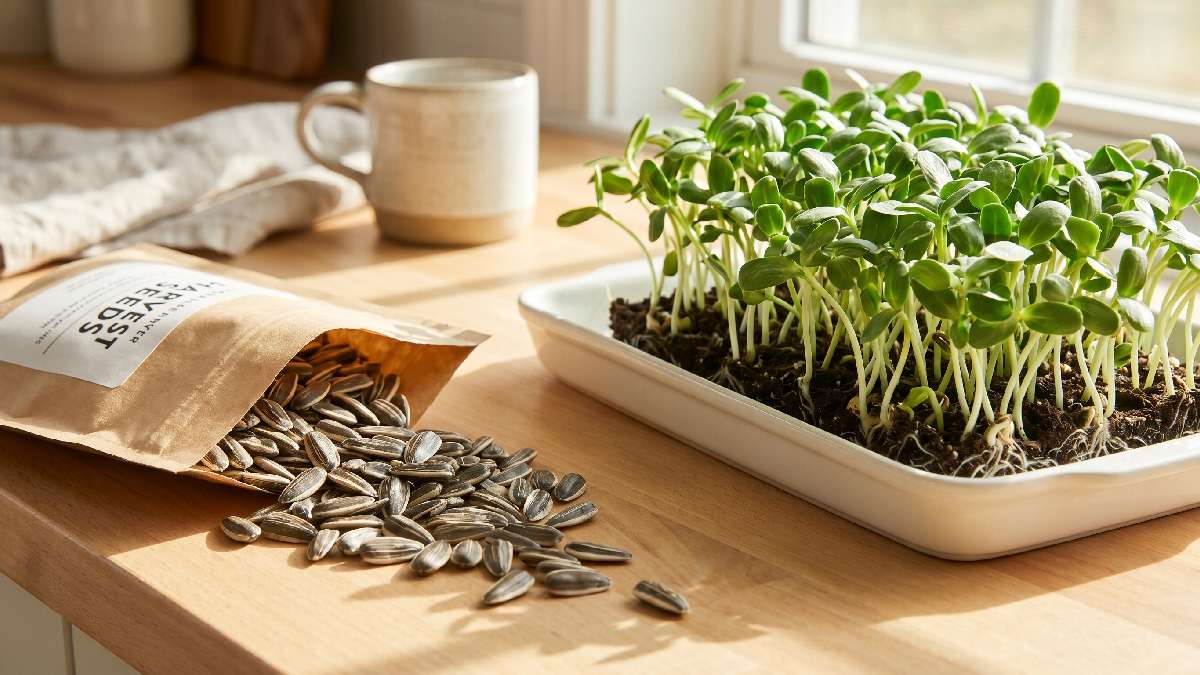
What You Need to Grow Sunflower Microgreens
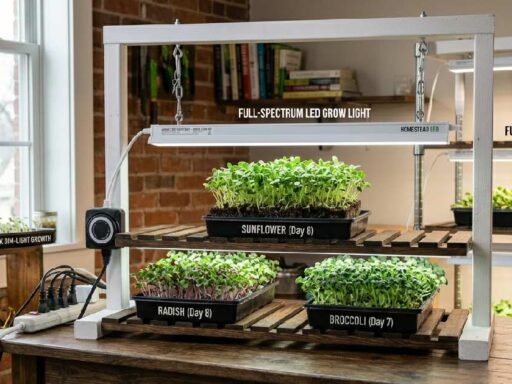
I keep it simple when growing sunflower microgreens at home. A shallow tray is enough, nothing fancy required. I use soil or a hydro mat; both give good results. Sunflower seeds are bigger, so I soak them first for a few hours. A spray bottle helps keep moisture balanced, not too wet. Light matters later; a window or a small LED works fine.
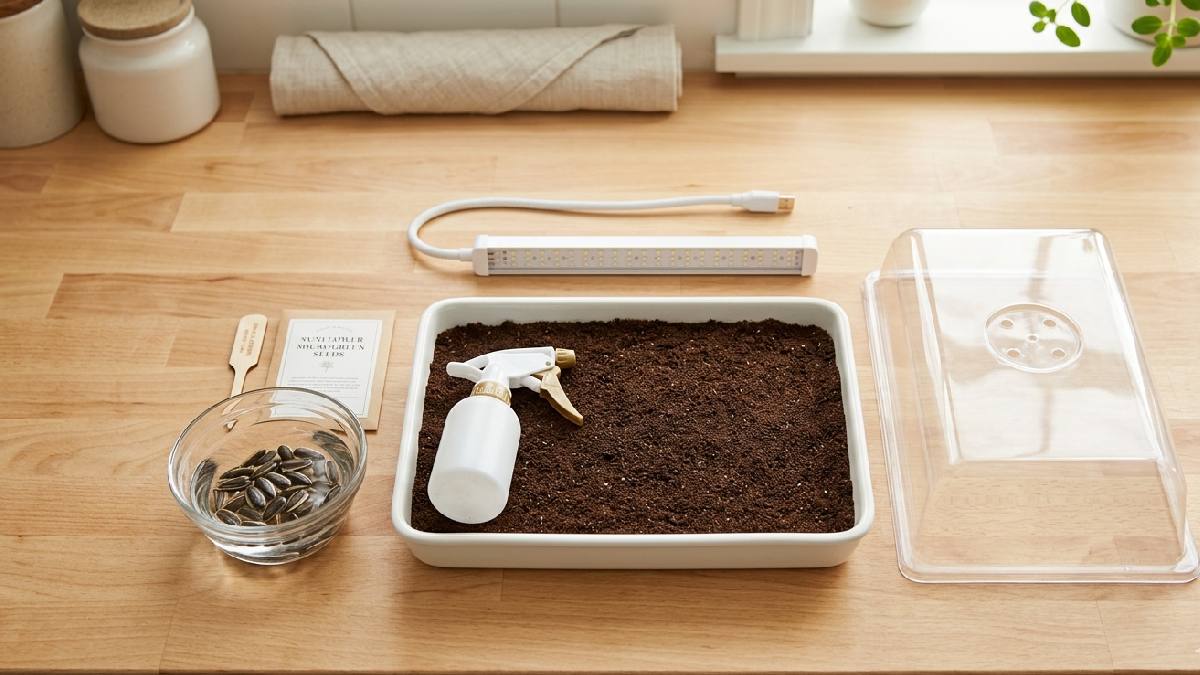
I sometimes use a cover in the early days, which keeps humidity steady. Airflow also helps; even a small gap is enough. Beginners don’t need expensive tools, just a basic setup. Everything fits in a small kitchen corner, simple and easy to manage.
Seeds You Should Use (Black Oil Sunflower Seeds)
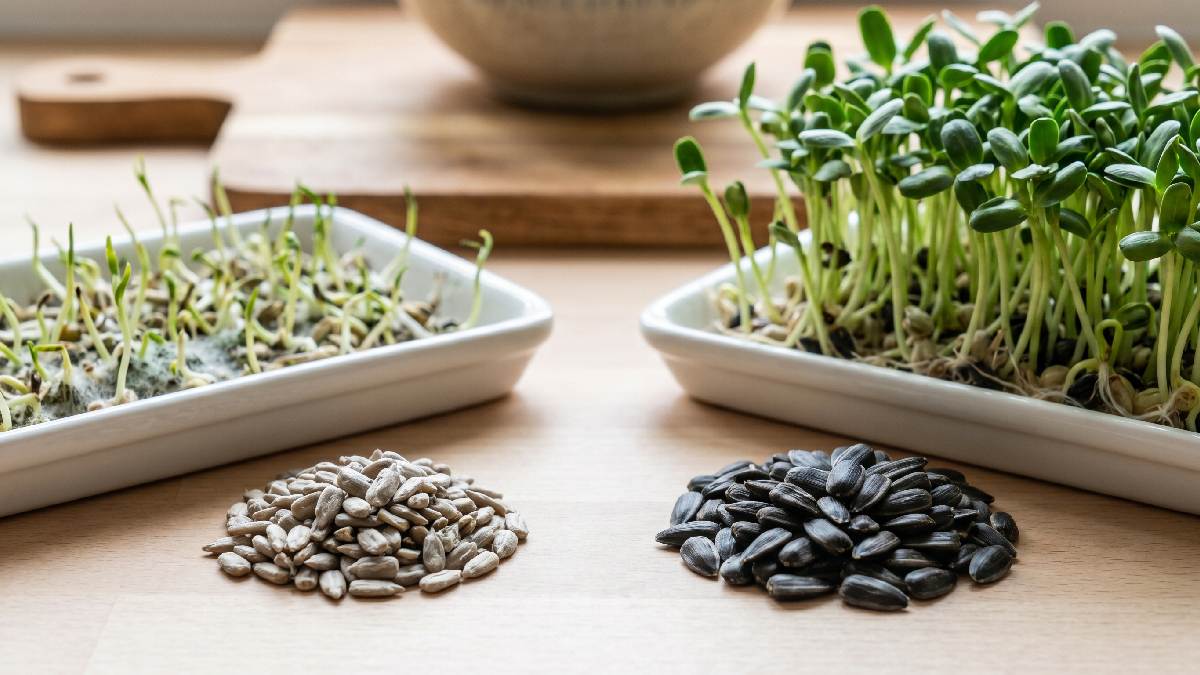
I learned quickly that not all sunflower seeds behave the same. Black oil sunflower seeds work best for microgreens; they sprout faster and grow more uniformly. I once tried roasted ones by mistake, nothing happened, lesson learned. Good seeds feel full and heavy, not dry or broken.
Soaking them for a few hours helps a lot; they wake up better. Beginners should stick with raw, untreated seeds only. Growth becomes smoother, tray looks even, no patchy spots. This one choice really decides how strong and healthy your microgreens turn out in the end.
Growing Tray or Container
I usually use a shallow tray, nothing complicated or expensive. Plastic trays work fine, and even old containers can be reused if they are clean. Depth should be low, just enough to hold medium and roots. I once used a deep box, water stayed uneven, and growth felt off. Flat surface works better, seeds spread evenly.
Drainage is helpful but not always required if watering is controlled. Beginners don’t need fancy setups; a simple tray does the job. It fits easily on a shelf or counter. A small space, a simple container, still gives a full, healthy microgreens tray at home.
Soil or Growing Medium
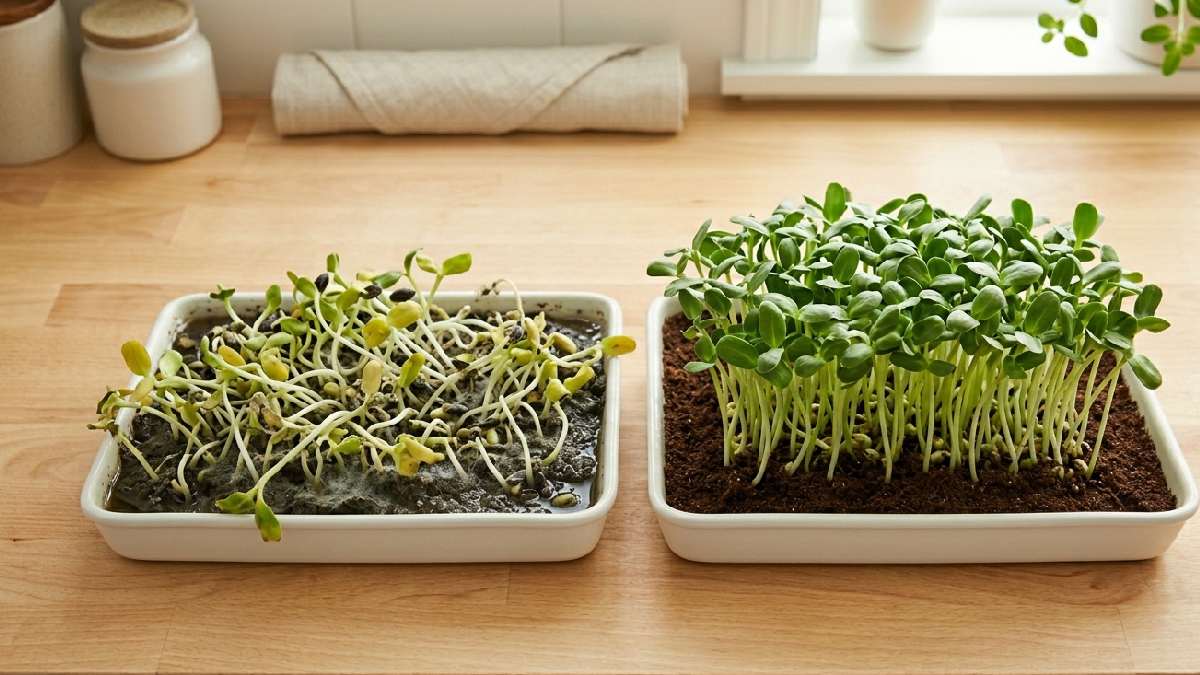
For sunflower microgreens, I tried both soil and hydro mats. Soil feels more stable, roots hold stronger, and growth looks fuller. Cocopeat also works, light and easy to handle. I once used very dense soil, and water stayed stuck, not ideal. Medium should feel soft and airy, not compact. Roots need space to spread underneath.
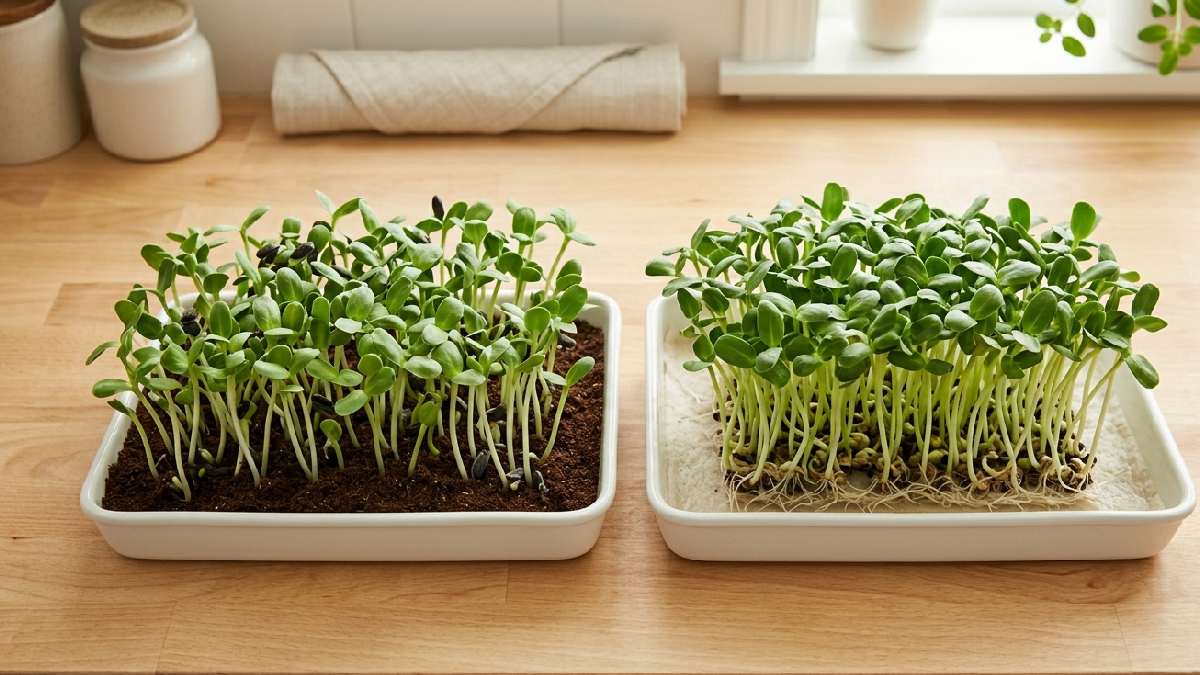
Beginners can start with basic potting mix; there’s no need for anything special. Even paper-based mats work in hydro setups. What matters is moisture balance and support. A good medium keeps everything steady and helps seeds grow evenly across the tray.
Water Spray Bottle and Light Setup
A spray bottle makes watering simple. I use it every day. It gives control, no flooding, just light mist over seeds. I used to pour water directly, which caused uneven moisture. Now, spray keeps things balanced. Light comes after germination; the window works fine if the sunlight is soft. I also tried LED, more stable and consistent.
Too strong light once burned leaves slightly, so I adjusted the distance. Beginners should keep it simple, just enough brightness for green growth. Small setup works perfectly indoors. Water and light together decide how strong and healthy microgreens become.
How to Grow Sunflower Microgreens (Step-by-Step)
I usually start sunflower microgreens with a simple setup on my kitchen counter. Everything feels easy once the routine is clear. Seeds need soaking first, then tray preparation, then careful spreading. After that, it becomes a waiting game with small daily care.
Growth is fast compared to normal plants; changes show every single day. I learned timing and moisture matter more than effort. Nothing complicated here, just steady steps followed in order.
Step 1:Soak the Sunflower Seeds
I start by soaking sunflower seeds in clean water. Usually, I leave them for 6 to 8 hours, sometimes overnight if I forget. Seeds swell up and feel softer after soaking. I noticed dry seeds always germinate more slowly, uneven too. Soaking wakes them properly, making growth more consistent later.
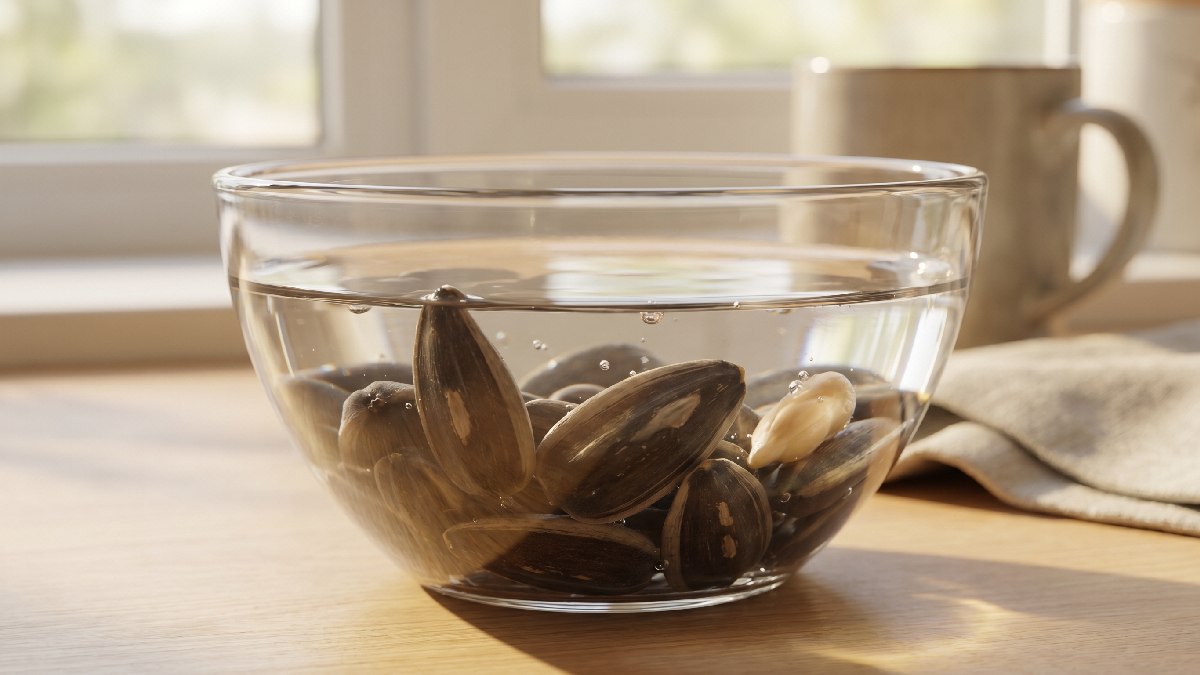
I use a simple bowl, nothing special. Water should fully cover the seeds. After soaking, they feel ready for the next step, almost alive already, and easier to handle in the tray setup.
Step 2: Drain and Pre-Sprout Seeds
After soaking, I drain water completely from the seeds. I rinse them once or twice to keep things clean. Then I leave them in a strainer or jar for a short pre-sprout phase. Seeds start showing tiny roots slowly. I noticed this step improves germination a lot.
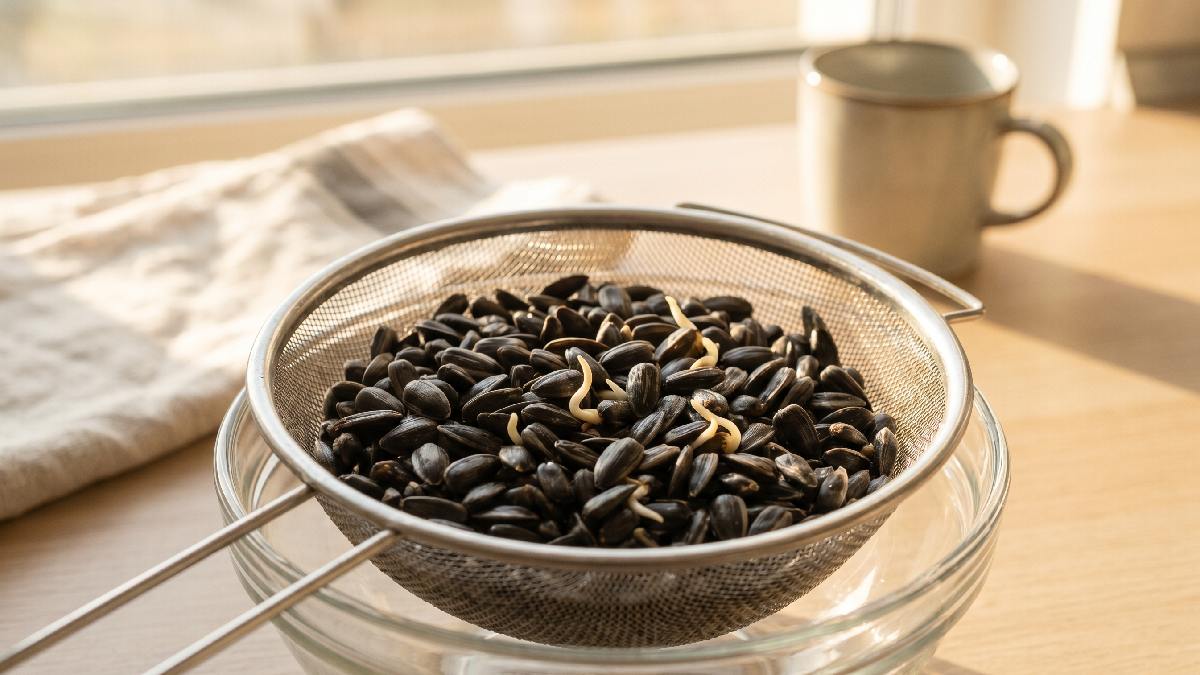
If skipped, growth feels uneven sometimes. I keep them slightly moist but not wet here. Airflow matters too. This stage feels quiet but important, seeds are preparing before going into the tray setup for the full growth cycle.
Step 3: Prepare the Growing Tray
I take a shallow tray and clean it properly before starting. Any dust or leftover moisture can affect growth later. Then I place a growing mat or thin soil layer inside. It should sit flat, no bumps or gaps. I mist water lightly until the surface feels damp.
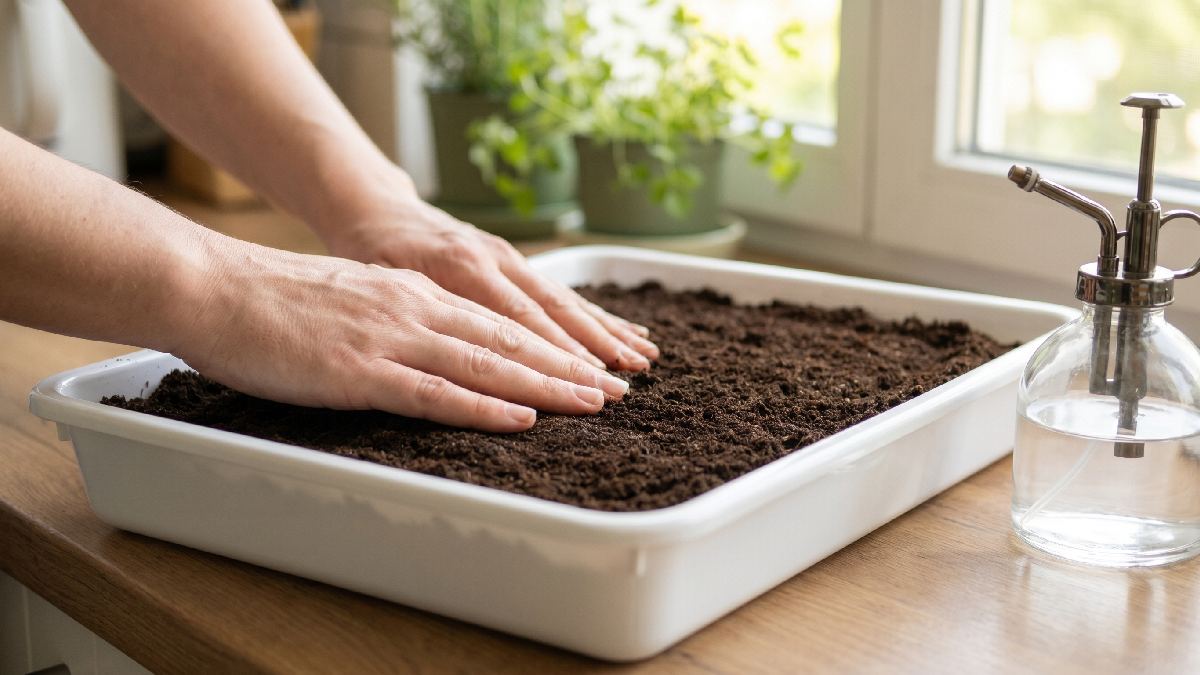
I avoid soaking it too much; I learned that mistake early. The tray setup decides how smooth the whole growth will be. Everything looks simple here, but this base step supports seeds through the entire sunflower microgreens cycle.
Step 4: Sow Seeds Evenly
I spread soaked sunflower seeds evenly across the tray surface. Not too crowded, not too loose, balance matters here. The first time I packed them too close, the growth turned messy and weak. Now I keep small gaps so each seed has space.
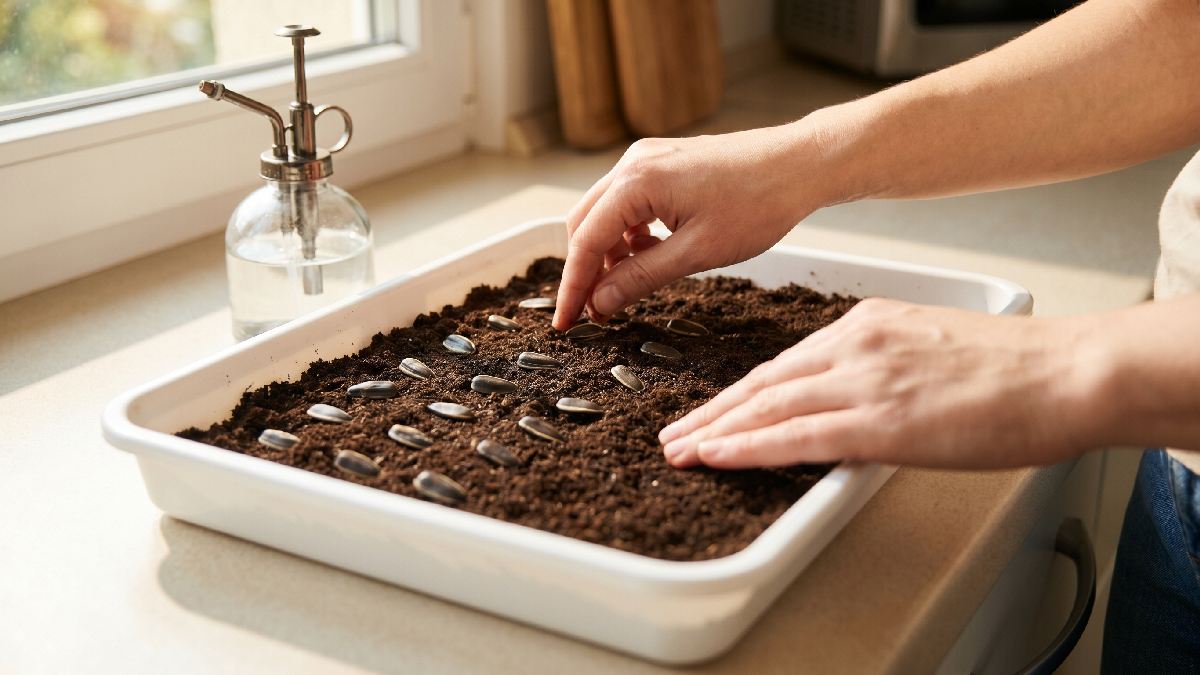
After spreading, I press them gently so they sit well on medium. Then I mist again. Even distribution helps uniform growth later. This step looks simple, but it really decides how clean and healthy the final sunflower microgreens tray will turn out.
Step 5: Cover and Germinate
After sowing, I cover the tray to create dark and humid conditions. I usually use another tray or a simple lid. Darkness helps seeds settle and start rooting properly. The first few days look inactive, nothing visible above the surface. But inside, growth is happening quietly.
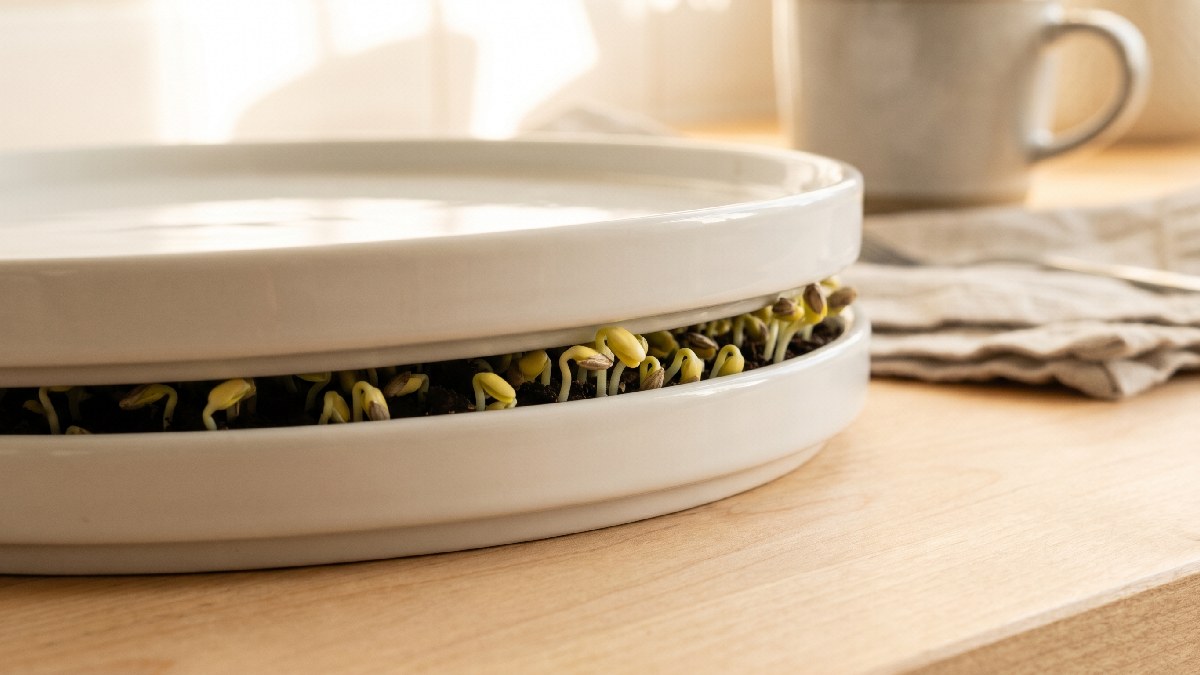
I check moisture once a day and mist if needed. Too much water is avoided here. This germination stage feels slow but important. Sunflower seeds respond well when kept warm, dark, and slightly moist during early development phases.
Step 6: Water and Provide Light
After germination, I remove the cover and shift the tray into light. Window light works fine, or I sometimes use an LED setup. I keep watering very lightly using a spray bottle. Medium should stay damp, not soaked. I learned that overwatering slows everything down.
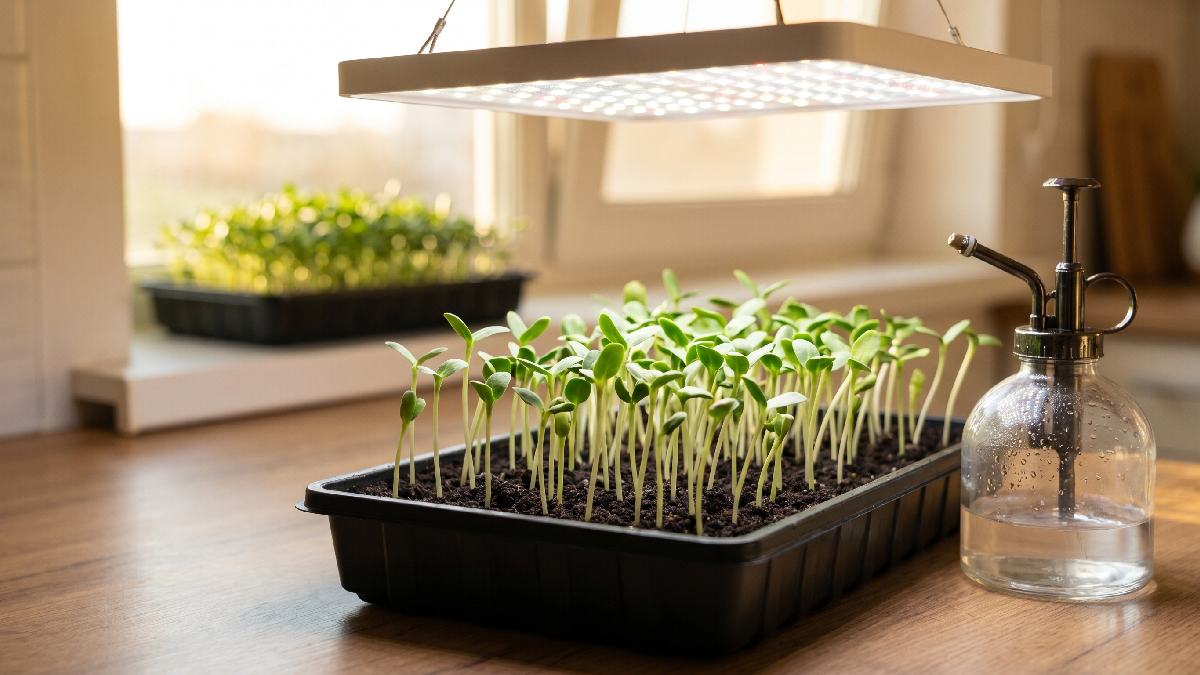
Leaves start turning green quickly once light hits them. Stems also become stronger and upright. I rotate the tray sometimes to keep the growth even. This stage feels active, daily changes become visible, plants respond quickly to light and moisture balance together.
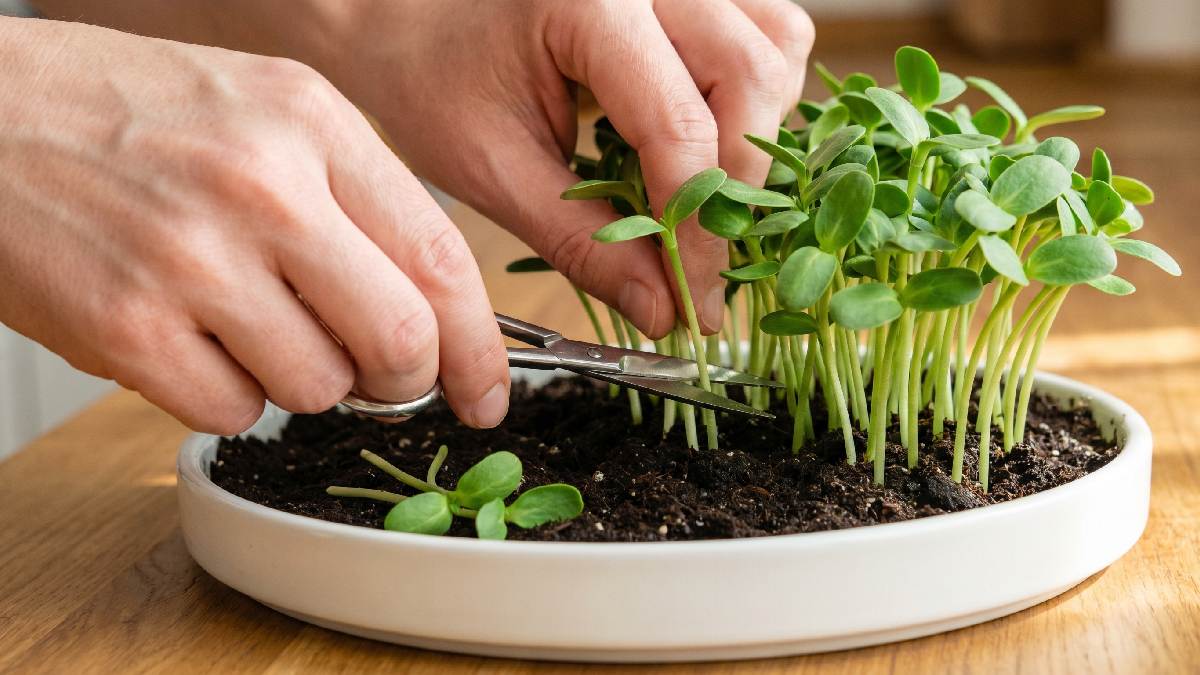
Step 7: Harvest at the Right Time
I usually harvest sunflower microgreens between 7 and 10 days. I look for open leaves and firm stems before cutting. If I wait too long, the taste becomes slightly bitter, and the texture gets tougher. I use clean scissors and cut just above the base.

Roots stay in the tray, keeping things cleaner. Harvesting early gives the best flavor and crunch. I noticed timing really changes the quality a lot. Freshly cut sunflower microgreens feel satisfying, ready to eat right away in simple meals.
Common Mistakes to Avoid
I made a lot of small mistakes with sunflower microgreens at the start. The biggest one was overwatering, the tray stayed too wet, roots struggled. Seeds also got crowded once, shoots came up tangled and weak. I skipped the soaking step early, and germination felt slow and uneven. Light mistakes show fast too; stems stretch, leaves look dull.
Sometimes I forgot airflow, and the tray smelled off after a few days. Beginners think that more water or more seeds help, but it doesn’t. Balance matters more than anything here. Clean tray, proper spacing, steady light, everything improves. Small fixes bring strong growth, healthy greens, and better harvests every time.
Overwatering the Seeds
Overwatering was my first mistake with sunflower seeds. I thought more water meant faster growth, but it didn’t work like that. The seeds stayed too wet; some didn’t even sprout properly. The surface felt heavy, almost suffocated. After a few days, I noticed mold forming, not a good sign.
Now I keep the moisture light, just damp enough for seeds to wake up. I mist instead of pouring water. Sunflower seeds are large; they hold moisture already, so there’s no need to overdo it. Beginners should remember this: balance matters more than excess. Small control gives much better germination results.
Poor Air Circulation
I didn’t pay attention to airflow at first; the trays stayed in a closed corner. After some days, things felt off, leaves looked weak, surface stayed too wet. That’s when I realized the air was not moving. Now I keep a small fan nearby or just leave space around trays. It doesn’t need strong wind, just gentle movement.
Airflow helps dry extra moisture and keeps mold away. Sunflower microgreens grow thicker; they need breathing space. Beginners often miss this part, but it changes everything. Simple airflow keeps trays fresh, healthy, and much more stable overall.
Using Low-Quality Seeds
I once bought cheap sunflower seeds, results were disappointing. Germination was uneven; some grew strong, others didn’t grow at all. Tray looked patchy, not satisfying at all. Since then, I have always picked good-quality seeds; the difference is clear. Healthy seeds sprout together, and growth looks uniform.
Sunflower seeds are bigger, so quality matters even more. Beginners should avoid old or unknown sources, as it saves frustration later. Good seeds feel solid, fresh, almost alive. Every tray becomes easier to manage when seeds are reliable. It’s a simple step, but it decides most of the outcome.
Harvesting Too Late
I used to wait too long before harvesting sunflower microgreens, thinking bigger is better. The leaves got larger, but the taste changed, slightly bitter and less fresh. Stems also became tougher, not as pleasant to eat. Now I cut them earlier, around 7 to 10 days, when the leaves just open. That stage feels perfect, crunchy texture, mild nutty flavor.
Timing really matters; here, even a few extra days make a difference. Beginners often delay harvest, but earlier cutting gives better quality. Each tray teaches this slowly. The right timing gives the best taste and an overall better experience.
Tips for Better Sunflower Microgreens Growth
I noticed sunflower microgreens respond fast to small changes. Soaking seeds properly makes a big difference; they wake up stronger. I spread them evenly now, not crowded like before, and the growth looks cleaner. Water stays balanced, just damp, never soaked. Light needs to be steady; I keep the tray near the window or under an LED.

Airflow also helps, even a little keeps stems firm. I remove seed shells gently if they stick; plants look healthier after that. Harvest timing matters too, not too early, not too late. Beginners learn this step by step. Small care brings thick shoots, fresh taste, and better yield every time.
Keep Moisture Balanced
Moisture balance is where most things go right or wrong. I used to overwater sunflower trays, thinking more is better, but the roots didn’t like it. Now I keep the medium just damp, not soaked, and that small change improved everything. I check with fingers, a simple habit, no guessing needed.
If it feels dry, I mist, nothing heavy. Too much water brings mold, too little slows growth. Sunflower shoots react quickly, so the balance shows fast. Beginners learn this step early; once it clicks, growth becomes smooth and steady every time.
Use Good Quality Seeds
Seed quality makes a clear difference with sunflower microgreens. I once used old seeds; germination was uneven, and some didn’t grow at all. Now I always choose fresh, reliable seeds; the results look completely different. Sprouting becomes faster, and growth stays uniform across the tray. Sunflower seeds are large, so weak ones stand out quickly.
Beginners should not compromise here; it saves time and effort later. Good seeds feel heavier, healthier, more alive somehow. Every tray grows stronger, cleaner, more predictable. Simple change, but it improves the whole process without needing extra work.
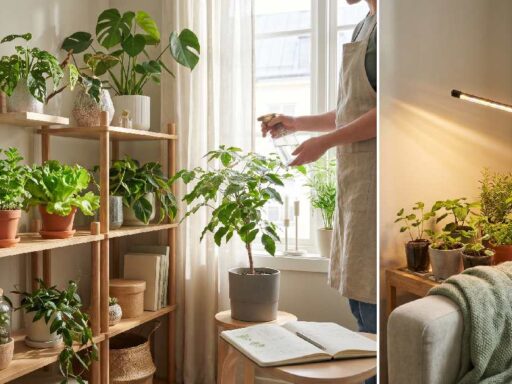
Provide Enough Indirect Light
Light plays a big role once the sunflower shoots come out. I keep trays near a window where light stays soft, not harsh. Direct sunlight sometimes burns leaves. I saw that once, the edges turned dry. LED light works better indoors, steady and controlled. Plants respond quickly when light is right, stems grow thick, leaves open wide.
If light is weak, shoots stretch tall and thin. Beginners notice this difference within days. I adjust position slightly when needed. Balanced light keeps growth compact, healthy, and visually strong in every tray.
Harvest at 7to 10 Days for the best taste.
Timing the harvest changes the whole experience. I used to wait longer, thinking bigger means better, but the taste became slightly bitter. Now I cut around 7 to 10 days, when the leaves open and look fresh. Stems feel crunchy, flavor stays mild and nutty. Waiting too long makes the texture tougher, not as enjoyable.
I use simple scissors, cut above the soil, quick and clean. Beginners often delay harvest, but early cutting gives better quality. Every day teaches this slowly. Right timing brings the best taste, a fresh feel, and satisfying results at home.
FAQs About Growing Sunflower Microgreens
How long do sunflower microgreens take to grow?
Sunflower microgreens usually take around 8 to 12 days to grow fully. I notice faster growth in warm rooms. Timing slightly changes with light, moisture, and seed quality conditions indoors overall.
Can I grow them without sunlight?
Yes, you can grow sunflower microgreens without direct sunlight. I often use LED grow lights indoors. They stay healthy under consistent artificial light; there is no need for outdoor sun exposure at all.
Are sunflower microgreens healthy?
Yes, sunflower microgreens are very healthy. I noticed they contain vitamins, minerals, and protein. They feel fresh, crunchy, and nutritious when added to salads, sandwiches, or simple daily meals regularly.
Do they regrow after cutting?
Sunflower microgreens usually do not regrow after cutting. I tried once, but the second growth was weak. It’s better to replant fresh seeds for consistent and healthy new microgreens harvest cycles.
Conclusion
Growing sunflower microgreens at home feels simple once you try it yourself. I started with small trays, not much knowledge, just curiosity. Step by step, things started making sense. Soaking seeds, spreading evenly, giving light, everything connects naturally. Growth happens fast; sometimes it surprises you daily.
Taste feels fresh, slightly nutty, very different from store greens. I noticed less waste, more control, and better freshness overall. Beginners don’t need a big setup; just consistency matters. Small effort brings a quick harvest. Home feels a bit greener, more alive, and that makes the whole process worth it in the end.