Best Microgreens to Grow Indoors for Fast
When I wanted a quick harvest indoors, I focused on microgreens that grow fast and stay reliable. Not every variety gives the same speed. Some take longer, some struggle in low space. I found radish, mustard, broccoli, and arugula among the fastest options. They usually reach harvest in 7 to 10 days under proper light.
Sunflower and pea shoots take slightly longer but still perform well. Fast-growing microgreens are ideal for beginners because results come early. That builds confidence. Indoor setups become more rewarding when fresh greens are ready within days, not weeks.
Introduction
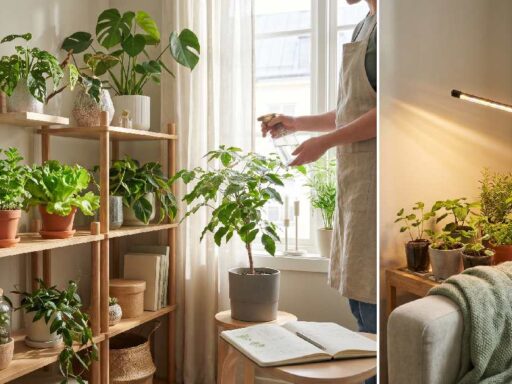
I started microgreens indoors without any big expectations. Just a small idea, fresh greens at home. First trays were uneven and messy, also. Still edible though. Over time, I learned indoor growing is simple but sensitive. Light, water, and space all matter. Now it feels like a small routine in my kitchen.
No garden needed, no outdoor setup. Just steady care gives a fresh harvest. Beginners can start small and slowly understand how plants behave in a limited space. It becomes easier with practice and regular observation every cycle.
What are microgreens?
Microgreens are young vegetable plants harvested at a very early stage. I usually cut them after the first true leaves appear. They are bigger than sprouts but smaller than baby greens. Flavor feels stronger, sometimes fresh and crunchy. I noticed they grow fast, mostly within one to two weeks.
Seeds like radish, broccoli, and sunflower work well indoors. They don’t need deep soil or a big space. Just try, and light is enough. People use them in salads, sandwiches, and as garnish. Small size but high nutrition makes them popular in home growing setups.
Why grow microgreens indoors?
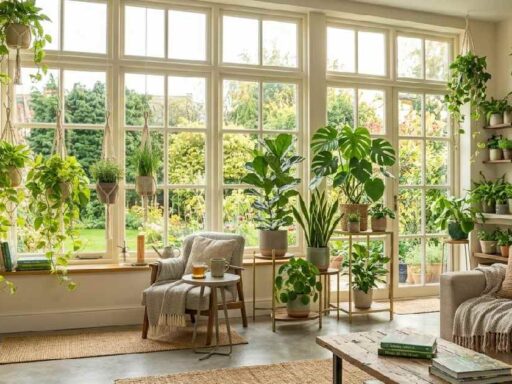
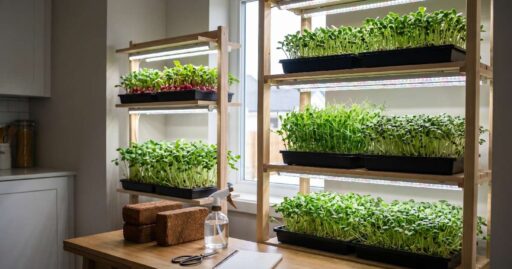
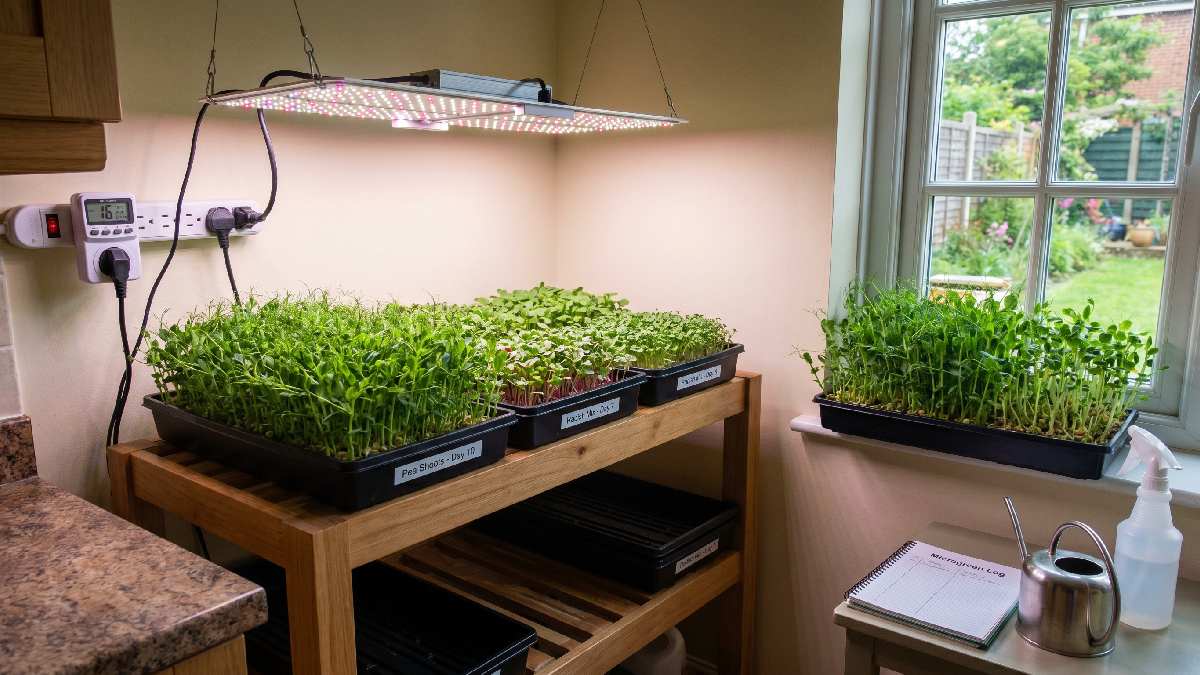
I prefer indoor growing because control stays in my hands. The weather does not matter here. Rain or heat outside, plants still grow the same way. Space requirement is very low, even a corner works fine. I keep trays near the window or the LED light setup. Growth feels consistent and predictable indoors.
No soil mess like outdoor gardening. Harvest also happens quickly, sometimes weekly. Fresh greens always available at home. Beginners find it easier to manage a small indoor system. It saves time, reduces cost, and still gives healthy food regularly.
Best Microgreens to Grow Indoors
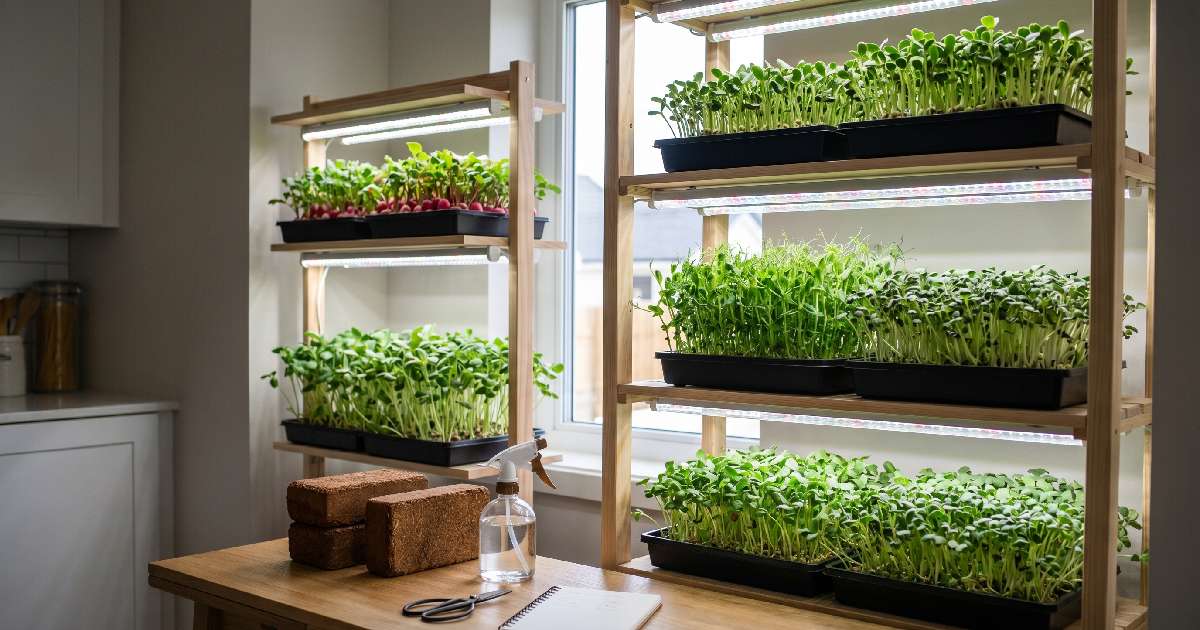
I tried many microgreens indoors; some worked smoothly, some felt tricky at the start. Over time, I understood few varieties always perform better in small home setups. They grow fast, need less care, and give a good yield even in limited space. I now stick mostly to these reliable options.
They fit well in trays, under a simple LED light, or near a window. Beginners should focus on these first. Easy growth, quick harvest, and steady results make indoor microgreens more practical and less confusing for a daily home growing routine.
Radish microgreens
Radish microgreens are the fastest I have grown indoors. Usually ready in 7 to 10 days. Flavor is spicy, strong, and very noticeable in food. Seeds germinate quickly, with almost no waiting time. I like them for quick results and steady demand. They don’t need complex care, just light watering and proper light.
Even beginners get success with radish trays. Growth is uniform if spacing is correct. I often use them for salads and garnishing. Simple crop, fast cycle, and reliable indoor production make radish a very popular choice overall.
Broccoli microgreens
Broccoli microgreens feel simple and stable in an indoor setup. Growth takes around 8 to 12 days, not too fast or slow. Flavor is mild, slightly earthy, and easy to mix in meals. I noticed they grow evenly with basic care. No special conditions needed, just steady light and moisture.
Beginners like them because mistakes don’t ruin the whole tray easily. They are also popular in a health-focused diet. I often grow them in batches for consistency. Reliable growth and good nutrition make broccoli a safe indoor option for regular microgreens production.
Pea shoots
Pea shoots grow taller compared to other microgreens I tried. They take around 10 to 14 days indoors. Flavor is sweet, fresh, and slightly crunchy when eaten. I like their full green appearance in trays. They need a bit more space, but still easy to manage. Light support is important for upright growth.
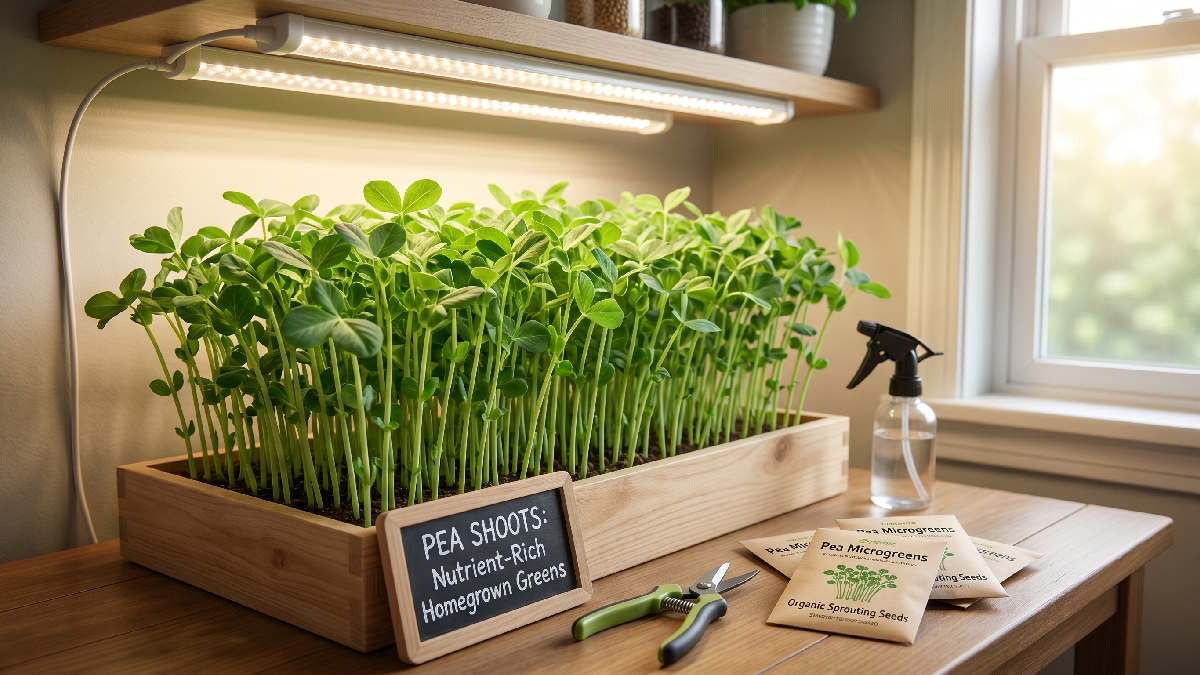
Restaurants often prefer them for plating and garnish. I noticed steady demand when the quality stays the same. They are slightly slower but give good volume. Strong texture and visual appeal make pea shoots valuable for indoor growing setups.
Sunflower microgreens
Sunflower microgreens are heavy and satisfying to grow. Seeds are large, so the soaking step is important. Growth feels strong, stems thick, leaves wide. They take around 8 to 12 days indoors. I noticed they give high yields per tray. Flavor is mild, nutty, and very pleasant in salads.
They don’t wilt quickly after harvest. Beginners like them because they are forgiving. Even small mistakes don’t ruin the full batch easily. I grow them regularly for both home use and market interest. Reliable crop with strong structure and good indoor performance.
Mustard microgreens
Mustard microgreens are sharp and spicy in taste. I use them mainly for flavor addition in dishes. Growth is quick, usually around 7 to 10 days. They germinate fast and fill trays evenly. I noticed a strong aroma develops in the early stage. Light care is enough; no complex setup is needed.
They are popular in gourmet cooking for bold taste. Beginners should handle watering carefully, not too much moisture. They grow well in indoor trays with simple LED lights. Small crop but strong impact on food presentation and flavor balance.
Arugula microgreens
Arugula microgreens have a peppery and slightly bitter taste. I grow them for variety in an indoor setup. Growth time is around 8 to 12 days. Seeds are small, so even spreading is important. They respond well to steady light and moisture balance. I noticed they add strong flavor to simple meals.
Not everyone likes taste, but chefs prefer it for depth in dishes. They grow well in small trays indoors. Consistent care gives healthy green leaves. Good option for adding diversity in microgreens production at home.
How to Grow Microgreens Indoors
I started growing microgreens indoors with very basic knowledge. First trays were not perfect, uneven growth, and some mistakes also happened. Over time, I understood that simple steps make everything easier. Seed choice, setup, light, and watering all connect. Indoor growing feels easy once the routine is clear.
No big space needed, just a small corner works fine. I now follow the same process every cycle. Beginners should not overthink it. Small steps done correctly give healthy green trays and quick harvests inside the home environment with steady results.
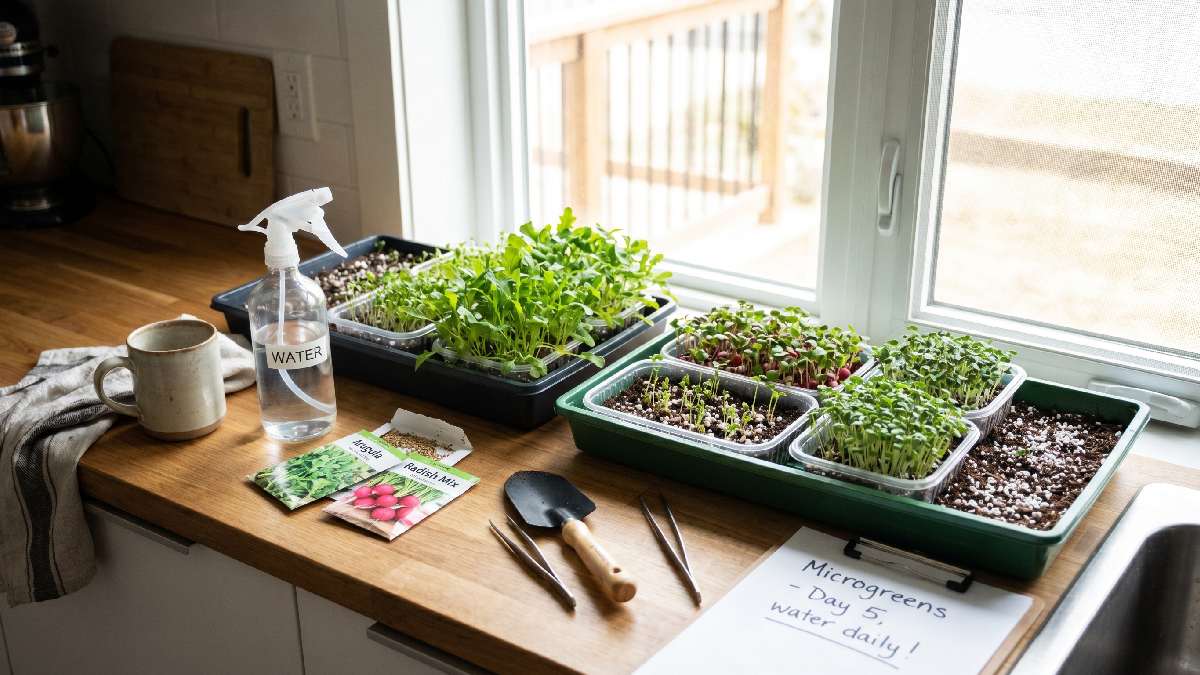
Choosing seeds & setup
I always start with good-quality seeds, which matters most indoors. Radish, broccoli, and sunflower work best in my experience. Old seeds give uneven growth, so I avoid them now. For setup, I use shallow trays and a simple growing mat or soil. Nothing fancy is needed. A clean surface is important before starting.
I keep everything ready before sowing seeds. Light setup is also planned early, usually an LED above the tray or near the window. Beginners should keep it simple, use fewer tools, focus better on the growing process, and be consistent in each batch.
Germination stage
After sowing seeds, I cover the trays to create a dark space. This helps seeds wake up properly. Germination usually takes 2 to 4 days indoors. I keep the medium slightly moist, not wet. Too much water slows growth and creates issues. During this stage, nothing looks visible on top. But inside roots start forming.
I check once daily, very light mist if needed. Cover stays until small sprouts appear. This stage feels slow but important for a strong base. Proper germination gives uniform growth later in the full tray development cycle.
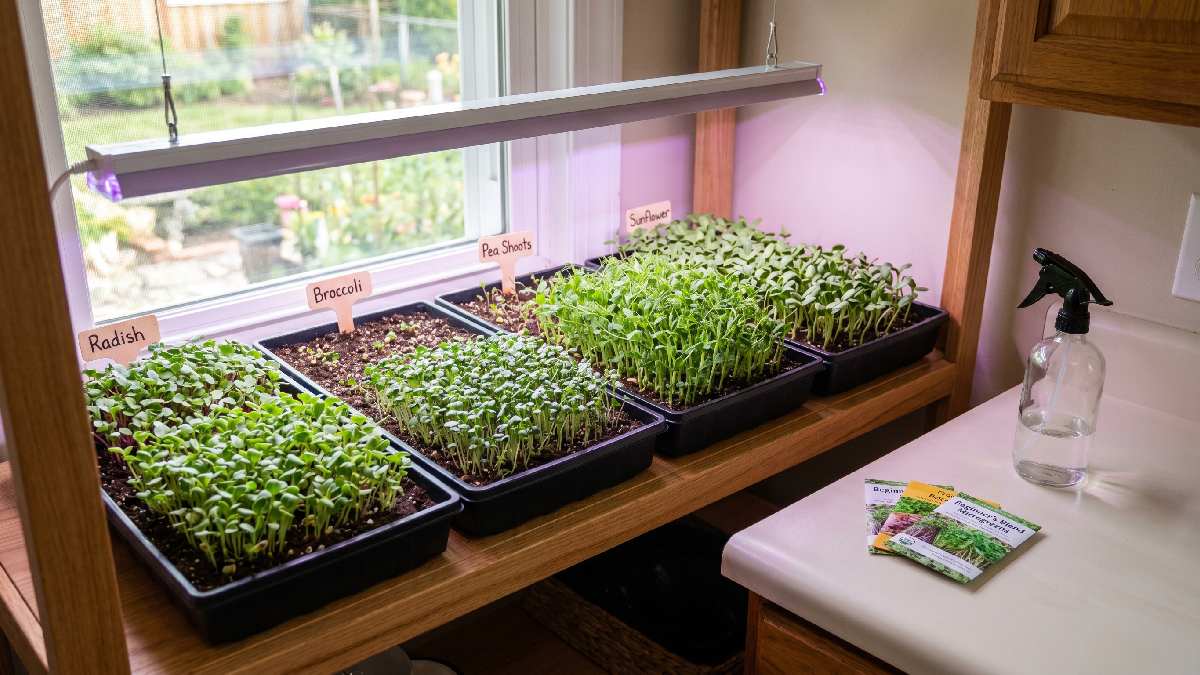
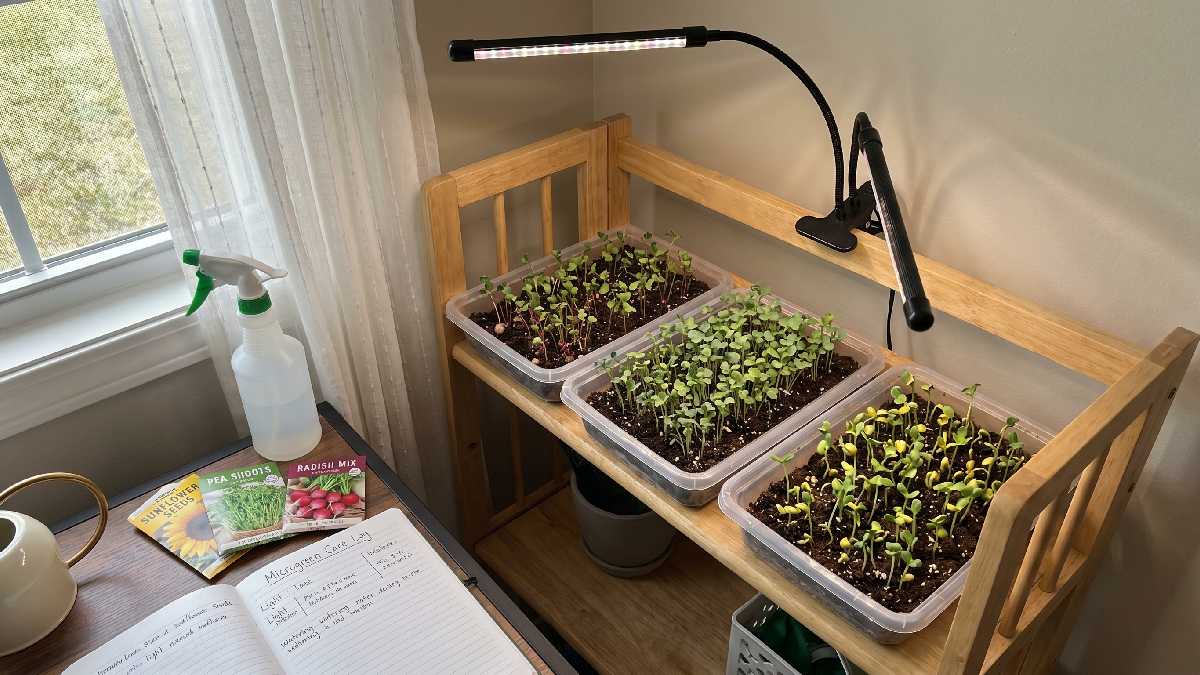
Light & growth stage
Once sprouts appear, I move trays under the light. LED works best in my setup. Natural window light also works if strong enough. Plants start turning green quickly after light exposure. I keep timing consistently daily. Around 12 to 16 hours of light works well. Growth becomes visible every day; stems start to stand up.
I rotate trays sometimes for even exposure. Weak light causes stretching, so balance matters. This stage decides the final quality of microgreens. Strong light gives compact, healthy plants with better color and structure indoors.
Watering tips
I keep watering very carefully for microgreens. Spray bottle works best for me. Medium should stay damp, not soaked. Overwatering creates mold and weak growth. Underwatering makes plants dry and slow. I check moisture daily with my fingers. Small misting is enough most times.
Drainage also important if soil is used. I learned balance after a few failed trays. Now watering feels like a simple routine. Beginners should avoid heavy watering at the start. Light and regular moisture keep plants healthy and stable during the entire indoor growing cycle.
Harvesting method
I harvest microgreens when the first true leaves appear. Usually between 7 and 14 days, depending on the crop. I use clean scissors and cut above the soil line. Pulling roots is avoided completely. Harvest time affects taste and texture a lot. Early harvest gives a mild flavor, and late harvest becomes slightly bitter sometimes.
I cut only what I need for use or market. Fresh harvesting gives the best quality. After cutting, trays are cleaned for the next cycle. Simple method, quick process, and a very satisfying part of the indoor microgreens growing system.
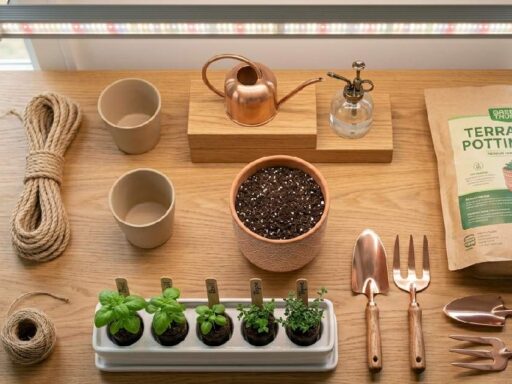
Equipment Needed
I started microgreens indoors with very basic equipment, nothing expensive or advanced. Over time, I realized simple tools are enough for good results. Growing trays, proper medium, light source, and watering tools make the whole system work. I did not buy everything at once; I slowly added items when needed.
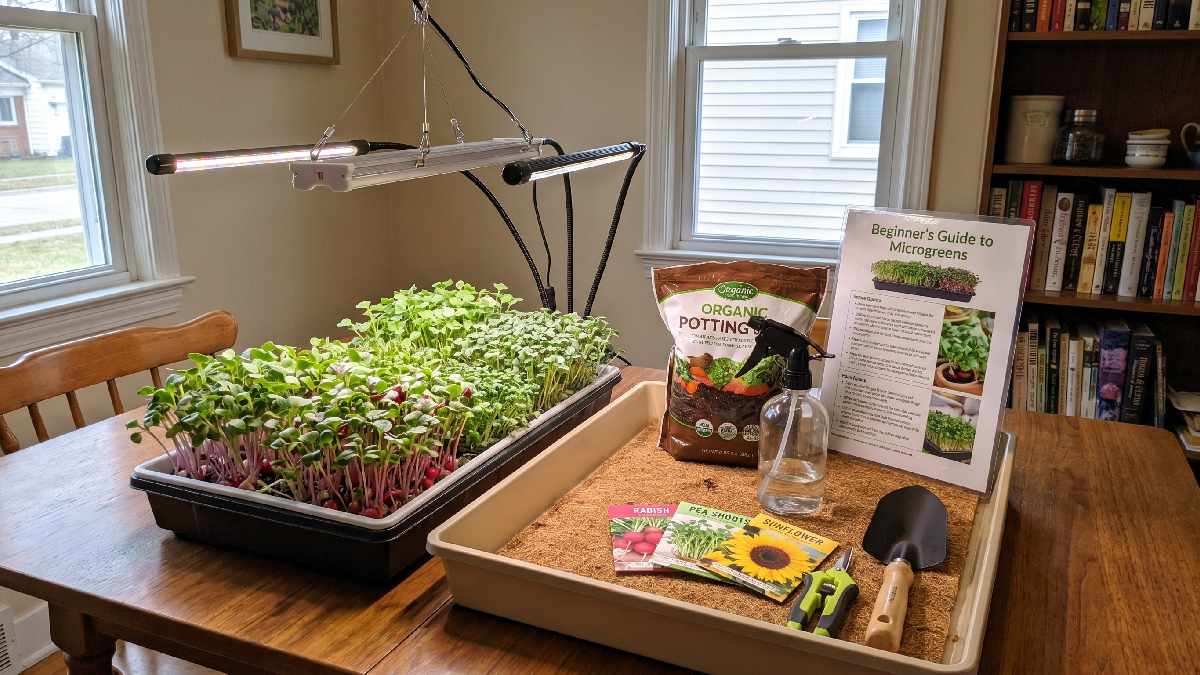
Indoor setup stays flexible, and even beginners can start small. Clean tools and simple arrangement matter more than expensive gear. With the right basics, microgreens grow healthy and consistent inside the home without a complicated farming setup or a large investment.
Growing trays
Growing trays are the base of an indoor microgreens setup. I use shallow plastic trays most of the time. They are easy to handle and clean. Drain holes help, but are not always necessary depending on the medium. Size matters because too deep trays waste space. I keep uniform trays for easy stacking and maintenance.
Cheap trays also work fine if the quality is decent. Beginners should avoid very small or very large sizes. Balanced tray size gives even growth and proper light exposure for all microgreens batches indoors.
Soil or coco coir
I use soil or coco coir as a growing medium, depending on availability. Coco coir feels cleaner and holds moisture evenly. Soil gives strong root support but needs careful watering. Both work well for microgreens indoors. Medium should stay light and airy, not compact.
I avoid heavy soil mixes because they block growth. Proper moisture balance is important in both cases. Beginners can start with coco coir for simplicity. A good medium supports healthy germination and steady growth throughout the cycle without many issues in an indoor setup.
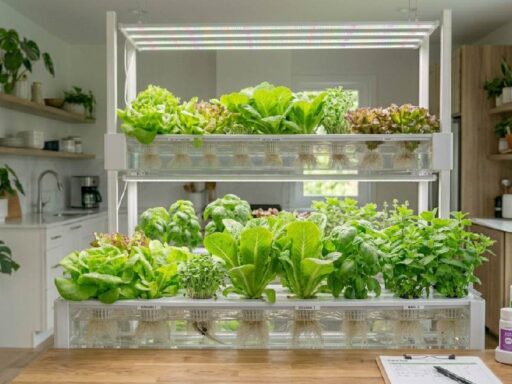
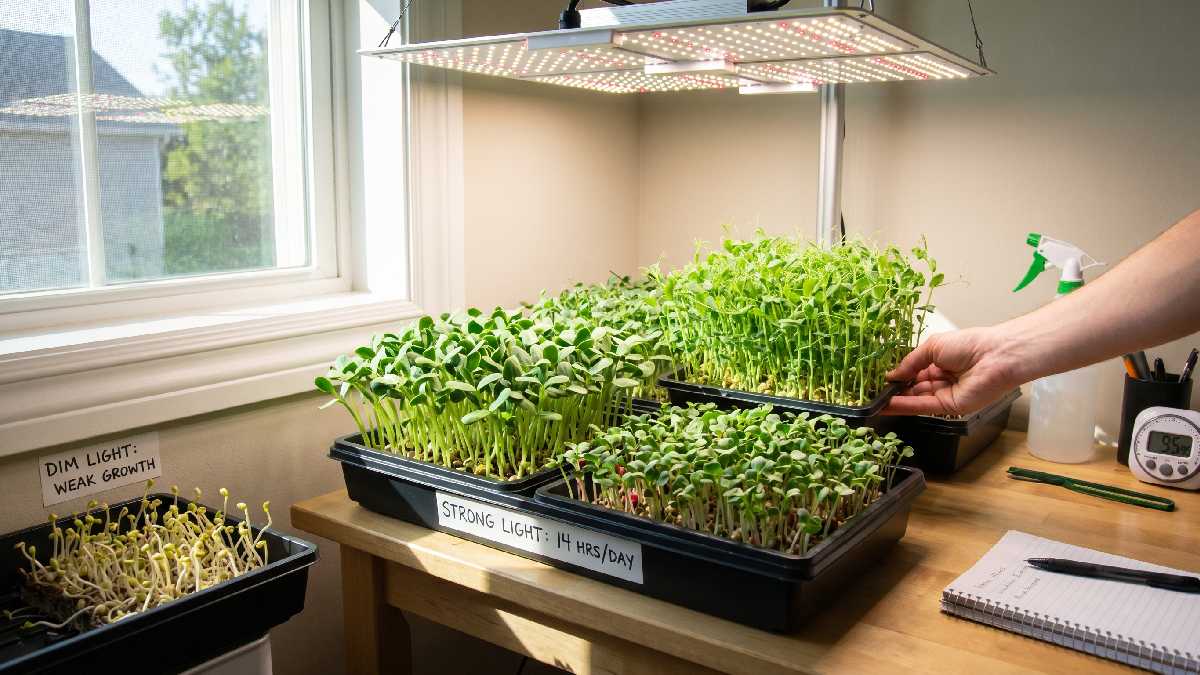
Grow lights (optional)
Grow lights are optional but very useful indoors. I use LED lights when natural sunlight is weak. They help maintain steady growth and good color. Without proper light, microgreens stretch and become weak. I keep the lights on a timer for fixed hours daily. Full-spectrum LEDs work best in my experience.
Beginners can start with window light, then upgrade later. Light distance also matters for healthy growth. Proper lighting improves the quality, speed, and consistency of microgreens in a home setup without depending on weather or seasonal changes.
Spray bottle & tools.
A spray bottle is my main watering tool for microgreens. It gives light and controlled moisture without disturbing seeds. I avoid pouring water directly because it damages growth. Small tools like scissors also help during harvest. Clean tools reduce contamination and improve quality.
I keep everything simple and easy to use. Beginners don’t need fancy equipment at the start. Just a spray bottle and basic cutting tools are enough. Proper handling of simple tools keeps indoor microgreens clean, healthy, and easy to manage during the full growing cycle.
Common Mistakes to Avoid
I made many mistakes when I first started growing microgreens indoors. Most problems were simple, but I didn’t notice them early. Over time,e I realized small habits decide everything. Water, light, spacing, and airflow all affect results directly. When one thing goes wrong, the whole tray looks weak.

I learned by failing a few batches. Now I avoid these issues carefully. Beginners often repeat the same errors, but once they understand the basics, indoor growing becomes smooth, predictable, and much easier to manage every cycle without frustration or wasted effort.
Overwatering
Overwatering was my biggest early mistake in microgreens. I used to spray too much water, thinking it helps growth. Instead, the trays became soggy and weak. Sometimes, mold started forming quickly. Roots didn’t develop properly in a wet medium. I learned plants only need light moisture, not soaking conditions.
Now I spray small amounts and check daily. Medium should feel damp, not wet. Beginners often think that more water gives better results, but it actually slows growth. Balanced watering keeps plants healthy and prevents many common indoor growing problems.
Lack of light
Lack of light caused weak and stretched microgreens in my early setups. I kept trays near weak window light; the results were not good. Stems grew long but thin and unstable. Later, I added an LED light, and growth improved fast. Plants need steady light for proper structure. Without it, color also looks pale.
I now keep a fixed light schedule every day. Beginners often ignore lighting, thinking water is enough. But light controls strength and shape. Proper exposure makes microgreens compact, green, and much healthier indoors.
Seed overcrowding
Seed overcrowding was another mistake I often made. I used to spread too many seeds in one tray. At first, it looked full and good. Later growth became uneven and weak. Air and light could not reach properly. Some seeds stayed underdeveloped. I learned spacing matters a lot for healthy trays.

Now I use controlled seed density for each crop. Even distribution gives better airflow and uniform growth. Beginners think more seeds mean a higher yield, but it reduces quality. Proper spacing improves the final harvest a lot indoors.
Poor airflow
Poor airflow created humidity problems in my indoor setup. Air stayed trapped around trays, and the surface felt too damp. Sometimes a mild smell or mold appeared. I didn’t realize airflow matters so much at the start. Later, I added a small fan nearby, results improved quickly. Plants became stronger, and surfaces dried properly.
Air movement does not need to be strong, just consistent. Beginners often ignore ventilation completely. Good airflow prevents disease and supports healthy growth. It keeps microgreens fresh, clean, and stable during the entire growing cycle indoors.
Benefits of Microgreens
I started microgreens mainly for fresh food, but the benefits surprised me later. They grow fast, need little space, and still give strong nutrition. Indoor setup makes them available all year without depending on the weather. I noticed simple trays can produce a regular harvest at home.
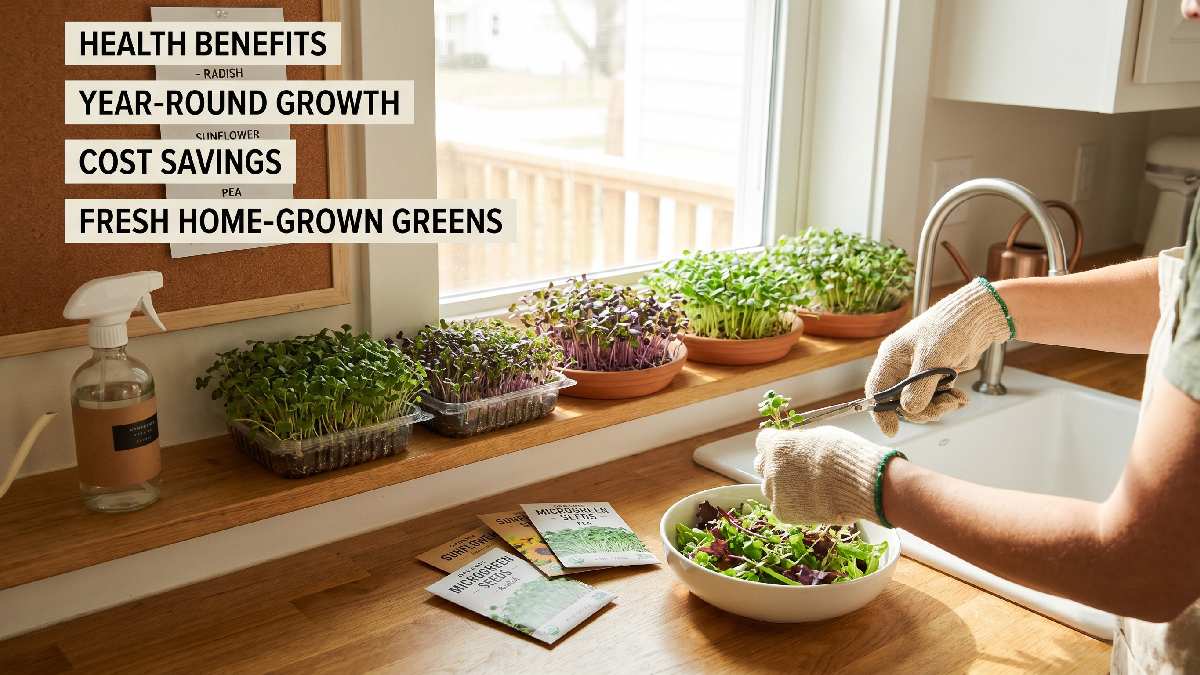
Cost stays low compared to buying greens from the market. Freshness is another big advantage. Now I see microgreens as a practical option for daily use. Beginners can easily start and enjoy both health and convenience from a small indoor growing system.
High nutrition
Microgreens are packed with high nutrition even in small quantities. I noticed the taste feels strong and fresh compared to normal vegetables. They contain vitamins, minerals, and antioxidants in the early plant stage. That makes them more concentrated in nutrients. I often add them to salads or sandwiches for extra health value.
Even a small portion gives benefits. Indoor-grown microgreens stay clean and chemical-free in my setup. Beginners like them because the health benefits come quickly. Simple trays produce highly nutritious food without complex farming or great effort.
Fast growth cycle
The fast growth cycle is one of my favorite things about microgreens. Most varieties are ready in 7 to 14 days. I like how quickly results appear compared to normal crops. No long waiting or seasonal limits. I keep rotating trays every week for a continuous supply. This fast cycle helps in regular harvest planning.
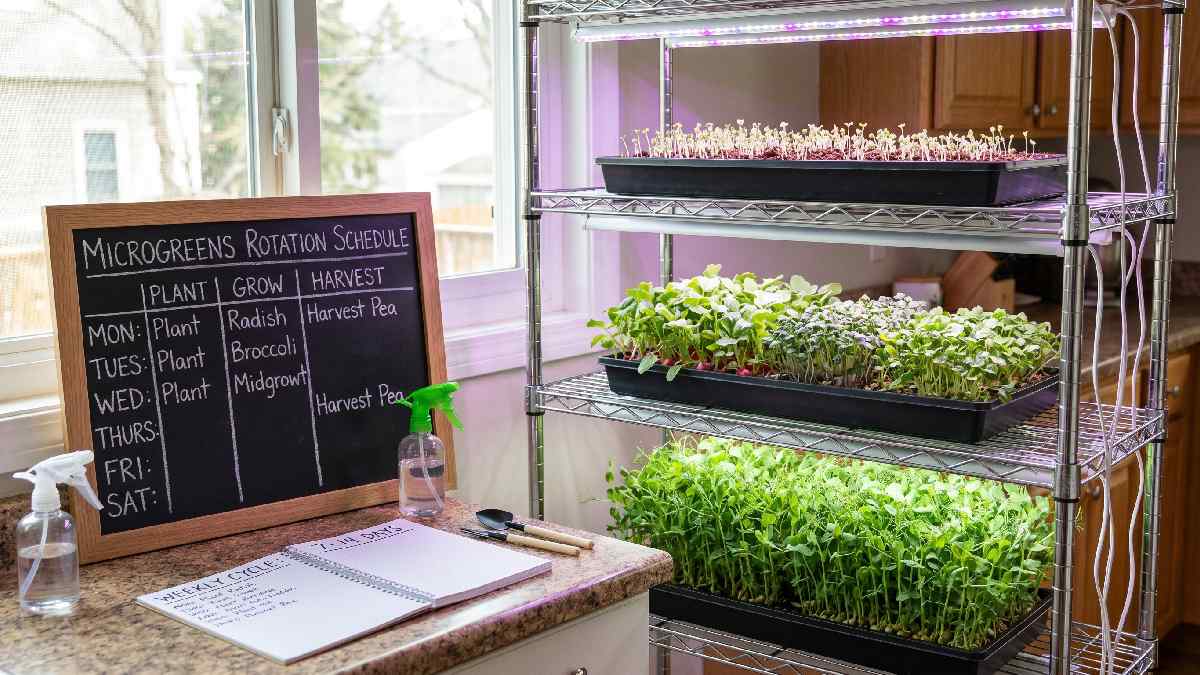
Even beginners can see progress quickly, which keeps motivation high. Short growth time also reduces the risk of failure. Indoor setup becomes active and productive all the time with a simple daily care routine.
Sustainable indoor farming
Microgreens feel very sustainable in my indoor setup. They use very little space and water compared to traditional farming. I grow them in small trays without soil waste issues. Electricity use stays low even with LED lights. I reuse trays and keep the system simple. No pesticides or heavy chemicals needed.
This makes production cleaner and safer. I noticed even a small home corner can produce steady greens. Beginners can manage it easily without big resources. Sustainable nature makes microgreens a practical choice for a long-term indoor food-growing system.
Are Microgreens Profitable?
I asked myself this same question when I started microgreens at home. At first, it looked like a small hobby, not a real income. Later, I saw consistent trays giving regular output. Profit depends on how you manage setup, timing, and selling. Costs stay low, production stays fast.
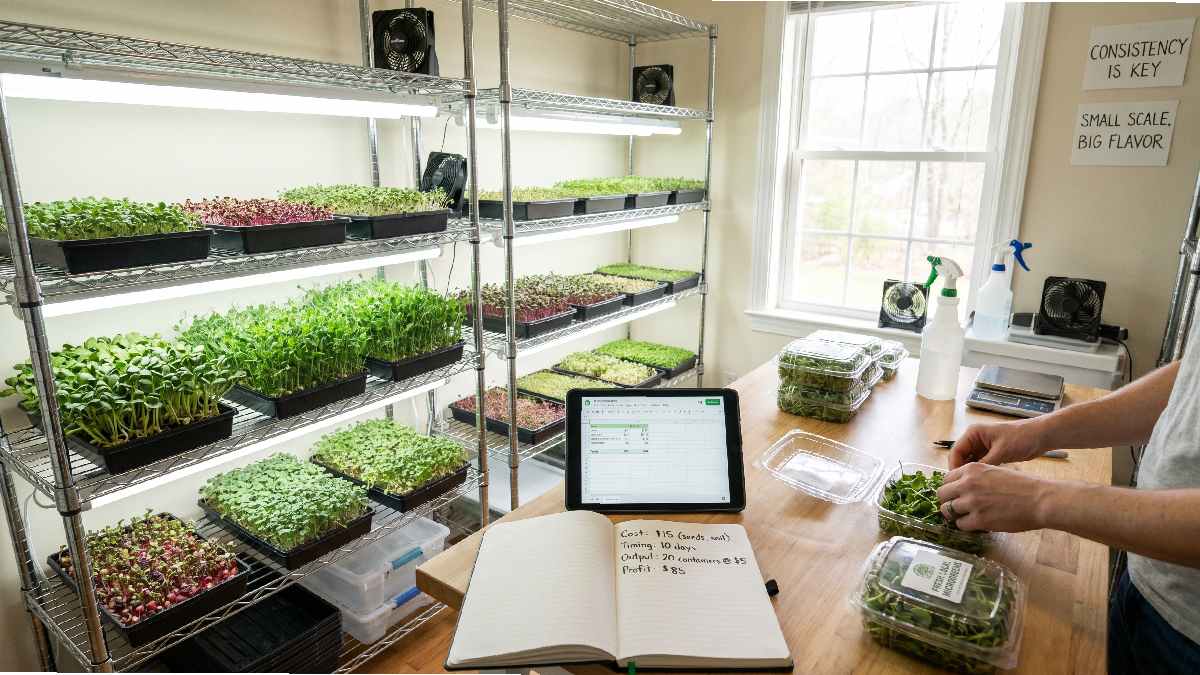
That combination creates income potential. Not huge at start, but steady. I noticed that even a small space can generate returns if managed properly. Beginners can make it work, but only with consistency and a simple system, not a random growing approach.
Low investment setup
Microgreens need very low investment to start. I began with simple trays, basic LED lights, and cheap seeds. No big farm equipment required. Space also stays minimal; even a small corner works. Most tools are reusable, so the cost stays low long term. I didn’t spend much in the early stage.
Mistakes were part of learning, not an expensive setup. Beginners can easily enter without a heavy budget. This low-cost entry makes microgreens attractive for a small home business idea. Simple start, slow growth, but manageable risk overall in an indoor setup.
High-demand market
I noticed steady demand for microgreens in the local market. Restaurants ask for fresh supplies regularly. Health-conscious buyers also prefer them for salads and meals. Demand stays stable in urban areas, not seasonal. Quality and freshness decide repeat orders. I saw customers returning when consistency was maintained.
Even a small production gets attention if the product looks clean. Beginners can tap into this demand easily. The market is growing slowly but steadily. That makes microgreens a good option for small-scale indoor farming with regular selling potential.
Selling options
There are multiple ways to sell microgreens. I started with direct sales to local customers. Later, I tried supplying small cafes and restaurants. Some people also sell through social media or home delivery. Each method works if the quality stays good. I noticed direct buyers give faster feedback and repeat orders.
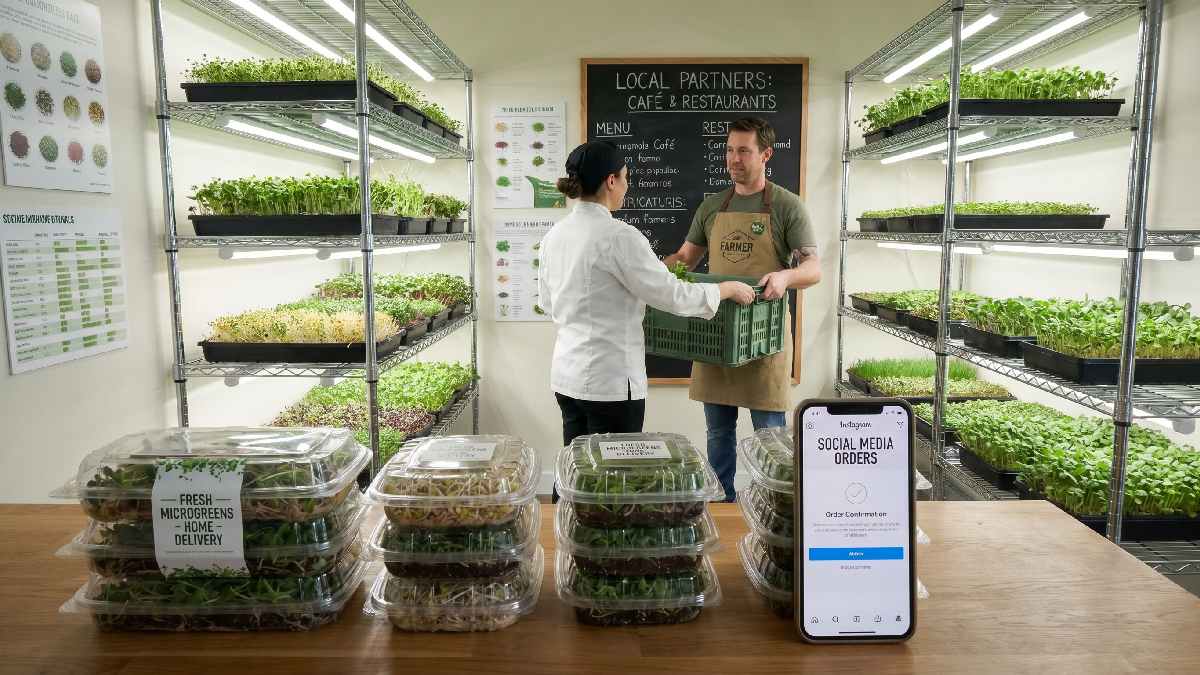
Restaurants prefer a regular weekly supply. Online selling needs good presentation and packaging. Beginners should test a small market first. Once demand builds, scaling becomes easier with multiple selling channels in the local area or nearby businesses.
FAQs: Best Microgreens to Grow Indoors
How long do microgreens take to grow?
Most microgreens take around 7 to 14 days to grow indoors. Some fast ones like radish finish even earlier depending on conditions and care.
Do they need sunlight?
They don’t strictly need sunlight. I use LED lights or window light. Good light is important for healthy, green and compact growth indoors overall.
Can they grow without soil?
Yes, microgreens can grow without soil. I often use coco coir or mats. Both support roots well and keep setup clean and simple indoors.
Which is easiest for beginners?
Radish and sunflower microgreens are easiest for beginners. They grow fast, handle small mistakes, and give reliable results in simple indoor tray setups.
Conclusion
Microgreens are simple, fast, and practical to grow indoors once the basics are clear. I started with confusion, but slowly learned how light, water, and spacing control everything. A small setup is enough to get a steady harvest at home. Profit, nutrition, and convenience all come together in this system.
Not perfect every time, but improvement happens with practice. Beginners should start small and stay consistent. Over time, indoor microgreens become an easy routine, giving fresh greens regularly without needing a big space or heavy investment in daily life.