

How to Compost at Home for Beginners
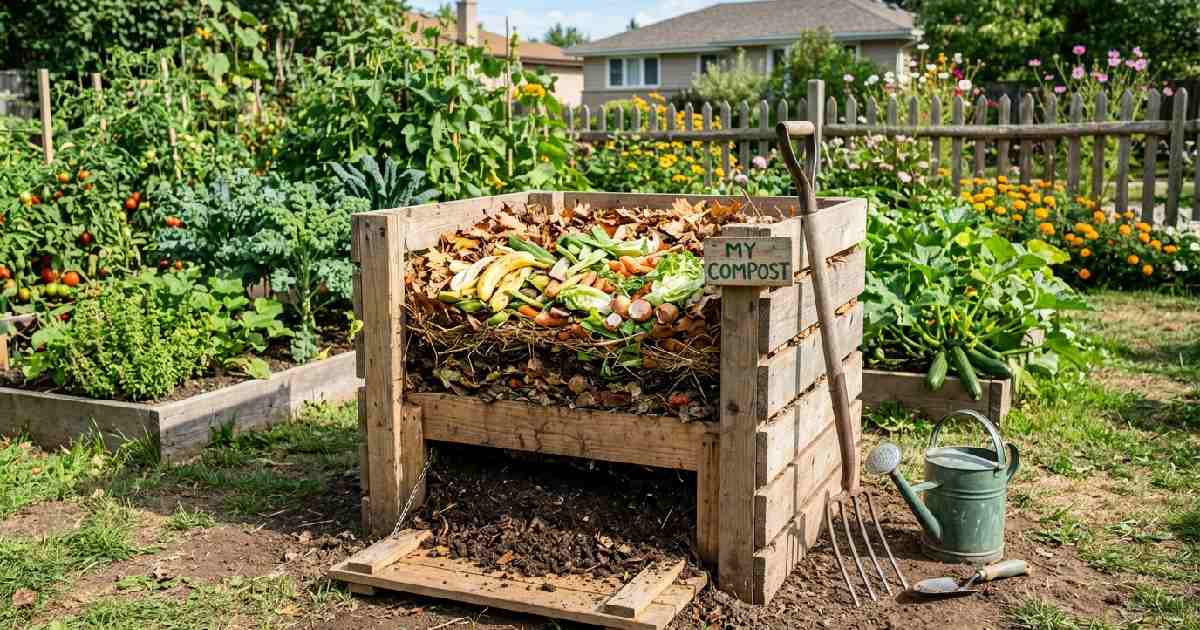
Learning how to compost at home for beginners is easier than most people think. Composting turns kitchen scraps and yard waste into rich, dark soil. This natural process helps plants grow stronger and healthier. It reduces household waste and saves money on fertilizers.
Anyone can start composting, even in a small apartment. You do not need expensive tools or a big garden. This guide covers everything step by step. Follow these simple tips and start creating free, organic compost at home today.
Introduction to Home Composting
How to compost at home for beginners starts with understanding the basics. Composting is a simple, natural process that benefits your home, garden, and the environment. Millions of people are now composting to reduce waste and grow healthier plants.
Getting started requires very little investment. This section explains what composting is and why it matters for every beginner. Once you understand the basics, the rest becomes easy and enjoyable.
What is Composting?
Composting is nature’s way of recycling organic materials. Microorganisms like bacteria and fungi break down food scraps and yard waste over time. The result is a dark, crumbly substance called compost or humus. This material is packed with nutrients that plants love.
The process needs four things: organic material, moisture, oxygen, and microorganisms. When these four elements work together, decomposition happens naturally. Finished compost looks and smells like rich forest soil. It is one of the most powerful and natural soil improvements available to any home gardener.
Why Composting is Important for Beginners
Composting is important because it solves two big problems at once. It reduces waste going to landfills and creates free fertilizer for your garden. Food waste in landfills produces methane, a harmful greenhouse gas. Composting at home prevents that. Beginners benefit because it is low-cost and low-effort.
You use materials you already have at home. Fresh produce scraps, paper, and dry leaves are enough to start. Composting also teaches patience and responsibility. It connects you to nature and makes your garden more productive every season.
Benefits of Composting at Home
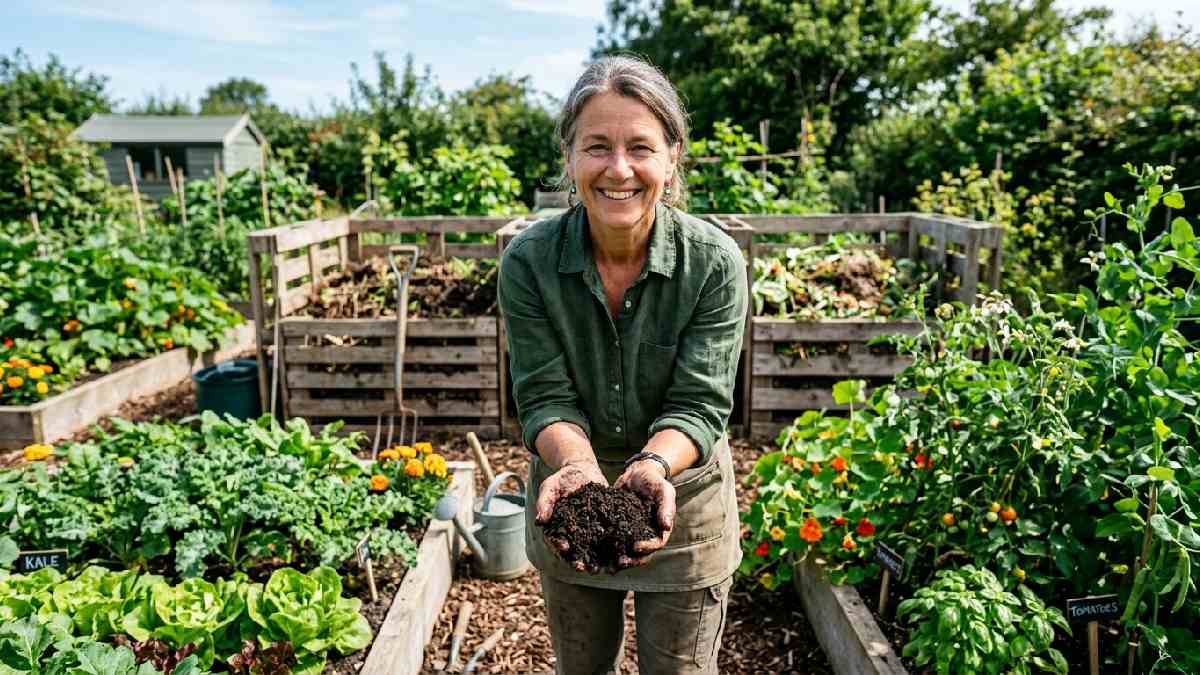
The benefits of composting at home are many and real. It is good for your wallet, your garden, and the planet. Once you start, you will wonder why you waited so long.
From reducing kitchen waste to improving soil health, composting delivers results fast. Every household can benefit from composting, no matter the size of the space. The following sections break down the top benefits in detail.
Reduces Kitchen Waste
Composting dramatically cuts down the amount of waste your household produces. Vegetable peels, fruit scraps, coffee grounds, and eggshells all go into the compost bin instead of the trash. This can reduce kitchen waste by up to 30 percent. Less trash means fewer garbage bags and lower disposal costs.
Composting turns what was previously waste into something valuable. Over time, you will notice your trash bin filling up much more slowly. It is one of the simplest habits you can adopt to live more sustainably every single day at home.
Improves Soil Health Naturally
Finished compost dramatically improves soil structure and fertility. It adds vital nutrients, improves drainage in clay soils, and helps sandy soils retain moisture better. Compost feeds beneficial microorganisms that keep soil alive and healthy. Plants grown in compost-enriched soil grow stronger with better root systems.
Leafy greens, tomatoes, cucumbers, and herbs all thrive in amended soil. It also improves aeration so roots get the oxygen they need. Unlike synthetic fertilizers, compost releases nutrients slowly and naturally over an entire growing season without any harmful chemicals.
Saves Money on Fertilizers
Buying bags of fertilizer every season costs real money. Composting creates free, organic fertilizer from waste you already have at home. Finished compost replaces costly store-bought soil amendments completely. It also reduces the need for pesticides because healthy soil naturally resists pests and disease.
Over one growing season, a home composter can save significant money on garden supplies. The materials needed to start are free or very low cost. Your kitchen scraps and dry leaves are all you need to produce rich, nutritious compost every season at absolutely zero extra cost.
Supports Sustainable Living
Composting is one of the most impactful habits for sustainable living. It keeps organic waste out of landfills, where it produces harmful gases. It builds healthier soil that sequesters carbon naturally. It reduces the need for chemical fertilizers that harm waterways and wildlife. Composting closes the nutrient loop, turning waste back into food for plants.
It teaches children and families about natural cycles and environmental responsibility. Every kilogram of compost produced at home is a direct contribution to a healthier planet. Sustainable living starts with small daily choices, and composting is one of the best places to begin.
What You Need to Start Composting
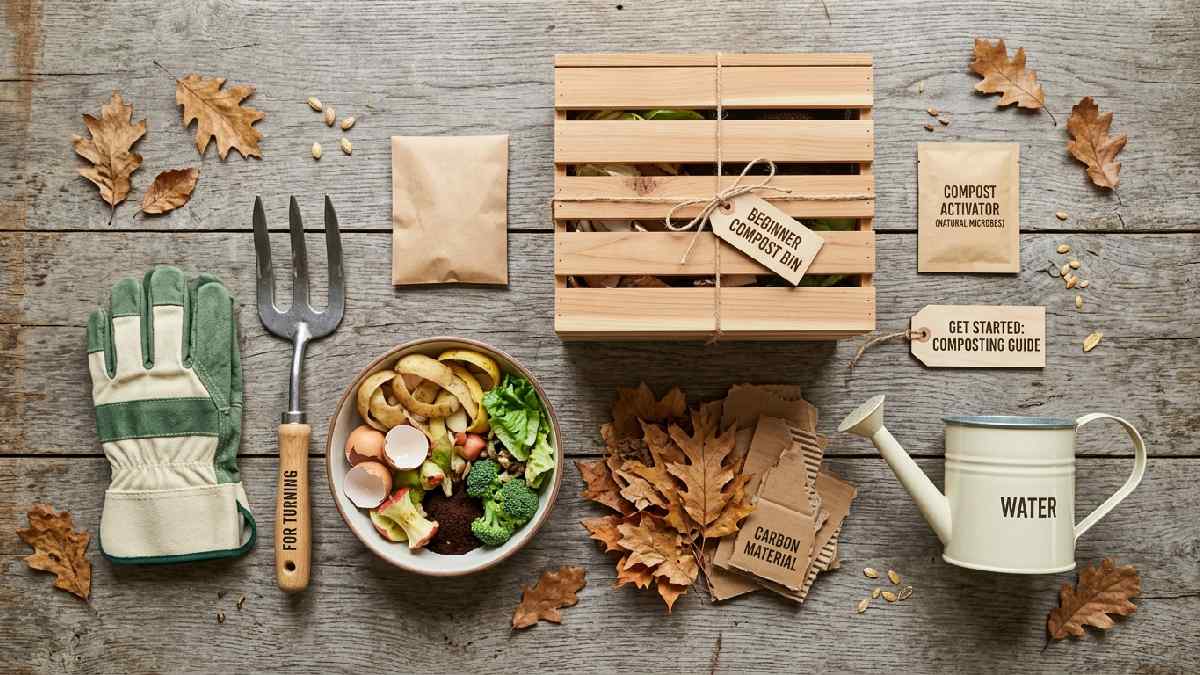
Starting to compost at home requires very little equipment. A few basic items are all you need to get going. Beginners do not need to spend a lot of money upfront.
Most materials are already available at home or can be found cheaply. This section covers the four essential things every beginner needs before adding the first scrap to their compost system.
Compost Bin or Container
Every composter needs a container to hold the materials. You can buy a purpose-made compost bin, use a large plastic container with holes drilled in the sides, or build one from wooden pallets. The container should be at least one cubic meter for outdoor composting. It needs ventilation holes for airflow and drainage at the bottom.
Compost tumblers are a popular choice as they make turning easy. For indoors, small countertop bins with charcoal filters work well. Choose a container that fits your space, budget, and the amount of waste your household generates each week.
Kitchen Waste (Green Materials)
Kitchen waste forms the nitrogen-rich green layer in your compost. These materials include vegetable and fruit peels, coffee grounds, used tea bags, eggshells, and fresh plant trimmings. Green materials are wet and break down quickly. They provide the nitrogen that microorganisms need to grow and multiply.
Collect kitchen scraps daily in a small countertop bin. Empty it into your main compost bin every two to three days. Avoid adding meat, dairy, cooked oily food, or fish to a basic home system, as these attract pests and create unpleasant odors very quickly.
Dry Leaves and Paper (Brown Materials)
Brown materials provide carbon, which balances the nitrogen from green scraps. Dry leaves, shredded cardboard, newspaper, paper bags, straw, and small wood chips are all ideal brown materials. Browns are the key to odor-free composting. Without enough browns, the pile becomes wet, smelly, and slimy.
Keep a bag of dry leaves or shredded paper near your compost bin at all times. Every time you add green kitchen scraps, add a layer of browns on top. This simple habit keeps your pile balanced, aerated, and working efficiently throughout the entire composting process each season.
Water and Airflow Requirements
Compost needs moisture and oxygen to decompose properly. The pile should feel like a damp sponge, moist but never dripping wet. If it is too dry, decomposition slows down significantly. If it is too wet, the pile becomes anaerobic and smelly very fast. Check moisture weekly and add water or dry materials as needed. Airflow is equally important.
Turning the pile every one to two weeks introduces fresh oxygen for microorganisms. Enclosed bins need ventilation holes to allow airflow at all times. Balancing moisture and airflow is the key to fast, efficient, and odor-free composting results at home.
Understanding Green and Brown Materials
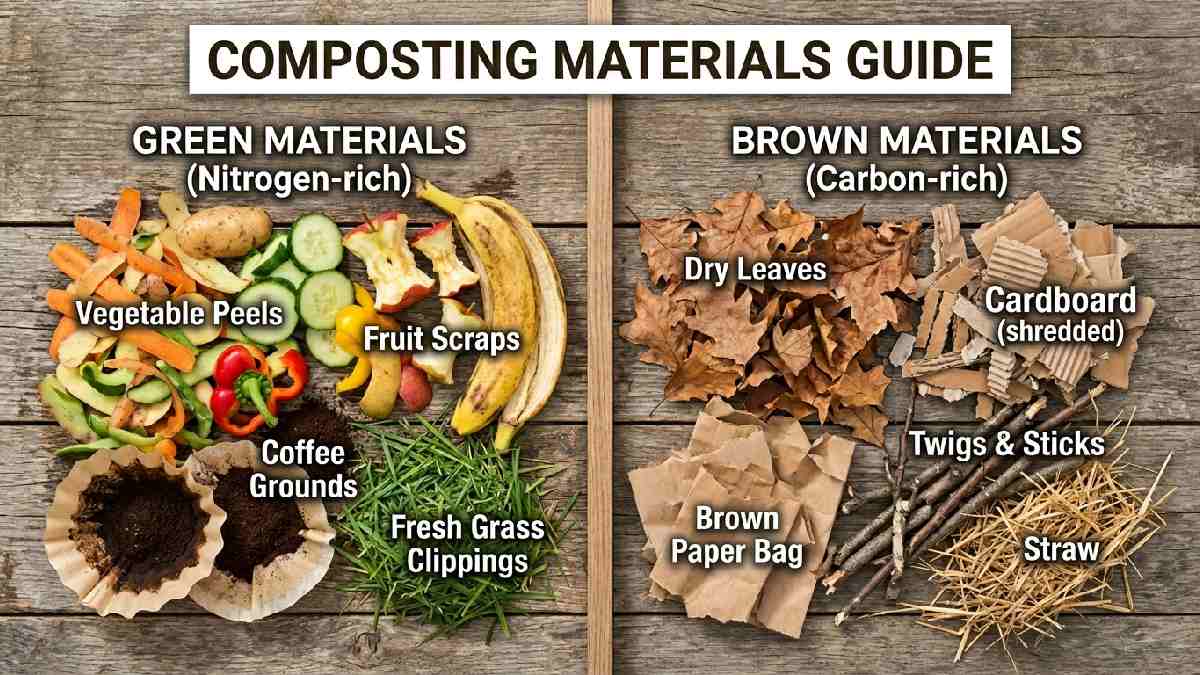
Green and brown materials are the two main ingredients in every compost pile. Getting the balance right is the most important skill in home composting. Too much of one causes problems. The right ratio creates fast, efficient, and odor-free results.
Every beginner must understand what counts as green, what counts as brown, and how to combine them correctly for the best possible outcome from their composting efforts.
What are Green Materials?
Green materials are fresh, moist, nitrogen-rich organic matter. They include fruit and vegetable scraps, coffee grounds, tea leaves, grass clippings, fresh plant trimmings, and seaweed. These materials break down quickly and release nitrogen into the compost pile. Nitrogen feeds the microorganisms that drive decomposition forward.
Without greens, the pile lacks the energy to decompose efficiently. Greens tend to be wet and compact, which is why they need to be balanced with dry brown materials. Most kitchen scraps fall into the green category, making them the easiest ingredient for any beginner starting out.
What are Brown Materials?
Brown materials are dry, carbon-rich organic matter. They include dry leaves, shredded cardboard, newspaper, straw, wood chips, paper bags, and dried plant stems. Browns provide the energy source and structure that microorganisms need for long-term decomposition. They also improve airflow within the pile by creating pockets of space between layers.
Without browns, the pile becomes dense, wet, and anaerobic. Browns absorb excess moisture and control odors naturally. They are the balancing ingredient in every successful pile. Keep a steady supply of dry leaves or shredded paper nearby for daily use during composting.
Ideal Ratio for Composting
The ideal ratio is roughly 2 to 3 parts browns to 1 part greens by volume. This ratio keeps the pile balanced, aerobic, and actively decomposing at all times. Too many greens create a wet, smelly pile that stalls quickly. Too many browns create a dry pile that decomposes very slowly and wastes time.
The ratio does not need to be perfectly exact. Aim for roughly twice as much brown material as green material. If your pile smells bad, add more browns. If it seems dry and inactive, add more greens or a little water. Adjust the balance regularly for best results.
What You Can and Cannot Compost
Knowing what to add and what to avoid is essential for every beginner. Adding the wrong materials ruins the pile, attracts pests, and creates bad odors quickly.
The right materials decompose cleanly and produce rich finished compost every time. This section gives a clear guide to what belongs in your bin and what should always be left out of any basic home composting system.
Items You Can Compost
A wide range of kitchen and garden materials can go into your compost bin. Fruit and vegetable scraps, coffee grounds, used tea bags, and eggshells are all ideal. Grass clippings, dry leaves, shredded paper, cardboard, and plant trimmings work well. Straw, wood chips, and hair can also be composted successfully.
The key rule is: if it was once living and plant-based, it likely belongs in your bin. Variety is beneficial as it creates a richer, more diverse final product. The more types of organic material you add, the more balanced and nutrient-rich your finished compost will be each season.
Items You Should Avoid Composting
Some materials do not belong in a basic home compost system. Avoid meat, fish, bones, and dairy products as they rot badly and attract rats and other pests. Do not add cooked food with oils, grease, or heavy seasoning. Diseased plants should stay out of the pile to prevent spreading illness through finished compost.
Pet waste and human waste carry harmful pathogens and must always be excluded. Glossy or heavily printed paper should also be avoided. Coal ash, synthetic materials, and anything treated with pesticides harm the beneficial microorganisms essential for efficient and safe composting at home.
Step-by-Step Guide to Composting at Home
Following a clear step-by-step process makes composting simple and successful for every beginner. Each step builds on the last. Skip a step, and results suffer noticeably.
Follow all seven steps, and you will produce rich, finished compost within a few months. This is the most practical section for anyone learning how to compost at home, for beginners, most effectively and efficiently possible.
Step 1: Choose a Composting Method
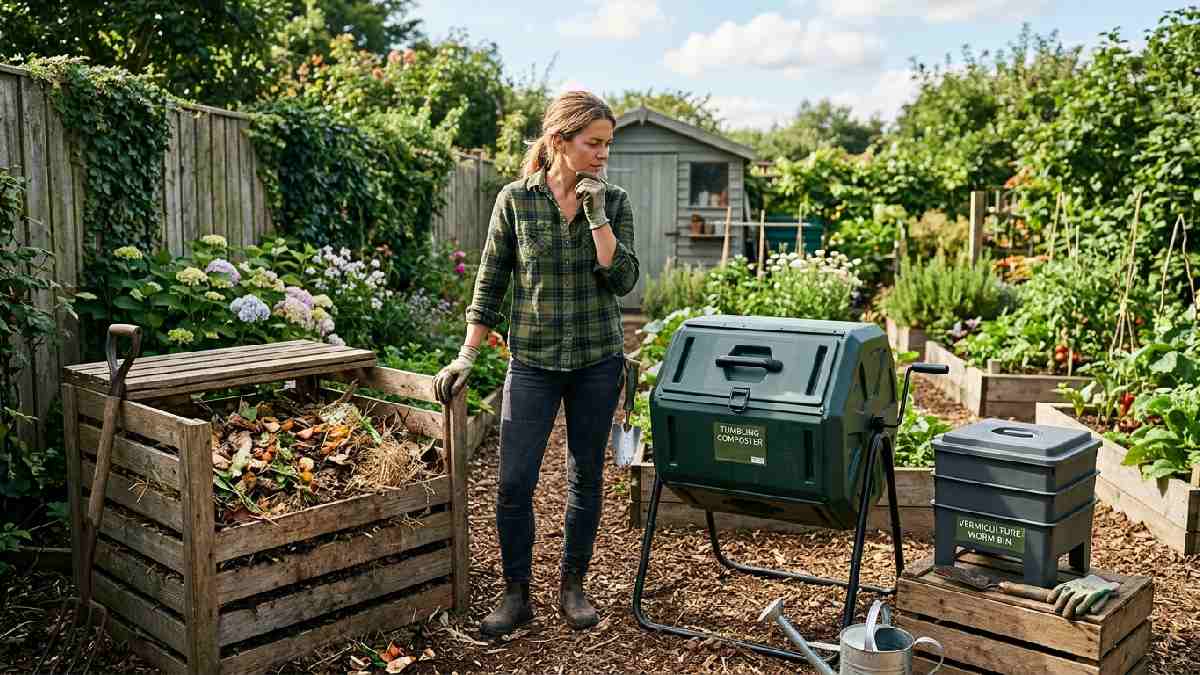
The first step is deciding which method suits your space and lifestyle best. Backyard composting suits homes with outdoor space. Compost tumblers work well for faster results and easy turning. Vermicomposting uses worms and is ideal for apartments and small spaces. Bokashi is perfect for composting cooked food and meat scraps.
Each method has different requirements and timelines. Choose one that matches your available space, time, and goals. Beginners often start with a simple backyard bin or countertop collection system and upgrade their setup as confidence and experience grow over time.
Step 2: Pick the Right Location
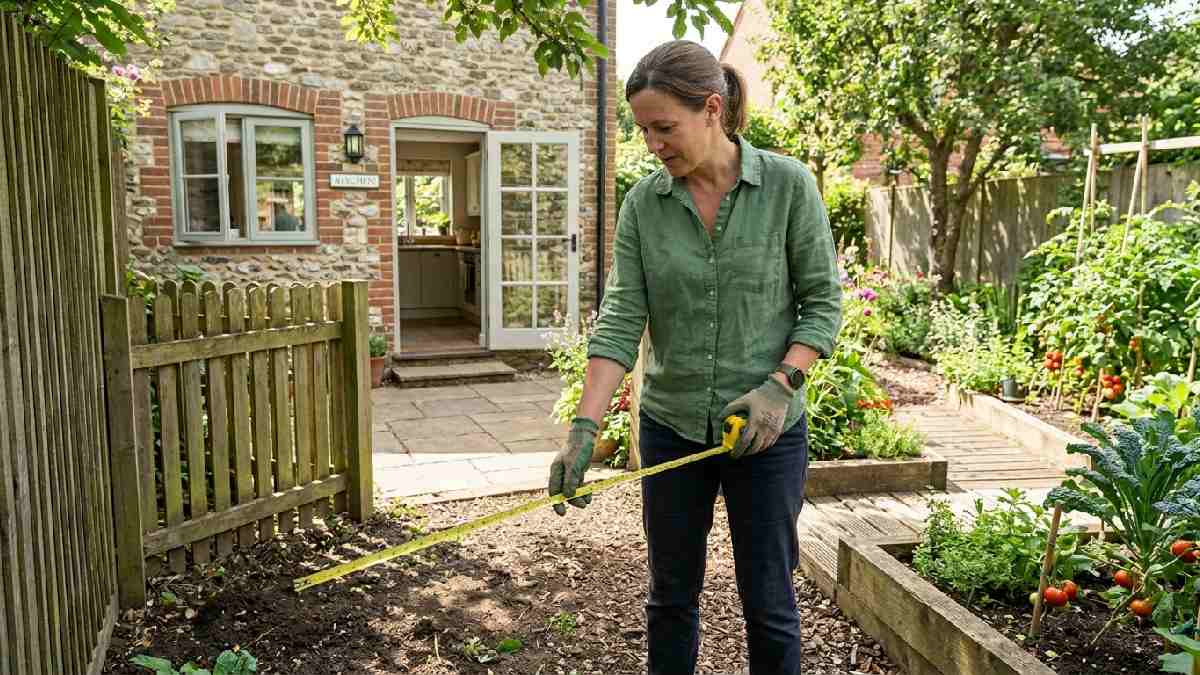
Location matters a great deal for outdoor composting success. Choose a spot with partial shade, good drainage, and easy access from your kitchen door. Too much direct sun dries out the pile quickly. Too much shade slows decomposition significantly. The bin should sit on bare soil so worms and beneficial organisms can enter naturally from below.
Keep it away from fences, walls, and areas where water pools after heavy rain. For indoor composting, choose a spot under the sink, on a countertop, or in a well-ventilated kitchen corner. Good placement makes daily maintenance much easier and more consistent for long-term success.
Step 3: Add Brown Materials First
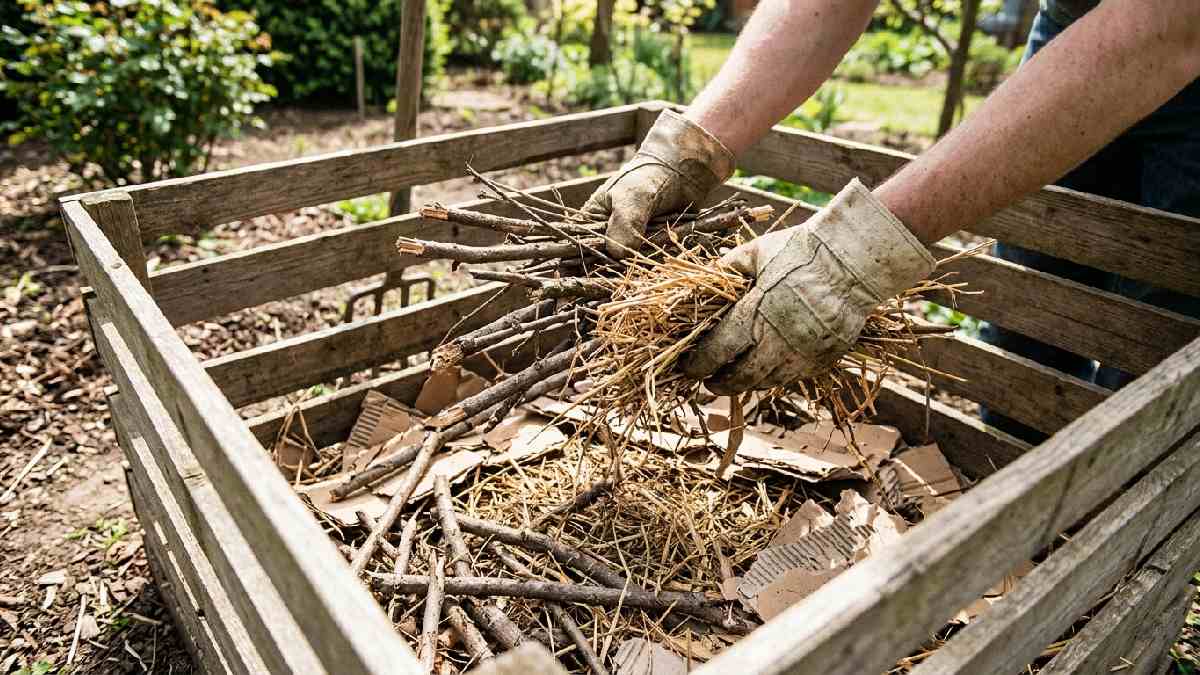
Always start your compost bin with a layer of brown materials at the bottom. Use dry leaves, shredded cardboard, or wood chips to create a 4 to 6-inch base layer first. This base layer improves drainage, allows airflow from below, and creates the carbon foundation your pile needs.
It also prevents wet kitchen scraps from sitting directly on the container base and rotting anaerobically. Think of browns as the structural support for everything added on top. This simple first step sets up your entire system for long-term success and faster breakdown of all materials added throughout the season.
Step 4: Add Green Materials
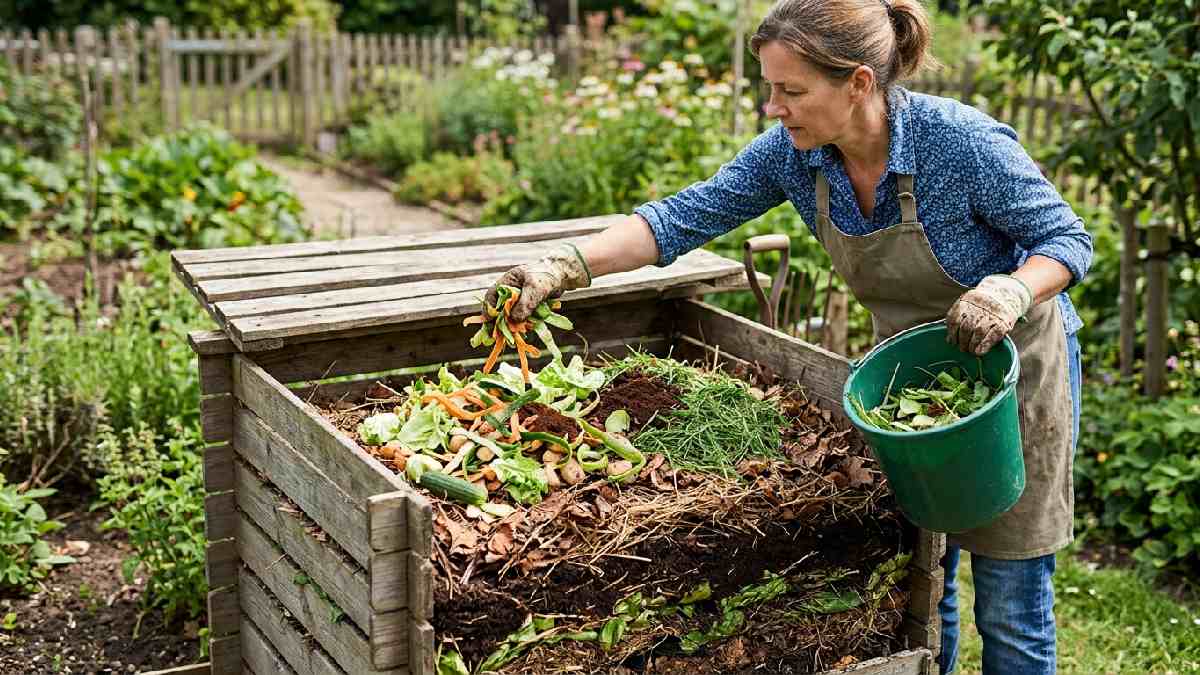
After your brown base layer, begin adding green kitchen scraps and fresh garden waste in layers. Layer greens on top of the browns in 2 to 3-inch sections. Alternate between green and brown layers as you build the pile over time. Think of it like building a lasagna with alternating layers. Green materials add nitrogen and moisture.
Browns add carbon and structure. Alternating layers keep the pile balanced and aerobic. Chop or shred materials into smaller pieces before adding for faster breakdown. Smaller pieces expose more surface area to microorganisms, speeding the entire process up significantly throughout every season.
Step 5: Maintain Moisture and Airflow
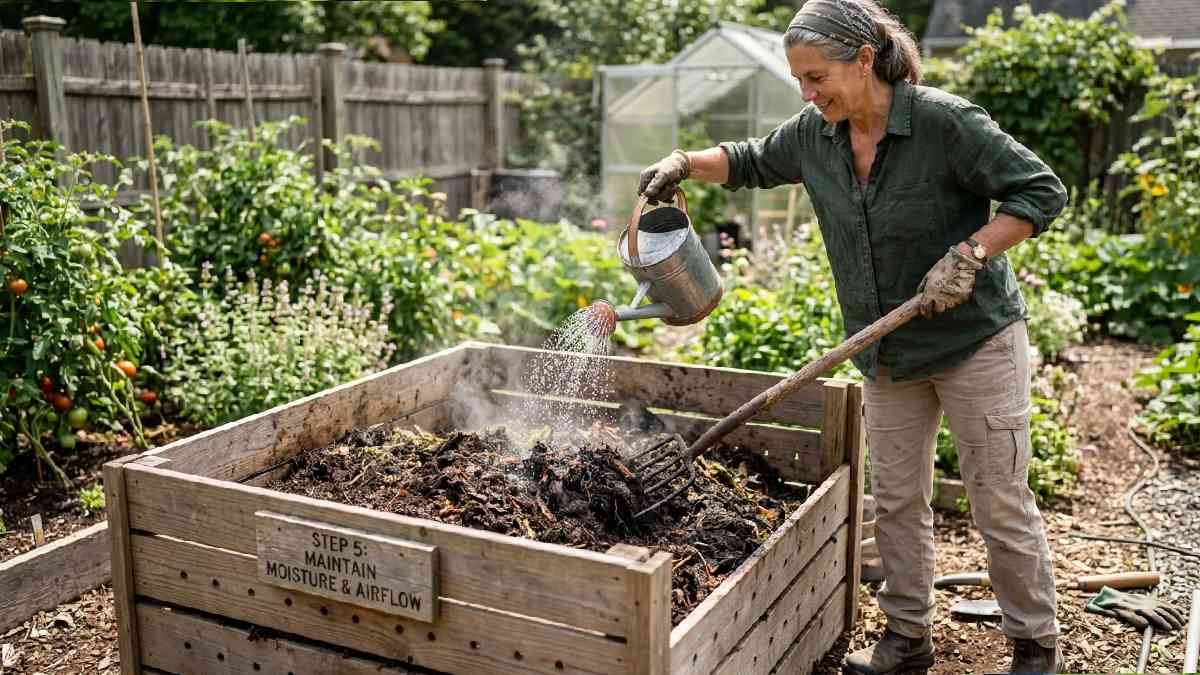
Once your pile is building, maintaining moisture and airflow becomes the main weekly priority. The pile should feel like a damp sponge at all times throughout the process. Check it weekly by squeezing a handful from the center. If water drips out, add more browns. If it feels completely dry, add water or more green scraps right away.
Moisture keeps the microorganisms alive and active at all times. Airflow prevents the pile from going anaerobic. Make sure your bin has ventilation holes on multiple sides. If using an open pile, ensure it is not packed too tightly at any point during the composting process.
Step 6: Turn the Compost Regularly
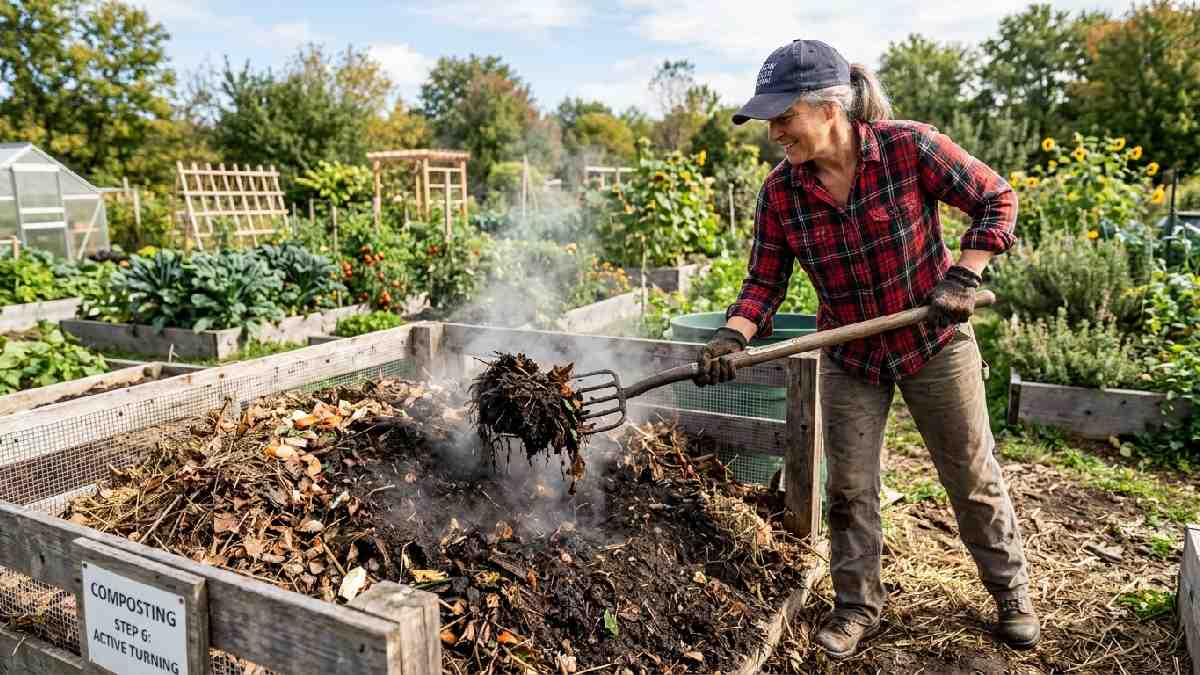
Turning the compost pile introduces oxygen and speeds up decomposition significantly every time. Use a garden fork, shovel, or compost aerator to turn the pile every one to two weeks consistently. Move outer materials toward the center where heat builds up most intensely. This ensures all materials get exposure to the active decomposition zone inside the pile.
Tumblers make turning very easy with a simple rotation of the drum. Turning also prevents the pile from compacting and going anaerobic. A well-turned pile can produce finished compost in as little as two to three months with consistent weekly attention and care.
Step 7: Know When Compost is Ready
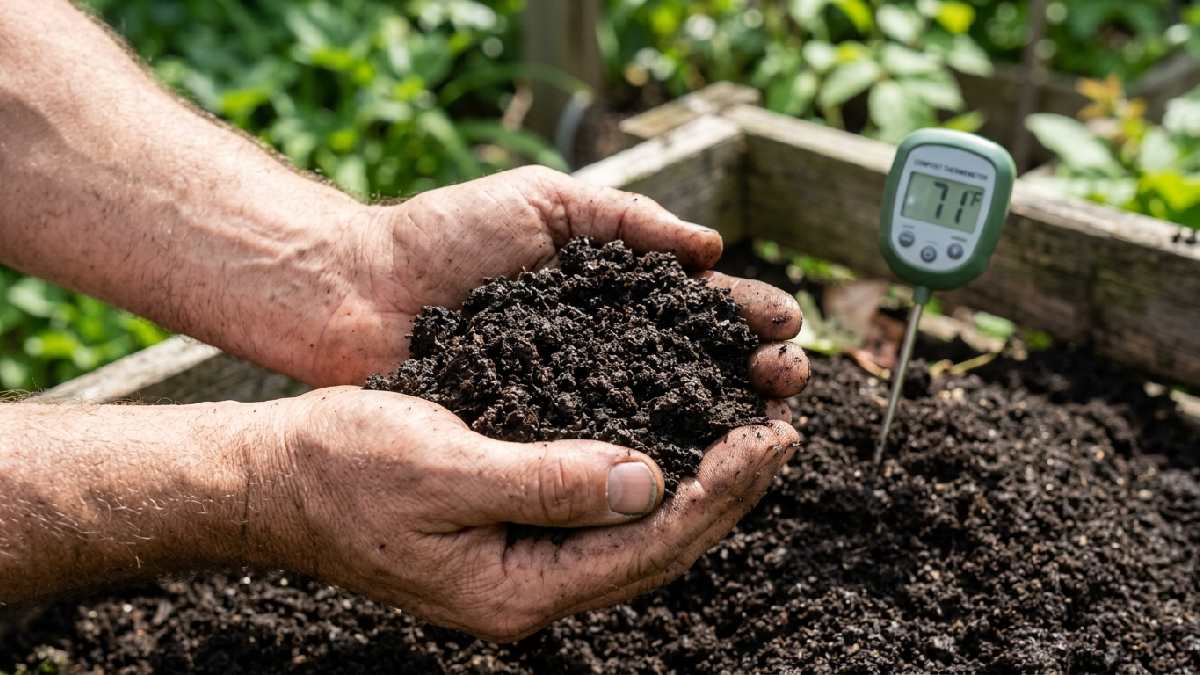
Finished compost is dark brown, crumbly, and smells like rich forest soil after rain. You should not be able to identify any original food scraps or plant materials in the finished mix. If you can still see recognizable pieces of vegetable peel or leaves, the pile needs more time.
Check the bottom of an open pile first, as older materials settle and decompose there first. The texture should be uniform and soil-like throughout the entire batch. If it passes the smell and texture test, it is ready to use. Always wait until decomposition is fully complete before applying finished compost to your garden plants.
Different Composting Methods for Beginners
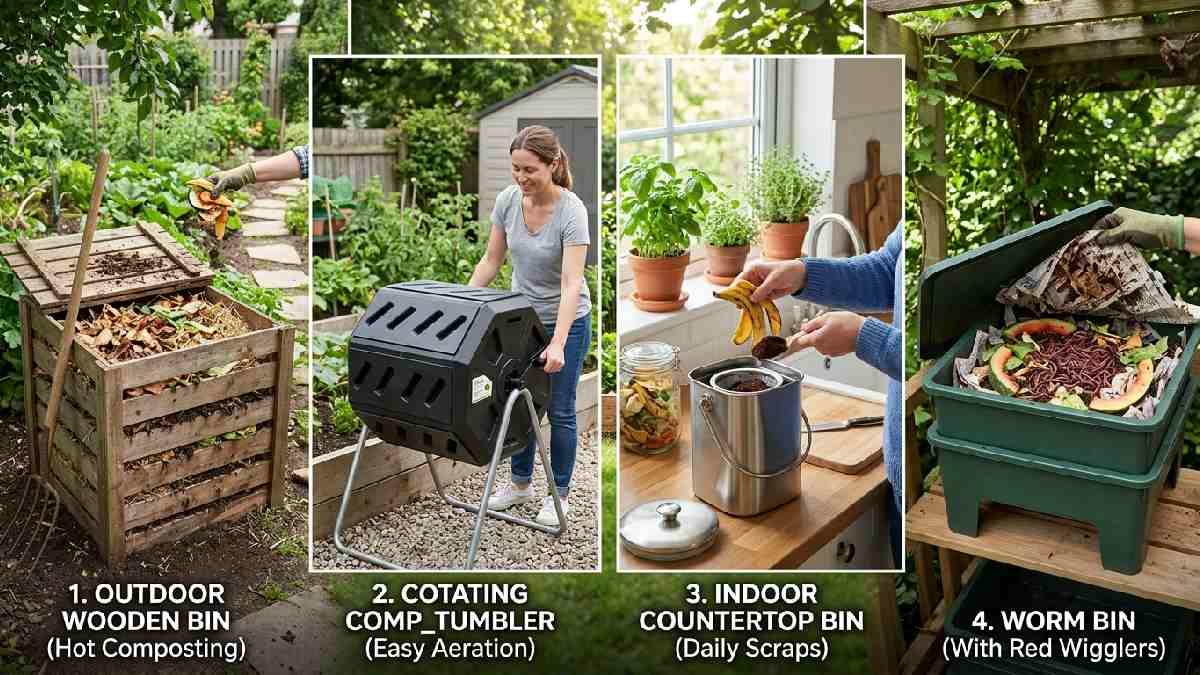
There are several composting methods available to beginners today. Each has its own advantages, timeline, and space requirements. Choosing the right method depends on your living situation, available space, and what types of waste you generate most.
All four methods described below are widely used in homes around the world and are suitable for people starting out with composting for the very first time.
Backyard Composting
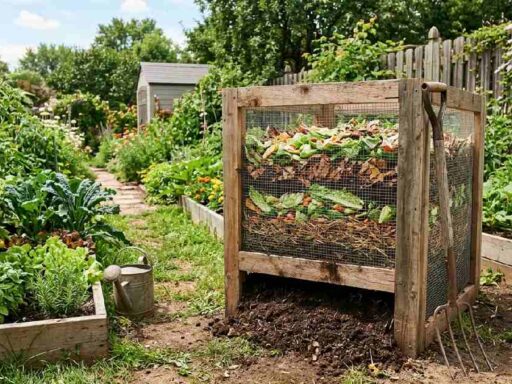
Backyard composting is the most traditional and widely used method for homes with outdoor space available. Set up a compost bin or open pile in a shaded corner of your yard. Layer green and brown materials and turn the pile every one to two weeks. Backyard composting handles large volumes of kitchen scraps and garden waste easily.
It requires minimal investment and produces large amounts of rich compost over time. Results typically arrive in two to six months depending on how actively the pile is managed. It is the best starting point for any homeowner wanting a simple, low-effort approach.
Compost Tumbler Method
A compost tumbler is a sealed drum mounted on a rotating frame. Load it with green and brown materials and spin it every few days to aerate. The enclosed design keeps pests out and heats up faster than open piles. Tumblers produce finished compost in as little as four to six weeks with regular turning.
They are clean, odor-resistant, and easy to use in smaller yards or patios. The main downside is limited volume compared to open outdoor bins. Tumblers work best for households that generate moderate amounts of kitchen and garden waste and want faster results with minimal daily effort throughout every growing season.
Vermicomposting (Worm Composting)
Vermicomposting uses red wiggler worms to break down food scraps into rich worm castings. Set up a worm bin with moist bedding, add kitchen scraps regularly, and let the worms do all the work. Worm castings are one of the most nutrient-dense soil amendments available to any gardener. This method is perfect for apartments and small homes as it requires very little floor space.
The bin is odor-free when managed correctly. Worms eat fruit and vegetable scraps, coffee grounds, and paper products. Avoid adding citrus, onion, and spicy foods in large quantities. Vermicomposting produces both solid castings and liquid fertilizer that plants love greatly.
Bokashi Composting
Bokashi is a Japanese fermentation method that uses beneficial microorganisms to process food waste. Add all kitchen scraps, including cooked food, meat, and dairy, into a sealed Bokashi bucket. Sprinkle Bokashi bran between layers to activate fermentation naturally. The process takes about two weeks and produces a fermented material that can be buried in soil or added to a compost bin.
Bokashi does not produce finished compost on its own, but pre-digests waste very efficiently with no odor. It is ideal for households that generate cooked food scraps and want to use every bit of kitchen waste productively without anything going to landfill.
Composting in Small Spaces (Apartments)
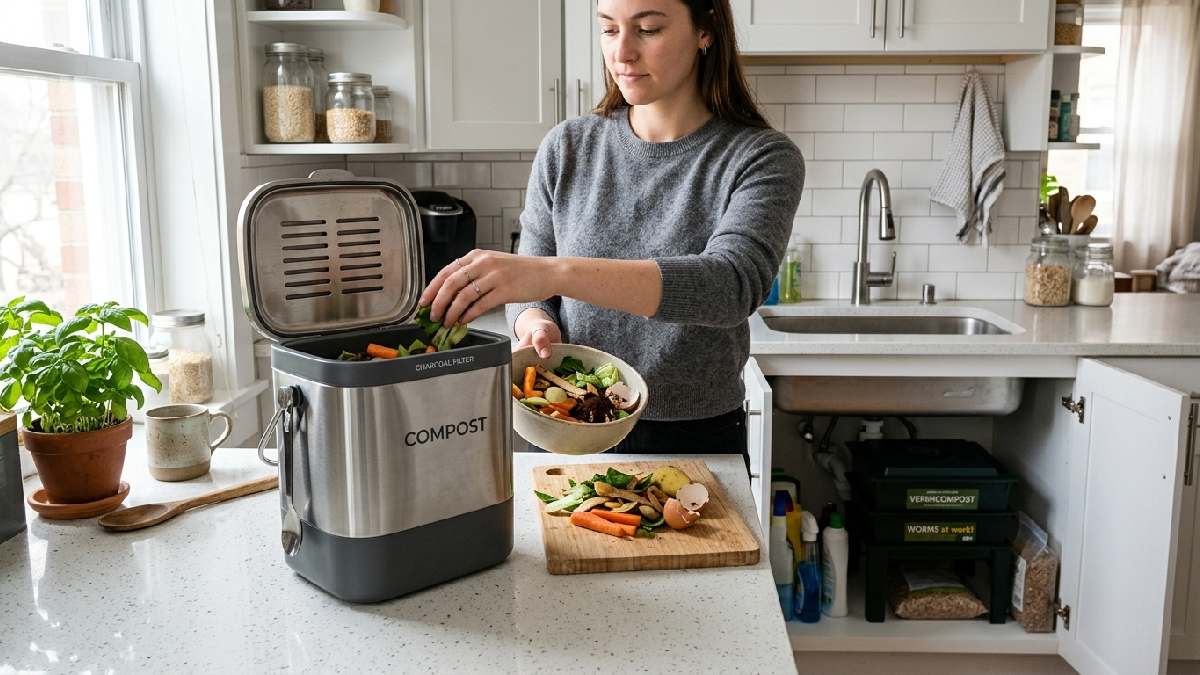
Living in an apartment does not mean you cannot compost at all. Many effective methods work perfectly in small spaces without any outdoor access required. Indoor composting options have improved greatly in recent years. Beginners in apartments can compost just as successfully as those with large backyards.
This section covers the best options for small-space composting, including indoor bins, balcony setups, and practical tips for keeping everything completely odor-free throughout the year.
Indoor Composting Options
Several excellent indoor composting options suit apartment living perfectly. Countertop compost bins with charcoal-filtered lids collect kitchen scraps daily without any odor. Worm bins fit under sinks or in closets and process food scraps continuously. Electric composters turn scraps into dry fertilizer powder within hours.
Bokashi buckets ferment all food waste in sealed containers very efficiently. Indoor bins work best when emptied into a larger outdoor system or municipal collection point every few days. Many cities now offer curbside composting collection for apartment residents. Indoor composting requires slightly more attention to odor control but is very manageable with the right equipment.
Balcony Composting Setup
A balcony is enough space to set up a productive compost system at home. Use a small sealed tumbler or compact bin that fits neatly in a corner of your balcony. Choose a bin with tight-fitting lids to manage odors and keep out insects effectively. Place the bin in a shaded spot away from direct sunlight to prevent overheating and excessive drying.
Collect scraps indoors and add them to the balcony bin daily. Keep a supply of dry browns like shredded paper nearby to balance each kitchen scrap addition. Balcony composting produces small but very useful batches of compost perfect for container plants throughout every growing season.
Odor-Free Composting Tips
Odor is the biggest concern for apartment and indoor composters worldwide. A well-managed bin should never smell unpleasant at any time. Always balance green scraps with equal or greater amounts of dry brown materials. Never add meat, fish, or dairy to a basic home system. Keep the bin sealed between each addition of fresh scraps.
Empty countertop collection bins every two to three days before scraps begin to ferment. Use activated charcoal filters on all indoor bins. Add a layer of shredded paper every time you add food scraps to cover them. A properly balanced bin smells earthy and clean, never rotten or unpleasant in any way.
Common Composting Mistakes to Avoid
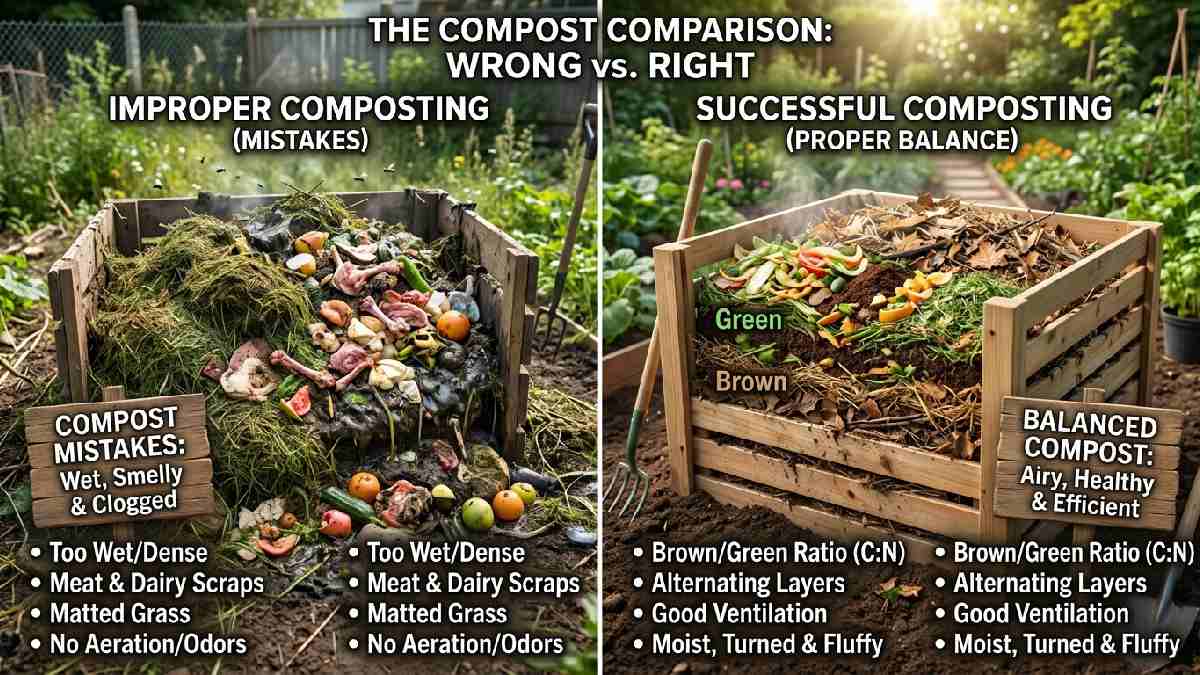
Even small mistakes can slow down or ruin a compost pile entirely. Knowing the most common errors helps beginners avoid them from the very start. Most problems are easy to fix once correctly identified.
The following four mistakes are the most frequently made by new home composters and the simplest to correct with a few small adjustments to your regular daily and weekly routine throughout the composting season.
Adding Too Many Green Materials
Adding too many green materials creates a wet, dense, and smelly pile that stalls quickly. Greens are nitrogen-rich and moist by nature. When they dominate the pile, anaerobic bacteria take over and produce foul odors fast. The pile becomes slimy and attracts flies and other unwanted pests.
Fix this immediately by adding large amounts of dry brown materials like shredded cardboard or leaves. Mix thoroughly to distribute moisture evenly throughout. Going forward, always match each kitchen scrap addition with at least an equal volume of dry brown material. This simple habit prevents overloading the pile with nitrogen-rich greens.
Not Adding Enough Browns
Not adding enough brown materials is as problematic as adding too many greens at once. Without sufficient carbon from browns, the pile becomes waterlogged and loses its structure quickly. Decomposition slows significantly and may stop entirely. The pile compacts and blocks airflow, causing unpleasant anaerobic conditions throughout the bin.
Always keep a supply of dry materials near your bin at all times. Shredded newspaper, dry leaves, cardboard, and straw all work well. Make it a daily habit to add browns every time you add food scraps. Keeping the two-to-one brown-to-green ratio consistent ensures your pile stays active and productive.
Overwatering the Compost
Adding too much water to a compost pile kills beneficial microorganisms and creates anaerobic conditions quickly. An overwatered pile becomes slimy, cold, and very smelly within days. It stops decomposing actively and may need to be rebuilt. Check moisture levels weekly by squeezing a handful of material from the center.
It should feel like a wrung-out sponge, moist but never dripping water. If water runs out when you squeeze it, the pile is far too wet. Add dry brown materials immediately and mix thoroughly throughout the pile. In rainy climates, always cover outdoor bins with a secure lid or tarp to prevent excessive saturation during heavy rainfall.
Ignoring Airflow
Compost needs consistent oxygen to decompose aerobically and efficiently. When airflow is ignored, the pile goes anaerobic and produces foul-smelling gases rapidly. Dense, compacted piles prevent air from circulating properly between layers of materials. Always ensure your bin has ventilation holes on all sides for constant air exchange.
Turn the pile regularly every one to two weeks to introduce fresh oxygen throughout the entire system. If using a covered bin, open it periodically to let fresh air in. Chop or shred large materials before adding to prevent dense clumping. A well-aerated pile stays warm, active, and odor-free throughout the entire composting process at home.
How Long Does Compost Take?
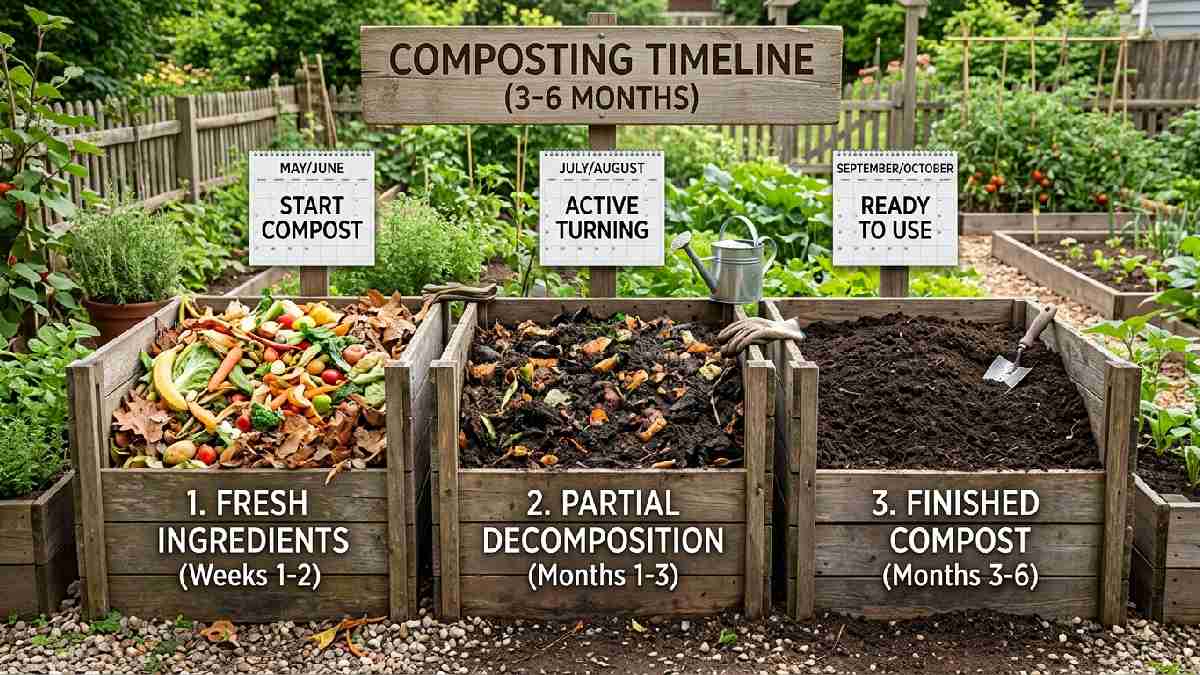
Composting time varies depending on the method used, the materials added, and how actively the pile is managed. Beginners often wonder how long they need to wait before their compost is ready.
The answer ranges from a few weeks to several months. Understanding the factors that influence composting speed helps you choose the right method and manage your pile for the fastest possible results throughout every season.
Fast Composting Methods
Hot composting and compost tumblers produce finished results the fastest. Hot composting involves building a large pile all at once, maintaining high moisture, and turning it every few days. Temperatures inside rise high enough to speed decomposition dramatically. Finished material can appear in as little as four to six weeks with proper hot composting technique.
Tumblers also produce results quickly due to easy turning and good heat retention inside the drum. Vermicomposting also produces castings relatively fast compared to cold methods. All fast methods require more active management, including regular turning, moisture monitoring, and careful material balancing to maintain optimum conditions throughout.
Slow Composting Methods
Slow or cold composting requires minimal effort but takes significantly longer to produce usable results. Simply pile up organic materials and let nature work at its own natural pace. No turning or active management is needed for this passive method. This approach takes six months to two full years to produce finished compost.
It is ideal for those who have plenty of time and generate mostly dry garden waste throughout the year. Cold composting does not kill weed seeds or pathogens as effectively as hot methods do. However, results are still very high quality and useful in any garden setting for improving soil structure.
Factors That Affect Composting Time
Several key factors influence how quickly your pile produces finished material. Particle size matters greatly for speed. Smaller pieces break down much faster than large chunks of material. Turning frequency is also critical to the timeline. More frequent turning always means faster decomposition. Moisture levels must stay consistently correct throughout the process.
Both too dry and too wet conditions slow the process down noticeably. The green-to-brown ratio affects speed significantly every season. A balanced pile always decomposes faster than an unbalanced one. Temperature plays a major role too. Warmer weather speeds up all microbial activity. Cold winters slow things down considerably.
How to Use Finished Compost
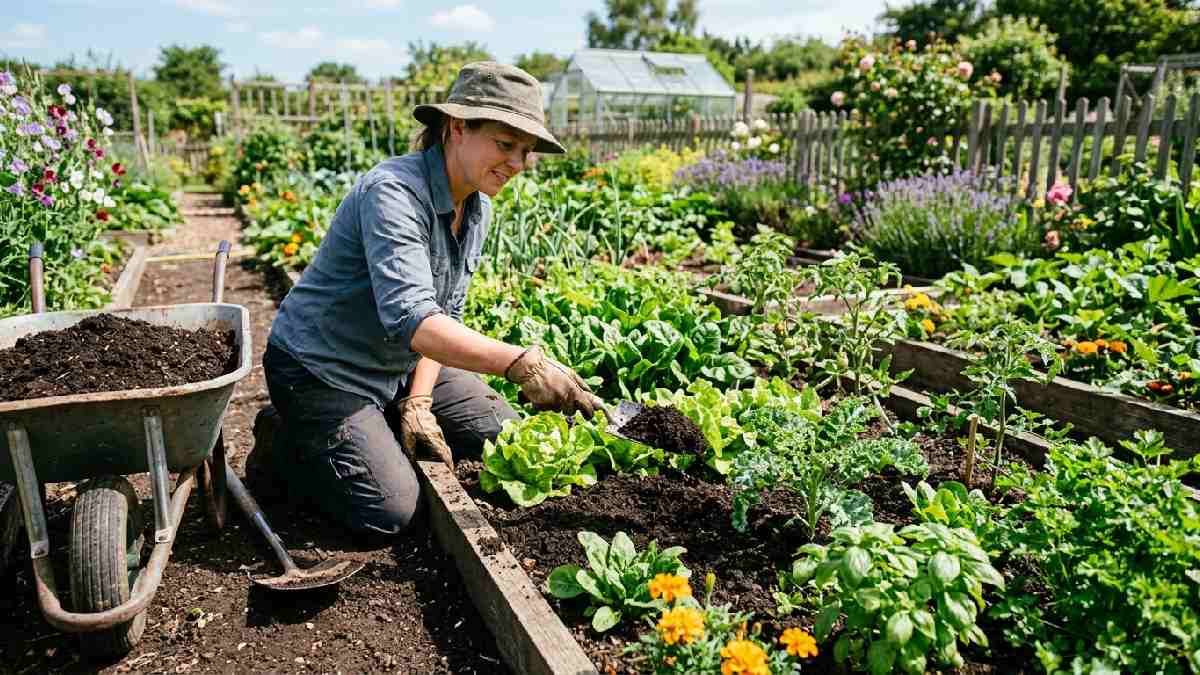
Once your compost is ready, it is time to put it to work in your garden. Finished compost improves almost every type of growing situation imaginable. Whether you have a vegetable garden, indoor houseplants, or container plants on a balcony, compost delivers noticeable improvements quickly.
This section explains the best practical ways to use your finished compost for maximum benefit in different growing situations at home throughout the year.
For Vegetable Gardens
Finished compost is ideal for vegetable gardens of every size. Spread a 2 to 4-inch layer of compost over your garden beds and mix it into the top 6 inches of soil before planting begins. This improves drainage, adds nutrients, and boosts microbial activity in the soil significantly.
Tomatoes, cucumbers, leafy greens, and root vegetables all respond beautifully to compost-enriched growing conditions. Reapply compost each season to maintain soil quality over time. You can also use it as a top dressing around established plants during the active growing season to provide a continuous slow-release nutrient feed.
For Indoor Plants
Indoor plants benefit greatly from finished compost as well. Mix compost into your regular potting soil at a ratio of about one part compost to three parts potting mix. This enriches the growing medium and reduces the need for liquid fertilizers throughout the year. Compost improves moisture retention in pots, which is especially helpful for busy plant owners who may miss occasional watering.
Use it when repotting houseplants or refreshing tired, nutrient-depleted soil in existing containers. Only use fully finished, dark, and crumbly compost indoors. Even a small amount mixed into potting soil produces visible improvements in plant growth, vigor, and leaf color very quickly.
For Container Gardening
Container gardening on balconies and patios benefits enormously from homemade compost added to the growing mix. Mix finished compost into your container potting mix to add fertility and improve water retention in every pot. Top-dress existing containers by adding a thin layer of compost on the soil surface each month during the growing season.
It acts as a slow-release fertilizer that feeds plants gently and consistently. Compost also helps prevent soil compaction in containers, which improves root health over time. For herbs, salad greens, and flowering container plants, compost-enriched soil consistently produces better results and healthier, more productive plants throughout the entire growing season.
Frequently Asked Questions (FAQs)
Can I compost in an apartment?
Yes. Use a countertop bin, worm bin, or Bokashi bucket indoors. These methods are compact, odor-free, and perfect for apartment living without outdoor space.
Does compost smell bad?
A well-managed compost bin should not smell bad. Balanced greens and browns with proper airflow keep odors completely under control at all times.
How often should I turn compost?
Turn your compost pile every one to two weeks. More frequent turning speeds up decomposition and prevents bad odors from developing inside the pile.
What is the fastest way to make compost?
Hot composting with frequent turning every few days is the fastest method. It produces finished compost in as little as four to six weeks of active management.
Can I compost cooked food?
Basic home systems should avoid cooked food. Bokashi composting is the best method for handling cooked food, meat, and dairy scraps efficiently at home.
Conclusion
Learning how to compost at home for beginners is one of the most rewarding sustainable habits you can start today. Composting reduces waste, improves soil, saves money, and helps the environment every single day. You do not need a big garden or expensive equipment to begin. Start with a simple bin, balance your greens and browns, and maintain proper moisture and airflow consistently.
Choose a method that fits your space and lifestyle. Avoid common mistakes and turn your pile regularly for best results. In just a few months, you will have rich, dark compost ready to feed all your plants. Start today and transform kitchen scraps into garden gold.