Step, by, Step Guide on How to Grow Microgreens Hydroponically at Home
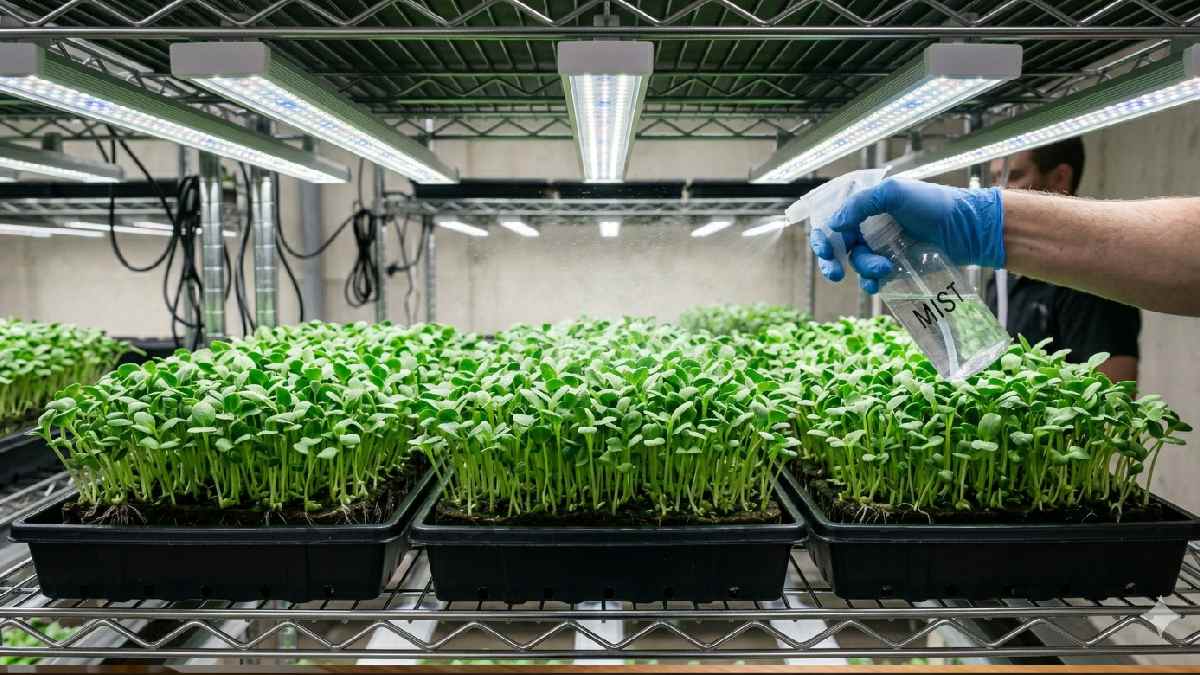
I start with a clean tray, nothing fancy, just something flat on the table. A hydro mat goes inside. I press it gently so it sits evenly. Seeds are scattered slowly, not crowded, learned that mistake early. A light mist of water keeps everything damp but not soaked. The tray goes into darkness for a few days; I usually cover it loosely.
Roots begin forming quietly, nothing visible above yet. After that, I move it into the light, window, or LED; both work fine. Green starts showing, small at first, then quickly more. I check moisture daily, small adjustments only. In about a week or two, I will harvest fresh microgreens easily.
What Are Hydroponic Microgreens?
I tried growing without soil once. Just a tray, a mat, and water underneath. Seeds sat quietly at first. Then roots dropped down, touching moisture. Leaves popped up fast, cleaner than before. No dirt, no mess around. Growth felt controlled, almost too neat.
Beginners notice changes quickly. Water needs balance, not too much, not too little. Nutrients are sometimes added, and shoots respond fast. Kitchen corners look fresh and organized. Effort small, reward big. Tiny greens, huge impact.
Definition of Microgreens
Microgreens are young vegetable or herb plants harvested very early. I usually see them just after the first leaves appear, still small but full of color. They are not sprouts and not fully grown plants either, something in between. Grown in soil, coco coir, or hydroponic mats, they develop fast under light.
Leaves look soft, stems thin but strong enough to stand. Flavor is more intense than that of mature greens. People harvest them in 7 to 14 days, depending on the type. They are eaten fresh, often used on salads or simple meals, and small greens have a strong impact.
What Does Hydroponic Growing Mean?
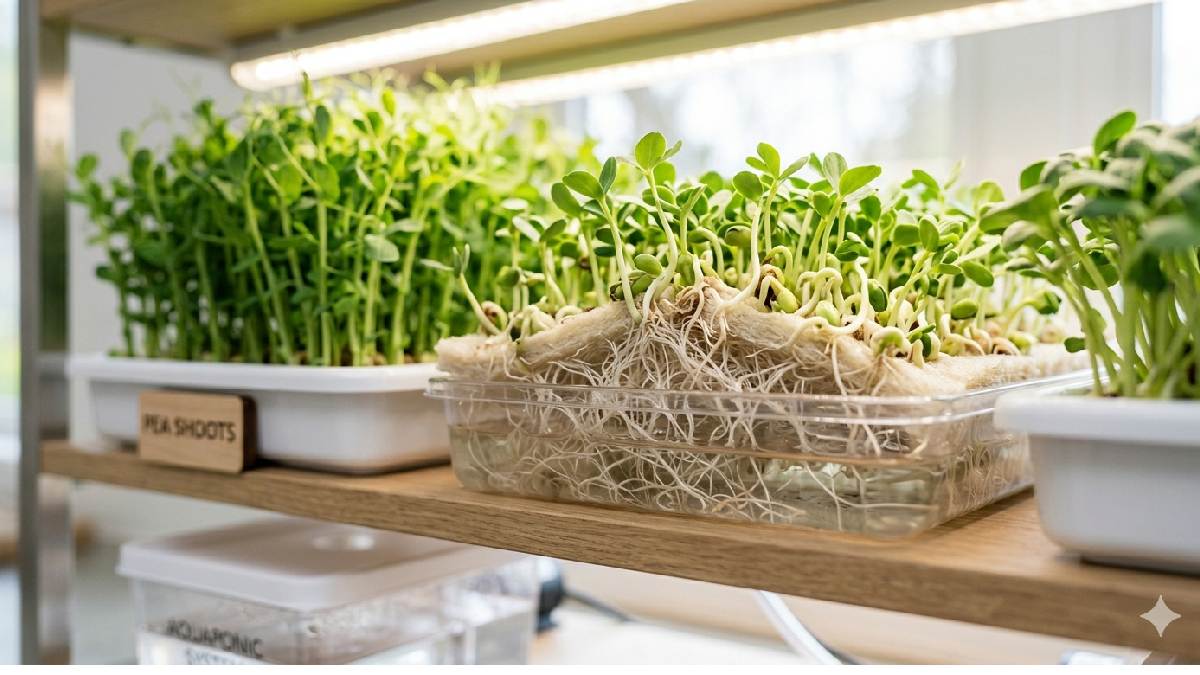
Hydroponic growing means plants grow without soil. I first saw it as something complicated, but it’s actually simple. Roots sit in water or a moist medium instead of dirt. Nutrients go directly into water, and plants take what they need. In my setup, I use trays and mats, seeds rest on top, roots hang below.
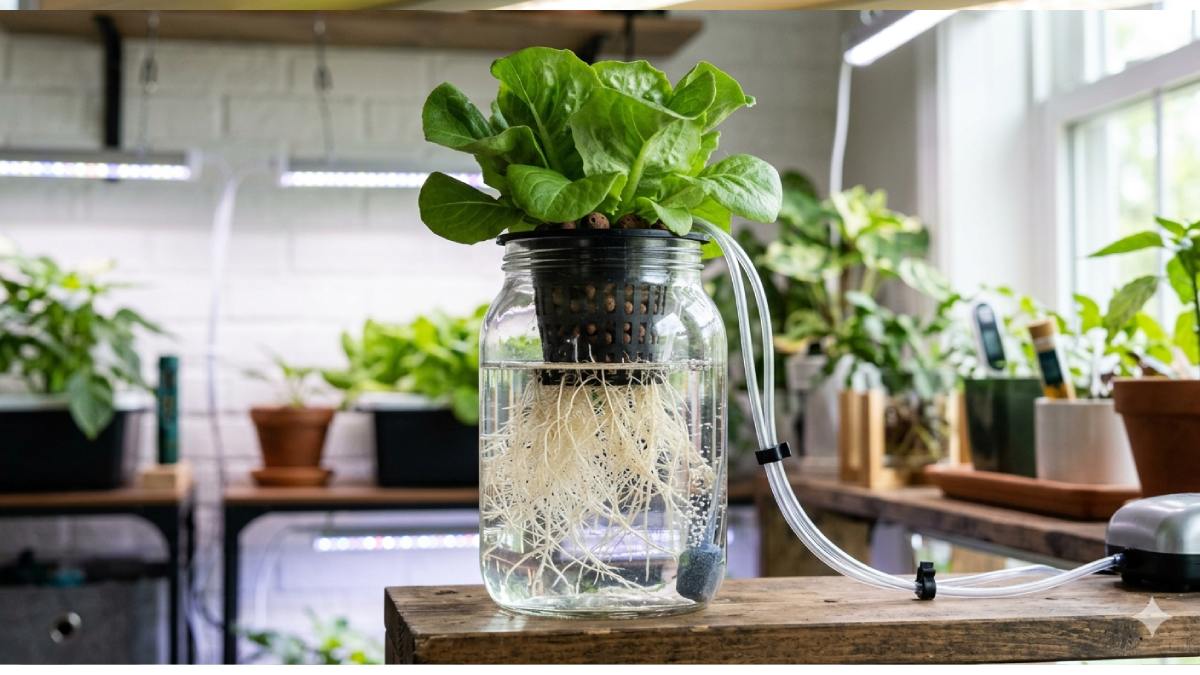
No digging, no soil mess, everything stays clean. Growth feels controlled, almost precise. Beginners find it strange at first, but it becomes normal quickly. It’s just water, light, and seeds working together in a small indoor system.
Difference Between Soil and Hydroponic Microgreens
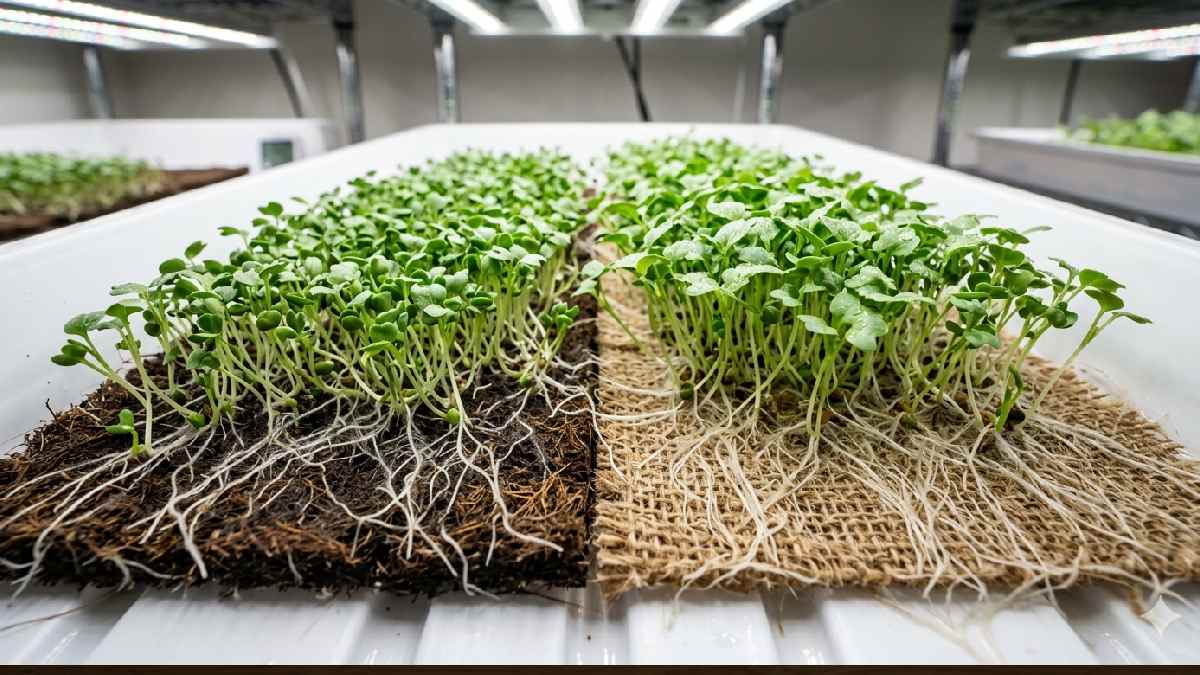
I tried both soil and hydroponic setups at home, and the difference shows quickly. Soil microgreens feel more traditional, roots dig into the medium, growth looks natural but a bit messy. Hydroponic ones stay cleaner, roots hang in water or a mat, and no soil sticks anywhere. Soil holds nutrients inside itself; sometimes, growth feels slower depending on the mix.

Hydroponics gives direct control, and water and nutrients reach faster. Soil trays need more cleanup; bits are everywhere after harvest. The hydroponic setup stays neat and easy to reset. Beginners usually notice that hydroponics feels simpler, less guesswork overall, more controlled indoor growing experience.
Benefits of Growing Microgreens Hydroponically
I switched to water-based growing one day. No soil mess on the counter. Trays stayed clean, roots hanging below. Growth looked faster, leaves brighter. Water is easy to control. Beginners notice the difference quickly. Fewer pests around, fewer surprises.
Nutrients go straight to roots, and shoots respond fast. Space feels organized, almost minimal. Shelf setups look neat. Mist lightly, check water level. Effort small, reward big. Kitchen corners turn fresh. Tiny greens grow steadily. Flavor stays sharp. Each tray tells a story.
Faster Growth Cycle (7to 14 Days)
Hydroponic microgreens grow fast; sometimes it feels unreal. I plant seeds, forget for a bit, then suddenly green shows up everywhere. Most trays finish in 7 to 14 days, depending on seed type. Radish comes quickly, broccoli steadily, pea shoots take a bit longer, but still fast compared to normal plants.
Every day brings visible change, not like traditional gardening, where you wait months. Beginners like this part the most; instant feedback keeps interest alive. Mist light, give good light, they just keep pushing up. Short cycle makes it addictive, honestly.
No Soil, Less Mess
Hydroponic microgreens feel clean from the start. No soil spilling around, no heavy cleanup after watering. I used to grow in soil before; the table was always messy, tiny bits everywhere. Now it’s just trays, mats, water, a very simple setup. Everything stays neat on the counter, even after harvest.
Roots hang below, not scattered in dirt. Beginners notice this quickly: less stress, less cleaning. You just rinse trays, dry them, and reuse them. Kitchen stays organized, almost calm. Small setup, big difference. Growing feels easier when the mess is not part of the process anymore.
Uses Less Water
Hydroponic microgreens use very little water compared to soil gardening. I noticed it when I first measured it, trays stay moist with just small refills. No soaking, no heavy watering sessions. Roots take only what they need from the mat below. Most water stays inside the system, with very little waste.
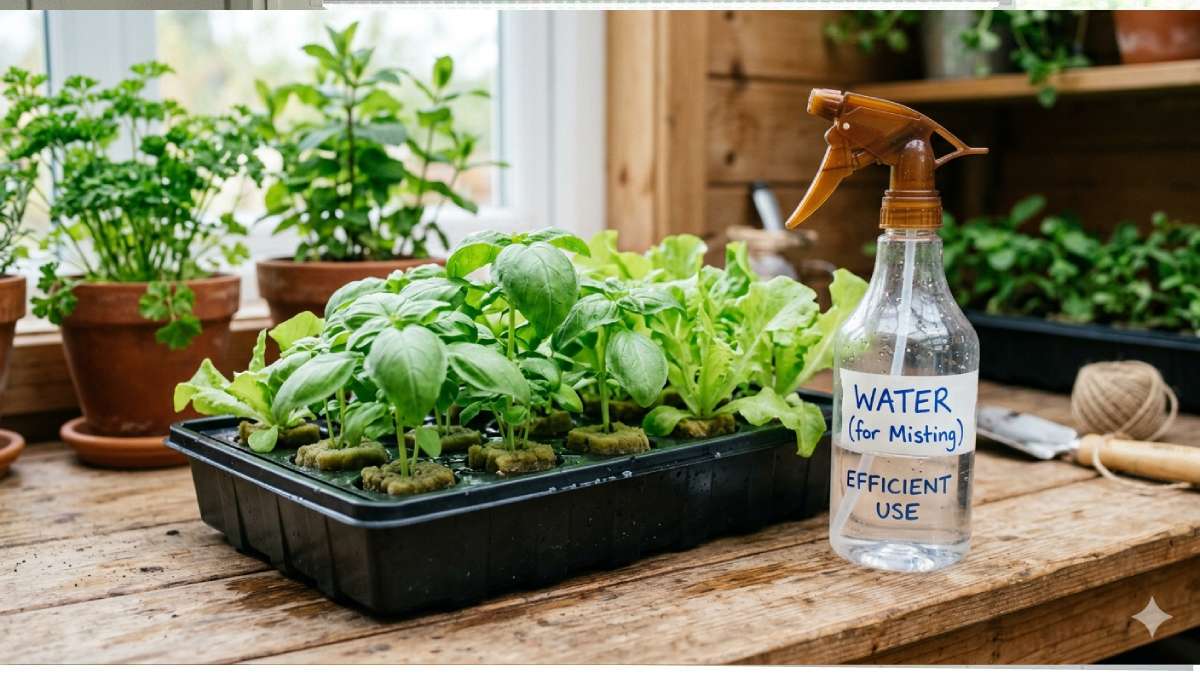
Beginners often think hydroponics needs more water, but it’s actually the opposite. A spray bottle is enough most days. Even a small container lasts many cycles. Plants still grow fast, still green, still fresh. Simple setup, low water use, efficient overall, that’s the real advantage.
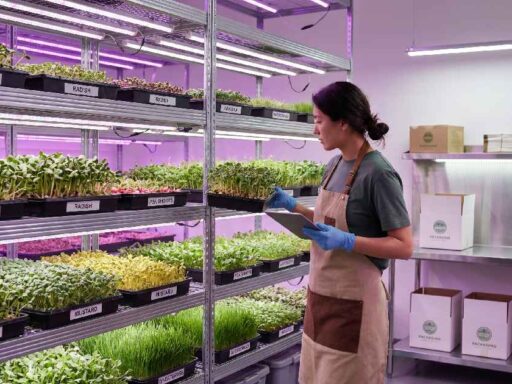
Ideal for Indoor & Urban Spaces
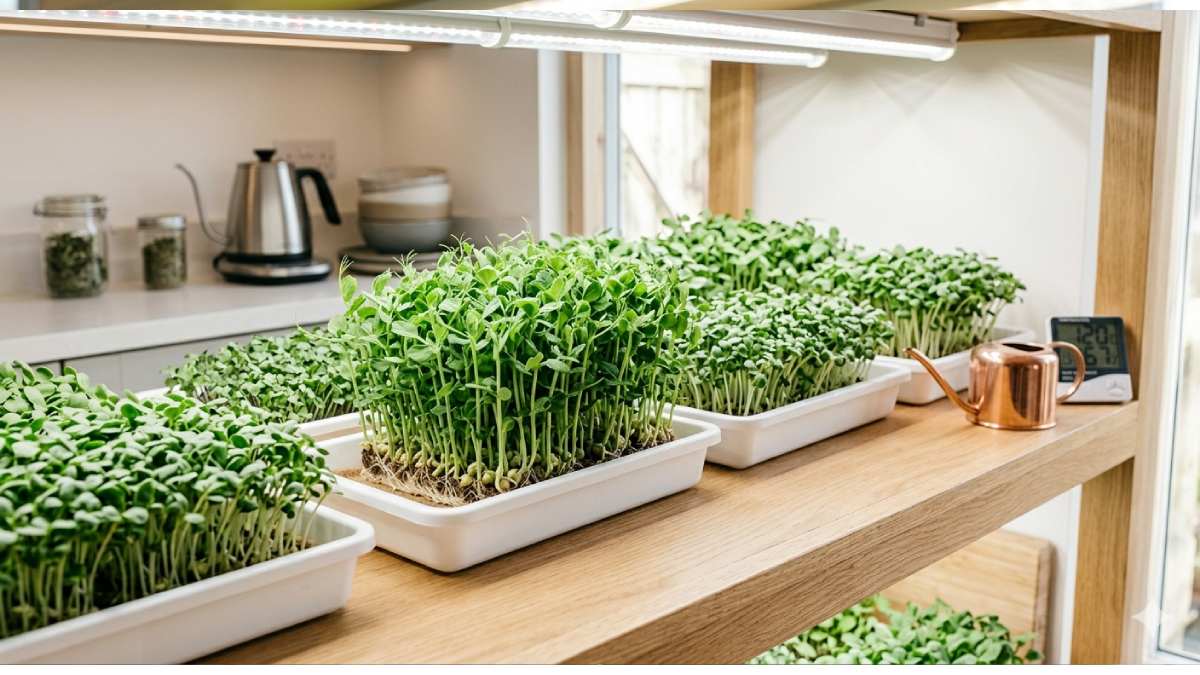
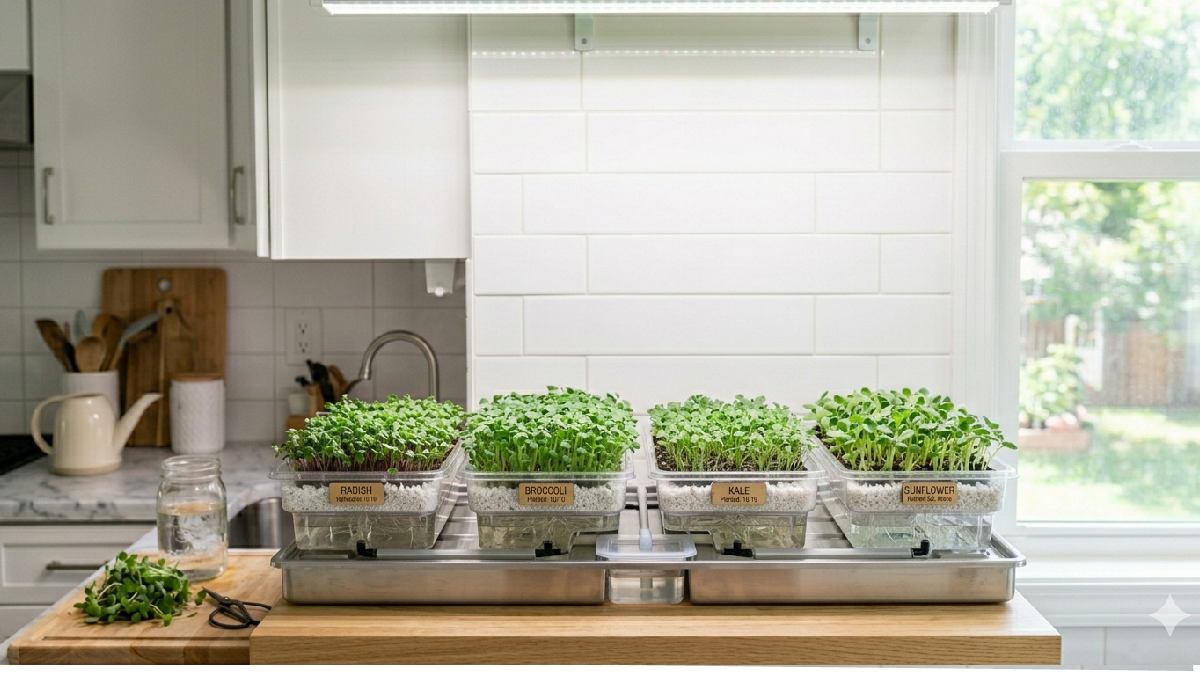
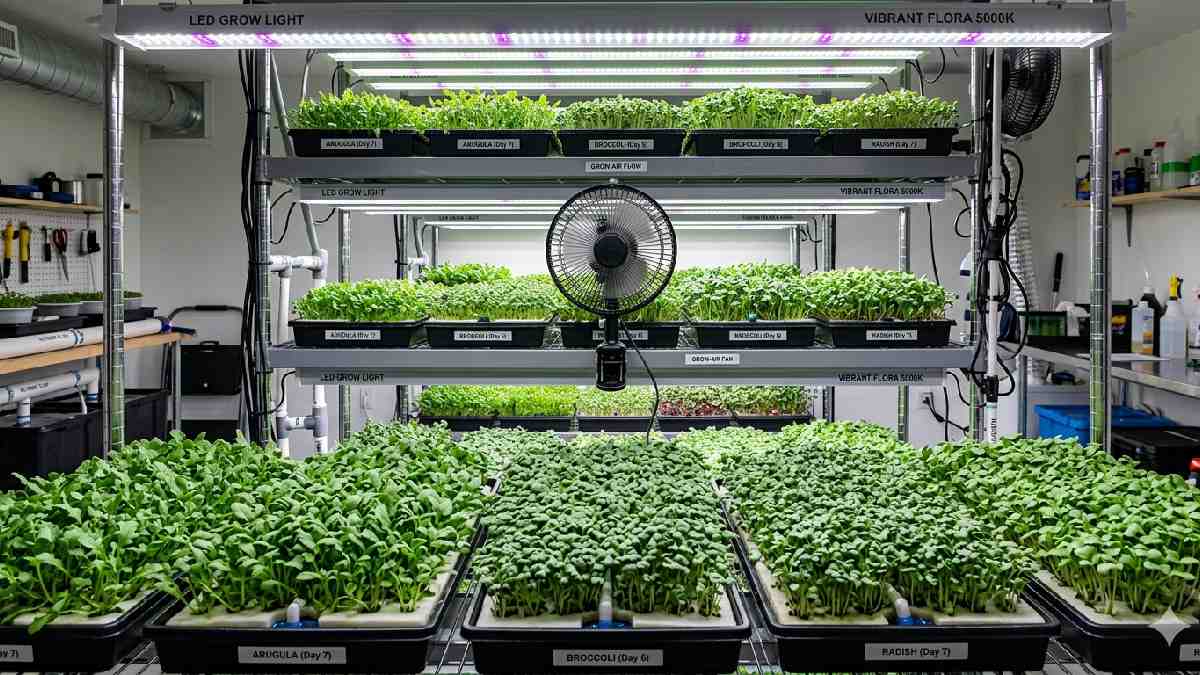
Hydroponic microgreens fit perfectly in small city homes. I tried them on a narrow kitchen shelf, worked fine. No need for a garden, no soil patch outside. Even a small apartment corner becomes a growing space. Trays stack easily, and LED lights hang above without taking up much space.
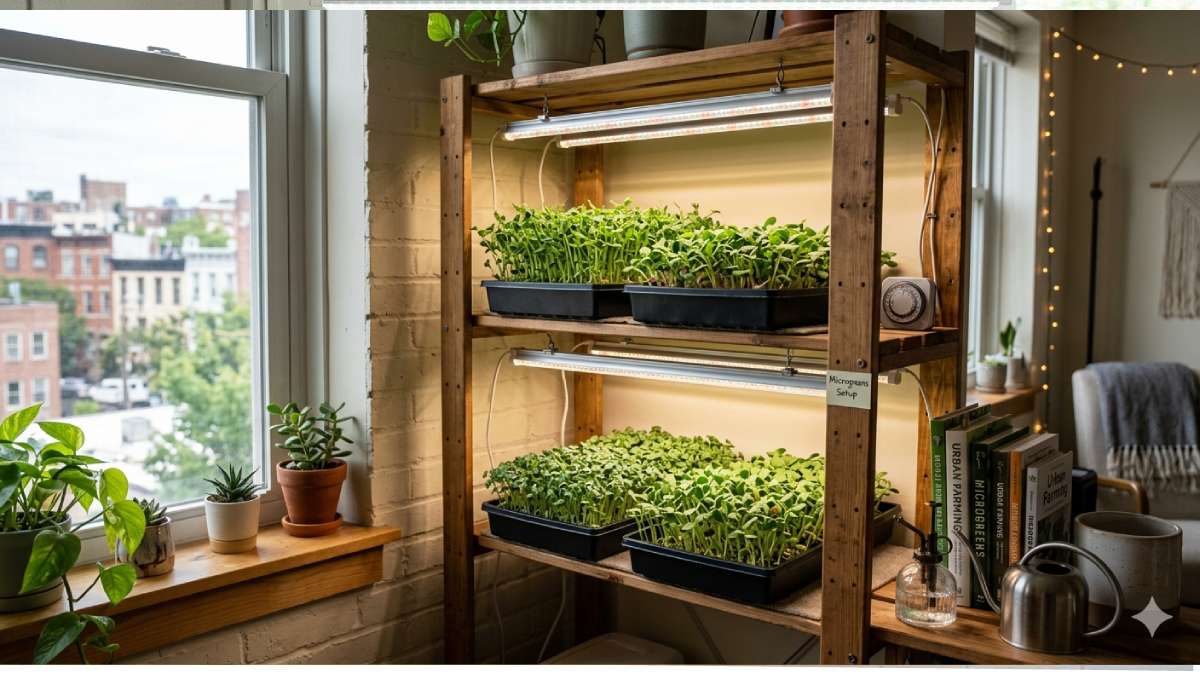
Beginners in cities like this set up because it feels simple and clean. Noise-free, low maintenance, just steady growth in the background. Balcony, window ledge, or even countertop works. Space never feels wasted. Tiny greens growing quietly make indoor living feel a bit more alive, more fresh somehow.
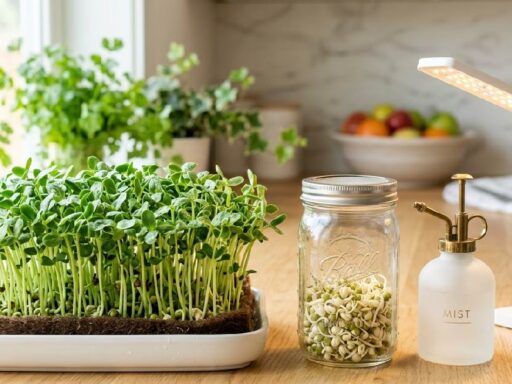
What You Need to Grow Hydroponic Microgreens
You don’t need much for hydroponic microgreens. A shallow tray to hold everything. A grow mat or paper towel for seeds to sit on. Clean water, that’s the base. Seeds, of course, are small but powerful. A spray bottle helps keep things moist without drowning them.

Light matters indoors, so a simple LED setup works fine. Some people add a small fan for airflow, which keeps things fresh. I started with very basic tools, still worked. Everything feels simple once you begin. Tiny setup, quick growth, daily changes you can actually see.
Growing Trays and Containers
I used random boxes at the start, not proper trays. Everything felt uneven, water pooling in corners, seeds shifting around. Later, I moved to shallow trays made for microgreens; the difference was clear. A hydroponic setup behaves better when the base is flat and stable. Mats sit properly, roots spread evenly, and growth looks cleaner.
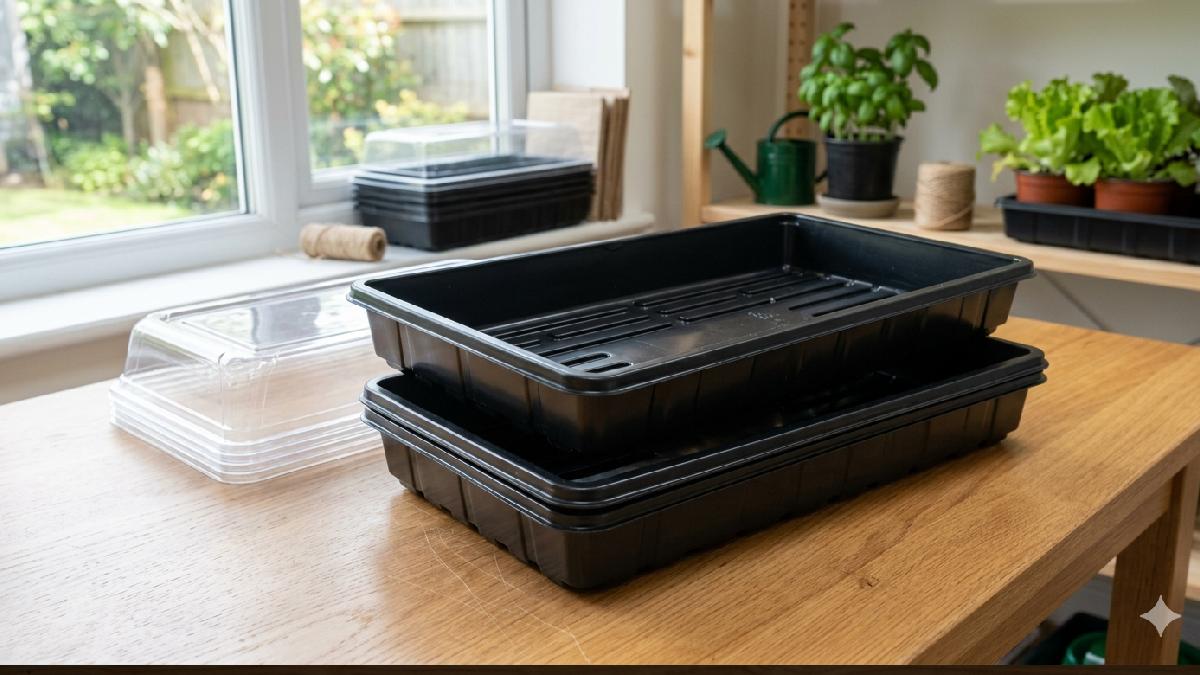
Some trays have drainage, some don’t; both can work if handled right. Cleaning matters a lot; leftover residue causes issues in the next batch. Beginners usually overlook this part. A good tray keeps the whole system simple, less stress, and better harvest every time.
Best Growing Medium (Coco Coir, Hemp Mats)
I tried Coco Coir first, soft texture, holds water nicely. Seeds settle well, roots spread easily, and growth feels stable. Sometimes it stays wet longer, so I had to be careful. Hemp mats came later, a cleaner feel, very neat setup. Water moves evenly, trays look tidy, less mess overall.
Hydroponic microgreens respond differently to both; coco gives softness, hemp gives control. Beginners usually prefer coco coir because it feels forgiving. I switch between them depending on mood and crop. Both work fine, just need balance in watering and patience while watching sprouts grow.
Seeds Selection (Best Microgreens Seeds)
Seed choice decides how smoothly your hydroponic tray goes. I noticed this after a few messy attempts. Radish seeds are always reliable, fast-sprouting, and strong in color. Broccoli is also easy, with a very clean growth pattern indoors. Sunflowers give thick shoots, feel heavy and fresh when cut.
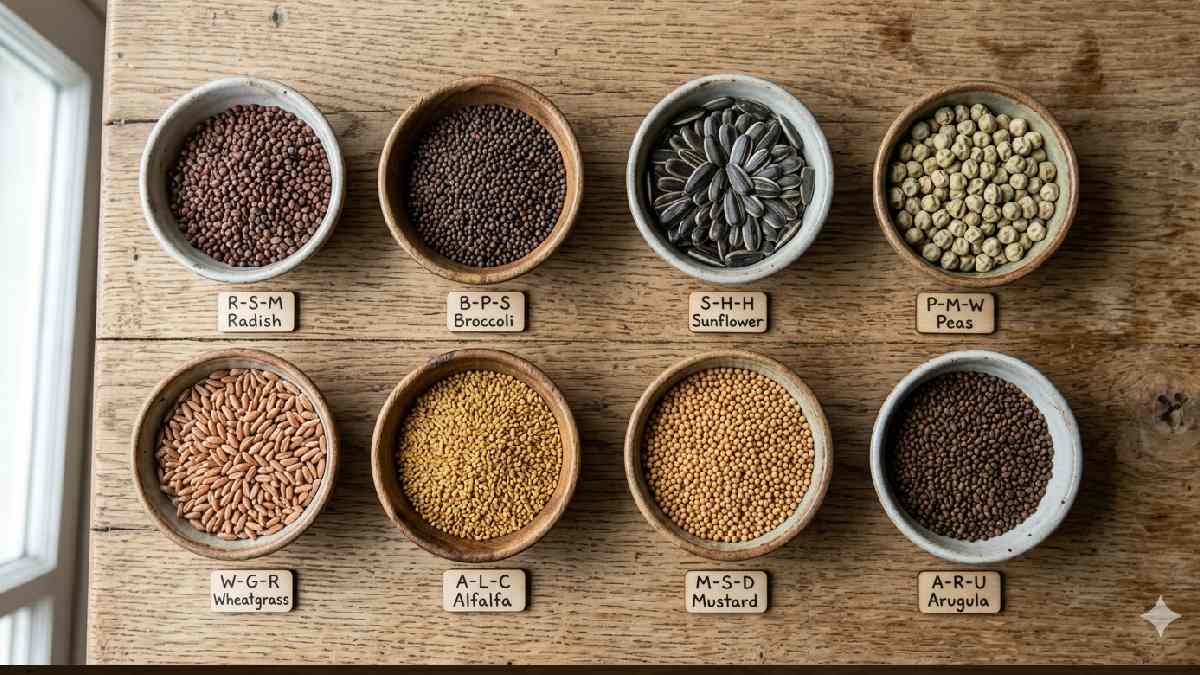
Pea shoots start slow but later grow wild, kind of satisfying. Mustard and arugula add a sharp flavour, a little spicy kick. Kale stays steady, no surprises, just consistent green. Beginners should avoid mixing too many types early. One seed type per tray works better. Less confusion, better results, simple setup.
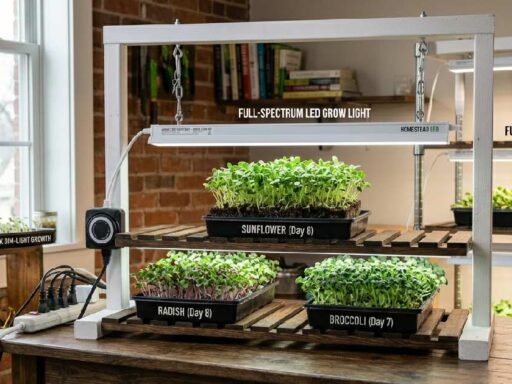
Light Requirements (Sunlight vs LED Grow Lights)
Light controls hydroponic microgreens growth. I first used sunlight near the window, which worked fine but unevenly. Some days bright, some cloudy, the shoots looked different every time. Plants leaned toward the gla; little stretch happened. Then I tried LED grow lights, results felt stable.
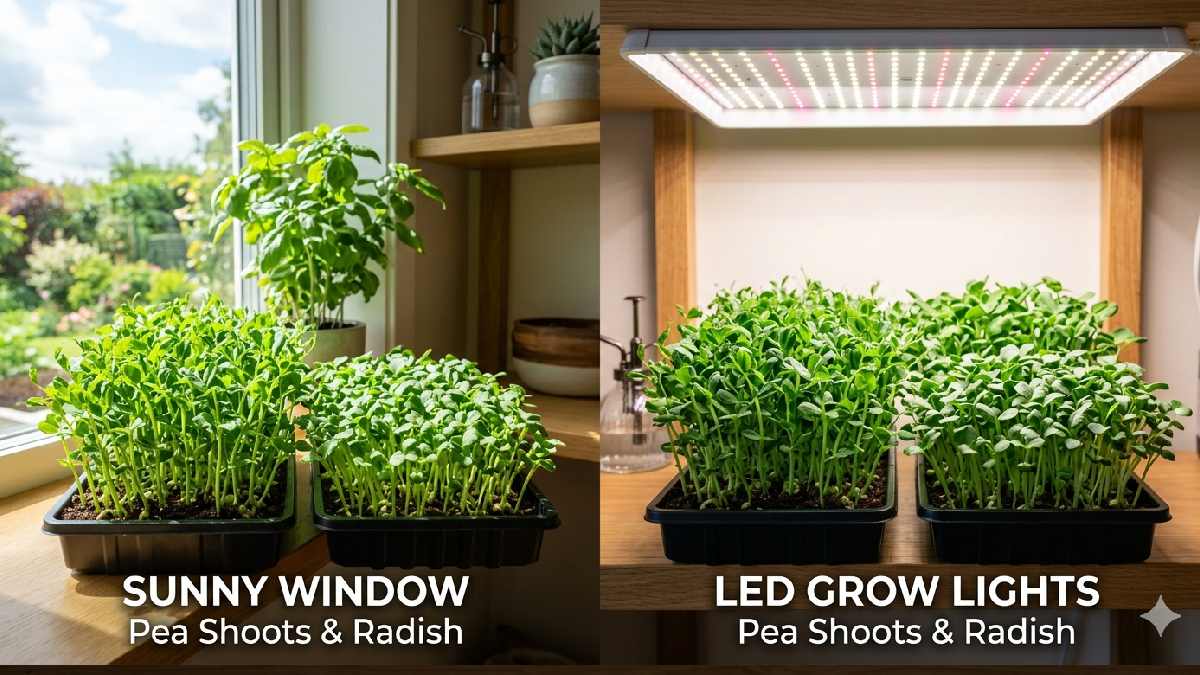
Same brightness daily, leaves stayed deep green, growth more uniform. Sunlight is free and natural, but it depends on the weather. LED gives full control indoors, no guessing. Beginners can use both setups. Too little light weakens stems, too much stress leaves. Balance matters most.
Water and Optional Nutrients
Water is the base of hydroponic microgreens. I keep it simple now, clean water most of the time works fine. Seeds already carry enough energy for early growth, so nothing extra is needed at the start. I used to add nutrients too early; plants looked a bit stressed, and I learned slowly.
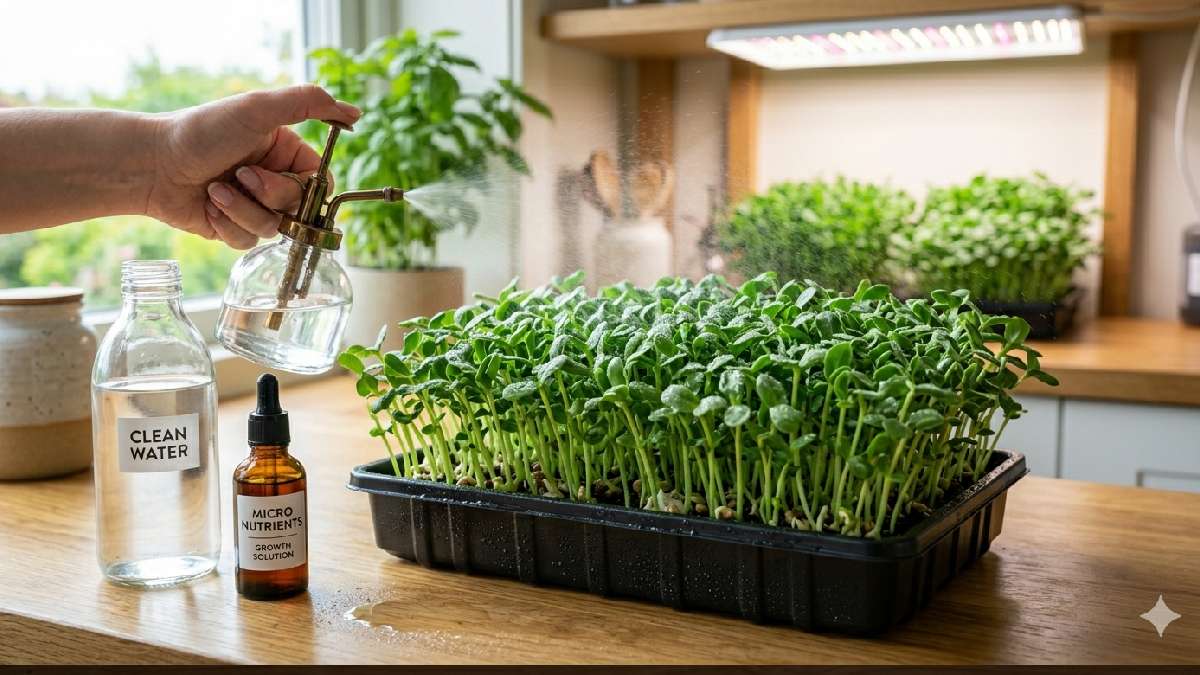
Now I wait, watch color and strength first. If leaves stay pale or growth slows, then a very light nutrient mix goes in the water. Not heavy at all. Too much feeding causes an imbalance quickly. Beginners should start with plain water and adjust only when needed. A simple setup always performs better.
Step, by, Step Guide to Growing Microgreens Hydroponically
I usually start with a clean tray, nothing fancy. Just something flat, ready to hold a mat and seeds. I place the hydro mat inside and press it gently so it sits evenly. Seeds go on top, spread lightly, not packed too tight. Mist water slowly, surface stays damp, not dripping.
First days feel quiet, nothing visible happens, but roots are working below. Then small green tips appear, slow but steady. Light comes next, window or LED, both work fine. I adjust water daily, with very small checks. Harvest comes quickly, around a week or two. Simple routine, same steps repeat every tray.
Step 1: Choose Your Hydroponic System
I started by just picking whatever tray I had at home, and didn’t overthink it. A shallow container works fine for microgreens. Some people use simple plastic trays, others go for proper hydro kits with drainage layers. I tried both, results were similar in the early stage.

What matters more is how it holds water and supports the mat. No need for big systems here, keep it simple. Beginners often get confused with fancy setups, but honestly, a basic tray does the job. You just need space for seeds, water, and light to work together.
Step 2: Prepare the Growing Medium
I usually take a clean tray first, no dust, no old residue left. Then I place the growing mat or coco layer inside, press it gently so it sits flat. Sometimes I use a paper towel too; it works fine for beginners. Water goes in slowly, just enough to make it damp, not soaking wet.
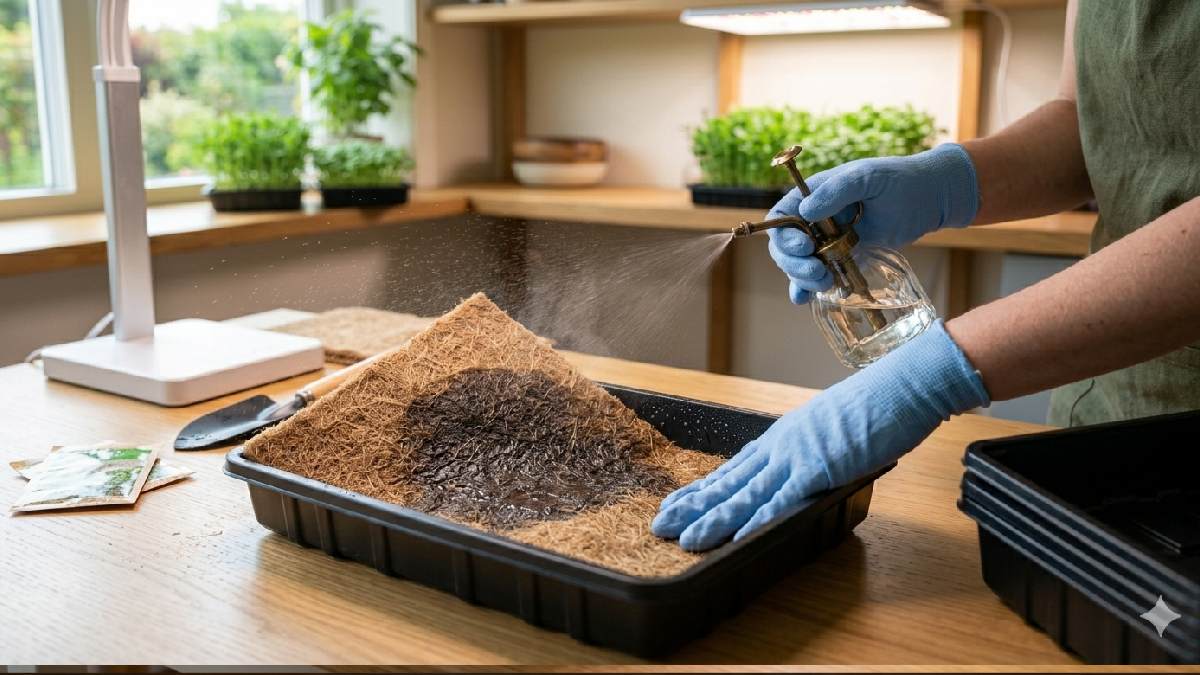
I learned that overwatering here causes trouble later. Medium should feel soft when touched, not dripping. Seeds need that balance to settle properly. Everything looks simple at this stage, but this step decides how smooth growth will be. Small care here makes the whole tray stronger later.
Step 3: Sow Seeds Evenly
I take seeds in hand and just scatter them slowly over the surface. Not too heavy, not too light, somewhere balanced. The first time I did it, I crowded them, and the growth went messy. Now I keep space between seeds; it works better. Each seed needs room to breathe and push up.
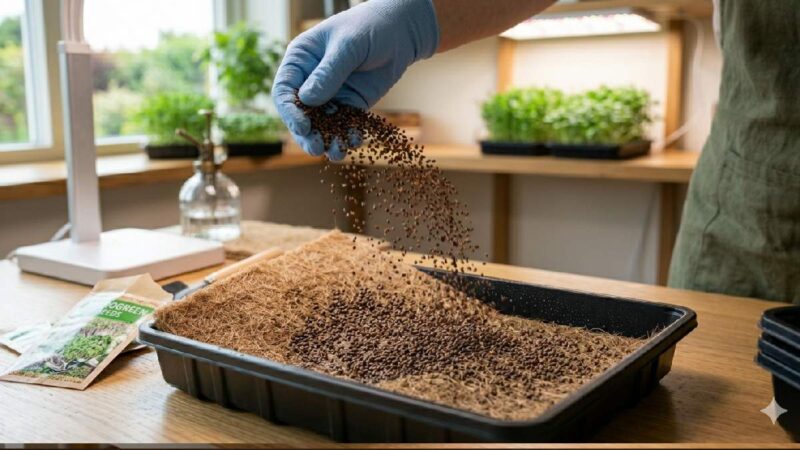
I press them slightly so they stay in place, nothing deep. Mist water gently after that. Surface should look covered but not packed. Beginners usually rush here, but slow spreading gives cleaner trays. Every small gap later becomes a strong, healthy shoot space.
Step 4: Germination Phase (Dark Period)
After sowing seeds, I usually keep the tray covered. Darkness helps them wake up better. I just place another tray or a simple lid on top, nothing special. First time I skipped this, growth felt uneven and weak. Now I always give them a dark rest for a few days.
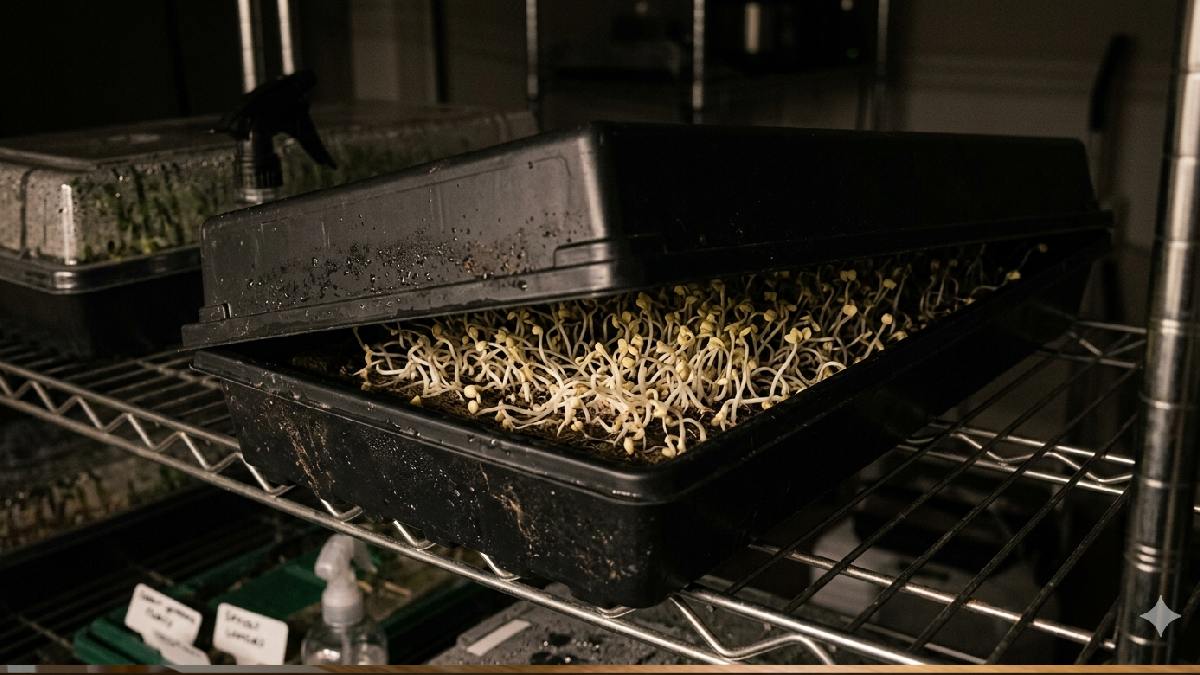
Moisture stays inside, seeds swell slowly, and roots start forming below. I check once a day, just a light mist if it feels dry. No light yet, only quiet waiting time. This stage feels slow, almost nothing is happening, but inside everything is starting.
Step 5: Provide Light for Growth
After germination, I remove the cover and move the trays into the light. Sometimes it’s a window spot, sometimes an LED above the shelf. The first time I used weak light, the plants stretched weirdly and palely. Now I keep steady brightness, it changes everything. Leaves start turning green fast, and stems stand stronger.
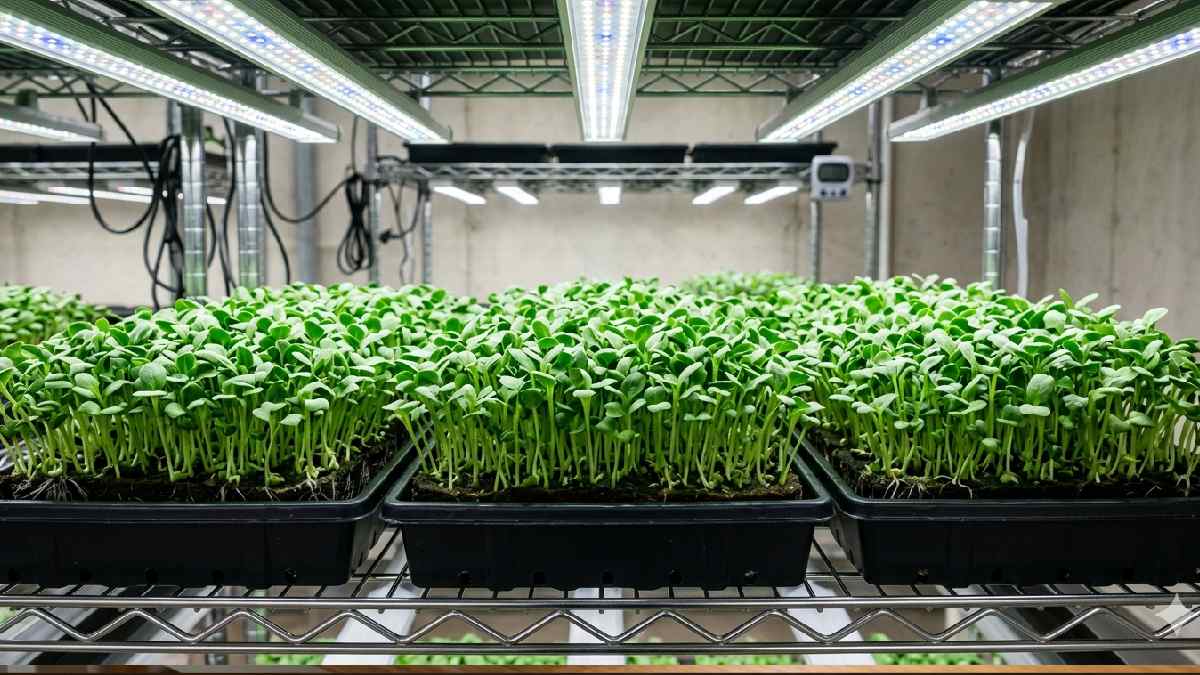
I adjust the height of the light a bit, not too close, not too far. Each day, growth becomes more visible, almost as if it wakes up fully. I check them morning and evening, and small changes show quickly. Light phase really decides the final quality, more than I expected earlier.
Step 6: Watering and Maintenance
I keep watering very simply, with small misting most days. Medium should stay damp, not soaked, that mistake I made early on. Roots react fast when water is balanced. Sometimes I check with fingers, just a light touch test. If it feels dry, I spray a bit, nothing heavy.
Air also matters here, so I keep a small gap in trays or use a fan sometimes. Leaves stay firm when everything is balanced. Every day feels like a small adjustment, not big work. Microgreens grow better when you don’t overdo anything, just steady care.
Step 7: Harvesting Your Microgreens
I usually harvest when the first true leaves show; that’s the sweet spot. Stems feel firm, color looks bright green. I take clean scissors and cut just above the medium, slowly and carefully. The first time I pulled them out, roots came with a mess, and I learned quickly.

Now I just trim from the top, tray stays clean for the next cycle. Harvest feels satisfying, like a small reward after waiting days. I don’t wait too long, or the taste gets rough. After cutting, I wash them lightly and use them fresh in meals. Simple ending, but it feels complete every time.
Best Microgreens to Grow Hydroponically
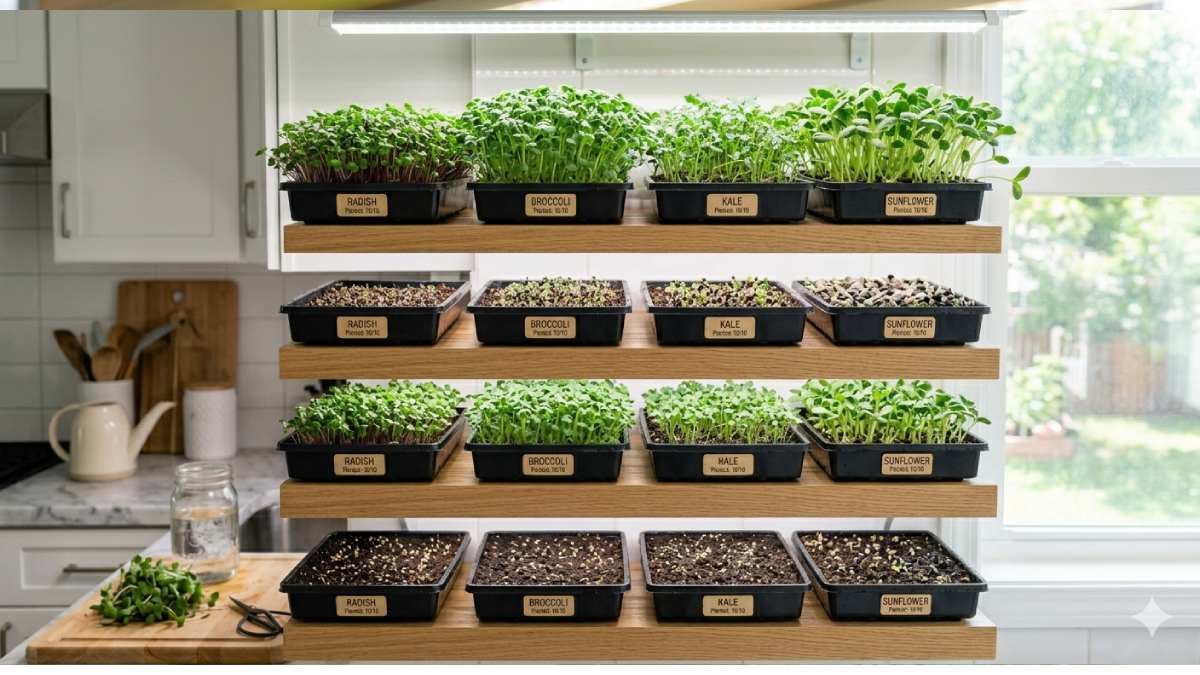
Some microgreens just behave better in hydroponic setups. I noticed that early on. Radish grows quickly, almost too fast sometimes, bright stems pushing up in days. Broccoli feels steady, no drama, just clean green growth. Kale takes patience but stays strong, never really fails. Mustard brings a sharp flavor, a bit wild in taste.
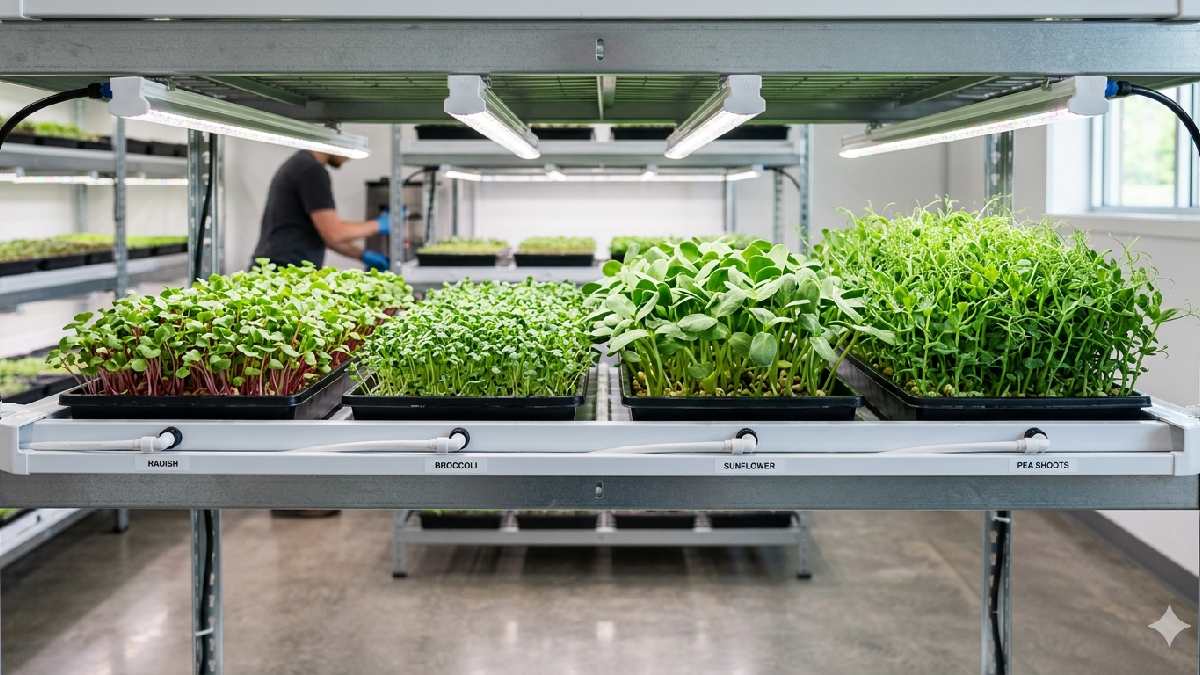
Arugula grows thin but spicy, adding punch to meals. Sunflower shoots have heavy, thick leaves, very satisfying to cut. Pea shoots climb slowly, then explode in growth. Beginners usually start with radish or broccoli, safer choices. Each tray reacts differently; small changes show fast. Mist lightly, watch daily, that’s enough.
Radish Microgreens
Radish microgreens are the fastest ones I’ve ever grown. I remember planting them and thinking nothing would happen, then suddenly green tips started popping up just a few days later. They grow sharp, almost aggressive in a good way. Stems come up firm, leaves are small but full of flavor, spicy bite.
A hydroponic setup suits them well; they don’t need much fuss. Just light, steady moisture, and they go wild. Beginners like them because the results show quickly. I still grow them often, simple, reliable, always gives that fresh punch to meals.
Broccoli Microgreens
Broccoli microgreens feel calmer than others. I planted them once, and they didn’t rush, just steady green growth showing day by day. Leaves stay soft, color deep green, almost soothing to look at. They don’t demand much attention, just light and balanced moisture.
Hydroponic setup works well here, roots settle quickly in the mat, and shoots come up clean. Beginners like them because they rarely fail. I still grow them often, especially when I want something simple and healthy. Taste mild, slightly earthy, nothing too strong, but very fresh in salads or sandwiches.
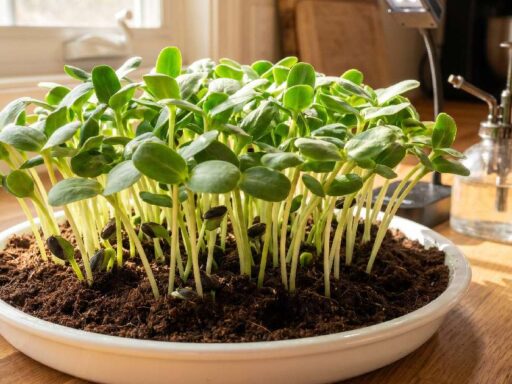
Sunflower Microgreens
Sunflower microgreens always felt a bit different in my trays. Seeds are big, heavier than others, so I spread them carefully, or they sit unevenly. When they start growing, stems come thick, almost chunky, not delicate like radish or broccoli. Leaves open wide, green and strong, kind of bold look.
The hydroponic setup needs a bit more support here; the mats should stay firm, or they tilt. I learned that after a few messy trays. Taste is nutty, very fresh, good in wraps or salads. Beginners get impressed because they look powerful and grow steadily with simple care.
Pea Shoots
Pea shoots were the first microgreens that actually surprised me. I planted them, thinking nothing special, just another tray. A few days later, they started climbing, slow at first, then suddenly fast like they decided to grow all at once. Stems come long and soft, leaves are bright green, kind of sweet taste when eaten fresh.
Hydroponic setups work well, but they need a bit more space, or they tangle easily. I messed that up once, looked messy, but still edible. Beginners like them because they feel like real plants, not just tiny sprouts. Fresh, simple, satisfying.
Common Mistakes to Avoid When Growing Hydroponic Microgreens
I made plenty of mistakes at the start; most people do the same. Overwatering is the biggest one; the mat stays too wet, roots start suffocating, and growth slows hard. Some days I ignored airflow, trays got a bit damp smell, not a good sign at all. Too many seeds also cause trouble; plants fight for space, and everything looks weak and tangled.
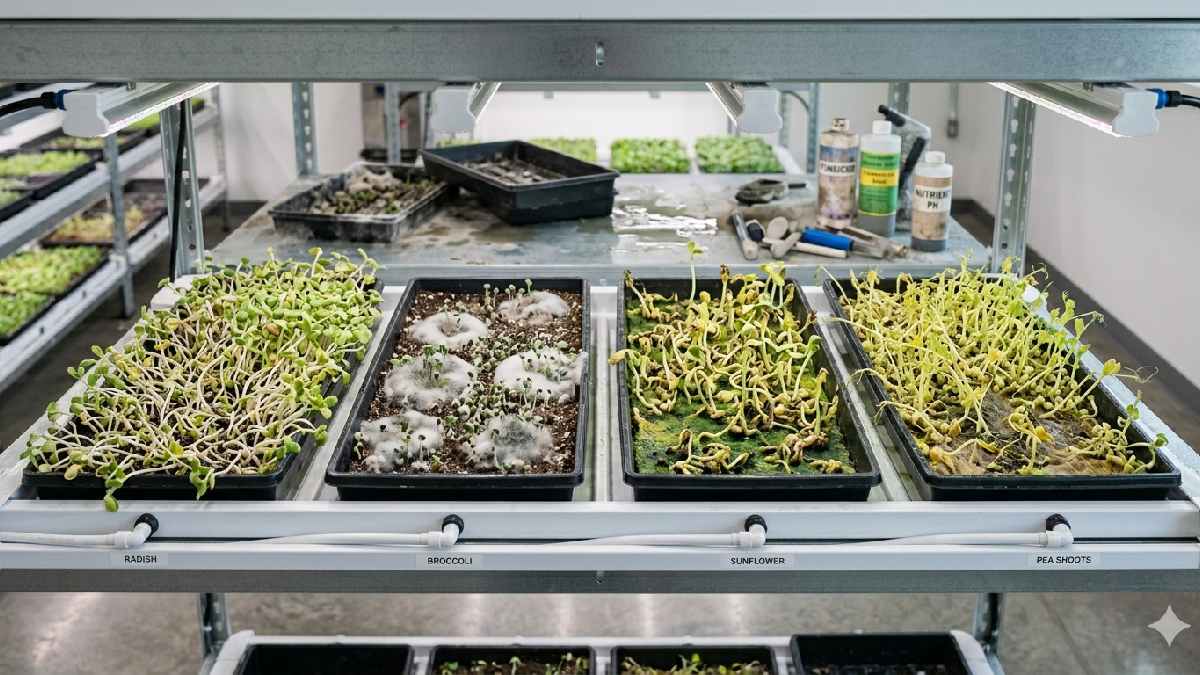
Light issues show fast, stems stretch long, and leaves lose color. Dirty trays bring problems; small mold spots appear suddenly. Beginners think more water helps, but actually, it doesn’t. Hydroponic setup needs balance, not excess. Small checks daily fix most issues. Growth stays clean when you stay careful.
Overwatering and Mold Issues
Overwatering is the first mistake I made with hydroponic microgreens. I thought more water meant faster growth, but it didn’t work like that. Mats stayed soaked, seeds felt stuck, and nothing moved properly. After a few days, white fuzzy mold started appearing on the corners, not a good sight at all.
Smell changed too, kind of damp and heavy. I had to throw the whole tray once, which felt annoying. Now I keep water low, just enough for roots to reach. Airflow helps a lot here; even a small fan makes a difference. Beginners panic when mold shows, but usually it’s just excess moisture. Clean setup fixes most of it.
Using Too Many Seeds
I used to think that more seeds meant a bigger harvest. It backfired every time. The tray looked full, almost nice at the start, then problems showed up. Seeds crowded each other, roots tangled, nothing grew strong. Some shoots stayed weak, others just stopped halfway. Air couldn’t move properly between them, and moisture stayed trapped.
That’s when I saw uneven growth, messy and thin. Now I spread seeds lightly, give them space, even if the tray looks half empty at first. Beginners make this mistake a lot. Fewer seeds actually give better yield, healthier greens, and cleaner taste.
Poor Air Circulation
Poor airflow messes up hydroponic microgreens fast. I noticed trays getting soft, almost tired-looking. Air stayed still around them, moisture just sitting there. That’s when problems started: mold spots, weak stems, uneven growth. I didn’t think air mattered much at first, but it does.
Even a small fan changes everything, keeps leaves firm, surface dry just enough. Without it, trays feel heavy and dull. Beginners often ignore this part, then blame the seeds or the water. The real issue is air is not moving. Now I always keep gentle circulation, which makes the whole setup feel alive again.
Insufficient Light
Insufficient light shows up quickly in hydroponic microgreens. I saw it in my early trays, stems stretching long, weak, almost falling over. Leaves turned pale instead of deep green. Everything looked tired, even though the water was fine. I kept them near a dim window at first, thought it was enough, but it wasn’t.
When I switched to LED light, growth changed fast, and plants stood firm again. Beginners often underestimate light. Without proper lighting, nothing really works well indoors. Now I keep a steady light schedule, plants respond better, color stays strong, and growth feels controlled.
Tips to Increase Yield and Quality
I learned that yield improves when small things stay consistent. Seeds spread evenly, not crowded, give stronger trays. Light kept steady, plants stopped stretching, and looked firm. Water level checked daily, not too high, roots stay happy. Airflow matters more than I thought; even a small fan changes everything.
Clean trays each cycle; old residue always causes weak growth. Harvest timing is also important; cut when the first true leaves show. Some days I miss, some days I almost forget, plants still respond, but not the same quality. Hydroponic microgreens reward attention; even small care shows a big difference in taste and volume.
Use High-Quality Seeds
I learned this the hard way. Cheap seeds look fine at first, then they act weird. Uneven sprouting, weak stems, and some trays just fail halfway. High-quality seeds feel different; they wake up together, almost like timing is perfect. Growth stays uniform, and leaves look healthier.
A hydroponic setup shows seed quality very clearly, with no soil to hide mistakes. I once reused old seeds; the results were patchy and slow, not worth it. Now I always pick a fresh batch from a trusted source. Beginners think setup matters most, but seed quality quietly decides everything in the background.
Maintain Proper Airflow
Airflow changes everything in hydroponic microgreens. I noticed trays get weak when the air stays still. Moist surface starts smelling odd, not fresh anymore. A small fan fixed it in my setup, nothing fancy, just gentle movement. Leaves stood firmer after that, no more droopy look.
Too strong a wind is also bad; plants dry out fast. Balance matters here. I keep the air moving slowly, almost a soft breeze. Beginners ignore this part often, then wonder why mold shows up. Simple airflow keeps trays clean, growth stable, kitchen feeling fresh again.
Clean Your Equipment Regularly
I used to skip cleaning trays sometimes, but I thought it was fine. Later, I saw small mold spots and slow growth; the lesson came quickly. The hydroponic setup stays sensitive; even tiny residue causes issues. After every harvest, I wash trays properly. Warm water works best, sometimes mild soap too.
Mats are replaced or cleaned depending on the type. Spray bottles also need to be rinsed; old water leaves a smell. Clean tools give clean growth, simple truth. Beginners ignore this part, then struggle later. Now I keep routine easy, clean, dry, and reusable. Everything works better when the setup stays fresh.
Monitor Moisture Levels
Moisture control makes or breaks hydroponic microgreens. I learned that after a few failed trays. Too much water and roots feel suffocated, and growth slows down significantly. Too little and the seeds just sit there, nothing moves. I check my mat with fingers, a simple habit now. It should feel damp, not dripping wet.
Water level underneath the tray stays low, roots reach down naturally. Some days it changes faster than expected, especially in warm rooms. Beginners often overwater, thinking it helps. It doesn’t. Small balance keeps everything alive, green, steady, simple.
Do You Need Nutrients for Hydroponic Microgreens?
We learned that ned that yield improves when small things stay consistent. Seeds spread evenly, not crowded, give stronger trays. Light kept steady, plants stopped stretching, and looked firm. Water level checked daily, not too high, roots stay happy. Airflow matters more than I thought; even a small fan changes everything.
Clean trays each cycle; old residue always causes weak growth. Harvest timing is also important; cut when the first true leaves show. Some days I miss, some days I almost forget, plants still respond, but not the same quality. Hydroponic microgreens reward attention; even small care shows a big difference in taste and volume.
When Nutrients Are Not Required
Hydroponic microgreens don’t always need extra nutrients. In the first few days, the seeds already carry food inside. They sprout fine with just clean water. I noticed this early, overfeeding sometimes slows growth instead of helping.
If the cycle is short, like 7to 10 days, nutrients are often unnecessary. Plants stay simple, just with light enough moisture. Beginners think more input helps, but nature already works inside the seed itself.
When You Can Add Nutrients
Sometimes I add nutrients when trays stay longer than usual. Growth feels slow, leaves look a bit pale. That’s when light feed helps. Not heavy, just a weak solution in water. Mid-growth stage works best, after roots have already settled in the mat. I tried too early once, plants looked stressed; lesson learned.
Now I wait, observe daily. If color stays dull or growth stalls, a small nutrient boost helps. The hydroponic setup reacts fast, so even tiny changes show quickly. Beginners should keep it simple first, then adjust slowly.
How Long Do Hydroponic Microgreens Take to Grow?
I usually see the first green signs within two to three days. Nothing big at the start, just a tiny movement under the mat. Around day five, things get noticeable, and leaves start forming properly. By day seven, some fast varieties like radish already look ready. Others like pea shoots take a bit longer, maybe ten to fourteen days.

I check them daily; small changes show quickly in hydroponics. Light, water, and seed type all affect speed. Sometimes I feel they grow faster indoors than in soil, maybe because everything stays controlled. It feels quick, almost surprising every time.
Germination Timeline
Germination starts quietly; nothing looks alive at first. I usually see seeds swelling in the first 24 hours; they just sit there absorbing moisture. Around day two, tiny cracks appear, and the root tip starts pushing out, very subtle but real. By day three, most seeds begin showing small green hints above the medium.
Radish moves fastest, broccoli follows steadily, and others take their own time. Temperature and moisture change rapidly. I noticed that clearly after a few trays. It feels slow, but actually everything is happening underneath, roots building a foundation before leaves show fully above.
Harvest Time
Harvest time feels like the most satisfying part of growing microgreens. I usually wait until the first true leaves show, stems look firm, and color is deep and even across the tray. Radish comes early, sometimes just a week, others, like pea shoots, take a bit longer, around ten to fourteen days. I grab clean scissors, cut just above the medium, slow and steady. The first time I rushed and pulled them out, the whole tray got messy, and the lesson stuck with me.
Now I keep it simple, no stress, just clean cuts. Fresh smell hits immediately, like something alive and ready. You eat them right away, and the taste feels sharp, almost surprising every time.
FAQs About Growing Microgreens Hydroponically
Can you grow microgreens without soil?
Yes, microgreens grow without soil using hydro mats, paper towels, or hydroponic systems. Clean setup, fast growth indoors.
Do microgreens need sunlight or artificial light?
They need light, both sunlight and LED grow lights work. LED gives stable growth, sunlight depends on weather changes.
What is the best medium for hydroponic microgreens?
Coco coir, hemp mats, or paper towels work best. They hold moisture well, support roots, and stay clean for harvest.
Why are my microgreens getting moldy?
Mold comes from excess water, poor airflow, or crowded seeds. Reduce moisture, improve ventilation, and keep trays clean always.
Conclusion:
Hydroponic microgreens feel simple once you actually start doing it, not just reading. I began with confusion, trays, lights, water balance, and everything looked too technical at first. After a while, it becomes a normal routine. Seeds go in, the light comes on, and small changes show up every day.
Some trays fail, some turn out perfect, both teach something. Mistakes like overwatering or poor light happen, but they fix fast when you notice them early. The real thing is consistency, not perfection. A small setup at home can keep giving fresh greens again and again, no big effort, just steady care and attention.