Grow Microgreens, Complete Step, by, Step Guide
Growing microgreens feels simple once you actually start. A tray rests on the counter. Seeds are already there. Light comes in from a window nearby. You don’t plan too much. You just begin, and that ease slowly changes how beginners look at indoor gardening.
Daily care stays quiet, not demanding or loud. Watering happens almost without thinking. Some days, growth feels slow. Other days,s leaves appear suddenly. You start noticing patterns without trying to study them. Mistakes happen, but plants don’t really panic.
They grow anyway. Harvest never feels like a big victory moment. It feels normal. You cut the greens, smell something fresh, then move on with your day. Food starts feeling closer than before. Not perfect. Not strict. Just a habit that settles in on its own.
Introduction to Growing Microgreens
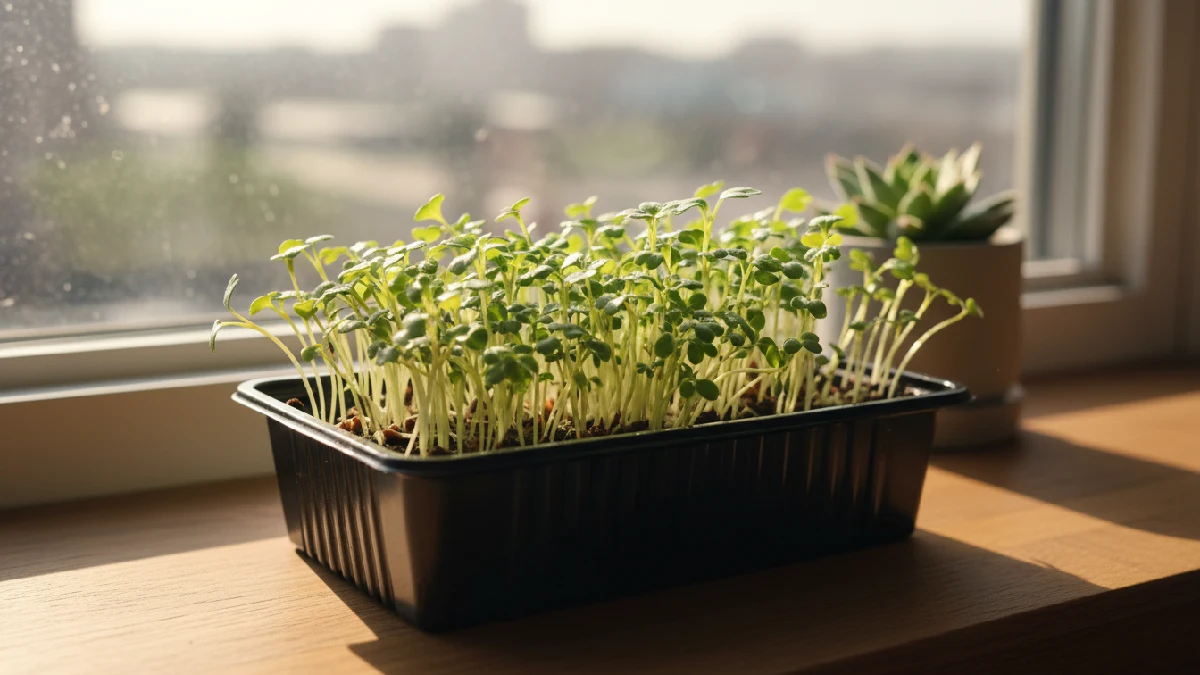
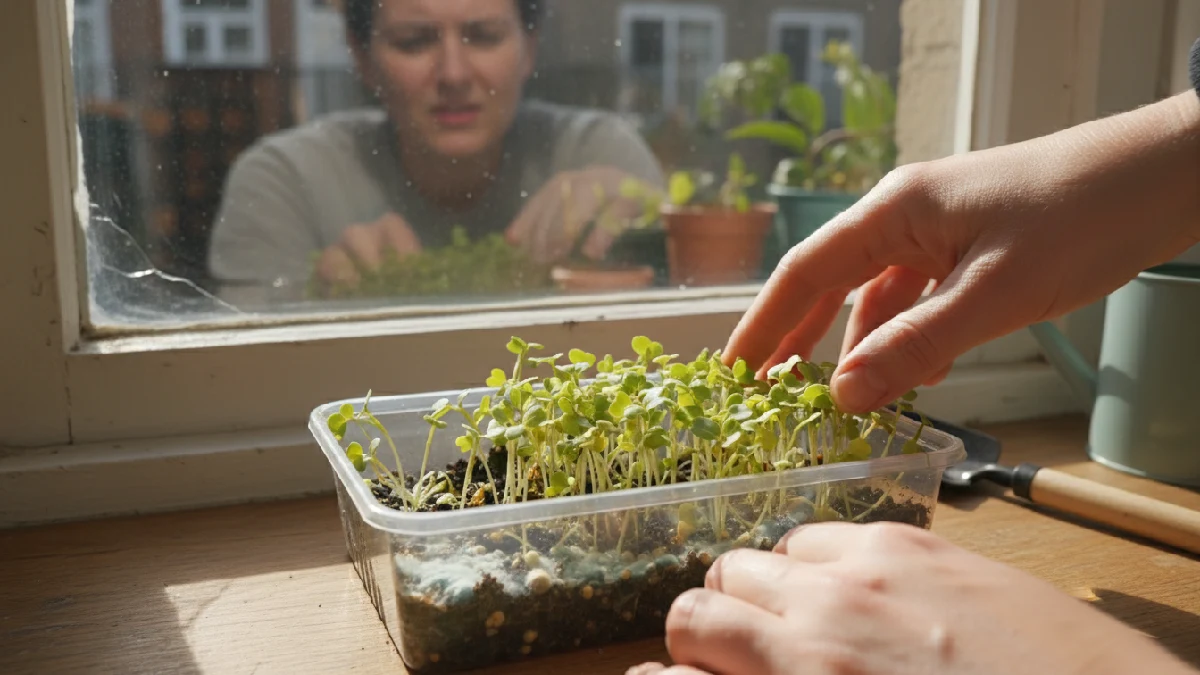
Growing microgreens at home is different. You open the tray. Sprinkle seeds. Watch tiny leaves push through soil or mats. Every day shows small changes. Beginners feel little victories. Plants grow fast. Sometimes uneven. Sometimes surprising. Microgreens work for small spaces. Counters, windowsills, even shelves. Seeds, tray, medium, all ready.
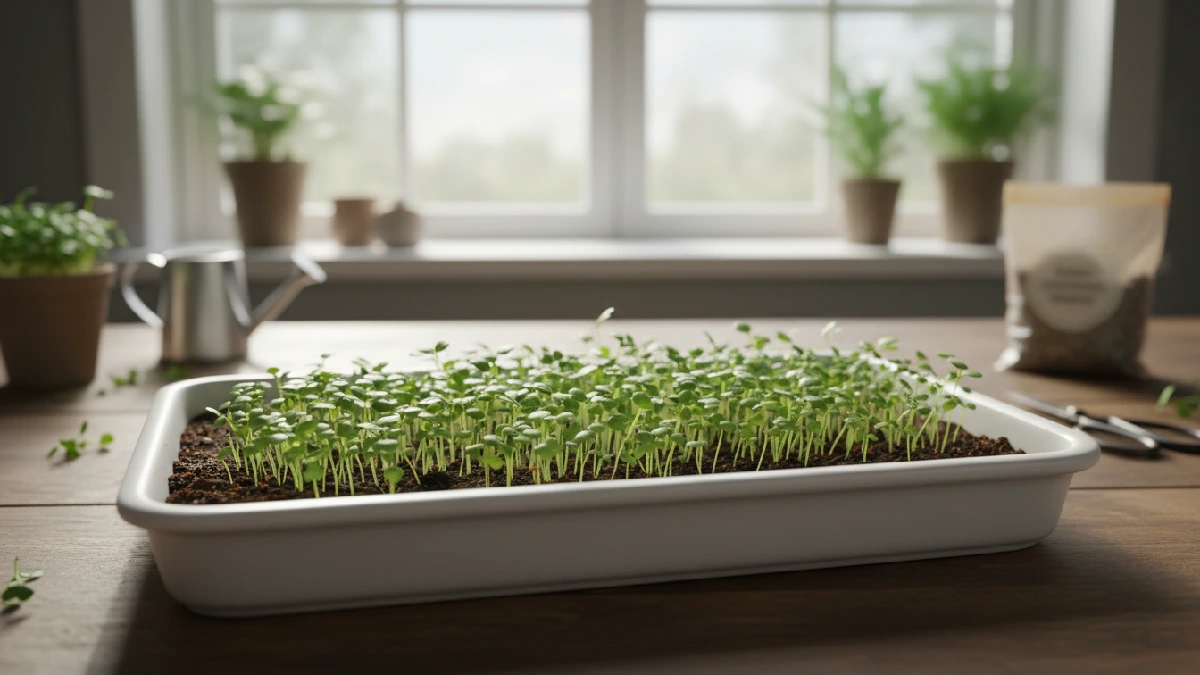
Mistakes happen. Plants bounce back. You learn slowly. Flavor is strong. Eating them feels fresh. Routine stays easy. It fits a busy life. Even a little light works. Water is simple. Watching sprouts appear is satisfying. Small green shoots brighten rooms. Microgreens turn indoor gardening into a quiet hobby.
What Are Microgreens?
Microgreens are tiny plants. Seeds rest a while. Leaves slowly push up. Colors pop. Flavor hits strong. Vitamins hide in small leaves. Growing microgreens at home feels different. Counters, shelves, and tiny balconies work. You touch soil. Water sprinkles softly. Sprouts show up.
Mistakes do not ruin anything. Plants forgive easily. Kitchens turn into small gardens. You watch leaves daily. Some mornings nothing. Other mornings are full of green. Patience grows quietly. Eating fresh greens becomes normal. It feels alive.
Definition of Microgreens
Microgreens are tiny plants. Leaves are small, stems thin. Seeds wake slowly. Then suddenly sprout. Flavor is sharp. Packed with nutrients.
Growing microgreens at home feels different. Counters work. Windowsills work. You touch soil. Water. Watch them grow daily.
Mistakes happen. They don’t matter. Beginners get confident fast. They change meals. Salads pop with color. Sandwiches taste fresh. You start small. Microgreens quietly take over routine. Every day shows new growth. Feels alive.
Microgreens vs Sprouts vs Baby Greens
Microgreens are tiny plants. above the soil. Leaves open. Flavor strong. Nutrients packed. Grow 7to 14 days. Easy for home kits. Sprouts are seeds that germinate. Usually eaten whole. Roots, seed, shoot. Quick growth. 2to 5 days. Very soft. Water daily. No soil needed. Messy sometimes.
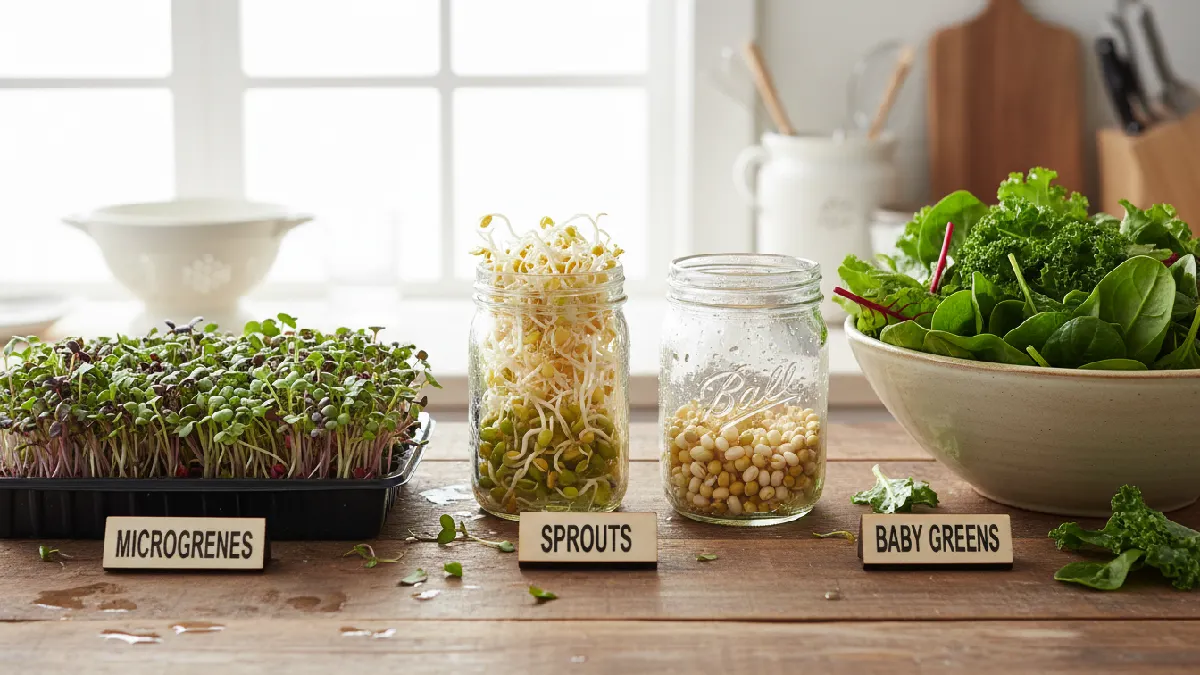
Baby greens are older. Leaves bigger. Taste milder. Sold in markets. Harvested after weeks. Less intense nutrients. Take more space. Microgreens feel lively. You see growth daily. Sprouts feel fragile. Baby greens are predictable. Each has its charm. Beginners often start with microgreens. Fun, fast, satisfying.
Nutritional Benefits of Microgreens
Microgreens are tiny but strong. You bite, flavor pops. Vitamins hit fast. Every leaf feels alive. Some mornings I watch them, green and crisp. Makes me want to eat more. They help immunity. Energy comes easily. Digestion feels lighter. A small tray gives so much food.
You don’t need big portions to feel good. Colors look happy. Red, green, yellow. Plates suddenly bright. Kids ask to taste. Even adults get surprised. Home, grown feels different. Every meal feels fresher.
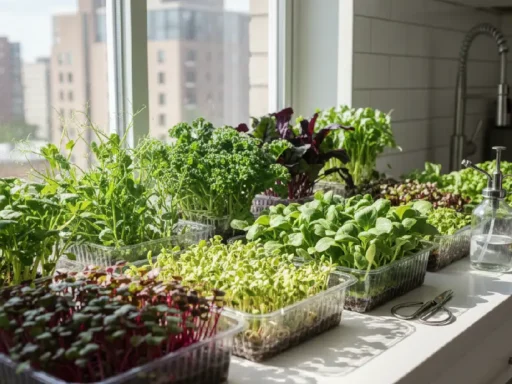
Best Microgreens to Grow
The radish microgreens grow fast. You plant them, and they respond quickly. The taste feels sharp and spicy. Beginners feel happy seeing results so early. It builds confidence without effort. Broccoli microgreens take a little more time. Leaves stay small and soft. Flavor remains mild. People add them to food without much thinking.
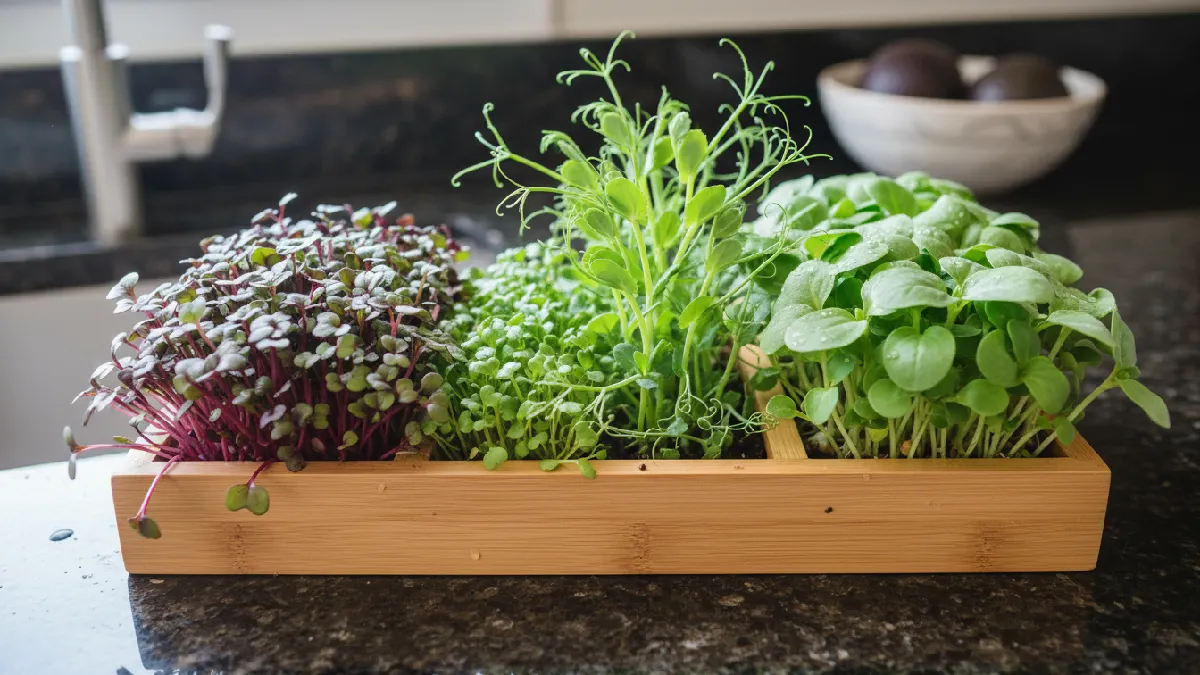
It quietly feels healthy. Pea shoots grow taller than most expect. The crunch feels sweet. Trays need space to breathe. Water carefully or stems lean. Harvesting feels light and enjoyable. Sunflower microgreens look strong from the start. Stems grow thick. Taste turns nutty. Seeds need soaking first, or growth slows. Waiting feels worth it in the end.
Radish Microgreens
Radish microgreens grow fast. Tiny seeds sit on the medium. You sprinkle them, nothing fancy. Water lightly, not drowning. The first day seems empty. The next day, small green tips push out. Leaves slowly open, delicate and soft.
Sunlight hits them, and they lean slightly. Smell is faintly peppery. A week passes, stems thicken. Scissors in hand, you snip. Fresh taste hits instantly. Growing at home feels simple, alive, and rewarding.
Broccoli Microgreens
Broccoli microgreens start in small trays. Seeds spread evenly, nothing fancy. Water sprayed gently, enough. A few days pass, and tiny green shoots push up. Leaves unfold slowly, stems stay tender. Light makes them stretch a little. Some mornings they look tiny, others fuller.
Smell is fresh, mild, not overwhelming. After a week, ready to cut. Scissors slice above medium, roots stay behind. Texture is soft, taste subtle. Growing them feels alive, satisfying, and easy to watch.
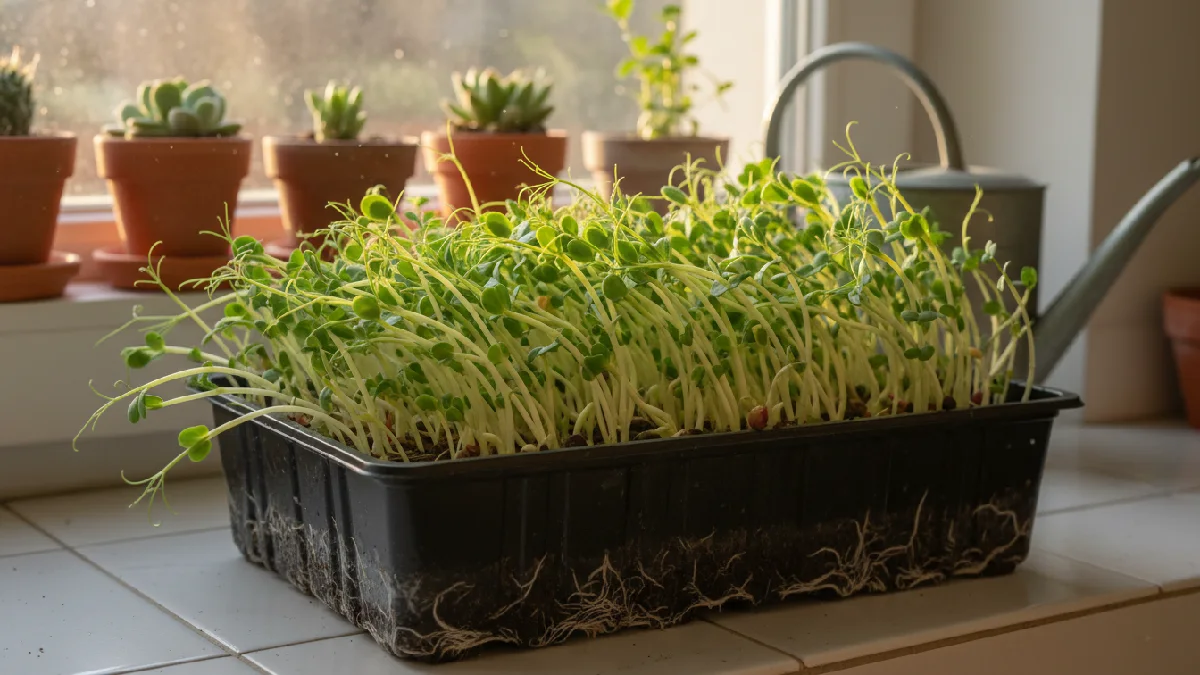
Pea Shoots
Pea seeds are round and firm. Soak them lightly first. Spread evenly on a moist medium. Tiny roots push slowly into the soil. Shoots grow taller every day. Leaves unfold in pairs. Stems stay crisp and juicy.
Flavor is slightly sweet, very fresh. Kids love picking them carefully. Water gently, keep light balanced. Harvest when 2to 3 inches tall. Snip above medium with scissors. Each tray feels alive, vibrant, and fun to watch.
Sunflower Microgreens
Sunflower seeds sit heavy in the tray. They need soaking first. Roots push through the medium slowly. Stems grow thick and firm. Leaves open wide, look bold. Flavor turns nutty and strong.
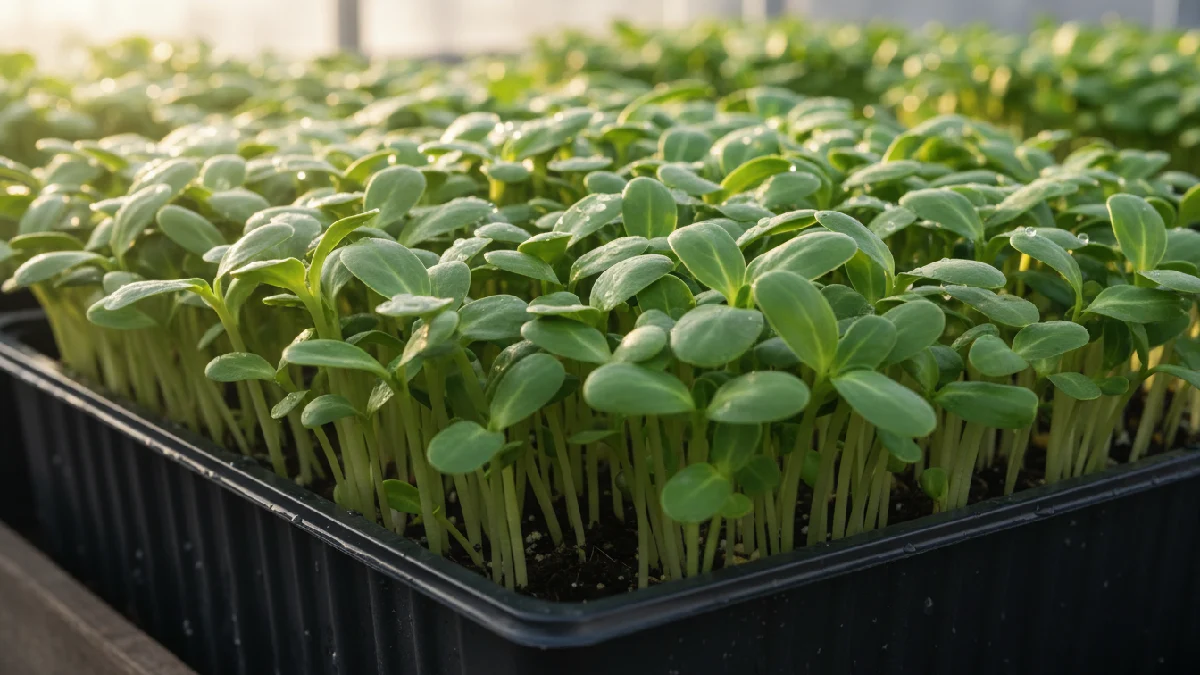
Growth feels steady. Water carefully, not too much. Sunlight or LED keeps them happy. Harvest after 7to 10 days. Crunchy texture makes salads fun. Watching them sway slightly feels alive.
Herb Microgreens (Basil, Cilantro)
Basil sprouts wake slowly. Leaves unfold soft green. Cilantro grows with taller, delicate stems. Water lightly. Roots grip the medium gently. Aroma spreads when you touch the leaves. Trays sit on counters; a small space is enough. Light stretches them right.
Mist daily, watch growth quietly. First true leaves are ready for harvest. Snip carefully with scissors. Flavors jump into salads or sandwiches. Indoor herbs feel alive. Patience becomes a satisfying habit.
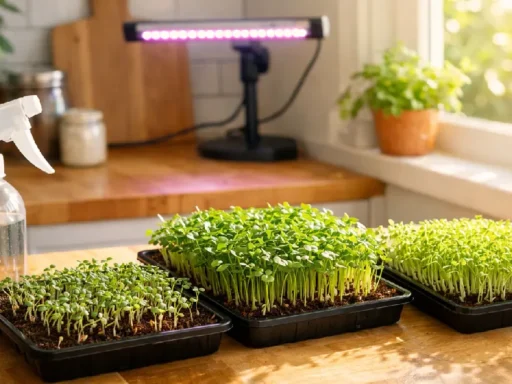
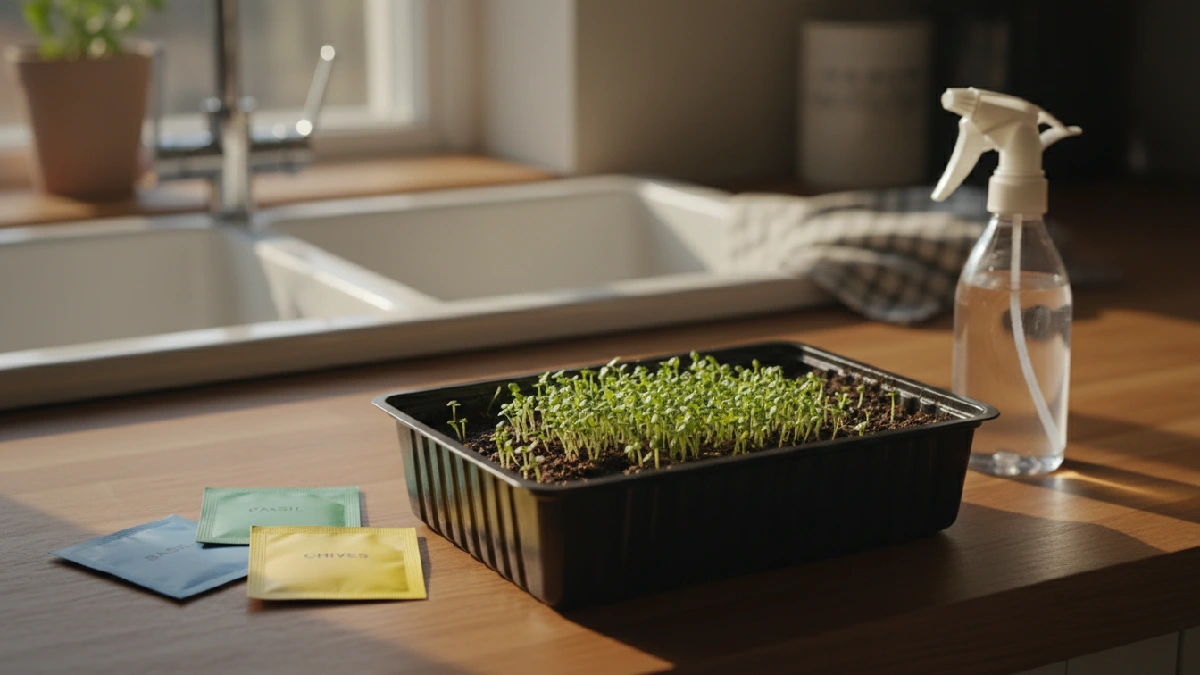
What You Need for Growing Microgreens
You get a tray. Seeds are in a small packet. The growing medium feels soft. You place the tray near a window. Light touches the seeds slowly. No strict plan. You start. Beginners might worry first. After a few days, things start feeling normal. Watering takes little attention. Sometimes you forget. Other times, you water too much. Roots stay strong anyway. Leaves push through slowly.
Mistakes show quickly. You watch patterns but don’t follow them exactly. Microgreens keep growing. Harvest comes quietly. You cut leaves with scissors. Fresh smell fills the kitchen. Nothing dramatic. You taste small leaves. Food feels simple and close. Habit forms slowly. You repeat the process next tray. Learning continues quietly.
Seeds Selection
Seeds sit in small packets. Each type has its own flavor. Some grow fast, others slow. You check them carefully. Beginners feel confused at first. A little trial and error helps. Fresh seeds matter. Old seeds sometimes fail. You notice tiny sprouts appear quicker with fresh ones. Color looks brighter.
Leaves taste better. You feel a small victory when the first seeds grow. Different seeds teach different things. You mix types sometimes. Watching patterns is interesting. Microgreens become more than food. They become a small daily story on your counter.
Growing Medium
Soil feels natural. Beginners like it first. You spread it in the tray. Roots hold well. Sometimes it gets messy. Watering is easy but careful.
Coco peat holds water steady. It stays light. Sprouts push through quickly. You watch them grow without worry.
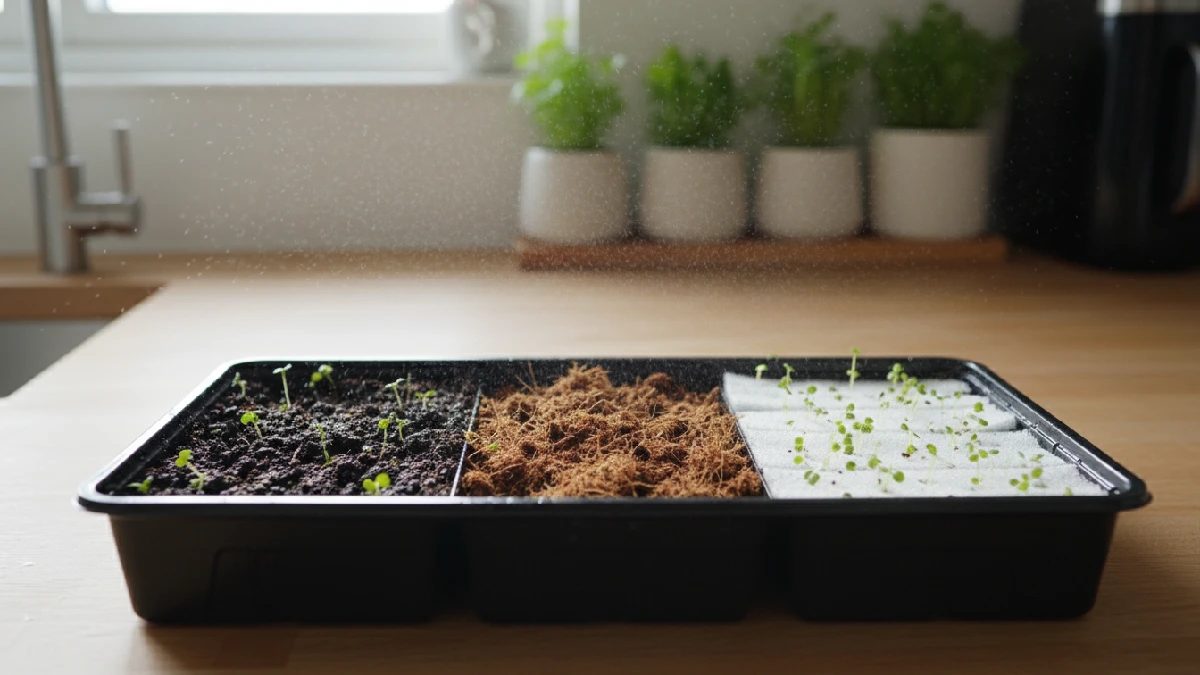
Medium doesn’t get heavy. Cleanup is simple. Hydroponic mats are clean. No dirt mess at all. They stay light and tidy. Water carries nutrients directly. Growth can be faster than the soil. The setup looks modern on your counter.
Trays & Containers
Trays with drainage help water flow out. Roots stay healthy. You don’t worry about overwatering. Leaves grow evenly. Cleaning is easier. Beginners feel confident using them. Trays without drainage need more attention. Water can pool if you’re not careful. Roots may get soggy.
You watch closely. Sometimes it feels tricky. But still, microgreens grow if you check often. Choosing the right tray depends on space. Counter, windowsill, or small shelf works. Stackable trays save room. Light and water matter more than a fancy container. You learn as you go.
Light, Water & Environment
Sunlight matters most. A windowsill works well. Leaves stretch slowly toward the light. Too little sun, growth slows. Too much sun, leaves might burn. You adjust trays by watching them. Water is quite work. Medium should stay moist. Not too wet, not too dry. Roots need space.
You check almost daily. Mistakes happen, but plants survive. The environment feels calm. Air circulation helps leaves stay strong. Room temperature matters. Microgreens grow in small spaces. You notice patterns slowly. Gardening becomes a small habit.
Light Requirements
Sunlight feels natural. A tray on the windowsill catches soft light. Leaves lean slowly toward it. Growth is steady. Beginners notice changes every day. Grow lights work too. LED or artificial lights fill darker rooms. You can place trays anywhere.
Leaves grow evenly if light is balanced. Rotation sometimes helps. Too much light can burn leaves. Too little slows sprouts. You watch and adjust. Microgreens respond quickly. Learning comes quietly. Light feels simple after a while.
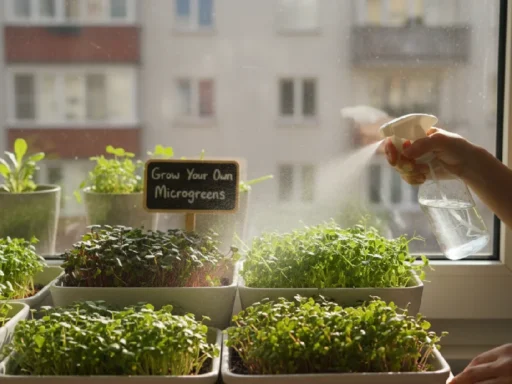
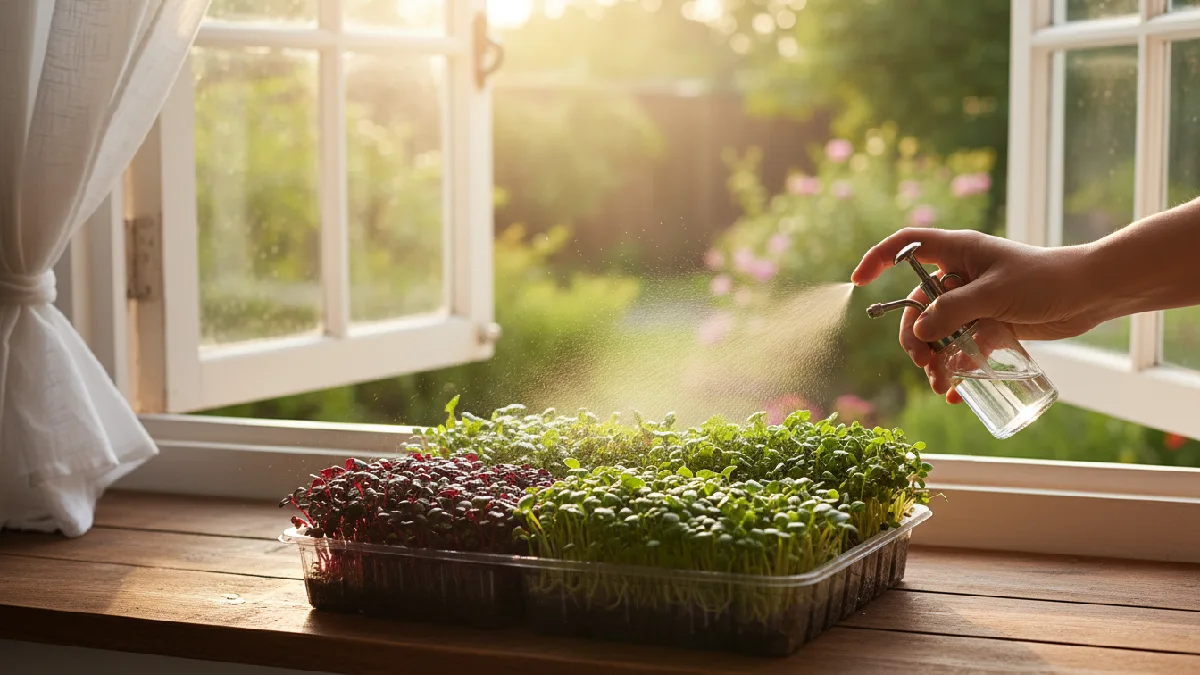
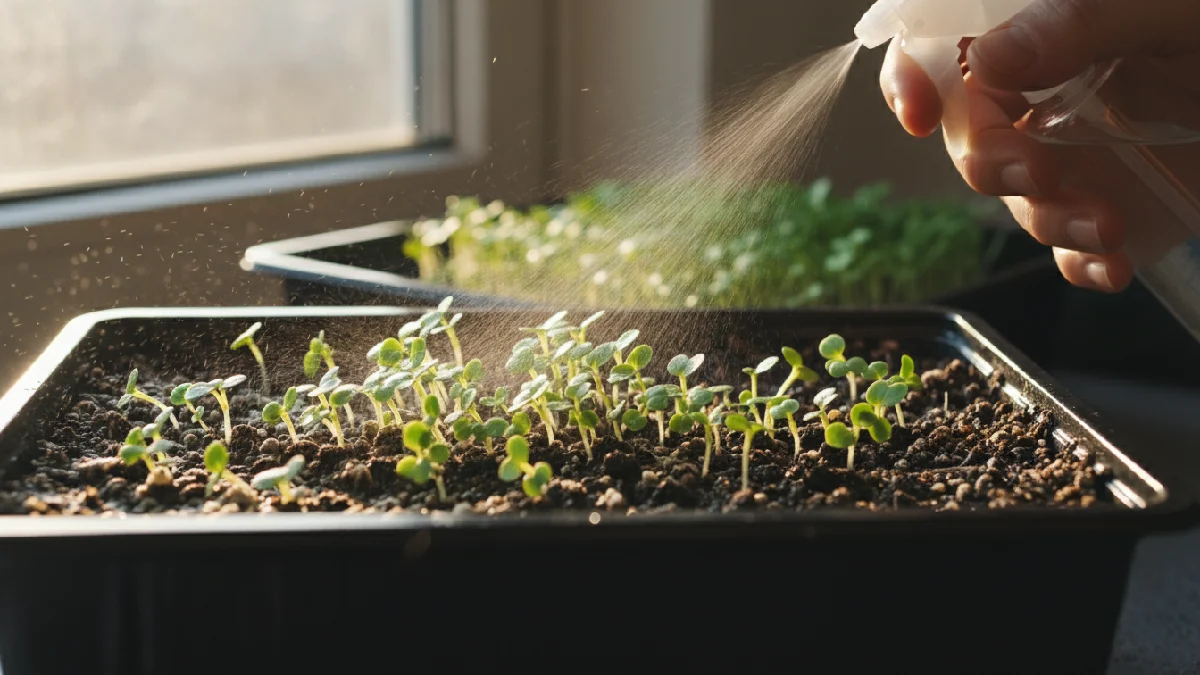
Watering Techniques
Mist watering is gentle. Spray water lightly on leaves. Medium stays moist. Roots get enough water without drowning. Beginners like how easy it feels. Bottom watering is different. The tray holds water below the medium. Roots drink slowly. You avoid wetting leaves too much.
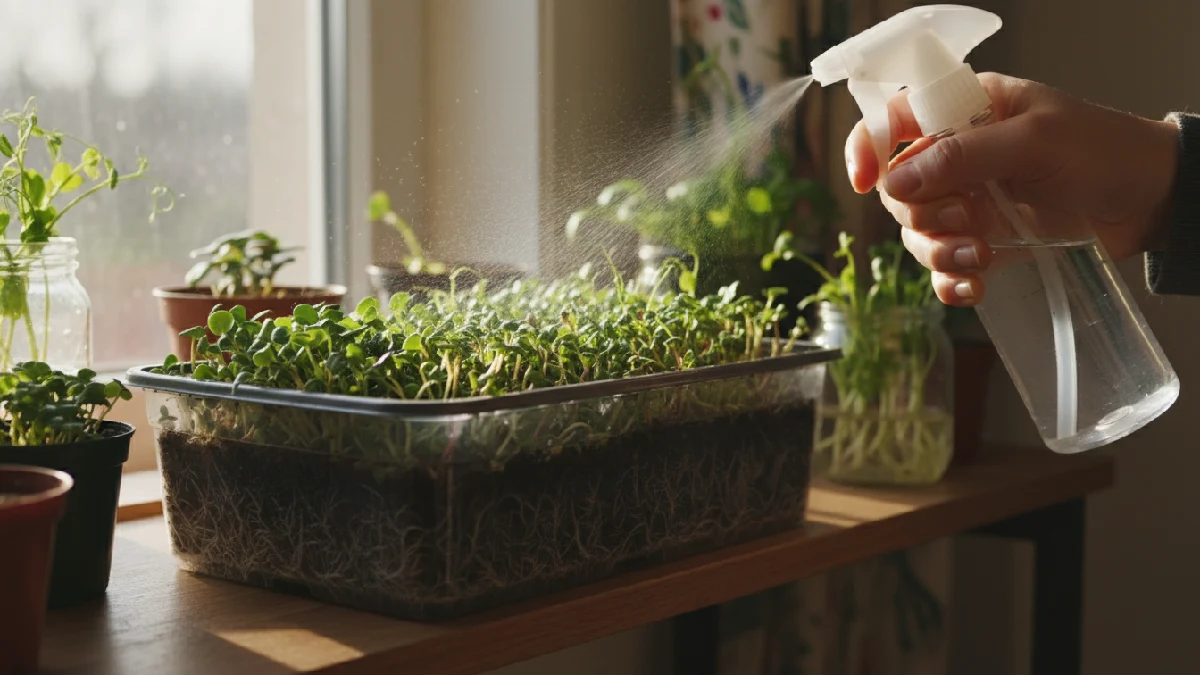
Growth is steady. Some days it feels faster. The choosing method depends on your space. Mist works if trays sit on a counter. Bottom works if you have deeper containers. Microgreens respond quickly. You notice patterns and learn naturally.
Temperature & Humidity
Microgreens like warm rooms. Too cold slows them. Too much heat makes leaves droop. You notice small changes. Plants respond slowly. You watch them every day. Air should feel gentle. Not too dry. Not too wet.
Mist sometimes, if needed. Roots stay strong. Leaves grow steadily. Indoor space works fine. Windows open sometimes. Air moves a little. Microgreens adjust. Patterns appear naturally. You start feeling confident.
Step, by, Step Process of Growing Microgreens
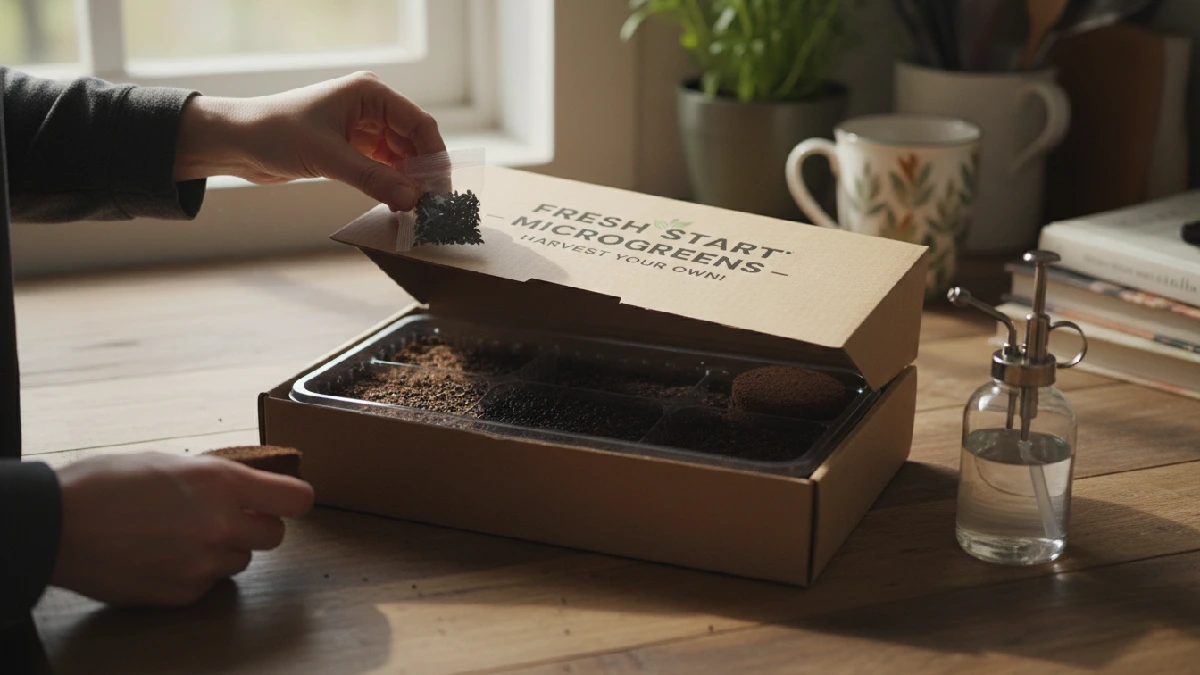
You open the kit. The tray sits on the counter. Seeds wait quietly. Medium feels soft under fingers. Sunlight touches the tray slowly. You start without much thinking. Beginners feel unsure first. They watch carefully. Watering happens gently. Medium stays moist. Not too wet. Roots push quietly.
Leaves grow and twist. Mist if it feels dry. Patterns appear slowly. You notice small changes. Harvest comes without fanfare. You cut leaves carefully. Fresh smell spreads in the kitchen. Food feels close now. You taste little leaves. Habit forms naturally. Confidence grows with each tray.
Step 1: Preparing the Tray
The tray sits on the counter. You check everything. Seeds, medium, and guide are ready. Beginners feel unsure first. Light hits the tray softly. You don’t plan much. You start. Medium goes in the tray. Spread it evenly. Not too thick, not too thin. Roots need space.
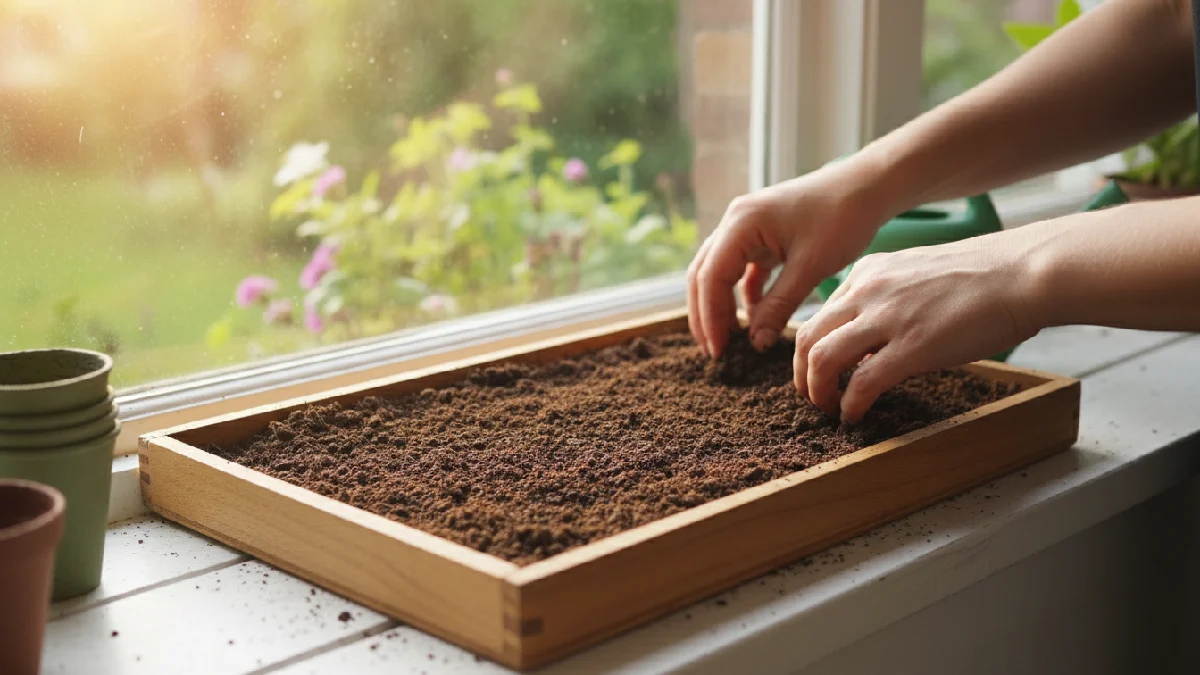
You press lightly. Tray feels simple to manage. Fingers touch the soil carefully. Tray sits steady. Easy to water. Windowsill or shelf works fine. You step back and watch. Kit feels ready. Small excitement appears. Indoor gardening quietly begins.
Step 2, Sowing the Seeds
Seeds wait in small packets. You sprinkle them evenly on the medium. Not too crowded. Each seed needs space. Beginners watch quietly. Sprouts start slowly. Press seeds lightly. Don’t bury them deep. Some kits say cover them gently. Tiny leaves appear faster this way.
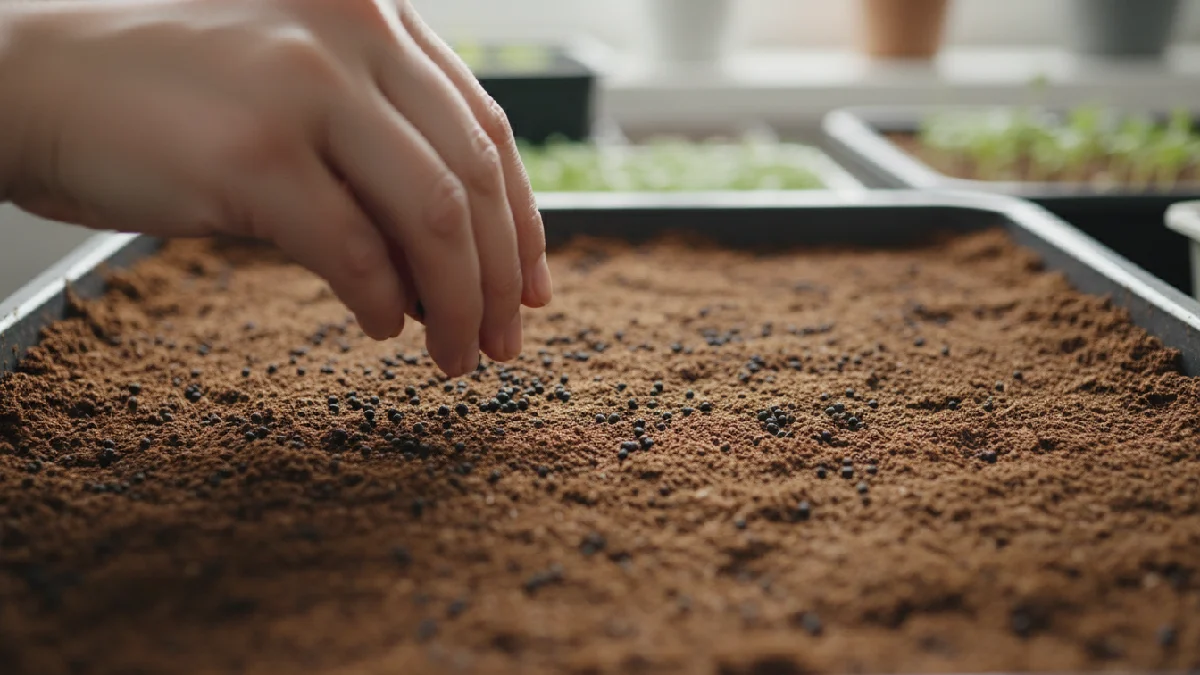
You notice changes every day. Patience feels important. The tray is ready for water. Sunlight touches seeds. You step back and look. Tiny sprouts might move soon. Indoor gardening feels calm. Learning happens naturally.
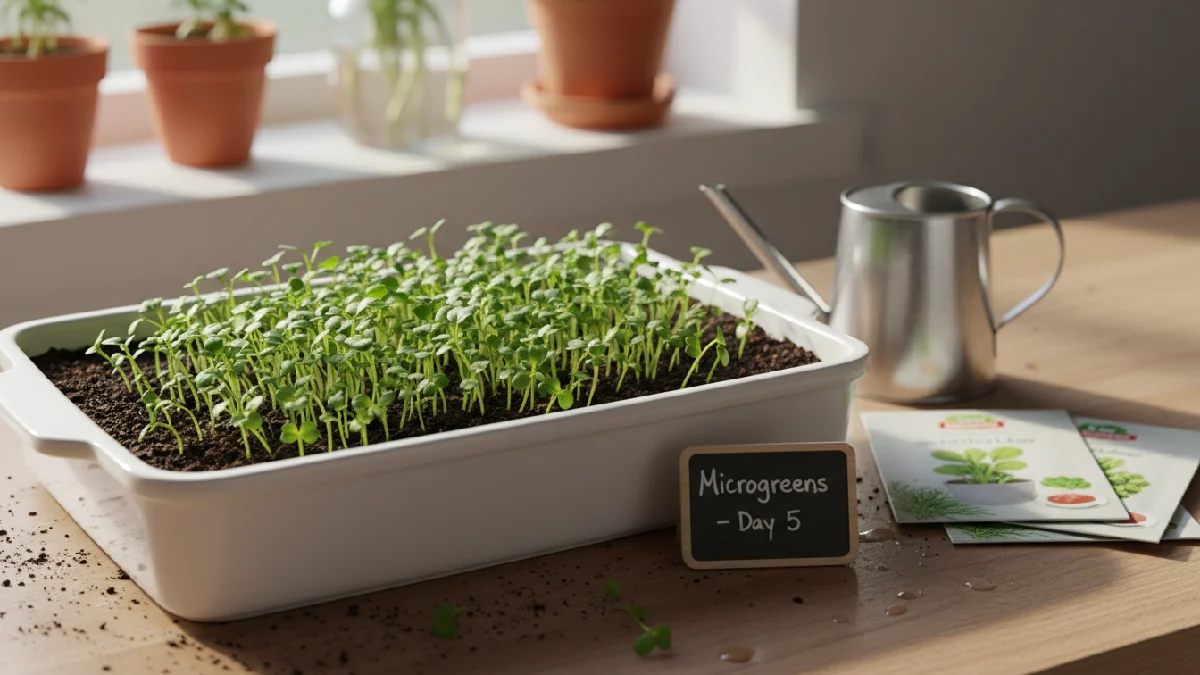
Step 3, Germination Stage
Seeds start to sprout slowly. Tiny leaves push through the medium. You watch carefully. Some days, nothing seems to happen. Other daysleaves pop up quickly. Beginners feel curious. Moisture is important. Keep medium damp, not soggy. Roots spread quietly.
Leaves turn green. You notice small patterns. Each tray teaches something new. Tray sits near the light. Air moves gently. You step back and observe. Microgreens grow steadily. Indoor gardening feels calm. Mist if needed.
Step 4, Growth & Care
Leaves grow steadily. You watch them every day. Some days, growth seems slow. On other days, sprouts appear quickly. Mist if needed. Medium stays damp. Roots feel strong. Light matters. A windowsill or soft LED works. Rotate trays sometimes. Leaves turn evenly.
Air moves gently. You notice small patterns. Microgreens respond quietly. Watering is gentle. Not too much. Not too little. Check daily. Mist if needed. Plants keep growing. Indoor gardening feels calm. You start feeling confident.
Step 5: Harvesting Microgreens
Leaves grow about 1to 3 inches. Scissors sit ready in your hand. You cut gently above the medium. Roots stay in the tray. The kitchen smells fresh. You feel small excitement. Rinse leaves lightly if needed. Microgreens look bright and green. Texture is crisp. You taste a few leaves.
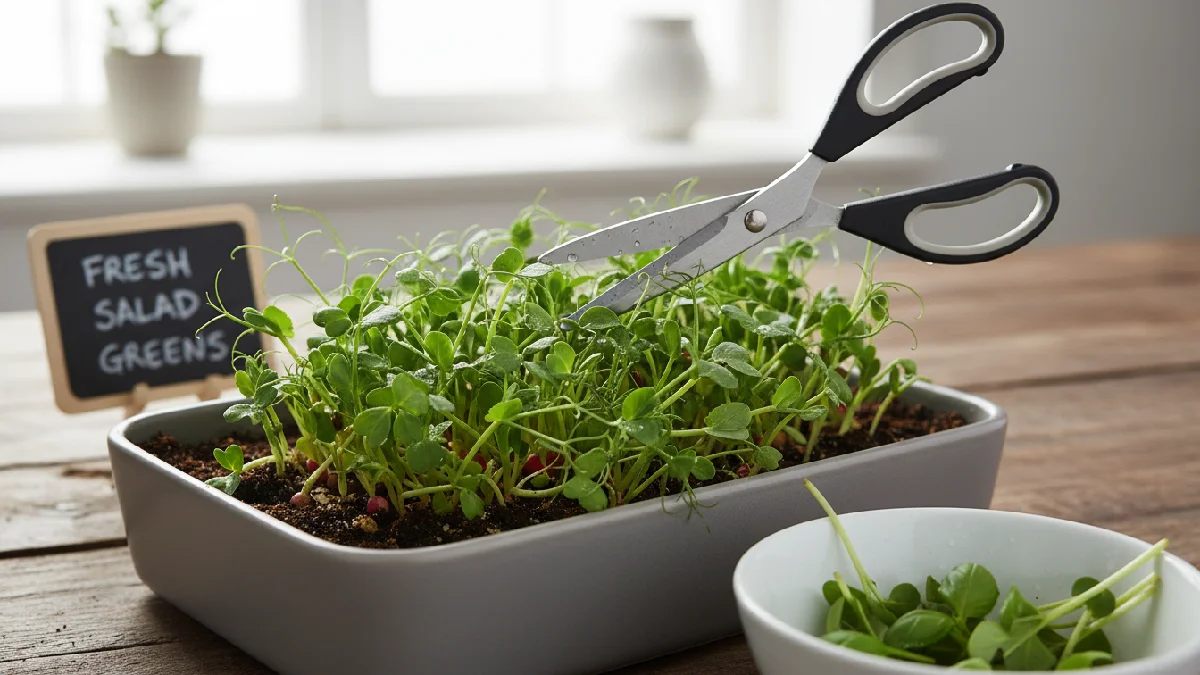
Flavors feel fresh. Each tray teaches something small. Use leaves in salads, sandwiches, and smoothies. Each tray gives little joy. You notice patterns for the next batch. Growing becomes quiet habit. Confidence grows slowly.
Common Problems in Growing Microgreens
Sometimes leaves turn yellow. You wonder what went wrong. Water may be too much or too little. Light can be uneven. You notice patterns slowly. Beginners feel some worry. Mold can appear on medium. It grows quietly. Too much water or ta ight space can cause it.
You remove the affected parts. Air moves gently. Plants recover slowly. Seeds may not sprout fast. Old seeds sometimes fail. You check each tray carefully. Some types take longer. Patterns appear with time. Indoor gardening teaches patience.
Mold Growth & Prevention
Sometimes white mold appears on the medium. It grows quietly. You notice small spots first. Too much water causes it. Leaves may curl. Beginners feel unsure. Remove affected parts gently. Don’t disturb healthy sprouts. Air circulation helps a lot.
You watch trays carefully. Mold slows growth, but plants survive. Keep the medium just moist. Not soggy. Sunlight or LED light touches the tray. Patterns appear slowly. You adjust watering. Microgreens recover naturally.
Uneven Germination
Some seeds sprout fast. Others take time. Tiny leaves appear at different moments. You watch the tray carefully. Beginners feel curious. Patterns are not perfect. Medium may hold water unevenly. Roots grow differently in spots. Leaves twist or lean.

You notice small changes every day. Growth still looks healthy. Patience matters. You water lightly. Light reaches all corners. Microgreens adjust slowly. Each tray teaches small lessons. Indoor gardening feels calm and quiet.
Yellow or Pale Leaves
Leaves turn yellow sometimes. You check the tray carefully. Water may be too much. Or too little. Light might be weak. You notice small changes. Nutrients affect color, too. Soil or medium may not be enough. Leaves look pale. You adjust watering slowly.
Microgreens keep growing. Beginners learn patterns quietly. Sunlight helps green return. Rotate tray if needed. Air moves gently. Leaves recover slowly. You watch patiently. Indoor gardening teaches small lessons.
Long & Weak Stems (Leggy Growth)
Sometimes stems grow too long. Leaves stay small. Plants stretch for light. You notice them leaning. Beginners feel unsure. Patterns look uneven. Light is often the cause. The tray may be too far from the window. LED or sunlight helps. You adjust carefully.
Roots stay strong. Leaves respond slowly. Patience matters. Microgreens recover with proper light. Rotate tray if needed. Growth evens out gradually. You watch quietly. Indoor gardening feels calm and simple.
How to Use & Store Microgreens
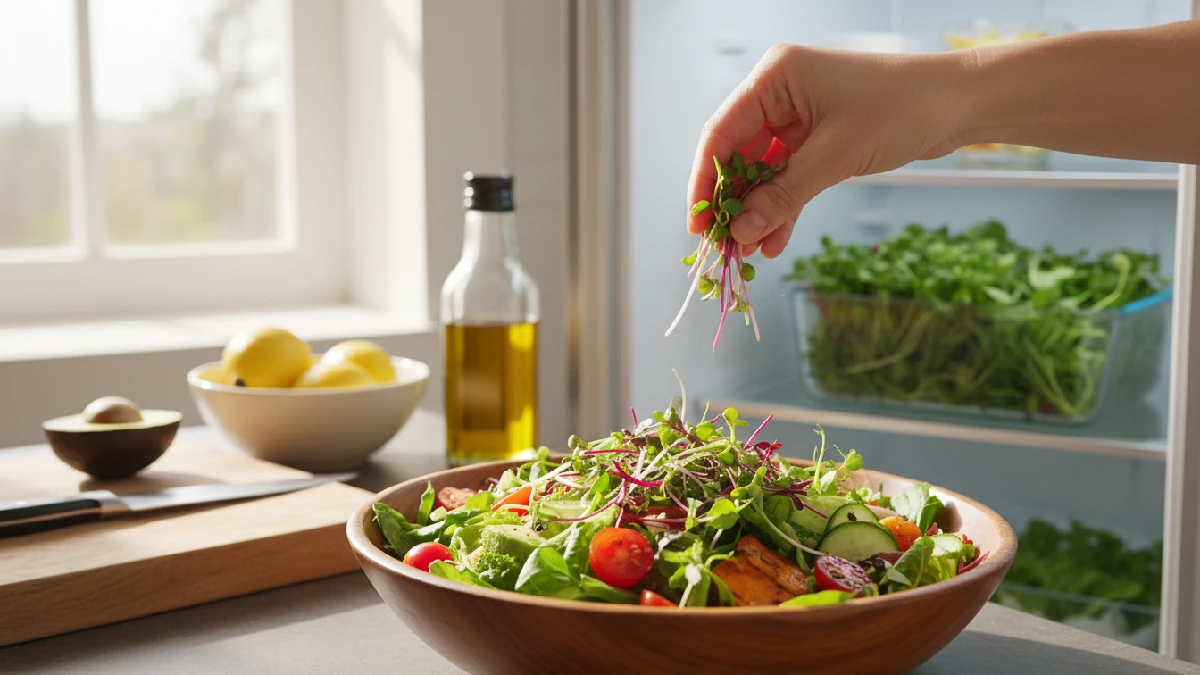
Microgreens are ready to eat. You cut leaves gently. Texture feels crisp. Flavor comes strong. Beginners enjoy tasting small amounts. You sprinkle them on salads, notice the color pop. Use in sandwiches, smoothies, and soups. Leaves add nutrition quietly. The kitchen feels lively. Cooking becomes a small joy.
Microgreens make simple dishes feel new. You watch little patterns form on each plate. Store leftovers in the fridge. Keep in an airtight container. Leaves stay fresh few days. Check them daily. Mist if needed. Indoor gardening continues slowly. You start noticing small habits form.
Culinary Uses
Microgreens fit easily in salads. You sprinkle them on top. Leaves add color and crunch. Flavors mix quietly with other greens. Beginners feel proud tasting small leaves. Sandwiches get brighter with microgreens. You layer them with cheese or veggies. Texture feels fresh.
Bite after bite, flavors combine softly. The kitchen smells good. Smoothies get a healthy boost. You drop a handful of leaves. Blend with fruits or yogurt. Color turns green. Taste stays mild. You drink slowly. A small habit feels rewarding.
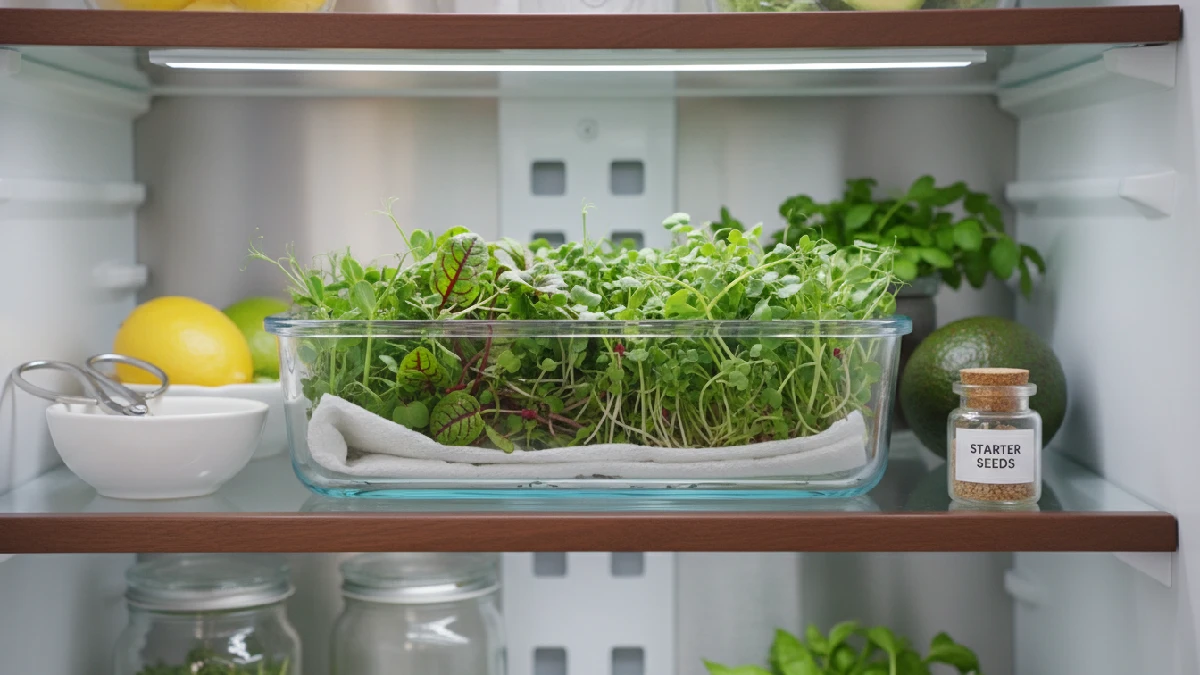
Storage Tips
Fresh microgreens stay best in the fridge. You place them in a container. Not too tight. Leaves stay green. Moisture matters a little. Beginners check them daily. A paper towel helps absorb extra water. You layer it under greens. The container stays clean.
Leaves last longer. You notice small changes. Taste stays fresh. Use quickly for the best flavor. Don’t wait too long. Each tray gives a small joy. You plan the next harvest. Indoor gardening feels easy. Confidence grows slowly.
Shelf Life of Microgreens
Fresh microgreens last about one week. You check leaves daily. Some stay crisp longer. Light and moisture affect them. Beginners notice small changes. Storage in the fridge helps. The container should not be too tight. A paper towel under the leaves works well.
You open the container carefully. Leaves stay green and fresh. Use quickly for the best flavor. After a week, the taste may change. Texture becomes softer. Each tray teaches a little. Indoor gardening feels simple and rewarding.
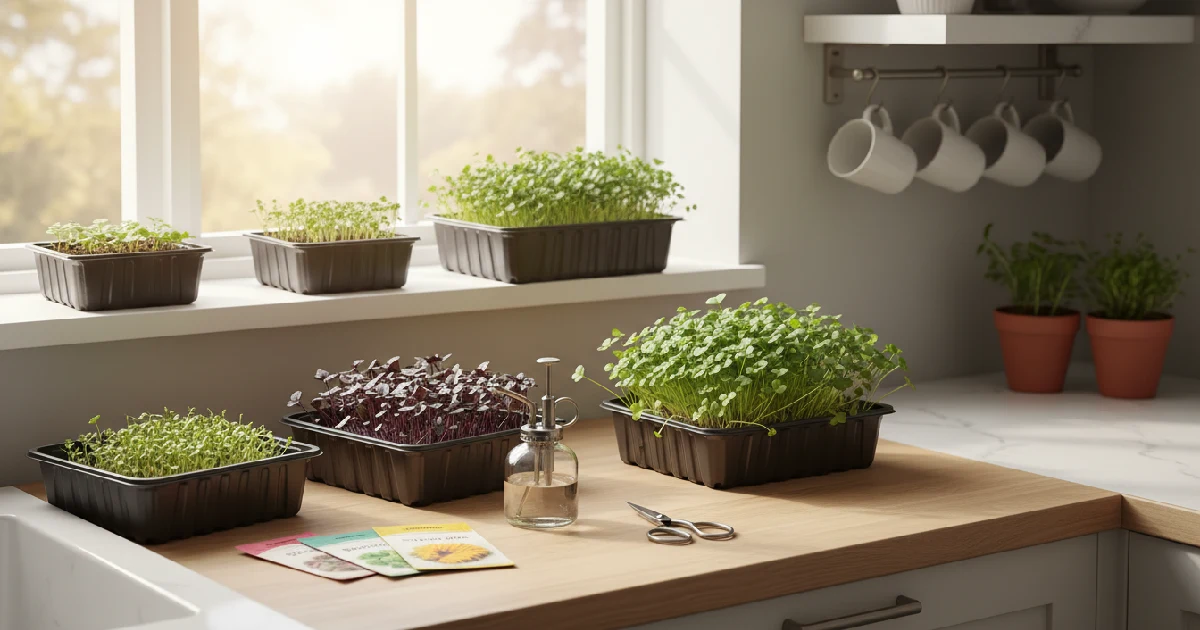
Tools & Equipment for Growing Microgreens
You need a tray. Seeds sit in small packets. The growing medium is ready. Spray bottle helps water gThe growingScissors or a knife help harvest. Beginners feel confident quickly. Some trays have drainage holes. Others don’t. Pick what fits your counter or windowsill. Grow lights help in darker rooms.
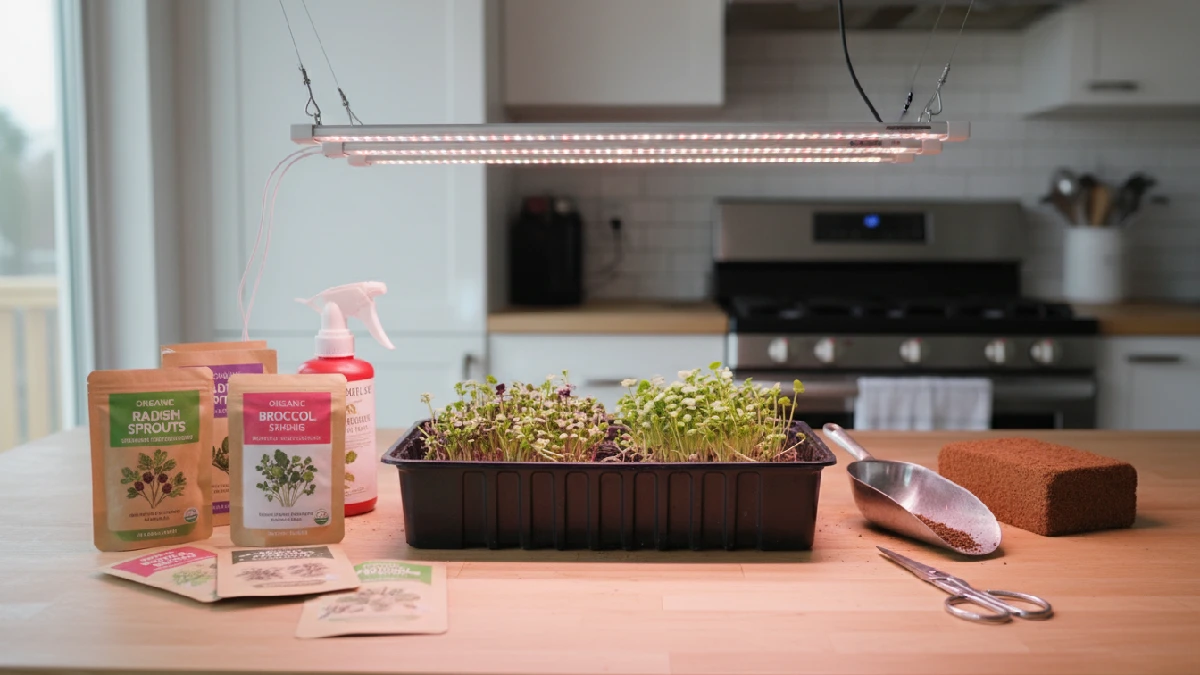
Leaves reach the light slowly. Patterns appear naturally. Extra tools make things easier. Paper towels, a small scoop, and containers help manage medium. You toua ch soil gentland y. Everything sits ready. Indoor gardening feels calm and easy.
Growing TraA spray
says hold the medium and seeds. You pick a size that fits your counter or windowsill. Bigger trays give more greens. Smaller trays save space. Beginners choose what feels easy. Some trays have drainage holes. Water flows out gently. Roots stay healthy. Leaves grow evenly. Cleanup is simple. You notice small patterns.
Other trays don’t drain. Water needs careful checking. Roots can get soggy if too much water stays. Leaves still grow if you watch closely. Indoor gardening becomes a little experiment.
Spray Bottle
A spray bottle helps water the microgreens gently. You don’t pour too much. Medium stays moist. Roots stay healthy. Beginners feel more confident. Mist leaves lightly every day. Tiny drops reach all corners. Growth feels steady.
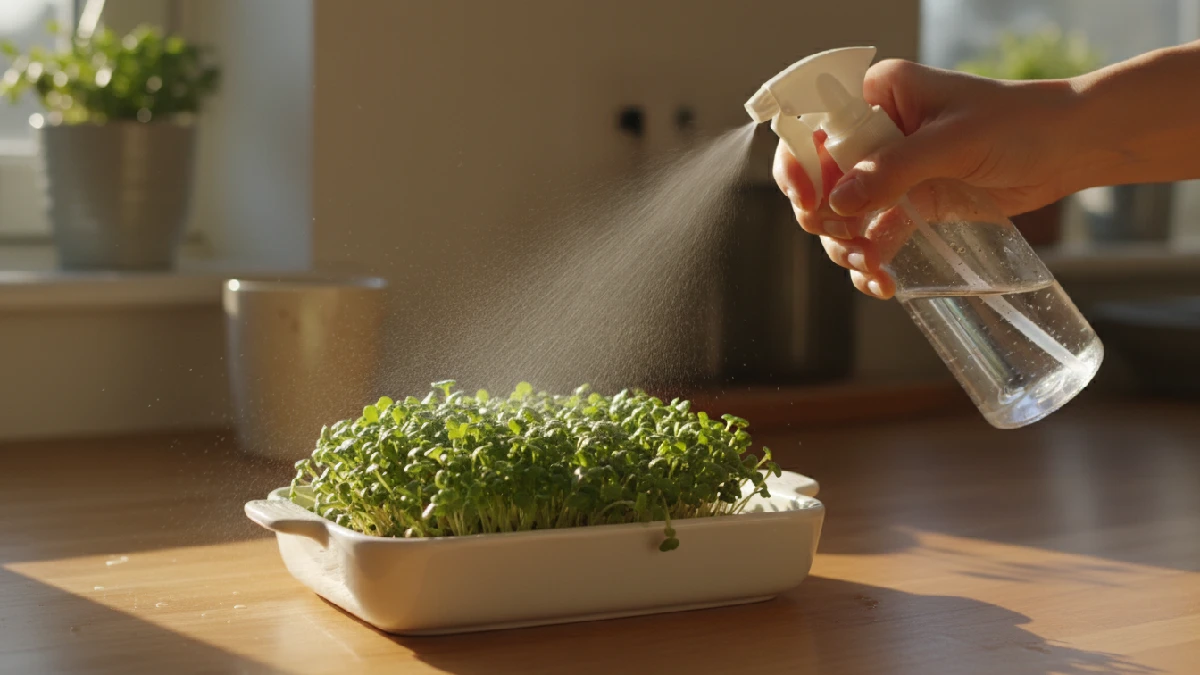
You notice small changes. Plants respond slowly. The spray bottle is easy to use. No mess happens. Leaves stay crisp. Indoor gardening feels calm. Habit becomes natural. You enjoy little daily progress.
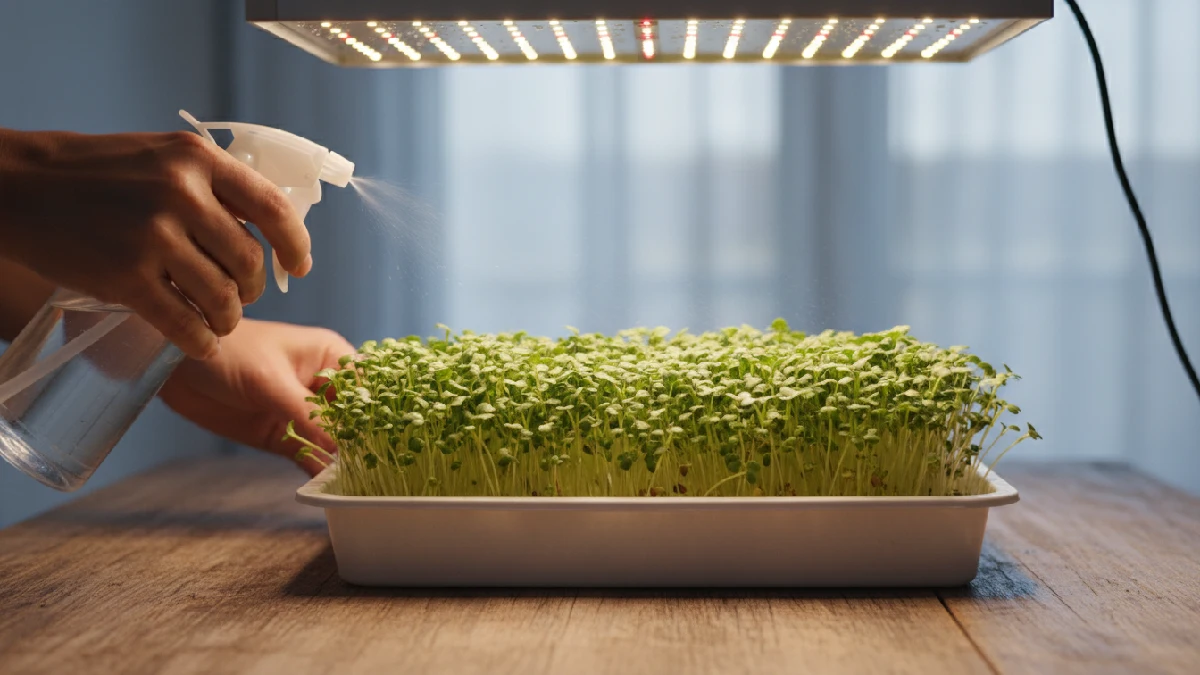
Grow Lights
Grow lights help microgreens in darker rooms. You place trays under stheLED or artificial light. Leaves grow evenly. Growth feels steady. Beginners watch quietly. Lights stay on few hours a day. Rotate trays sometimes. Leaves reach light from every side.
Color stays bright. Plants respond slowly. Grow lights make indoor gardening flexible. You don’t depend on sunlight. Microgreens grow anywhere in your home. Patterns appear naturally. Learning happens quietly.
Scissors or a sharp knife
Scissors or a small knife help harvest microgreens. You cut just above the medium. Roots stay in the ray. Leaves stay fresh. Beginners feel careful at first. Cut gently. Too much pressure can damage sprouts.
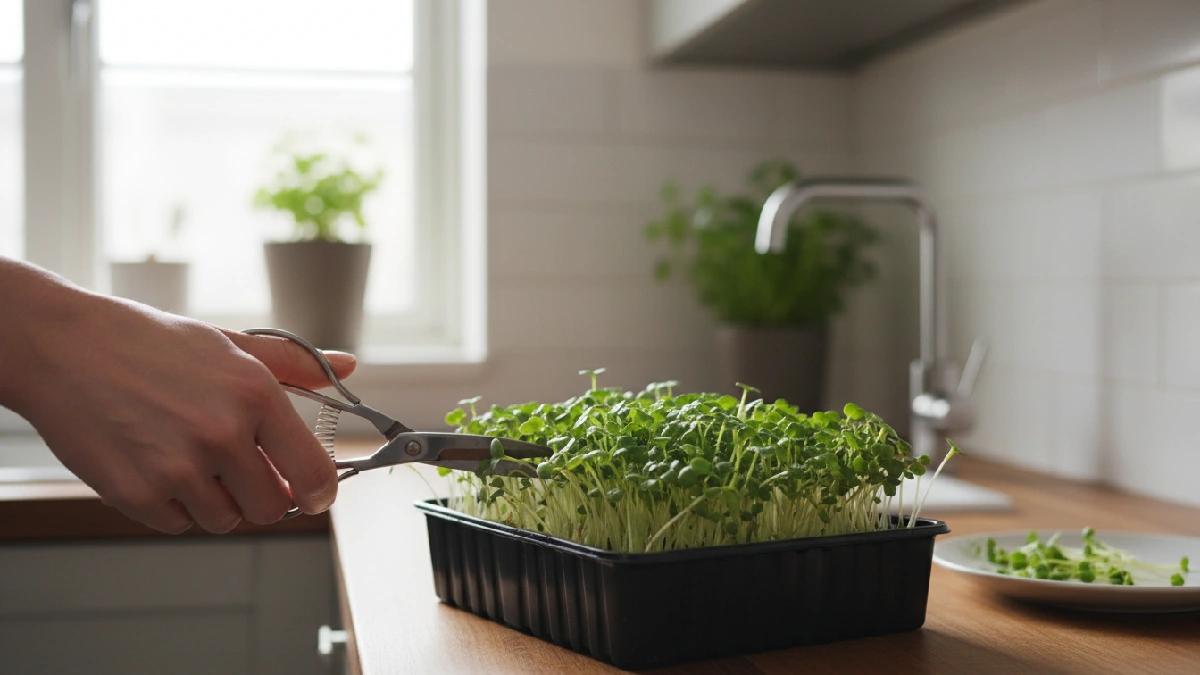
Small leaves stay intact. The kitchen smells green. Taste feels crisp. Tools are easy to clean. You wash after each use. Habit forms quietly. Microgreens stay healthy. Harvesting becomes simple and fun.
FAQ, Growing Microgreens
How long does it take to grow microgreens?
Most microgreens are ready in 7to 14 days. Growth depends on light, water, and the type of seed.
Can I grow microgreens without soil?
Yes, you can use hydroponic mats or coco peat. Plants get nutrients from water instead of soil.
How often should microgreens be watered?
Keep the medium lightly moist every day. Mist once or twice daily to stay fresh.
Are microgreens profitable to grow?
Yes, growing at home saves money on store-bought greens. You can grow small batches easily and eat fresh.
Which microgreens grow fastest?
Radish, mustard, and arugula sprouts grow quickly. You can harvest them in about one week.
Conclusion
Growing food at home slowly feels less like work and more like part of daily life. When you grow microgreens, the process stays simple, trays resting quietly while days move on. Watering happens without pressure, light comes naturally, and growth shows up in its own time. Some seeds rise fast; some take longer.
Nothing feels perfect, but everything still works. Cutting fresh greens feels normal, almost expected. You don’t need strict rules or experience to grow microgreens well. Over time, this habit adds a fresh taste to meals, builds quiet confidence, and turns indoor gardening into something personal, calm, and easy to keep up every day.