
Microgreen Containers: Complete Guide to Choosing, Setting Up & Growing Healthy Microgreens
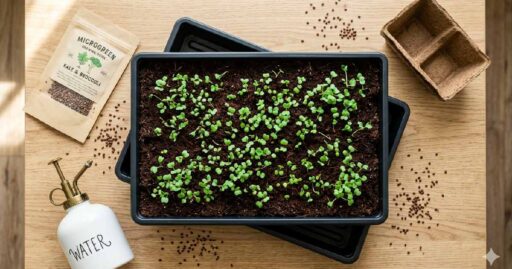
Microgreen containers are honestly the starting point of everything. You don’t really need anything fancy for it. Most of the time, a simple tray or even an old box lying around works fine. What matters more is how it holds the soil and lets water move out. If water stays stuck inside, things start going wrong pretty quickly. So drainage is kind of the main thing here, even more than the container itself.
Setting it up is not a big process. You just put a thin layer of soil or growing mix, nothing too heavy or packed. Seeds go on top, just spread them around, no need to stress about perfect lines or spacing. Then a light spray of water, not pouring, just enough to make it moist. After that, you mostly leave it alone and let it do its thing. It looks like nothing is happening for a few days, but inside, roots are working quietly. Then suddenly green shows up, and it feels like it came out of nowhere.
Introduction
Microgreens are something very simple on the surface, but they change the way you look at home growing. A small tray, a bit of soil, some seeds, and that’s really it. Nothing heavy, nothing complicated. Still, after a few days, that same plain setup turns into fresh green growth sitting right in front of you. It feels almost too easy when you see it happening.
Most people think growing plants needs space or proper gardening knowledge. Microgreens don’t really follow that idea. You can start them in a corner of your kitchen, on a table, or even near a window. The container is the main thing here. It holds everything together and keeps the whole process stable. If the container is right, half the work is already done without doing much.
At first, nothing looks active, just seeds sitting quietly in the soil. No visible change for a couple of days, maybe even feels like nothing is happening. But under that surface, things are moving slowly. Roots start forming, moisture gets balanced, and the system slowly wakes up. Then one day, green starts appearing, and the whole tray changes its look completely.
It’s not a fast process, and that’s kind of the point. Microgreens grow in their own simple rhythm. You don’t really control much; you just support it a little and let it happen naturally.
What Are Microgreen Containers?
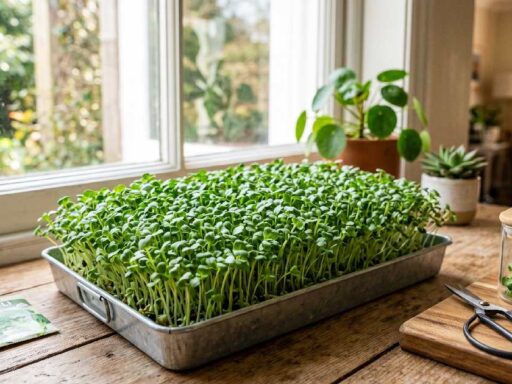
Microgreen containers are simple trays or shallow boxes used to grow microgreens in a small, controlled space. Nothing fancy about them, mostly just basic holders that keep soil and seeds together. But still, they play a very important role in the whole growing process. If the container is not right, even good seeds struggle a bit, and things don’t grow evenly.
These containers are usually shallow because microgreens don’t need deep soil. Their roots stay small, and the real growth happens upward, not downward. So depth doesn’t matter much, surface space does. More space means seeds can spread properly and grow without fighting for room. Most of the time, people use plastic trays, food boxes, or simple reusable containers. Some even use whatever is available at home.
The main idea is just to hold soil and manage moisture. A good container also helps extra water drain out, because if water stays inside too long, the setup gets weak and messy. In simple terms, a microgreen container is just a small setup that keeps everything in place. Soil, water, and seeds all stay in one controlled area. Nothing complicated, just a basic system that makes growing easier and more stable.
Types Of Microgreen Container
Microgreen containers come in a few different forms, and each one works in its own way. There is no single perfect option; it mostly depends on how someone is growing and what setup they have available.
Some people go for simple trays, some prefer eco-friendly options, and others just use whatever is lying around at home. All of them can work, but results depend on handling more than the container itself.
Plastic Grow Trays
Plastic grow trays are the most common choice. Almost every commercial grower uses them because they are simple, cheap, and easy to reuse. They are made in a standard shape, usually shallow, which is perfect for microgreens.
They can be used again and again without much damage if handled properly. That’s why they are considered industry standard in most setups.
Pros:
- easy to clean
- widely available
- reusable and scalable
Cons:
- needs proper drainage, otherwise water builds up and causes problems
Biodegradable Containers

These containers are made from natural materials like fiber, paper, or coconut-based material. They are designed for people who prefer eco-friendly growing methods. They feel more “natural” compared to plastic and are often used in organic setups.
They work fine for small batches and home growing, but they are not built for long-term or repeated use.
Pros:
- organic farming friendly
- eco-friendly and low waste
Cons:
- short lifespan, break down after some time, especially with moisture
Hydroponic Containers
Hydroponic containers are a different system altogether. Instead of soil, they use water mixed with nutrients. This changes the whole growing style and makes it more controlled.
This method is often used when cleaner setups or faster growth are needed. Everything depends on water balance and nutrient mix.
Pros:
fast growth
clean setup, no soil mess
Cons:
needs experience, small mistakes can affect results quickly
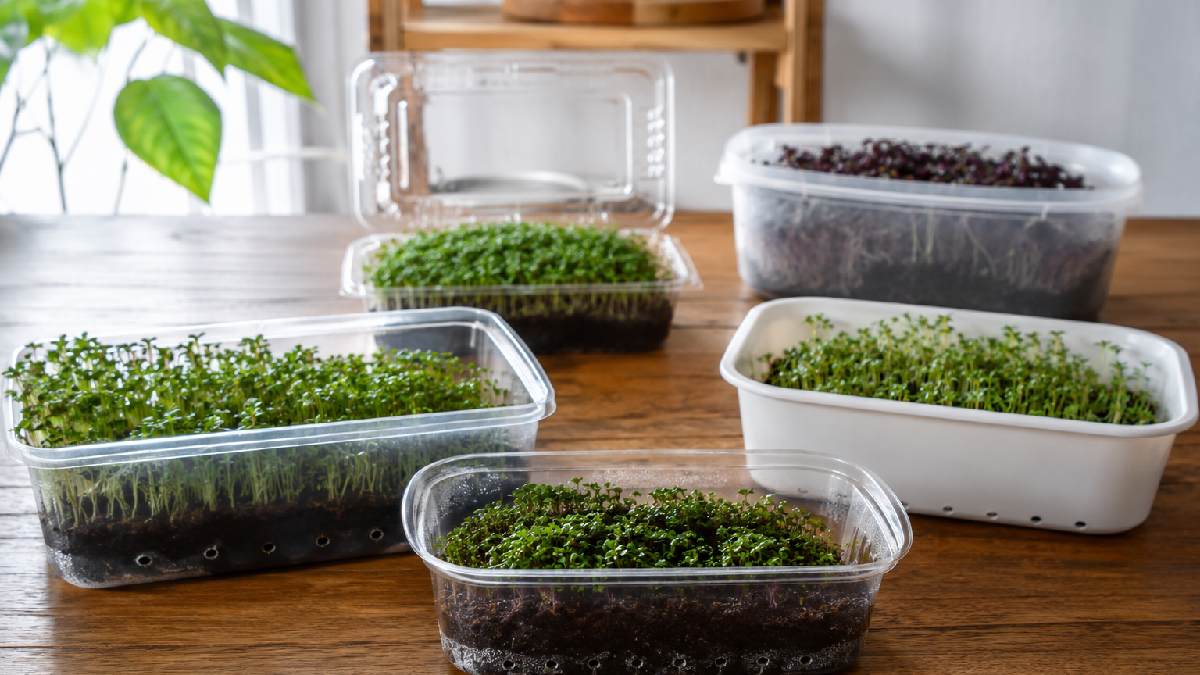
DIY Containers
DIY containers are the most flexible option. People use food boxes, kitchen trays, or reused plastic containers from home. It is cheap and easily available, so beginners usually start here. But this method needs care because not all containers are made for growing.
Best Materials For Microgreen Containers
Choosing the right material for microgreen containers is important because it affects drainage, airflow, durability, and plant health. Most growers prefer shallow containers because microgreens grow fast and do not need deep roots.
I tried different setups and noticed container material changes, watering, and mold problems more than expected. Some materials are cheap and simple, while others last longer and feel easier to manage for daily growing.
Food-grade plastic
Food-grade plastic is the one most people end up using. It’s simple, light, and doesn’t cost much. Most microgreen trays you see in shops are made from it. Nothing fancy, just practical. It works fine for beginners and even for regular growing, as long as water doesn’t get stuck inside.
Stainless steel
Stainless steel is on a different level. Strong, clean, and long-lasting. Some people like it because it feels more solid and doesn’t wear out easily. But it’s not something everyone goes for since it’s more expensive and a bit overkill for small setups.
Fiber trays
Then there are fiber trays. These feel more natural, made from plant-based stuff. They are good for eco setups and break down over time. But they don’t last long, especially if they stay wet too much.
In the end, most people stick with plastic growing trays because they are simple and reliable. Other materials are available, but they fit specific situations more than everyday use.
Drainage System
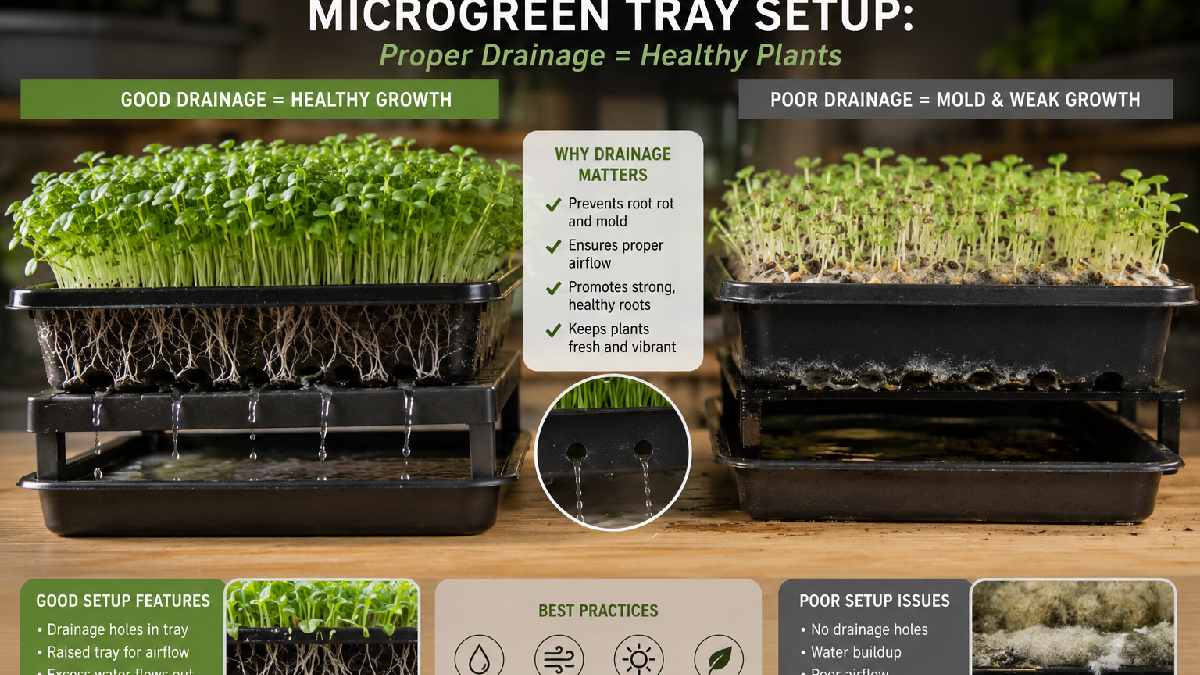
The drainage system is one of the most important parts of growing microgreens, but beginners often ignore it. In reality, if water does not drain properly, the whole setup can fail quickly. Roots don’t only need water, they also need air to stay healthy. When excess water stays at the bottom of the tray, airflow gets blocked, and roots start to suffocate.
This slows down growth and makes the plants weak. Simply put, if water remains collected at the bottom, mold and bacteria can start developing within 1to 2 days. That’s why proper drainage is the foundation of every successful microgreen setup; without it, healthy growth is almost impossible.
Why drainage is critical
Drainage is one of those things that looks small but ends up deciding the whole result of microgreen growth. Most people don’t pay attention to it in the beginning. They focus on seeds, soil, and light, but water control is what actually keeps everything stable. If the drainage is not right, the setup slowly starts going bad without any clear warning.
Roots are the main reason drainage matters. They don’t only need water, they also need air around them. When extra water stays inside the container, air gets blocked. Roots start to struggle, and growth becomes weak and uneven. It doesn’t happen instantly, but after a short time, the difference becomes visible.
Mold and bacteria are another issue. Standing water creates a damp, closed environment where unwanted growth spreads easily. Many beginners think something is wrong with the seeds or soil, but most of the time, it is just excess water sitting at the bottom. Everything looks fine at first, then suddenly problems show up within a day or two. A simple way to understand it is: “If water stays at the bottom, roots suffocate, and mold develops within 1–2 days.”
Tray-with-holes system
This is the most commonly used method. Small holes are made at the bottom of the tray so extra water can drain out naturally. It helps keep the moisture level balanced and prevents overwatering. This system is simple, cheap, and works well for almost every beginner setup.
Bottom-water tray system
In this setup, the growing tray is placed inside another tray that holds a small amount of water. The plants take moisture from below instead of direct watering from above. It keeps hydration steady, but it needs attention because water levels must be managed carefully. Drainage is not just a small detail. It is the base that keeps everything alive and healthy.
How to Set Up Microgreen Containers
Setting up microgreen containers is simple and does not require expensive gardening tools. The main goal is to create a clean space with proper drainage, airflow, and enough room for seeds to grow evenly.
I tried my first setup using a small tray near a kitchen window, and it worked surprisingly well. Microgreens do not need deep pots, so shallow containers are usually the best choice for beginners.
Choose container type.
The first step is selecting a suitable container. Most people use shallow trays or basic growing boxes. The container should have enough surface area and proper drainage. Without drainage, excess water stays inside and creates problems later. A simple, clean container always works better than a fancy but unsuitable one.
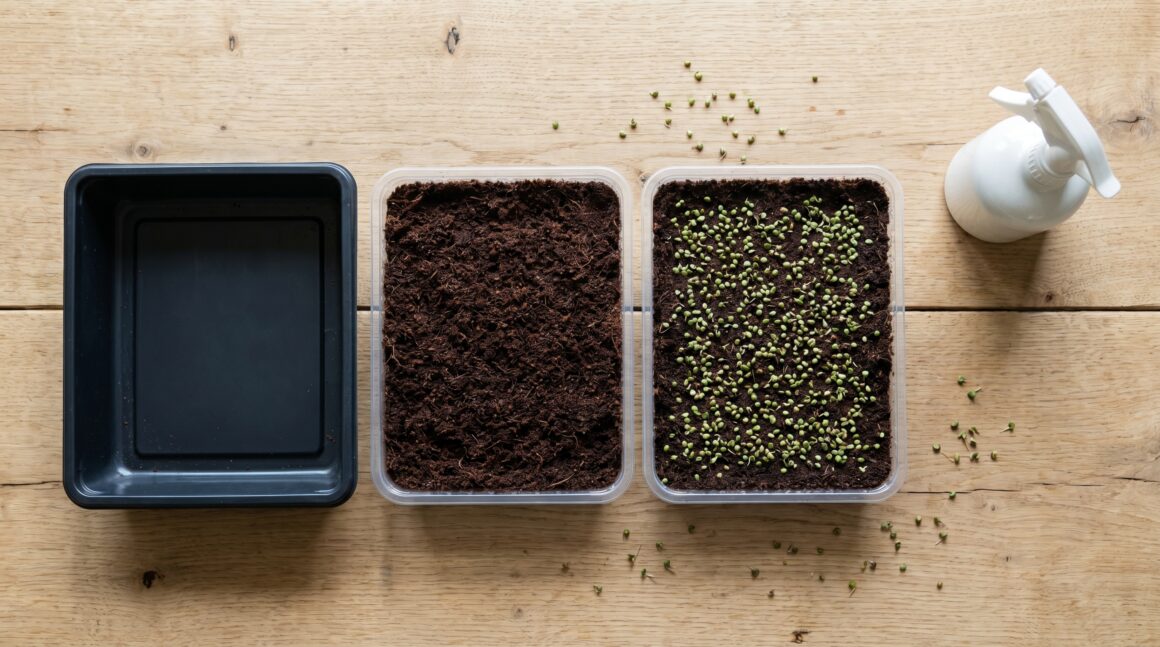
Add growing medium (soil/coco coir)
Once the container is ready, add a thin layer of growing medium. This can be soil or coco coir. The layer should be even, not too thick, and not too compact. If it is packed too tightly, roots struggle to spread. If it is too loose, the moisture won’t stay balanced. A soft, leveled surface works best for uniform growth.
Spread seeds evenly
The next step is seed distribution. Seeds should be spread evenly across the surface. There is no need for perfect spacing, because microgreens naturally grow in dense form. The main idea is to avoid empty gaps or heavy clumps.
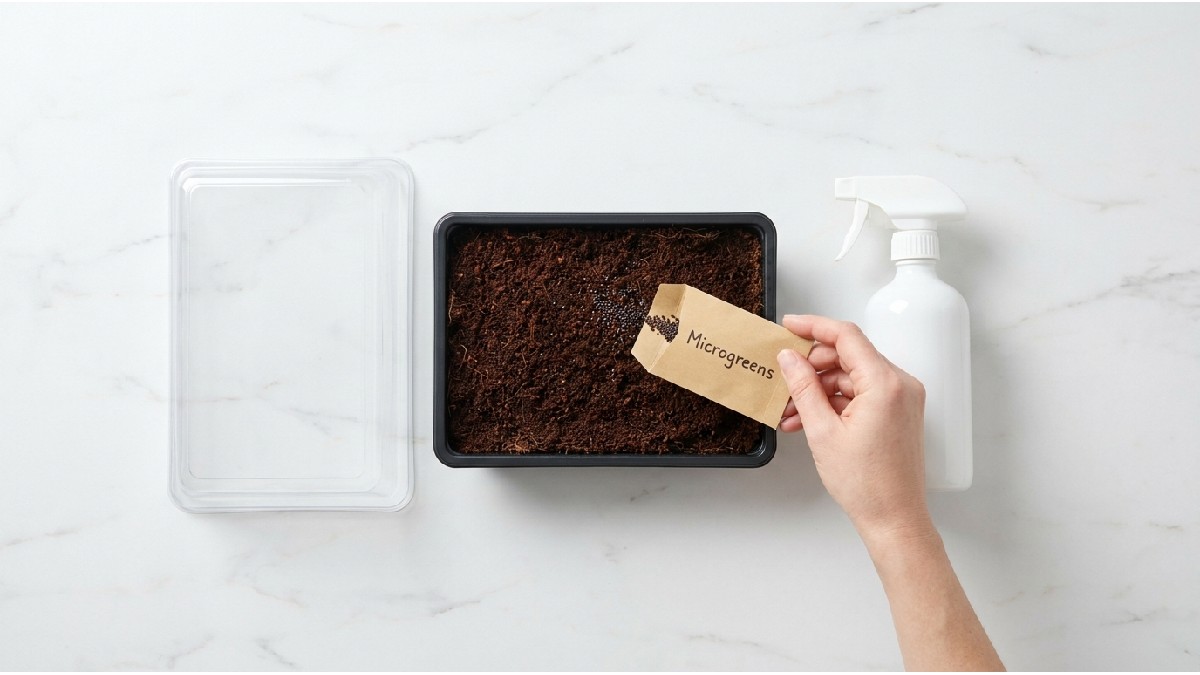
Mist water lightly
After spreading seeds, water should be applied gently using a spray bottle. Heavy rain can disturb the seeds and the soil layer. Light misting keeps everything moist without over-saturating the container.
Cover for blackout stage
In the initial stage, the container is usually covered to block light. This helps seeds germinate properly. This stage is important because it creates a stable, warm environment for early growth.
Move to light after germination.
Once seeds start sprouting, the container should be moved to light. Natural sunlight or indirect light helps leaves develop proper color and strength.
Common Mistakes
Growing microgreens looks easy, but small mistakes can ruin the whole setup. The most common issue is overwatering, which makes the soil too wet and slows growth. Another big mistake is not using proper drainage, so extra water stays inside and creates mold.
Deep containers are also unsuitable because microgreens require only a shallow layer to grow well. Many people also reuse trays without properly cleaning them, which can spread bacteria.

Overcrowding seeds is another problem, as too many seeds in one space lead to weak and uneven growth. Most of these issues are simple, but they affect the final result a lot if ignored.
Too Much Water
Growing microgreens seems easy at first, but small mistakes can quickly ruin the whole setup. Most issues don’t come from seeds or soil quality; they come from simple handling errors that are often ignored in the beginning.
Too much water is one of the most common problems. People think extra watering helps growth, but it actually creates the opposite effect. The setup becomes too wet, roots lose balance, and growth slows down instead of improving.
No Drainage Holes
Another big mistake is using containers without proper drainage holes. When water has no way to escape, it stays at the bottom and creates a damp environment. This often leads to mold and weak plant growth within a few days.
Deep Containers Used
Deep containers are also not suitable for microgreens. They hold more moisture than needed and make it difficult to control watering. Microgreens only need a shallow layer to grow properly.
Poor Cleaning
Poor cleaning of reused containers is another issue. Leftover dirt or bacteria can affect new batches and create hidden problems later in the cycle.
Overcrowding Seeds
Overcrowding seeds is also very common. When too many seeds are placed together, they compete for space, light, and water. This results in uneven and weak growth instead of a healthy, uniform tray. In short, most mistakes are simple but have a big impact if not avoided early.
Best Beginner Setup
A best beginner setup for microgreens is simple, low-cost, and easy to manage. It usually includes 1020 plastic trays, a bottom water tray, and a basic growing medium like coco coir or light soil.
Seeds are spread evenly and watered gently using a spray bottle to avoid disturbance. This setup works well because it keeps everything controlled and reduces common mistakes. It is cheap to start, easy to scale by adding more trays, and has a low failure rate when basic care is followed.
H3 Simple System
A beginner microgreen setup doesn’t need anything complicated or expensive. Most people think they need special equipment, but in reality, it starts very basic. The main goal is just to keep things controlled and easy to manage, so mistakes stay low.
The most common setup uses 1020 plastic trays. One tray is used for growing, and another tray sits underneath to hold extra water. This bottom tray setup helps keep moisture balanced without flooding the soil. It keeps things stable and reduces watering errors.
For growing medium, coco coir or light soil is usually used. Coco coir works well because it holds moisture evenly and stays clean. The layer should be thin and flat so seeds can spread properly and roots don’t struggle while growing.
Watering is done using a spray bottle. This is important because heavy watering disturbs seeds and creates uneven growth. Light misting keeps the surface moist without making it too wet.
Why It Works
This setup is popular because it is simple and forgiving. It doesn’t require much money to start, so beginners can try without risk. It is also scalable, meaning more trays can be added easily once you understand the process.
Another reason it works is the low failure rate. Even if small mistakes happen, the system still stays stable because everything is basic and controlled.
Overall, this beginner setup keeps things simple and practical. It avoids complexity and focuses on consistency, which is the most important part of growing microgreens successfully.
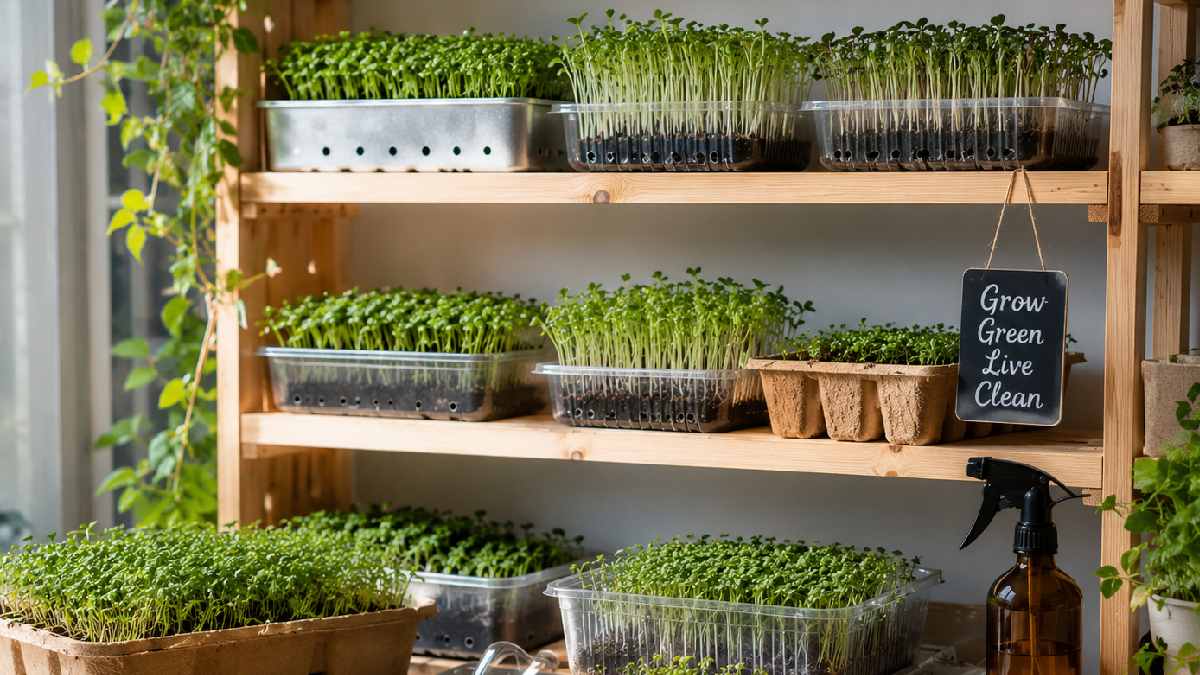
Commercial Microgreen Setup
A commercial microgreen setup is a structured system designed for large-scale production where multiple trays are grown at the same time in an organized way. Instead of simple home trays, growers use rack systems, stacked trays, and controlled irrigation to maintain continuous output.

The main focus is efficiency, space-saving, and consistent quality across all batches. This setup allows growers to harvest regularly while new trays are already in different growth stages, making it suitable for business-level supply and steady production.
Rack Systems
A commercial microgreen setup is built for large-scale growing where consistency and output matter more than anything else. Instead of using scattered trays, everything is arranged in a proper structure so production stays smooth and organized.
Rack systems are the base of this setup. These are multi-layer shelves where trays are placed one above another. This vertical arrangement saves space and allows more trays to run at the same time. It also helps keep different growth stages separate, so everything doesn’t mix up.
Stacked Trays
Stacked trays are commonly used in commercial growing. The idea is simple: multiple trays running together in cycles. One batch can be harvested while another is still growing. This keeps production continuous and reduces waiting time between cycles. It makes the system more stable for regular supply.
Irrigation System
In bigger setups, watering is not done manually. Instead, irrigation systems are used. These can be drip lines or timed mist systems that give controlled water to all trays. It keeps moisture balanced and reduces human mistakes. Everything stays more uniform.
Large-Scale Production
Commercial microgreen setups are mainly focused on scale. The whole system is designed to produce more in less space. Rack structure, stacked trays, and controlled irrigation all work together to keep production steady and efficient without wasting time or resources.
FAQ
What is the best container for microgreens?
The best container for microgreens is 1020 plastic trays with proper drainage holes. They are widely used because they are simple, affordable, and give enough space for even growth. The drainage holes help control excess water, which keeps roots healthy and prevents moisture problems.
Do microgreens need drainage holes?
Yes, drainage holes are very important for microgreens. Without them, extra water stays inside the container and blocks airflow to the roots. This can lead to root rot, weak growth, and mold within a short time. Proper drainage keeps the growing environment balanced.
Can I reuse microgreen containers?
Yes, microgreen containers can be reused multiple times. However, they must be cleaned properly after each cycle. Any leftover soil, roots, or bacteria can affect the next batch and reduce growth quality. Simple washing and drying are usually enough for safe reuse.
How deep should containers be?
Microgreen containers should be shallow, ideally around 1–2 inches deep. This depth is enough to hold the growing medium while keeping moisture under control. Deeper containers are not needed and can actually make watering and drainage more difficult.
Conclusion
Microgreen containers may look like a small part of the whole growing process, but they actually decide how smooth or difficult everything becomes. From simple plastic trays to more advanced setups, each container type has its own purpose and impact on growth quality. The key is not to choose something fancy, but something practical that supports proper drainage, airflow, and easy maintenance.
When the setup is correct, microgreens grow stably and predictably. Simple steps like using shallow trays, avoiding overwatering, and keeping containers clean make a big difference in results. Most failures don’t come from seeds or soil, but from ignoring these basic container rules.
For beginners, starting with basic 1020 trays is usually the safest option. For larger production, rack systems and irrigation setups help maintain consistency. No matter the scale, the principle stays the same: a good container creates a healthy environment.
In the end, microgreen growing is less about complexity and more about control. Once the container system is right, the rest of the process becomes much easier and more reliable over time.