Microgreens Growing Tray: Types, Sizes & How to Choose the Right One
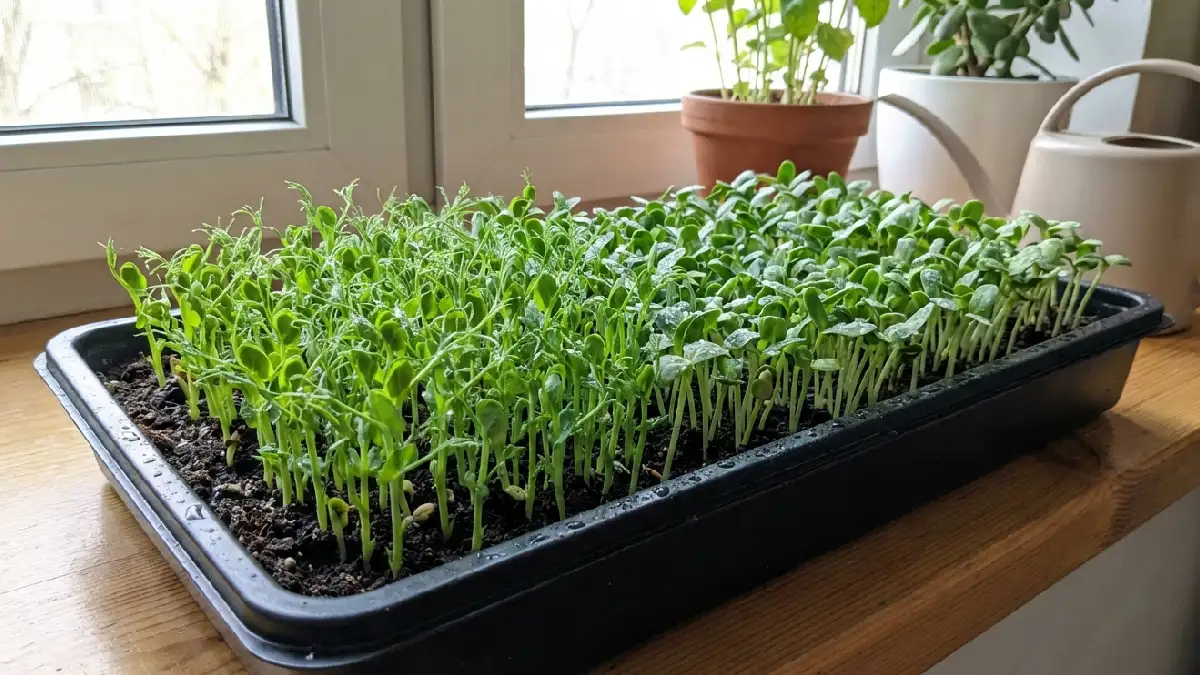
Growing microgreens often looks easy from the outside, yet small setup choices quietly change the final result. The tray you use becomes the base where everything begins, from seed spacing to moisture control. Many growers notice slow growth or patchy germination without realizing the container itself is causing stress to the plants.
A microgreens growing tray gives seeds a stable surface while managing water movement underneath. Too much water stays trapped, roots weaken. Too little support, seedlings dry faster than expected. Different tray types and sizes exist because growing conditions are never the same. Understanding how trays work helps avoid uneven growth and wasted harvests, especially when production starts increasing week by week.
Introduction
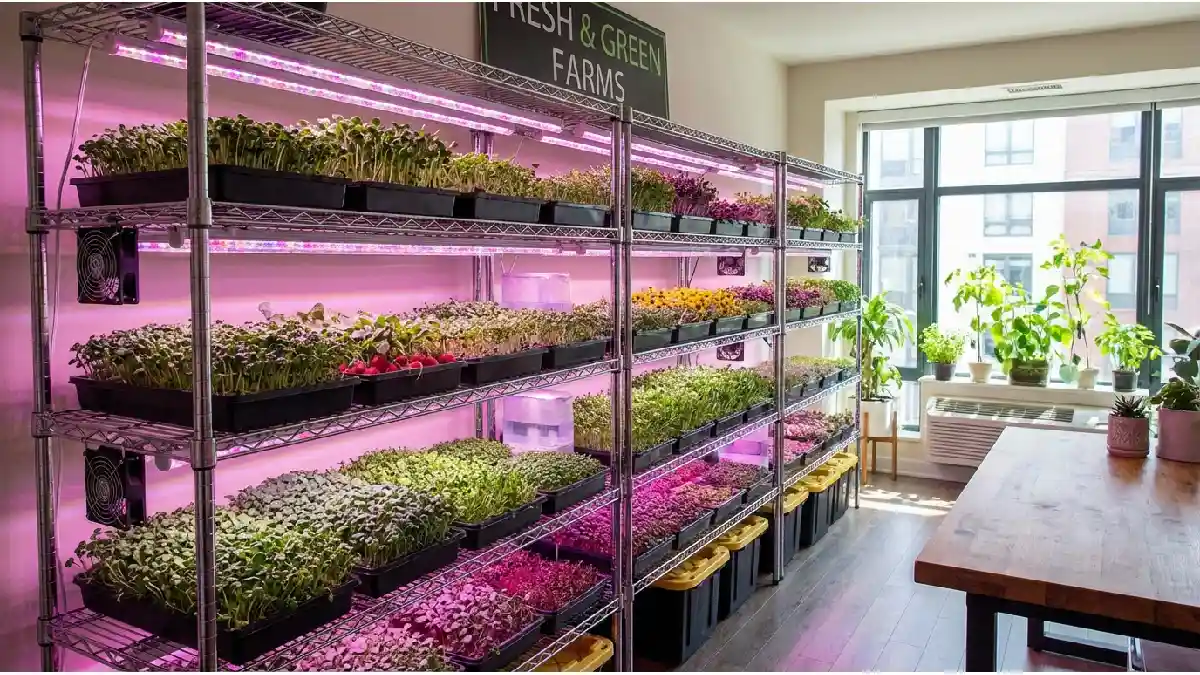
Microgreens are becoming a favorite in kitchens everywhere. People sprinkle them on salads, toss them into sandwiches, or even blend them into smoothies. But here’s the catch – many beginners completely overlook one small but essential thing: the tray. It might sound simple, just a shallow container, but it’s actually the foundation of your entire microgreens setup. Pick the wrong one, or don’t handle it properly, and you could face problems like mold, uneven growth, or tiny yields that leave you frustrated.
A microgreens tray is more than just a box for seeds. It’s where your plants start their journey. Some trays are shallow, some a bit deeper. Some come with drainage holes, others don’t. Each type has its own purpose. Using the wrong tray or ignoring its care is something even experienced growers slip up on.
In this article, we’ll cover everything you need to know. From tray types and sizes to practical buying tips. Plus, real-life usage advice that helps your microgreens thrive. Whether you’re just starting or already growing like a pro, this guide is a full reference. For readers of Rooted Urban, think of it as your complete roadmap to growing lush, healthy microgreens every time.
What Is a Microgreens Growing Tray?
When you start with microgreens, most people ignore the tray. They think it’s just a box. It’s not. It’s where everything begins. Seeds, soil, and water all depend on it. Pick the wrong tray, or treat it carelessly, and suddenly, seedlings get crowded. Roots stay wet. Growth turns patchy. Tiny mistakes here ruin the whole batch.
A tray does more than hold seeds. It controls water so the roots don’t drown. Moisture spreads evenly. Seeds get space. Germination works better. Depth, material, and design all matter.
Even small details change results. The right tray turns weak sprouts into strong, healthy microgreens.
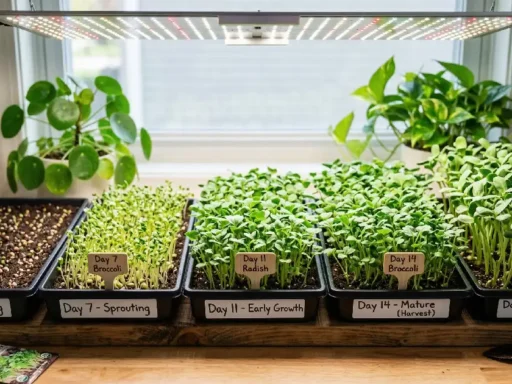
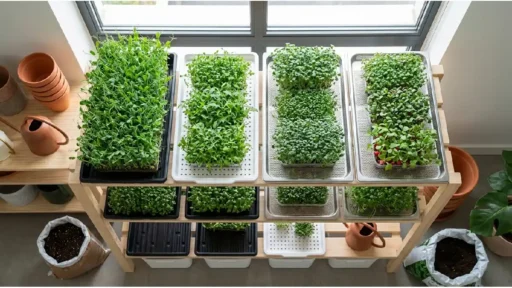
Most trays come in common sizes.
1020, 1010 numbers mean inches in length and width. Bigger trays, 1020, fit larger batches. Smaller 1010 trays are easier to handle. Beginners like them. They’re simpler, cleaner, less messy. Picking the right tray saves time. Makes everything easier. And it gives your microgreens the best chance to grow strong and vibrant.
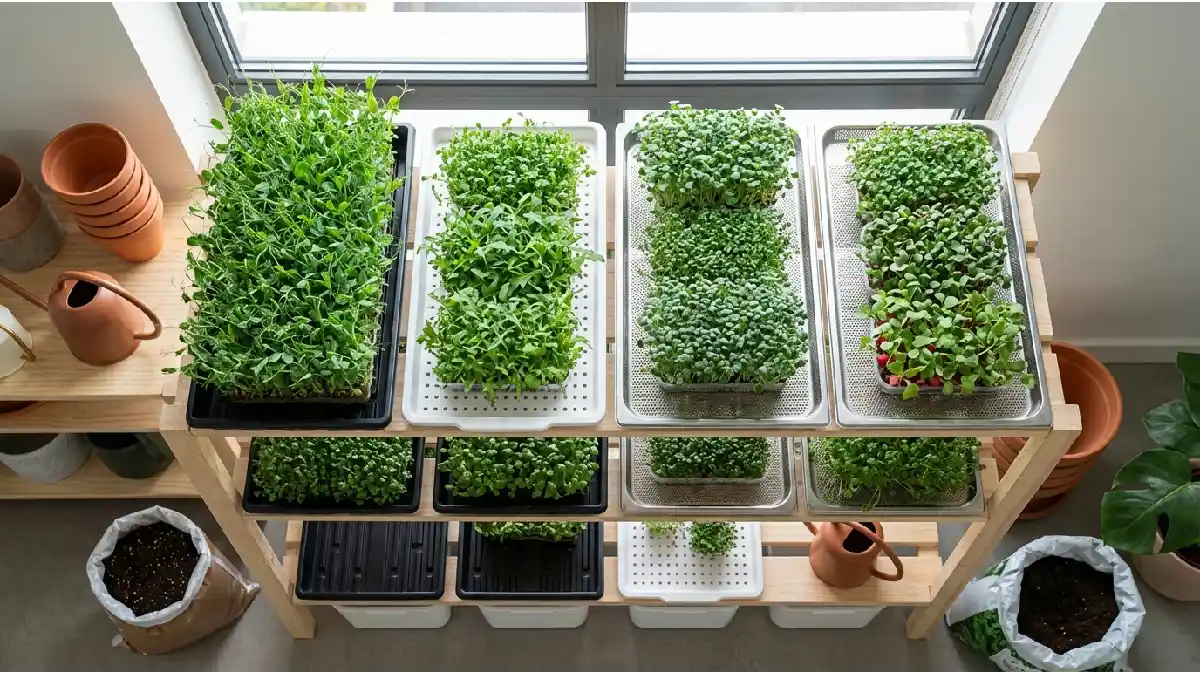
Types of Microgreens Growing Trays
Growing microgreens isn’t just about seeds or light. The tray you pick matters. A lot of different trays suit different seeds and setups.
Picking the wrong one can mean wasted seeds, soggy roots, or slow growth. Let’s break it down.
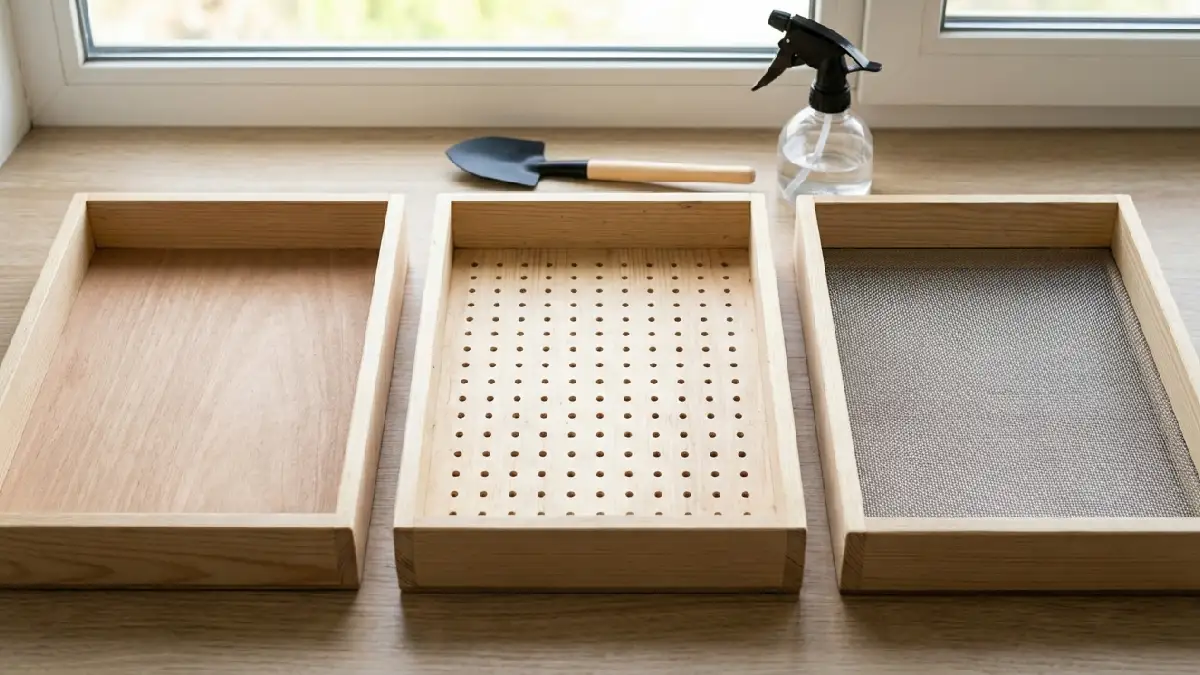
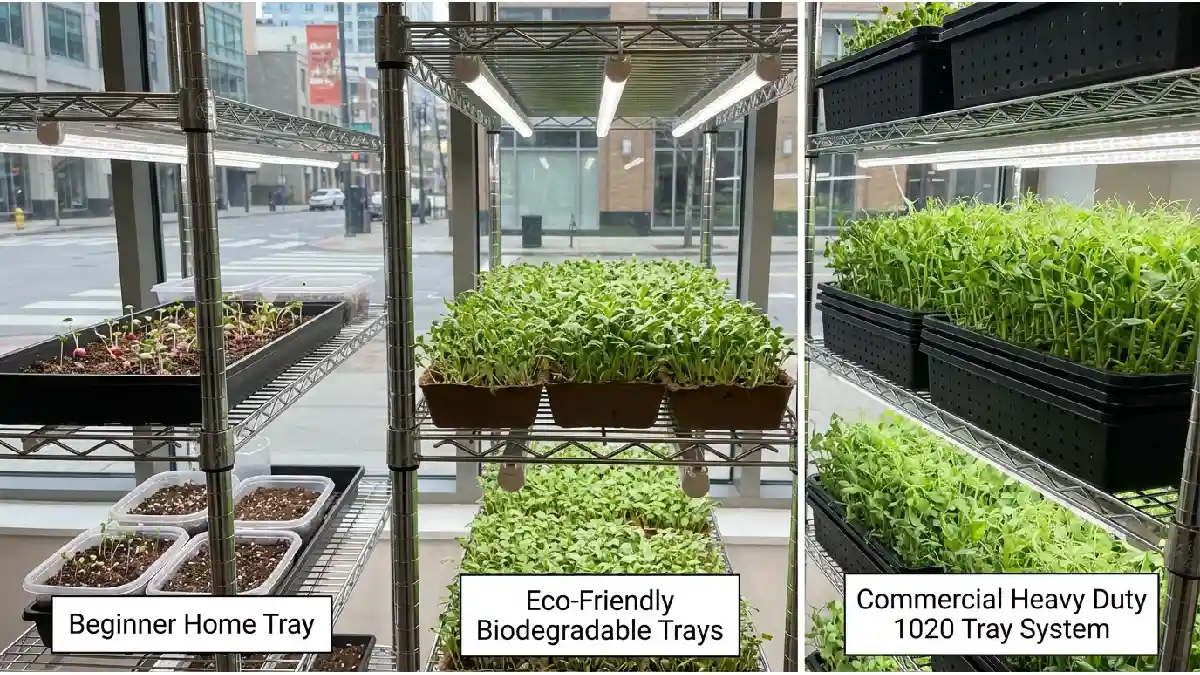
Solid‑Bottom Trays
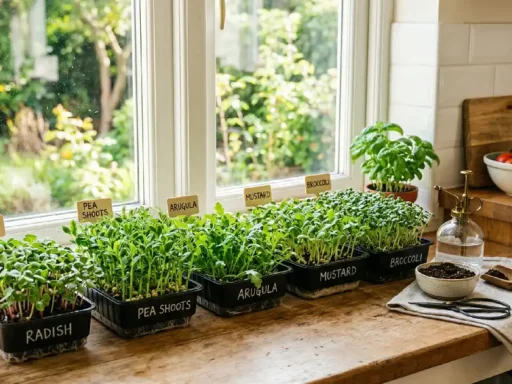
These trays are flat at the bottom, with no holes. Simple, cheap, and perfect for beginners. Small seeds like broccoli, radish, or mustard love them.
Pros: Easy to handle. Holds water well. Great for small batches.
Cons: Overwater and mold show up fast.
Who should use them? Beginners, small seeds, anyone keeping it simple. Just be careful with watering.
Perforated (Drainage) Trays
These have tiny holes at the bottom. Water drains out naturally. That keeps the roots healthy and mold away. Soil stays balanced.
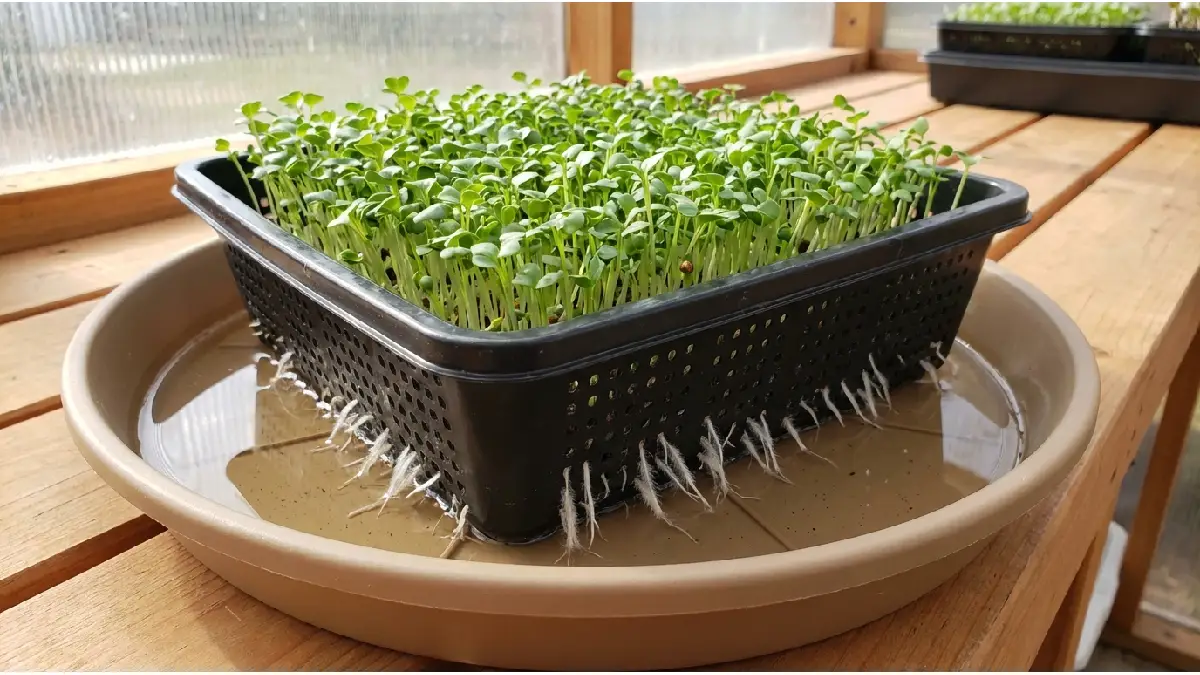
Pros: Excellent drainage. Reduces mold risk. Keeps roots strong.
Cons: You need a bottom tray to catch the water.
Best for? Intermediate growers or setups with lots of moisture. Medium seeds like sunflowers or peas can do well if you watch the water.
Mesh Trays
Mesh trays have a fine screen at the bottom. They’re made for big seeds. Think peas, sunflowers, and lentils. Water drains through. Roots stay strong. Harvesting is easier.
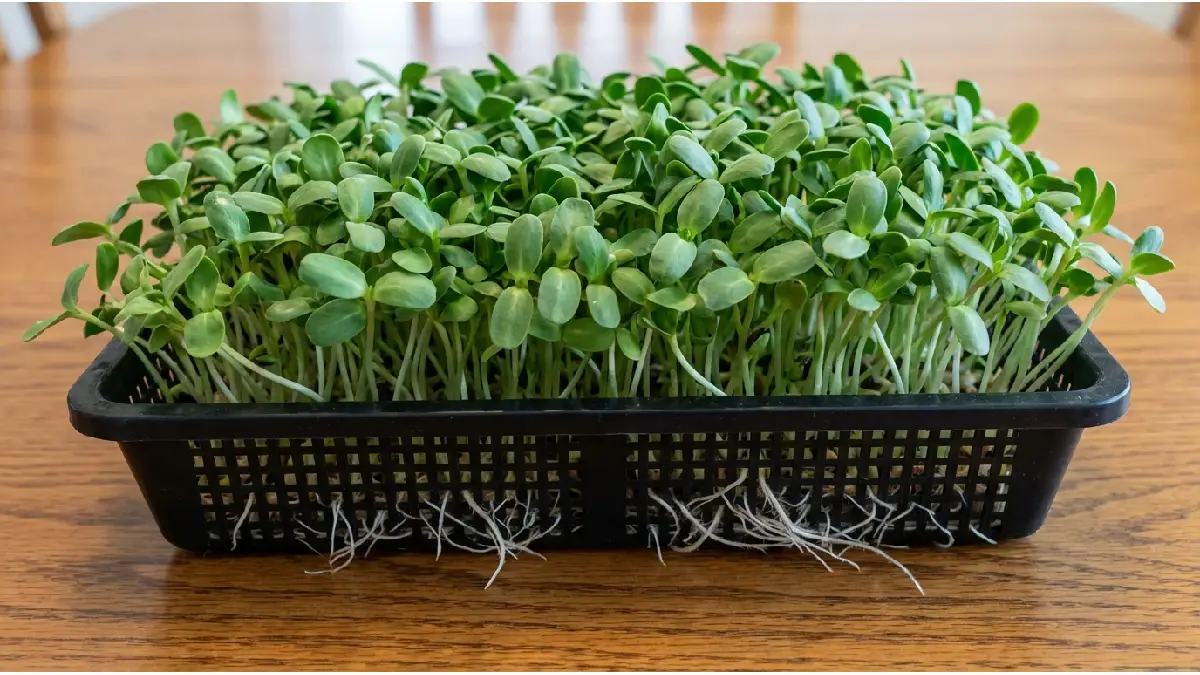
Pros: Big seeds thrive. Easy to harvest. Strong roots.
Cons: Tiny seeds may fall through. Handle carefully.
Quick Comparison:
- Solid-Bottom: Small seeds, beginners. Pros: simple, holds water. Cons: poor drainage, mold risk.
- Perforated: Medium seeds. Pros: good drainage, healthy roots. Cons: needs a bottom tray.
- Mesh: Large seeds. Pros: strong roots, easy harvest. Cons: small seeds fall through.
Choosing the right tray changes everything. Even pros adjust trays depending on seed and growth goals. With the right tray, your microgreens at Rooted Urban will grow strong, healthy, and full of flavor.
What Size Tray Should You Use?
Trays are small. But their size changes everything. Beginners often overlook this. Tiny trays? Fine for a few seeds. But the yield is tiny.
Huge trays? Hard to manage, especially at home. Picking the right size saves effort, time, and frustration.
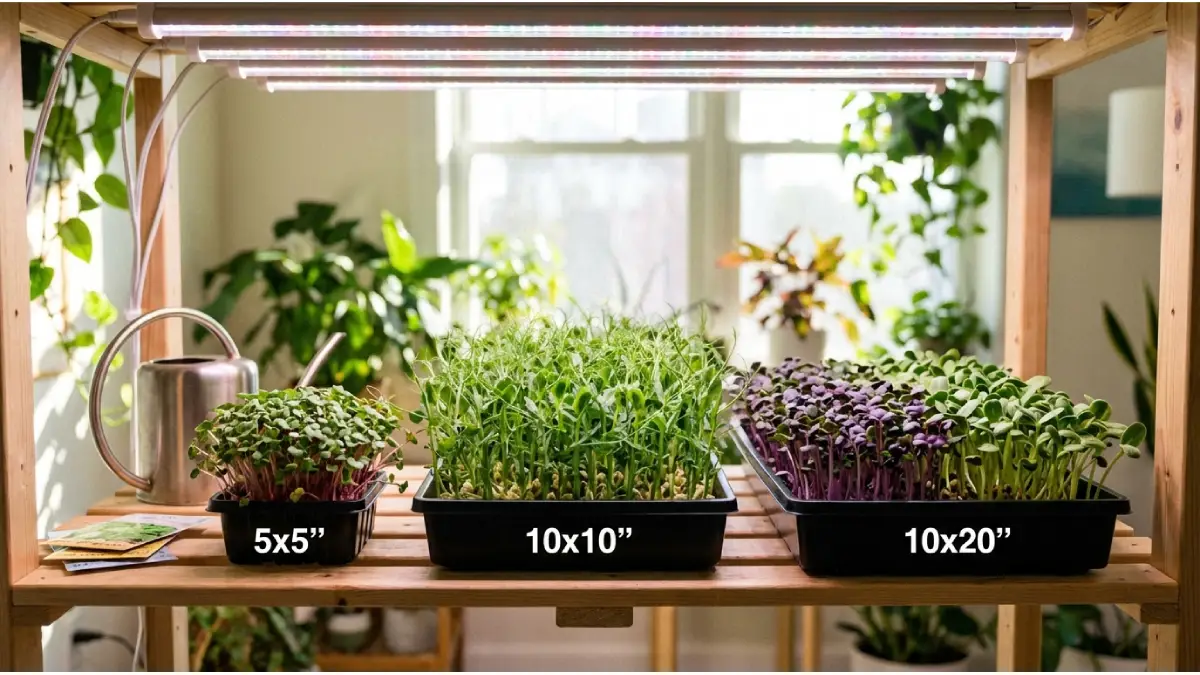
Common tray sizes are 5×5, 1010, and 1020. Each works differently.
- 5×5: Small and simple. Great if you want to test new seeds without wasting much.
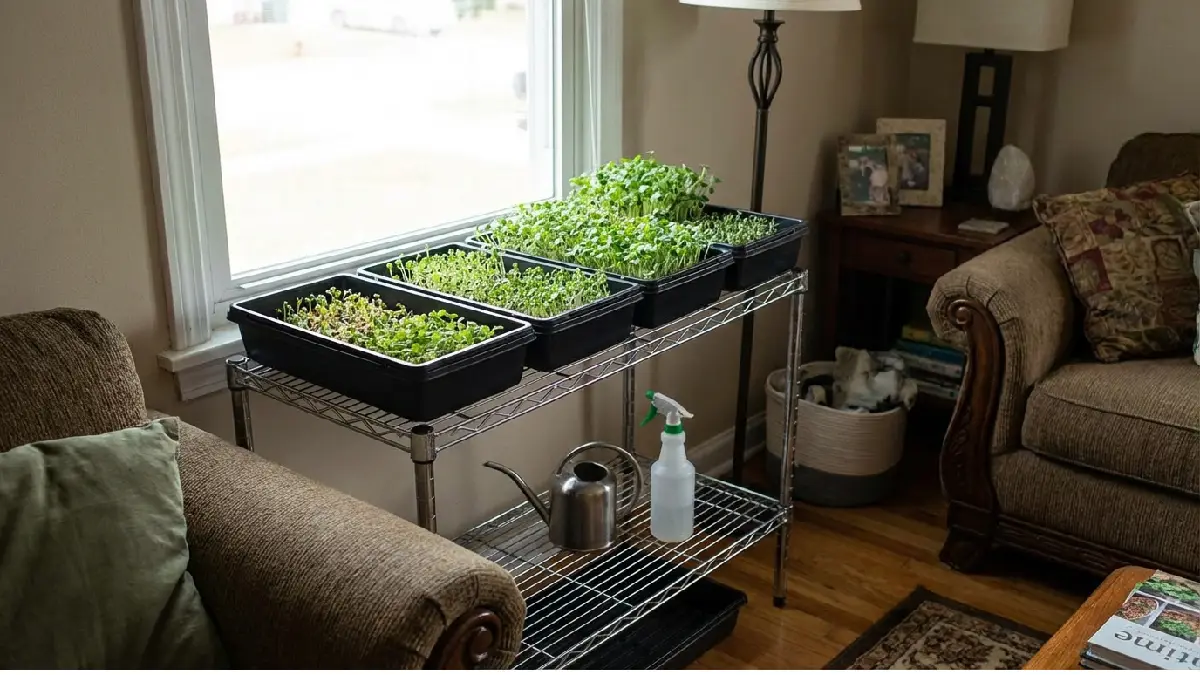
- 1010: Balanced size. Perfect for home growers. Fits on shelves. Easy to water. Gives enough greens for a week.
- 1020: Big tray. Best for commercial growers. Large batches, more seeds, more harvest at once.
Practical example: Growing broccoli at home? The 1010 tray gives enough for salads, sandwiches, and smoothies for a week. Watering and harvesting are easy. Switch to 1020, and suddenly you have enough for a café or small market.
Mini Table (Text Style):
5×5 → Small batches → Great for testing varieties
1010 → Home growers → Balanced size, easy to handle
1020 → Commercial → Large scale, bigger batches
How to Choose the Best Microgreens Growing Tray
Choosing a microgreens tray sounds easy at first. Just pick one and start growing. That’s what most beginners think. Later, they realize trays behave differently.
Some hold too much water. Some crack after a few cycles. Some simply don’t fit the setup. Small decisions here quietly affect the whole harvest.
Material (food-grade, UV-resistant)
Material comes first. Always look for food-grade plastic. Cheap trays sometimes release odor after repeated watering. Not ideal when you’re growing food. UV-resistant trays last longer, especially if your setup sits near windows or strong grow lights. Sun exposure slowly weakens low-quality plastic. Many growers notice this only after trays begin to bend.
Drainage & holes
Drainage matters more than people expect. Trays with properly sized holes allow excess water to drain. Roots stay healthier. Mold problems reduce naturally. Solid trays still have their place, though they usually work better as bottom trays for watering support. Using both together often makes daily care easier.
Depth for seed type
Depth also plays a role. Small seeds like broccoli or arugula prefer shallow trays. Larger seeds—peas or sunflowers—need extra room for roots to push downward. Too shallow, and the roots struggle. Too deep and moisture control becomes tricky. Finding balance helps more than chasing fancy equipment.
Compatibility with lights/shelves
Another thing growers forget is compatibility. Your tray should fit the shelves, racks, or lighting distance comfortably. A tray that barely fits becomes annoying fast. Water spills. Airflow suffers. Maintenance turns messy. Simple alignment saves effort later.
Reusability & cleaning
Reusability matters over time. Good trays survive multiple growing cycles without cracking or warping. Cleaning should feel easy, not like extra work. Smooth surfaces rinse faster. Rough plastic traps residue. After several harvests, this difference becomes obvious.
Cost vs durability
Cost often confuses beginners. Cheap trays look attractive in the beginning. They rarely last. Spending slightly more on durable trays usually saves money long term. Fewer replacements. Less frustration. More consistent growth.
How to Use a Microgreens Growing Tray (Step-by-Step)
Starting a tray for microgreens isn’t complicated. Still, small details change results. Many beginners rush the process. Seeds grow, yes. But growth stays uneven. A simple routine usually works better than complicated setups.
1. Prepare the Tray and Growing Medium
Start with a clean tray. Always. Leftover moisture or debris can cause problems later. Add your growing medium evenly, soil, coco coir, or mats, all work depending on preference.
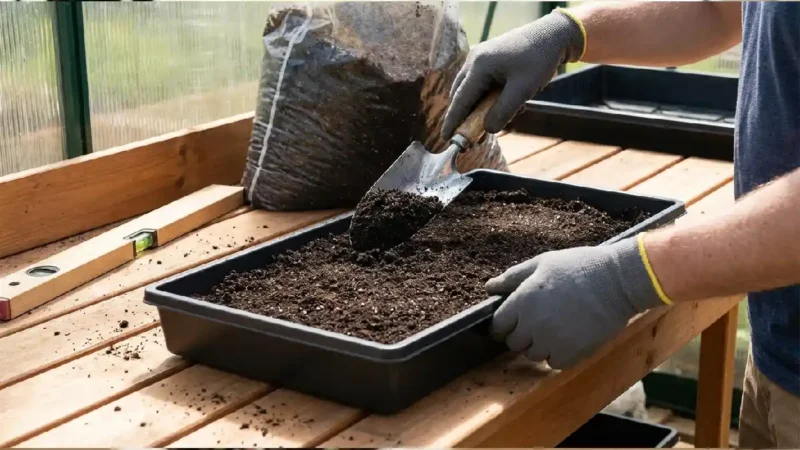
Keep the layer level. Uneven surfaces lead to uneven growth. Press lightly. Not too hard. Roots need breathing space.
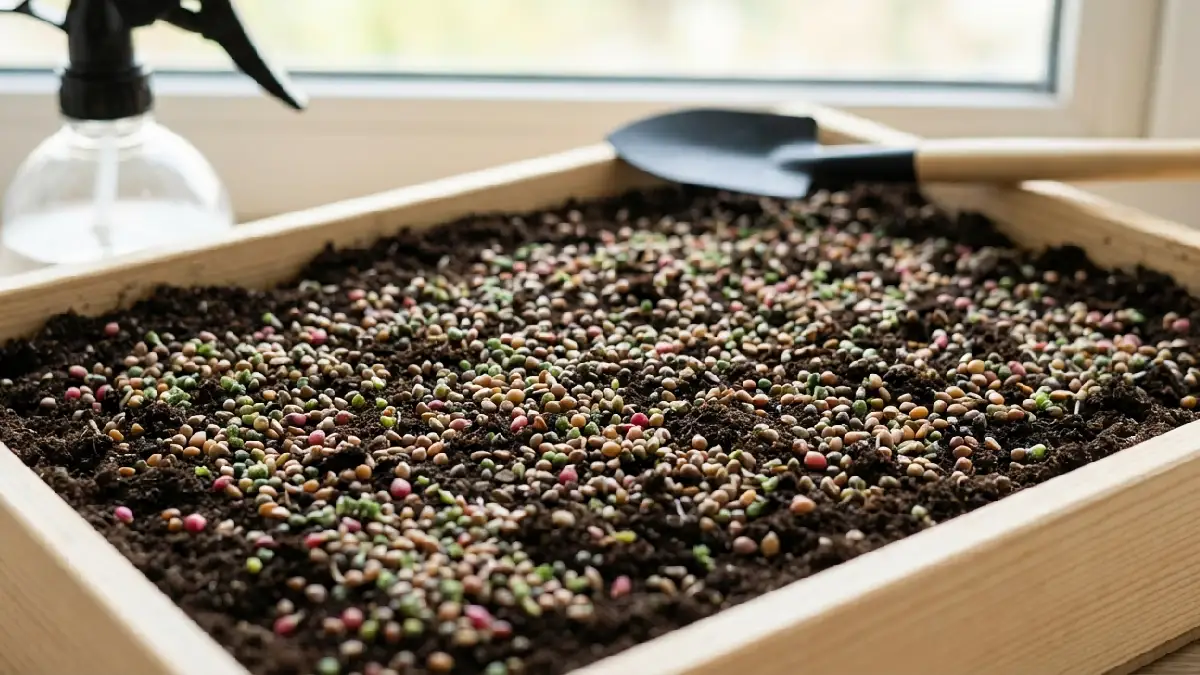
2. Spread Seeds Evenly
Scatter seeds across the surface. Try not to pile them in one spot. Crowded seeds compete for space and airflow. Some overlap happens.

That’s normal. Just avoid thick clusters. Even spreading usually means an even harvest later.
3. Watering Techniques
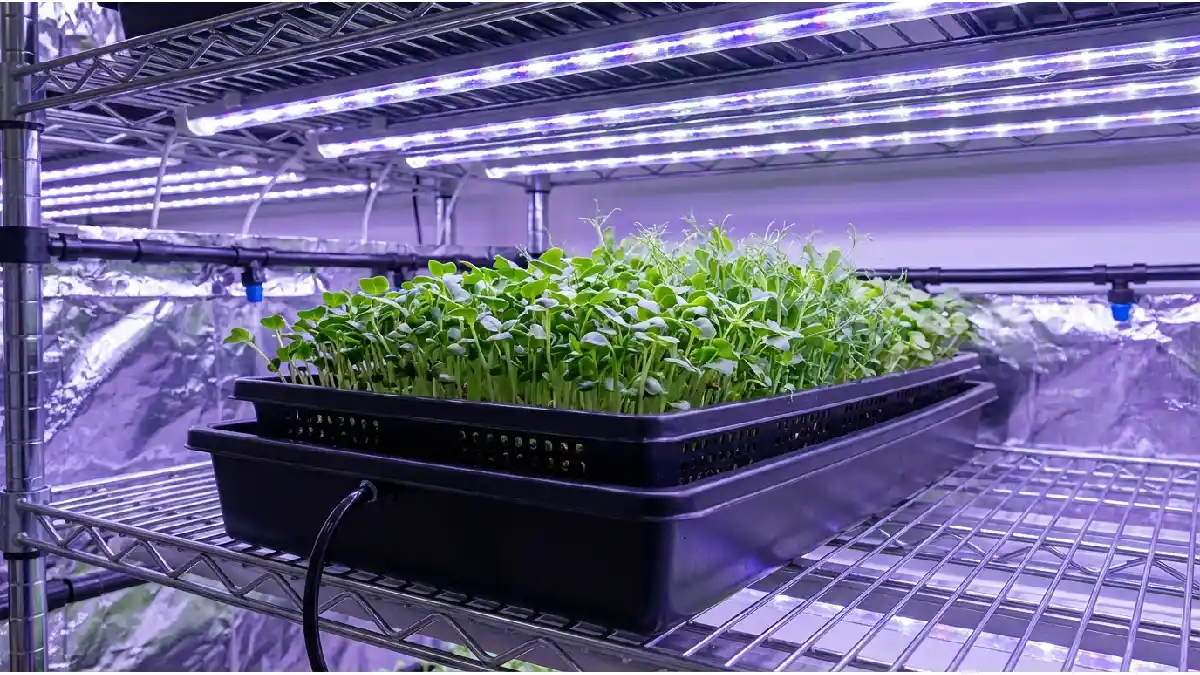
Watering confuses most new growers. Top watering works in the early stages, using a gentle spray so seeds stay in place. After germination, bottom watering becomes more reliable.
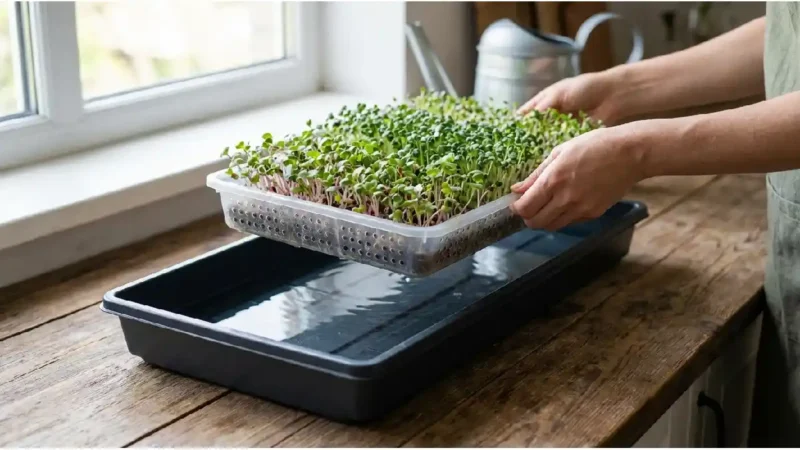
Place the tray inside a solid base tray with water. Roots pull moisture upward on their own. Less mess. Stronger roots, too.
4. Covering and Germination
After sowing, cover the tray for a short blackout period. Another empty tray works fine as a cover. Seeds prefer darkness while sprouting. Weight helps roots anchor properly.
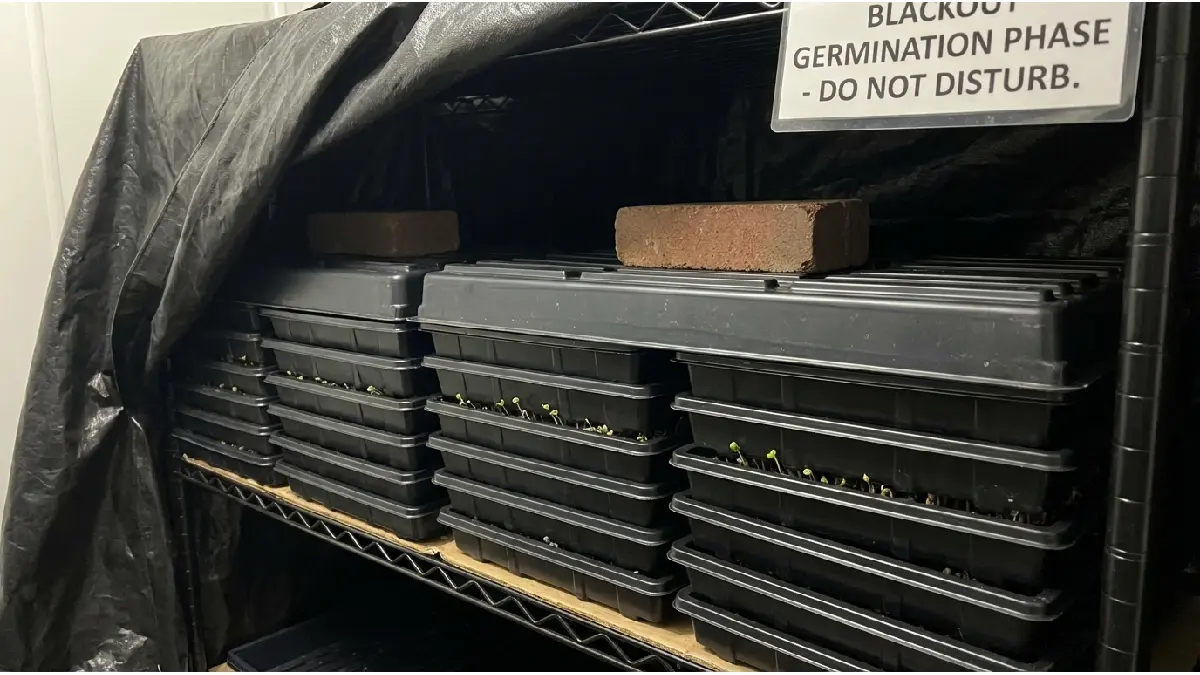
Leave it covered for a few days until sprouts push upward. You’ll notice them searching for light.
5. Light, Airflow, and Harvest Timing
Once uncovered, move trays under grow lights or near bright natural light. Good airflow matters more than people think. Stale air slows growth.
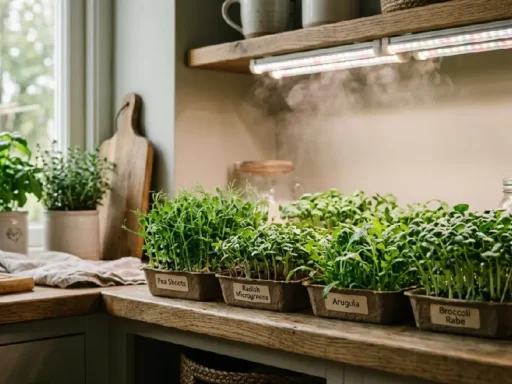
Gentle circulation keeps plants upright. Within 7–10 days, most microgreens reach the harvest stage. Cut just above the growing medium using clean scissors. Fresh, crisp greens ready to use.
Common Mistakes When Using Growing Trays
Most tray problems don’t come from bad seeds. They usually come from small mistakes that people don’t notice at first. Everything looks fine in the beginning.

A few days later, growth slows down. Mold appears. Some areas grow thick while others stay empty.
No Drainage — Mold and Root Rot
Using trays without proper drainage is one of the biggest issues. Water collects at the bottom and stays trapped. Roots sit in constant moisture. At first, nothing seems wrong. Then mold shows up quietly. Roots weaken. The entire tray can fail within days. Proper drainage or pairing trays correctly prevents this problem.
Wrong Tray Size — Poor Growth
Tray size often gets ignored. A tray that’s too small crowds the seedlings. Too large, and moisture becomes difficult to manage. Growth turns uneven. Some areas dry faster while others stay wet. Matching tray size with your growing space and seed quantity keeps things balanced.
Uneven Seed Distribution
Seeds thrown quickly across the tray rarely grow evenly. Some spots become dense mats. Others stay almost empty. Crowded areas struggle for airflow and light. Thin areas grow more slowly. Taking a few extra seconds to spread seeds evenly changes the final harvest more than people expect.
Overwatering
This happens a lot. More water feels safer, but microgreens don’t need soaked conditions. Excess moisture blocks airflow around roots. Stems weaken. Mold risk increases. Light watering, especially from the bottom after germination, usually works better than frequent heavy sprays.
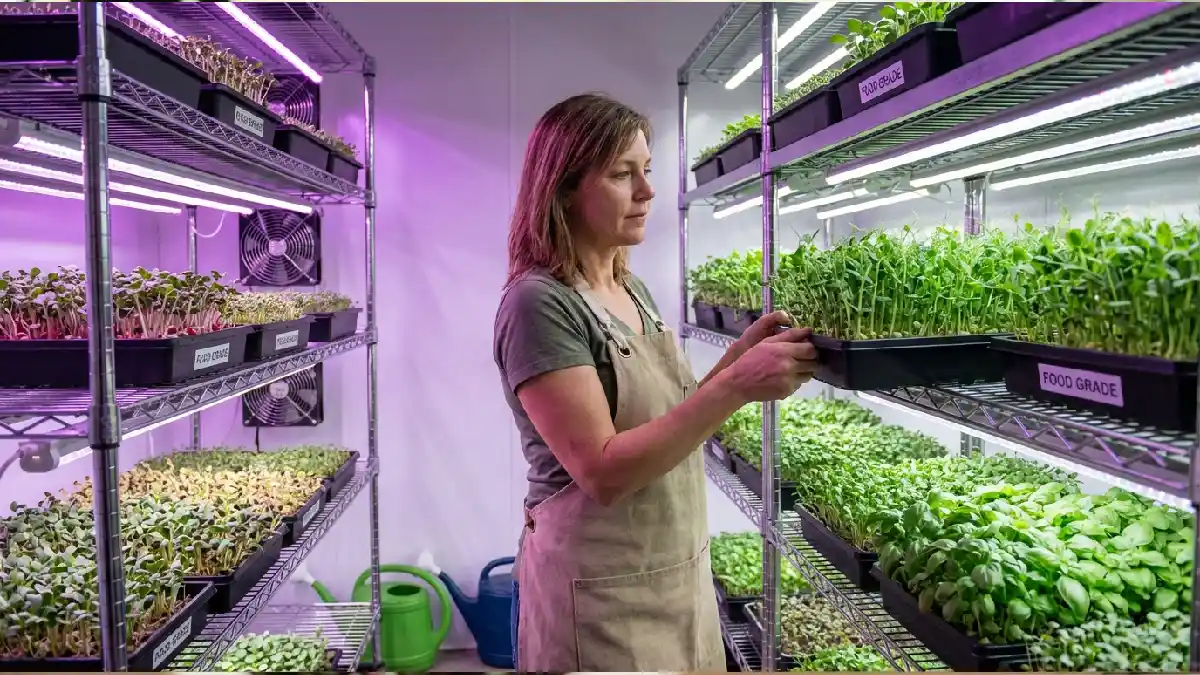
Best Trays for Different Needs
Not every grower needs the same type of tray. Someone growing a small batch at home looks for simplicity. A commercial grower thinks about durability and volume.
The right tray usually depends on how often you grow and how much effort you want to spend maintaining the setup.
Budget Trays
Budget trays work well for beginners. They’re lightweight, easy to find, and good for learning the basics without spending too much. Many new growers start here just to understand watering and germination. These trays handle short growing cycles fine.
Over time, though, cheaper plastic may bend or crack after repeated use. Still, they serve their purpose when starting.
Eco-Friendly Trays
Some growers prefer environmentally conscious options. Eco-friendly trays made from biodegradable or recycled materials reduce plastic waste. They feel slightly different compared to traditional trays. Lighter sometimes. Less rigid too. Good choice for small home setups or experimental growing. Cleaning needs gentle handling since natural materials wear faster.
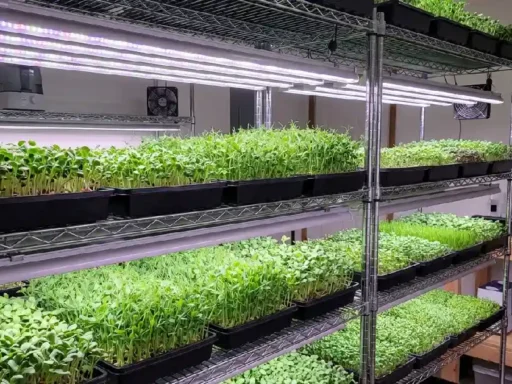
Commercial Scale Trays
Commercial growers usually move toward heavy-duty trays. Thicker plastic. Strong edges. Designed for stacking and repeated harvesting cycles. These trays survive constant washing, movement, and lighting exposure. A stable tray becomes important when you’re managing multiple harvests every week. Consistency matters more than appearance at this level.
Popular Tray Styles Growers Prefer
Many experienced growers stick with standard 1020 perforated trays paired with solid bases for bottom watering.
Mesh trays are often used in larger-scale seed production, such as peas or sunflowers. No fancy branding required. Reliability tends to matter more than labels or trends.
FAQs (User Intent Driven)
Can I reuse microgreen trays?
Yes, trays are normally reused many times. After harvesting, the leftover roots and growing medium should be removed. A simple wash with water is often enough. Some growers clean immediately, others wait until trays dry. Strong cleaning products aren’t always necessary. Good trays last long if treated carefully between growing cycles.
Do microgreens trays need holes?
Not every tray must have holes, though drainage makes growing easier. Without holes, water sometimes stays trapped longer than expected. Roots remain wet for too long. Perforated trays allow excess water to move away naturally. Many growers place them inside solid trays so watering stays controlled while drainage still happens.
What’s the best watering method for trays?
In the early stage, gentle misting from above helps seeds stay moist. After sprouts appear, watering from the bottom often works better. Roots absorb moisture slowly while leaves stay dry. Growth usually looks more even this way. Over time, growers notice fewer mold issues using this method.
How many trays do I need for a weekly harvest?
There isn’t a fixed number for everyone. Home growers often keep three or four trays running together. One tray is freshly seeded, another is growing, and one is almost ready to cut. This rotation keeps harvest coming every week without rushing the process. Larger growers simply repeat the same pattern with more trays.
Conclusion
Choosing the right microgreens growing tray often decides how smooth the growing experience feels. Tray type, size, and proper drainage usually matter more than expensive tools or complicated setups. A simple tray chosen carefully can prevent problems like mold, uneven growth, or weak roots. Many growers understand this after a few trial runs. Getting these basics right early saves time and effort later.
For beginners, starting with a manageable setup keeps things simple and easier to control. Commercial growers benefit from stronger trays that can handle repeated growing cycles without damage. The goal stays the same for both—healthy roots, steady growth, and reliable harvests every week. Once the tray setup feels right, growing microgreens becomes much more consistent.
If you’re planning your next batch, exploring quality seeds, practical growing tips, or beginner starter setups can help improve results over time. Small improvements in setup often lead to healthier trays and better harvests without adding extra complexity.