Microgreens Growing System: Complete Guide to Growing Microgreens at Home.
Microgreens are tiny but mighty. Seeds sit waiting. You water gently. Leaves pop bright green. Kitchen corners turn alive. Every tray tells a story. Growth excites daily. Beginners smile, learn fast. Windowsill, balcony, and small counter work. Light matters. Water matters. Soil or soilless, both are fun.
Mist lightly, watch roots grab. Flavor hits sharply. Nutrition stacked. Vitamins A, C, and Kare hidden inside. Tiny effort, big reward. Each tray surprises. You peek, leaves stretch. Indoor gardening feels alive. Small space, huge impact. Energy feels real.
What is a Microgreens Growing System?
A microgreens growing system keeps plants organized. Trays, shelves, lights, water, all together. Seeds sit neatly. Roots grab support. Water flows steadily. Leaves stretch green. Light hits right. Growth predictable. Beginners notice fast results. Some use soil, some hydro, some mats. Each system is tiny and efficient. Mist roots lightly. Rotate trays.
The air moves gently. Small mistakes fixable. Energy feels real. The kitchen corner comes alive. Harvest early, eat fresh. Every system tells a story. Easy to repeat batch after batch. Space matters less. Windowsill, balcony, shelf works. Plants react. You learn slowly. Tiny leaves, huge impact. Care feels natural. Growth surprises daily.
Components of a Microgreens Growing System
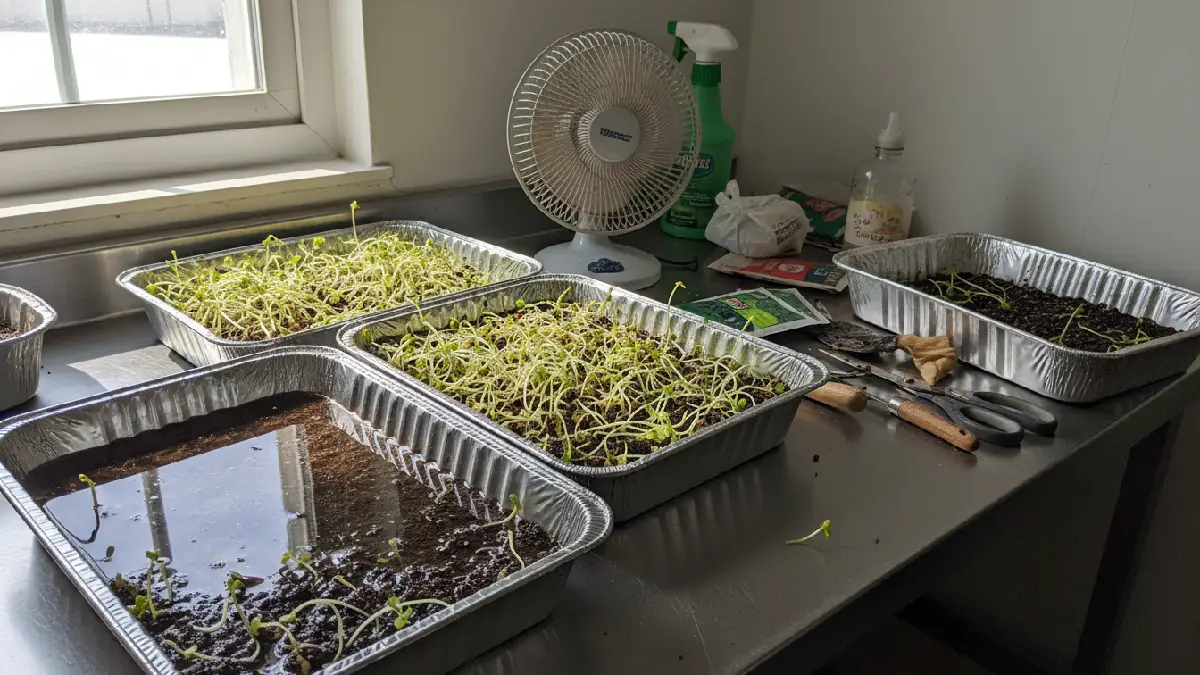
Every system has basics. The tray holds seeds. Shallow, clean drainage holes matter. Shelves stack trays. Light above shoots. Sun works, LED better indoors. Watering setup helps. Mist lightly or bottom, water. Substrate or mats support roots. Seeds sit cozy, not crowded. Fan moves air, keeps stems strong. The thermometer is optional but useful.
Timer handy for lights. Some add a pH meter. Beginners peek daily. Roots grow, leaves push green. Tiny tweaks change results. Every tray surprises. Space is small, results are big. Energy feels alive. Kitchen corners turn lively. Growth teaches patience. Harvest feels rewarding. Tiny leaves, huge impact. Set up repeats batch after batch.
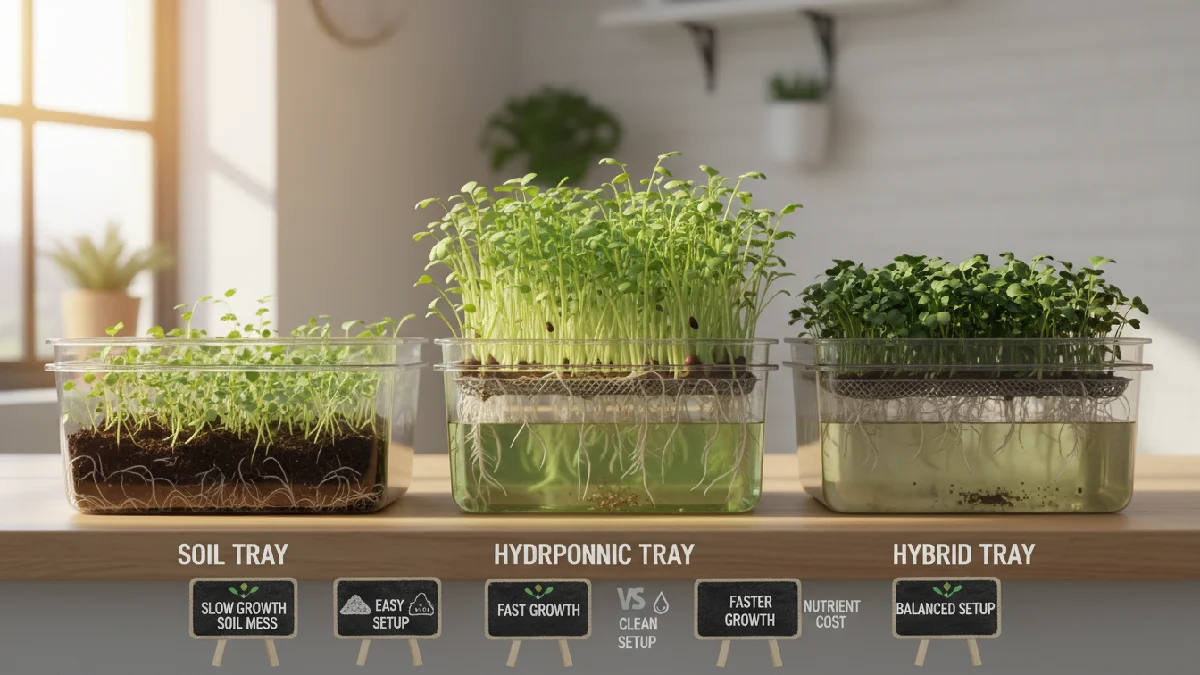
Soil vs Hydroponic vs Hybrid Systems
Soil feels familiar. Roots dig in, nutrients are natural. Messy sometimes. Water spills. Pests hide. Plants react slowly but steadily. Hydroponic fast. Roots dangle in nutrient water. Growth controlled, strong stems. Leaves pop green. Cleaner, less mess. Mistakes are visible immediately. Hybrid mixes both. Soil, based plus nutrient solution. Some control, some comfort.
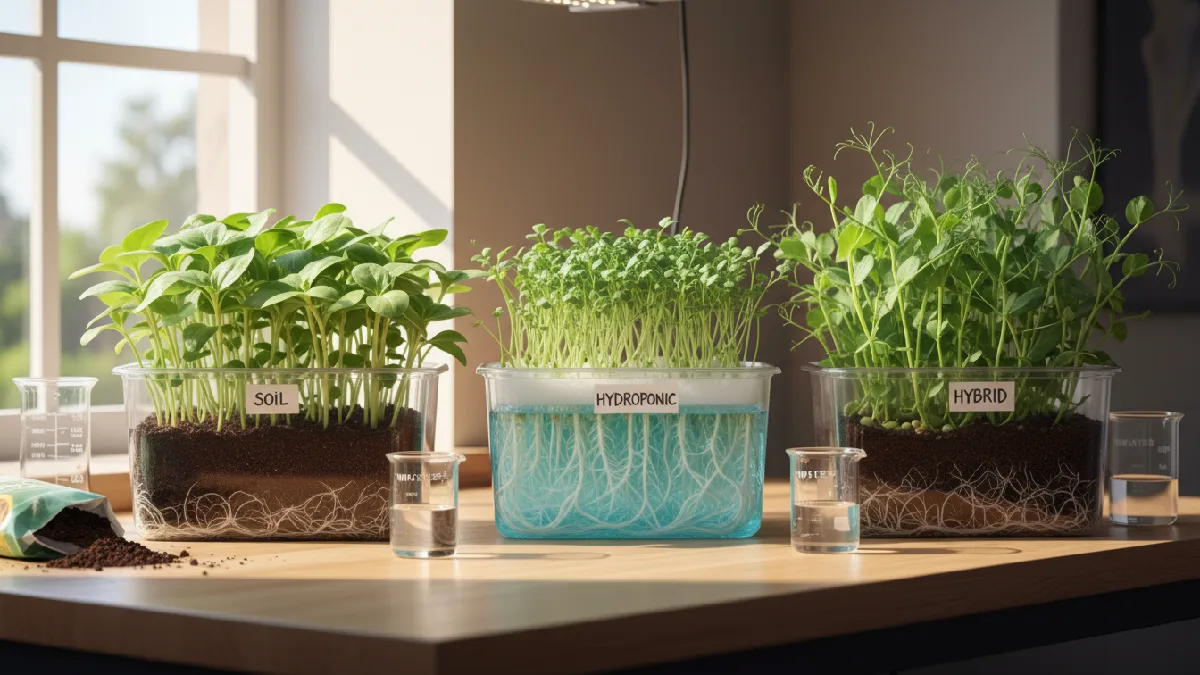
Beginner’ss experiment. Space matters. Cost matters. Energy feels alive watching roots. Each system teaches something. Tiny changes matter. Trays react differently. Light, water, and airfloware all crucial. Every tray tells a story. Flavor, nutrition, and speed differ. Harvest shows the result. One method fits some, another fits others. Tiny leaves, big lessons.
Types of Microgreens Growing Systems
Microgreens need support. Some growers pick soil. Simple, natural, messy. Roots dig, plants steady. Water carefully, or the soil will be soggy. Pests sneak in sometimes. Hydroponic systems different. No soil, clean trays. Roots in water, nutrients controlled. Growsfast, leaves pop green. Mistakes vary quickly. Hybrid systems mix both. Soil plus nutrient water.
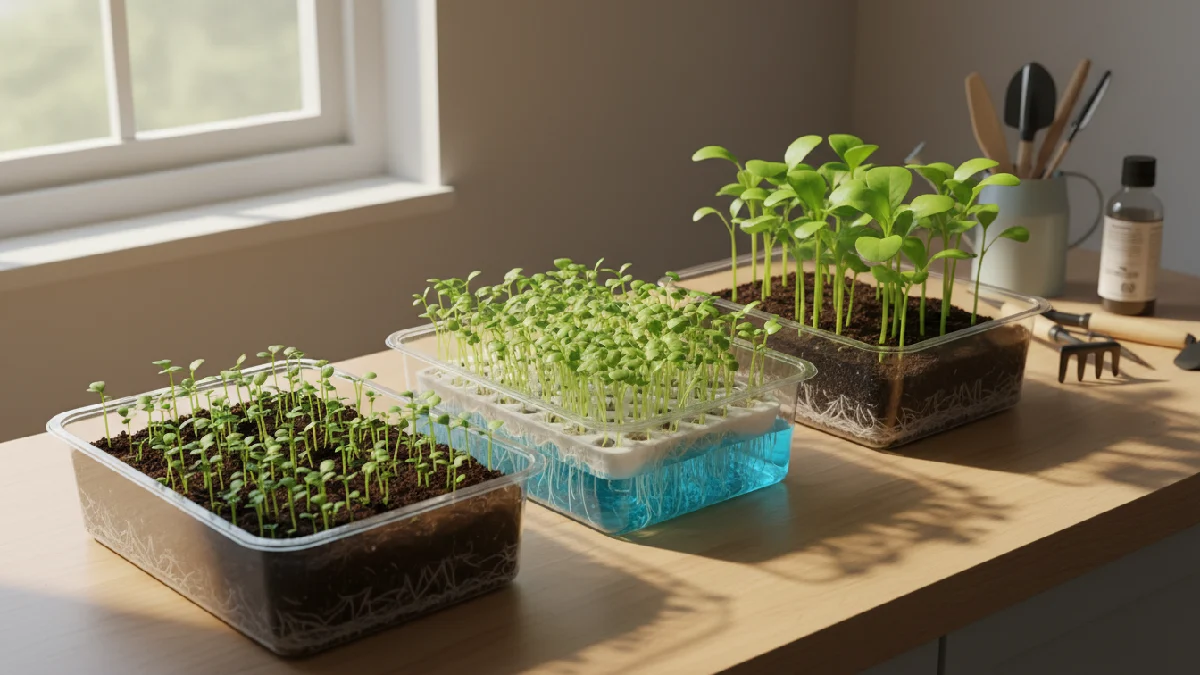
Comfort plus speed. Beginners try small batches. Lights, airflow, and temperature matter. Every system teaches. Tiny tweaks change results. Trays react differently. Flavor, nutrition, and growth speed vary. Some love soil, some hydro. Hybrid fits those experimenting. Watching shoots push up feels alive. Every tray tells a story. Lessons come fast. Energy feels real.
Soil, Based Systems
Soil is classic. Seeds sit snug in it. Roots dig and grab nutrients naturally. Water carefully. Too much, roots drown. Too little, shoots slow. Soil holds moisture, and flavor develops strongly. Messy sometimes. Counters need cleaning. Pests hide easily. Organic soil best. Compost added helps growth. Trays, small or large, work. Windowsill, balcony, kitchen corner, all fit.
Light matters. Sun or LED works. Watch daily. Leaves push green, stems firm. Beginners notice tiny changes fast. Soil teaches patience. Every tray reacts differently. Flavor pops, nutrition packs in. Effort small, reward visible. Soil, based growing feels natural. Every harvest tells a story. Energy from greens feels real.
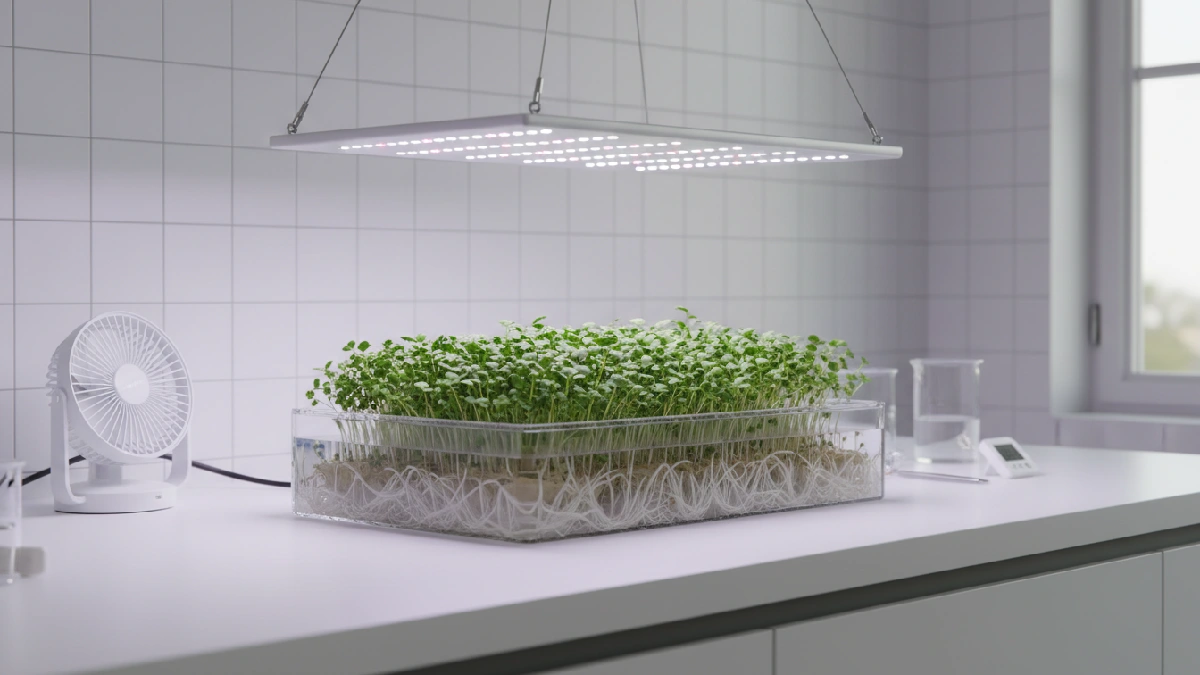
Hydroponic Systems
Hydroponics is clean. No dirt. Seeds sit on mats or in trays. Roots dangle in water full of nutrients. Growth feels fast. You see everything. Water must stay right. Too strong burnsthe roots. Too weak slows shoots. LED lights help. The sun works sometimes. Airflow matters. A small fan keeps leaves firm and mold away. Beginners notice changes daily.

Mist lightly, check roots often. Trays are small and easy to manage indoors. Set up costs more than soil but feels controlled. Harvest comes quickly. Flavor pops, nutrition stays strong. Mistakes are fixable. Every tray teaches something. Watching roots drink, shoots stretch green, feels alive. Microgreens respond fast. Energy from growth feels real.
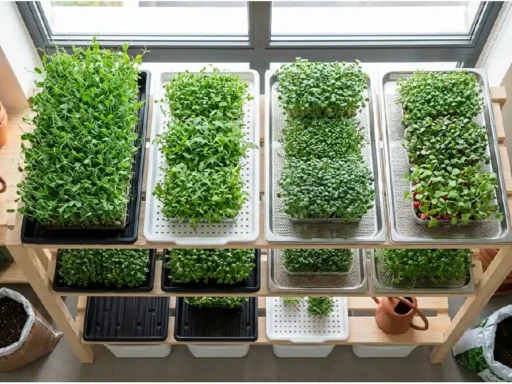
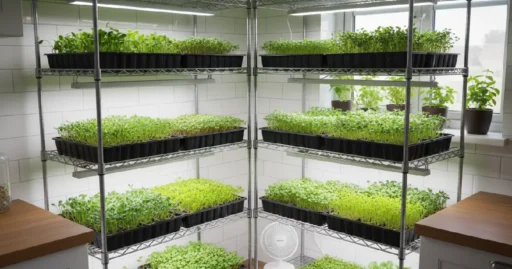
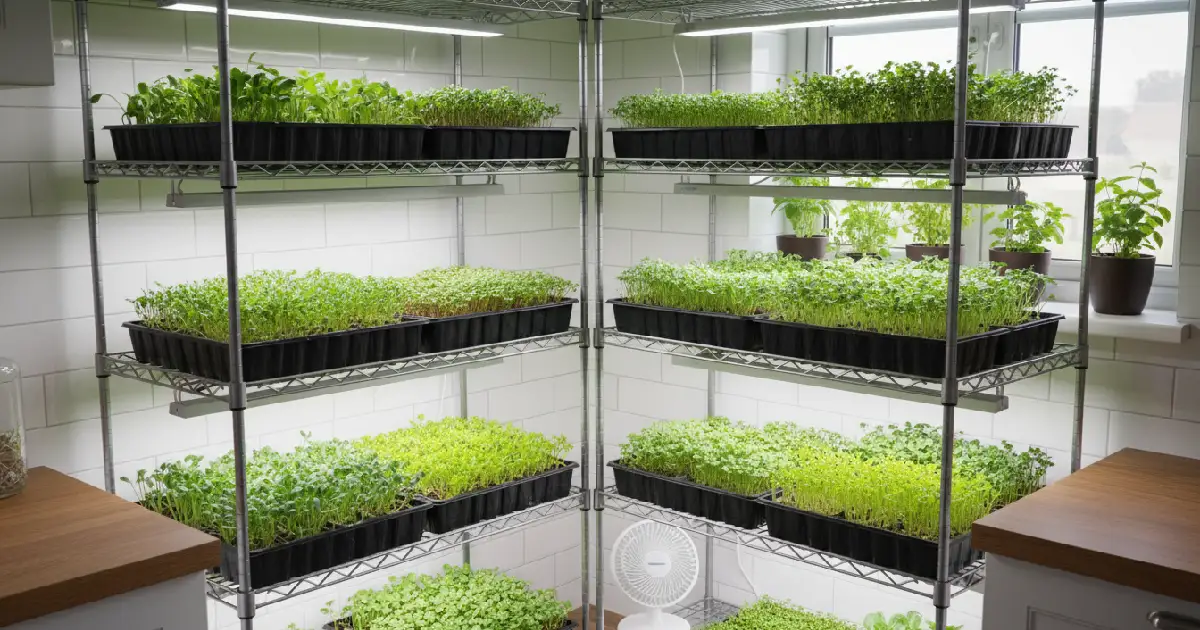
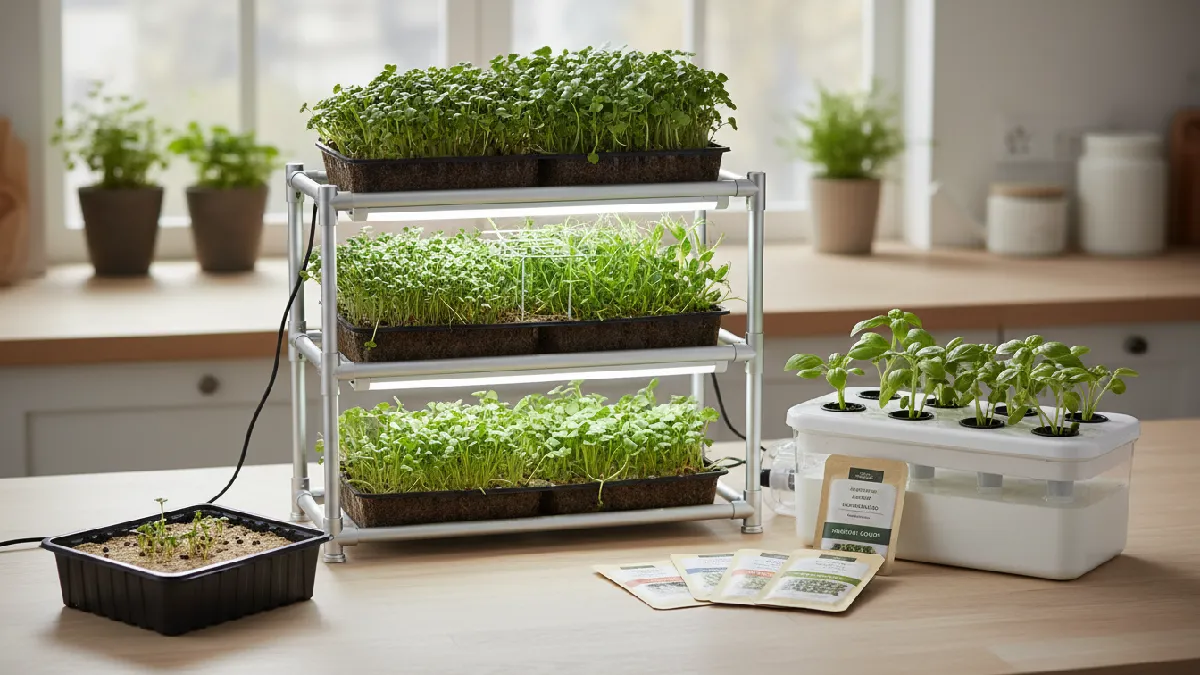
Automated & Vertical Systems
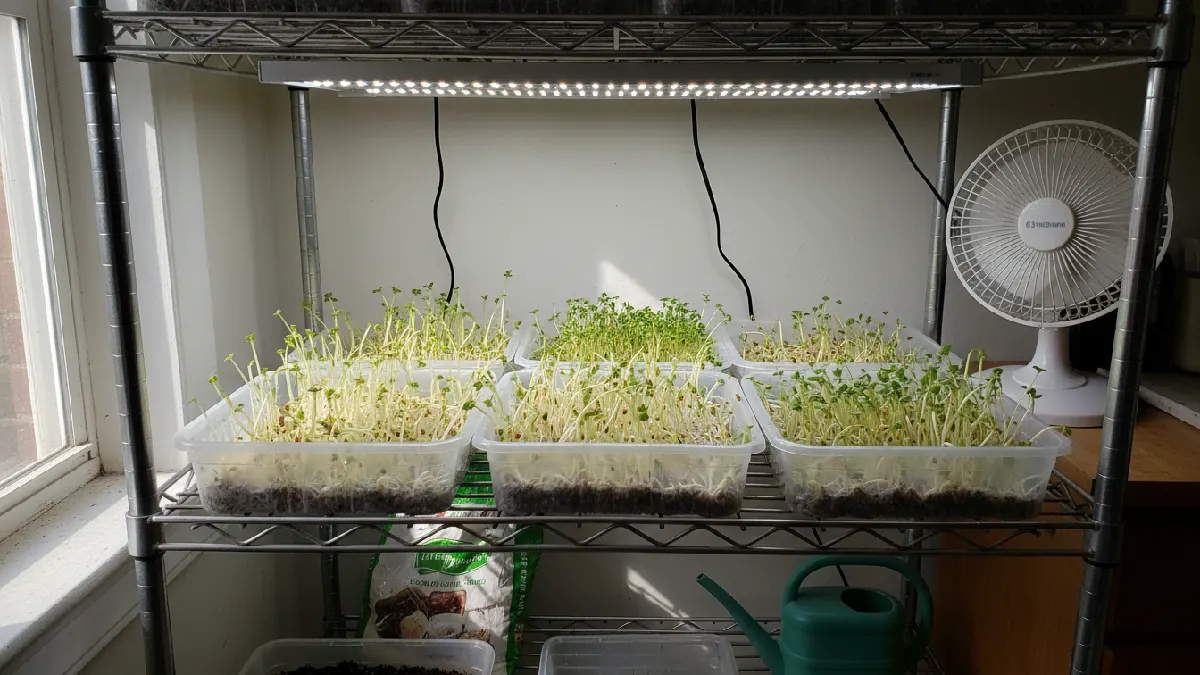
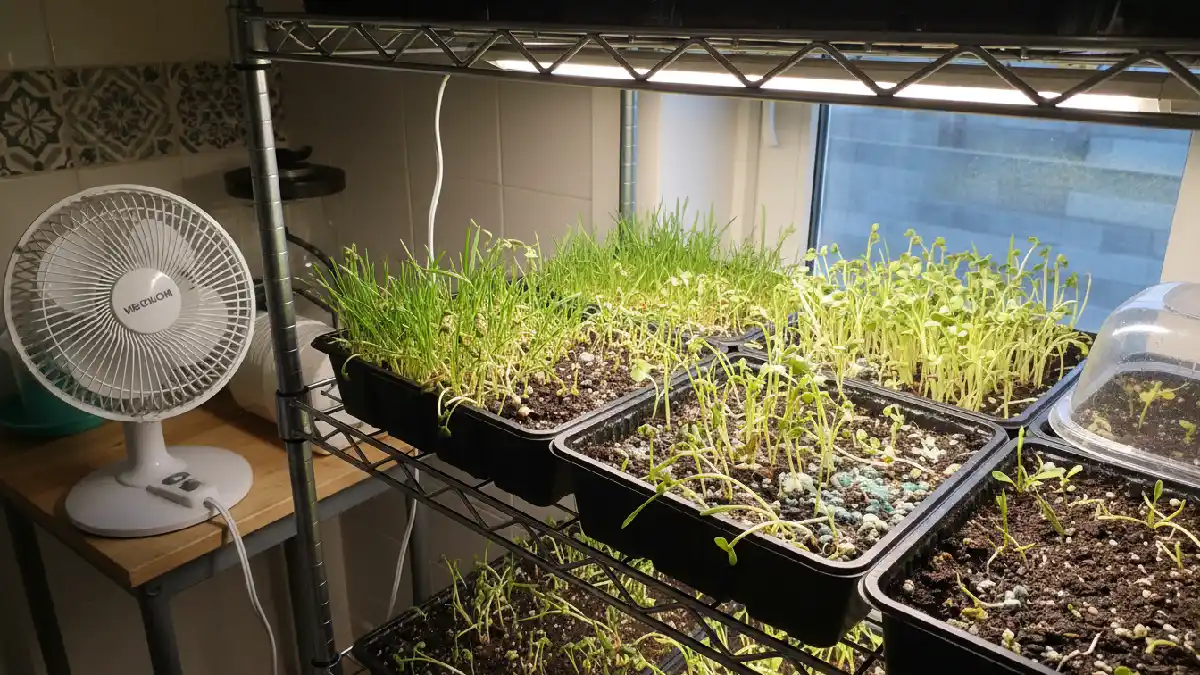
Automated systems feel futuristic. Lights, fans, and water pumps all run on timers. You set once, check daily. Trays stacked vertically save space. Walls, shelves, and even corners work. Sensors watch moisture and temperature. Nutrients flow automatically. Growth feels consistent.
Beginners love seeing shoots pop without constant worry. The setup costs a lot, but the time saved is huge.
Mist lightly if sensors say dry. LEDs reach every layer. Vertical racks make small spaces feel full of green. Harvest comes fast. Every tray tells a story. Energy from growth hits you. Tiny tweaks still matter. Plants respond quickly. Flavor strong, nutrients packed. Watching stacked greens stretch, grow, alive, it’s satisfying and motivating.
How to Set Up a Microgreens Growing System
Setting up starts simply. Pick trays or racks first. Soil or mats? Your choice. A water source nearby helps. Light matters. Sun by the window works, LED works better. Stack trays if space is tight. Keep air moving. A small fan does wonders. Spread seeds evenly. Mist gently, roots grab fast. Check daily. Adjust if leaves stretch or curl.

Automated timers help, but beginners can start manually. Rinse trays, clean mats, and avoid mold. Track temperature, moisture, and growth. Every tray tells a story. Tiny tweaks make a huge difference. Flavor strong, shoots firm. Energy feels alive. Indoor corners, balcony, small apartment, green pops everywhere. Start simple, learn fast, enjoy growth daily.
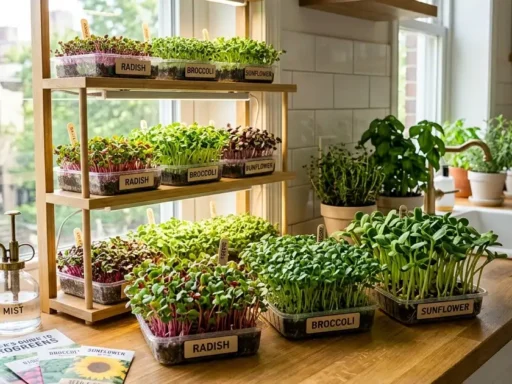
Step 1: Choose Seeds and Trays
Seeds matter: radish, broccoli, sunflower, fast, strong, forgiving. Small ones sprout quickly. Large seeds tricky, tip easy. Trays are shallow and clean. Plastic, metal, whatever works. Drainage holes needed.
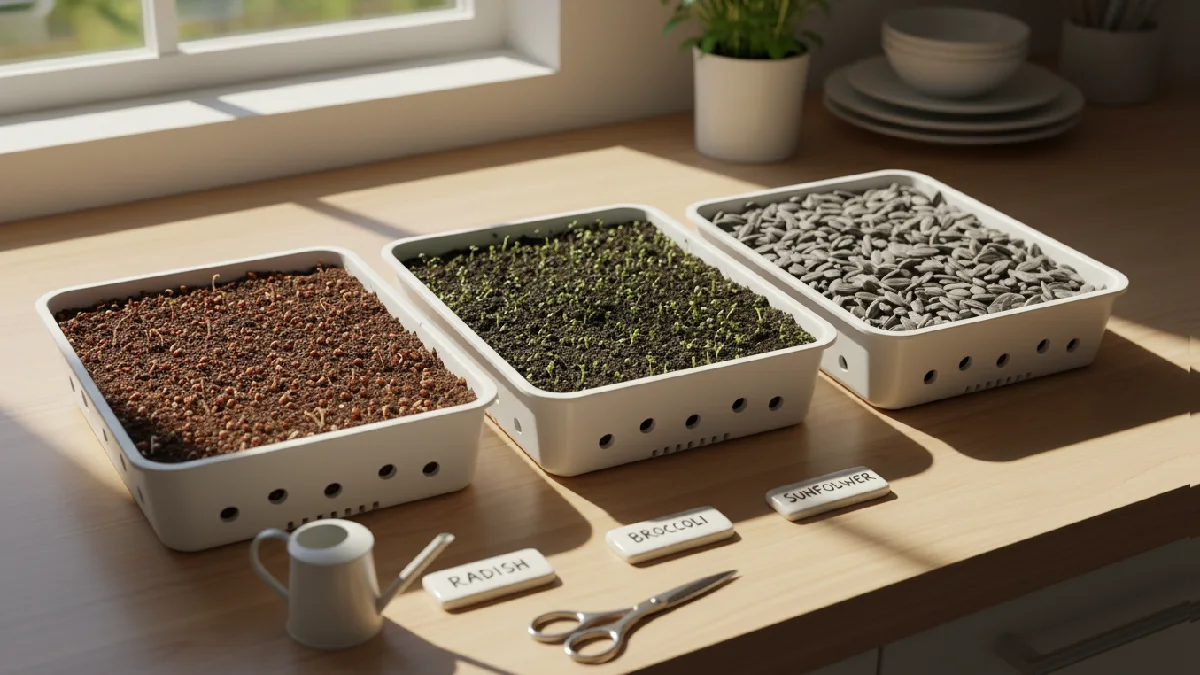
Roots breathe, water drains. Beginners peek daily. Tiny adjustments help. Spread seeds evenly. Mist lightly. Energy feels alive. Watching the first shoots push up excites me. Every tray tells a story.
Step 2: Germination Setup
Tray ready. Seeds spread. Cover lightly. Darkness helps sprouts push. Mist soil or mat gently. Not soaked, not dry. Check twice a day. Tiny shoots wait under cover.
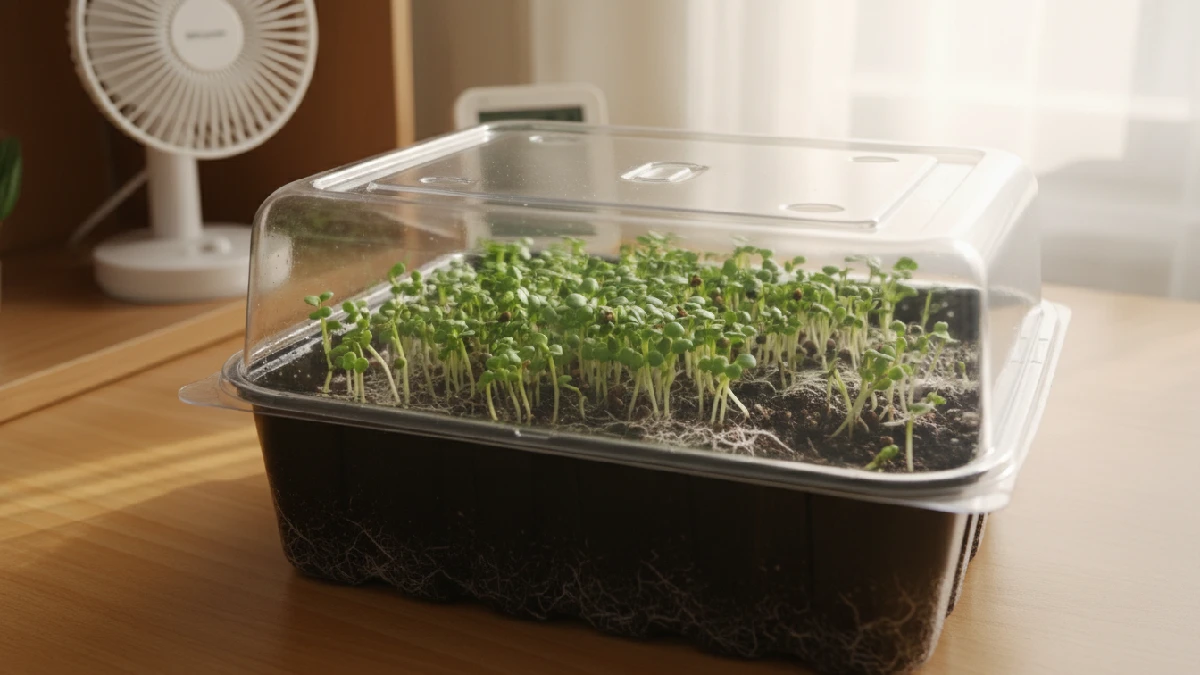
Roots grab medium. Air moves slowly, keep it gentle. Energy builds. First green peek excites beginners. Every tray feels alive. Patience matters. Growth teaches quietly.
Step 3: Lighting and Temperature
Light matters. Place trays near the window or under the LED. Six to twelve inches above shoots. Twelve to sixteen hours daily. Too close? Leaves burn. Too far? Stems stretch weakly. Temperature cozy, around 65, 75°F.
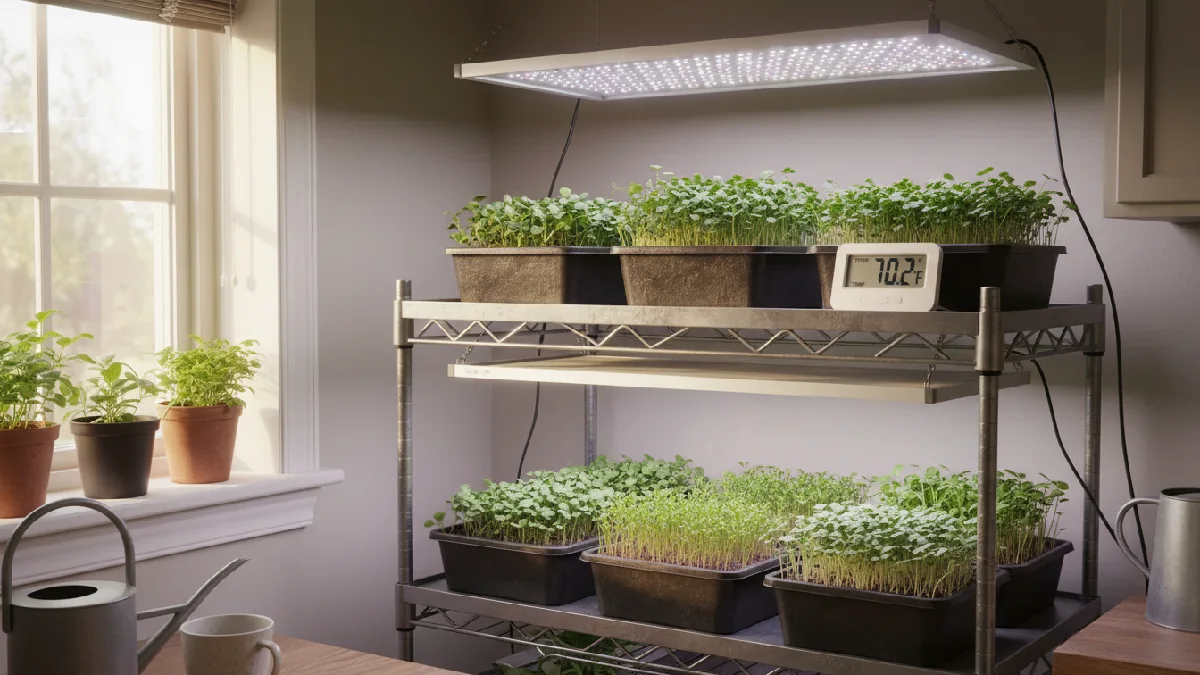
Hot weather slows growth. Cold delays shoots. Tiny adjustments make a big difference. Beginners notice changes fast. Plants react. Energy feels alive. Every tray surprises.
Step 4: Watering and Maintenance
Water microgreens gently. Mist soil or mat lightly. Too much drowns roots. Too little slows growth. Check trays daily. Roots drink slowly. Leaves pop green. Fans help airflow. Prevent mold. Beginners notice changes fast. Remove dead sprouts. Keep trays clean.
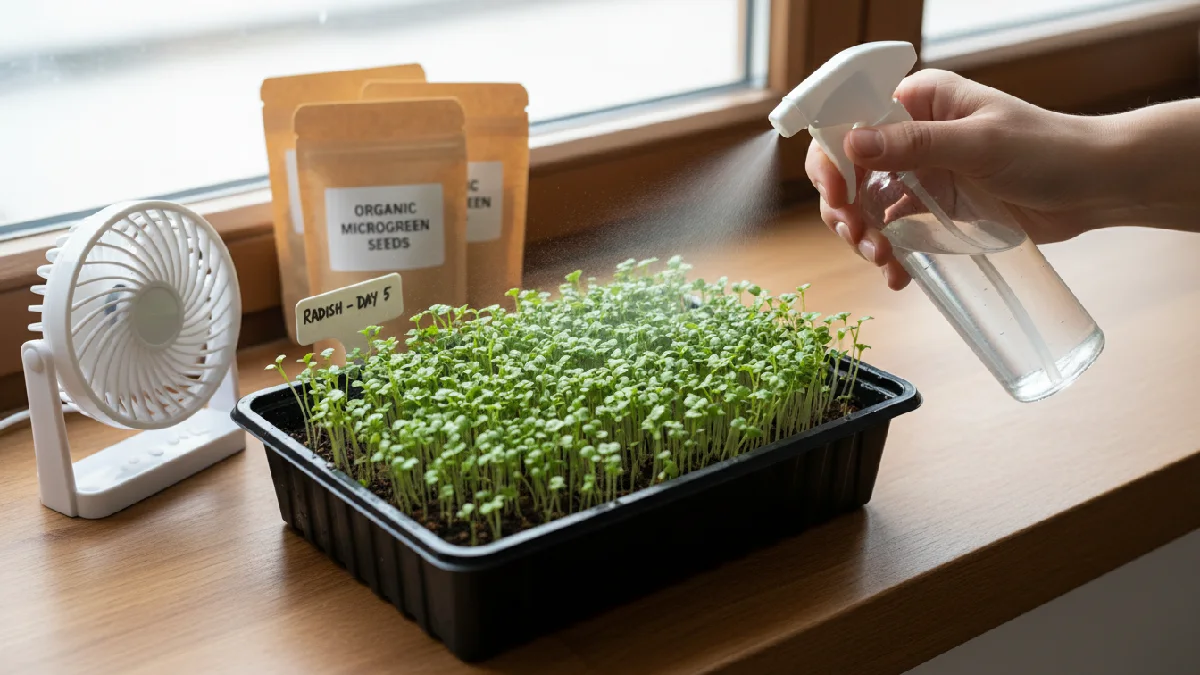
Tiny tweaks make a big difference. Rotate trays sometimes. Light and temperature affect water needs. Energy feels alive. Microgreens respond quickly. Care stays simple. Effort small, reward big. Watching shoots grow excites me.
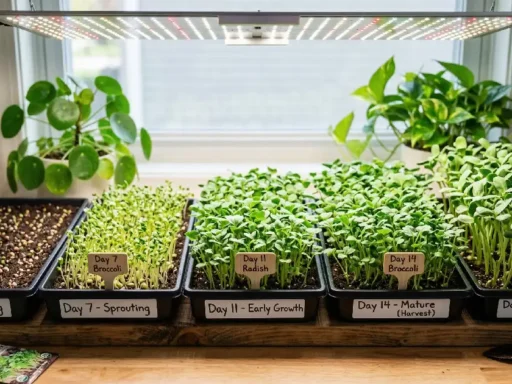
Step 5: Harvesting Microgreens
Microgreens are ready fast. Usually 7to 14 days. Look for true leaves, stems firm. Grab scissors. Cut above the roots. Don’t pull. Keeps the tray clean. Harvest gently. Eat fresh for the best flavor. Some varieties regrow a bit. Radish pops fast.

Pea shoots sometimes surprise. Beginners smile seeing green shoots. Tiny leaves, huge impact. Every tray teaches. Energy feels alive. Storage short. Use within a few days. Effort small, reward big. Watching growth excites.
Pros and Cons of Different Systems
Every microgreens system has trade-offs. Soil feels natural. Roots grip firm. Flavor is sometimes richer. Cleanup is messy, though. Spills happen. Hydroponic looks modern. Water is clean, and growth is faster. Nutrients are controlled tightly. Equipment costs more. Mistakes show quickly. Hybrid balances both. Soil, based comforts beginners. Liquid feed boosts speed.
Setup slightly complex. Not hard, just different. Space decides often. Budget decides too. Small apartments prefer cleaner setups. Larger areas handle soil more easily. Each tray reacts uniquely. Some growers chase speed. Others value simplicity. Results depend on care. Effort small, impact visible. Tiny systems, big lessons. You test one. You adjust. Leaves never lie.
Soil, Based System Pros & Cons
Soil feels natural. Roots anchor deep. Nutrients already present. Flavor is often richer. Many beginners trust it. Set up simply. Trays, soil, seeds, water. Affordable start. Mistakes are forgiven sometimes. Growth steady. Leaves look vibrant. Cleanup is messy, though. Soil spills happen. Fungus gnats appear if overwatered. Storage space needed for bags.
Weight is heavier on the shelves. Harvest clean if careful. Some growers love the earthy smell. Others dislike the dirt. Each tray behaves differently. Moisture tricky. Too much invites mold. Too little slows growth. Soil rewards patience. Tiny leaves rise strong. Work slightly more, experience more hands-on.
Hydroponic System Pros & Cons
Hydroponic feels clean. No soil mess around trays. Roots sit on mats or float in nutrient water. Growth often occurs faster. Leaves look uniform. Set up modern. Shelves stay lighter. Water use is controlled. Monitoring required. Nutrient mix must be right. Mistake shows quickly. Yellow leaves happen if the balance is off. Equipment costs are slightly higher. Pumps or timers are sometimes needed.
Beginners feel nervous first. Results impressive when dialed in. Harvest cleaner. Fewer pests usually. A power outage can stress the system. Attention needed daily. Tiny adjustments matter. Plants respond quickly. Precision helps profit. Not everyone enjoys measuring levels. Some love control. Tiny trays, high efficiency. Work smarter, not harder, but watch closely.
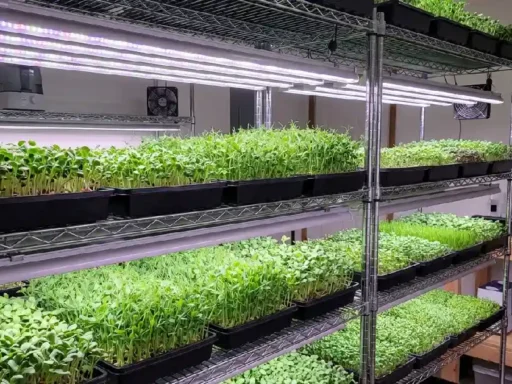
Automated System Pros & Cons
Automation feels impressive. Timers control lights. Pumps manage water. Shelves stacked neatly. Labor drops fast. Consistency improves. Harvest cycles are predictable. Great for scaling a business. Less daily handling. Beginners feel confident watching systems run. The setup cost is higher, though. Equipment failure risks are real. Power outages stressful. Maintenance required. Sensors need checking.
Not fully hands off, as people think. Small glitch harms trays quickly. Space utilization excellent. Precision high. Profit margins increase when dialed correctly. Technical knowledge helpful. Some growers love the control. Others miss the hands, on feel. Automated systems save time. Investment serious. Results strong when managed right. Tiny leaves grow steadily. Business feels structured, almost corporate.
Best Microgreens Growing Systems & Kits
Choosing a microgreens growing system feels confusing at first. So many trays, kits, and lights online. Simple starter kits work fine. Tray, mat, seeds included. Easy start. Shelf systems better for scaling. Stack trays, add LED strips. Hydro kits look modern. Cleaner setup. Automated racks feel professional. Timers, pumps, organized rows. Budget matters. Space matters more. Small apartments need compact kits.
Bigger rooms handle multiple, tier shelves. Quality plastic trays last longer. Cheap ones bend. Grow lights with adjustable height help a lot. Some kits are overpriced, honestly. Basic setup grows the same greens. Beginners test small first. Upgrade later. Every system teaches something. Tiny leaves don’t care about fancy gear. They need light, water, and patience. Results depend on care.
DIY Kits
DIY kits feel personal. You gather trays, lights, and shelves yourself. Costs are usually lower. Flexibility high. Choose quality parts. Skip overpriced bundles. Plastic trays affordable. LED shop lights work fine. Wire racks are easy to assemble. Setup simple but requires planning. Mistakes happen first batch. Adjust spacing. Move the lights closer. Experiment with mats or soil.
Each tweak improves growth. No fancy branding, just function. Beginners learn faster by building their own system. Sense of control stronger. Some parts are cheap online. Durability varies, though. Research important. DIY teaches patience. Tiny changes showa difference. Shelf by shelf, you improve. Business growssteadilyy. Not glamorous, but practical. Results solid when done right.
Commercial Kits
Commercial kits look impressive. Clean packaging. Everything included. Trays, lights, shelves, sometimes seeds too. Set up faster. Instructions are mostly clear. Beginners feel confident opening the box. Fewer guesswork moments. Systems are designed to match together. Less trial and error. Price is higher, though. You pay for convenience. Some kits are basic inside, branding-heavy outside.
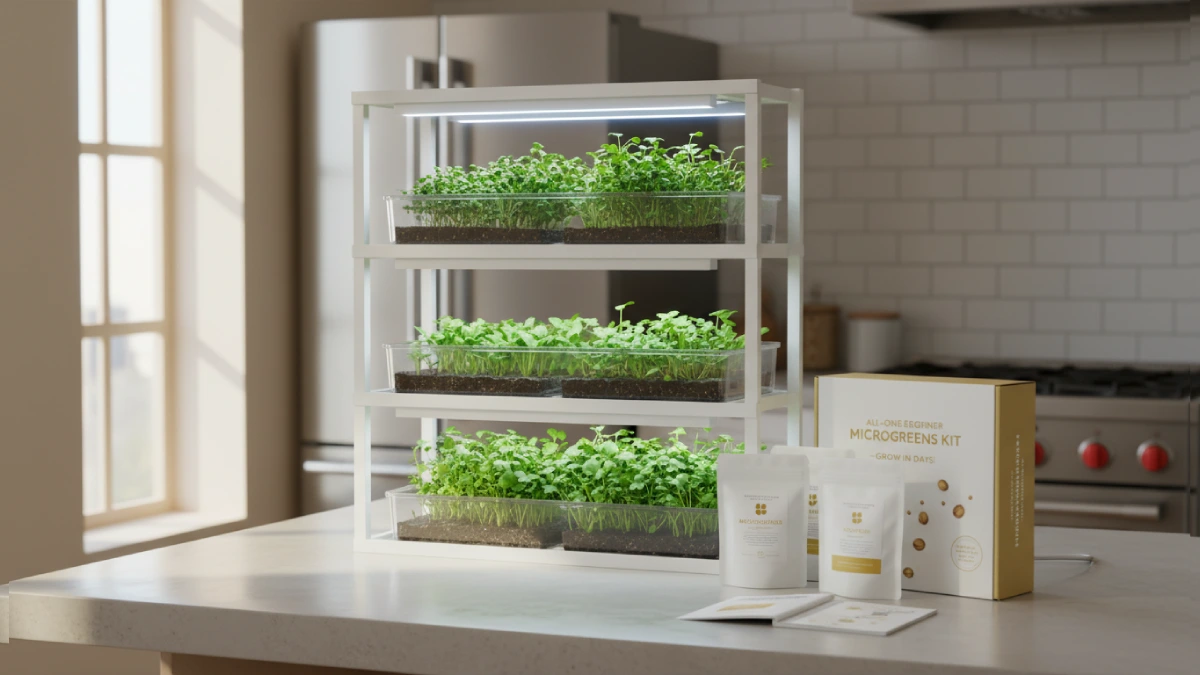
Research matters before buying. Quality varies brand to brand. Good ones save time. Bad ones frustrate. Space usage is usually optimized. Expansion possible but sometimes limited to brand parts. Maintenance is still required. Not fully plug and play as ads claim. Tiny leaves grow the same as a DIY setup. Care still matters. Investment bigger. Results are steady when managed properly. A professional look attracts buyers.
Common Mistakes to Avoid
Overwatering happens fast. Seeds drown quietly. Mold appears overnight. Beginners panic. Underwatering slows growth. The leaves look weak. Balance is tricky at the start. Light placed too high stretches stems. Too close burns tips. Crowding seeds causes airflow problems. Trays need space. Poor hygiene invites fungus gnats. Dirty tools spread issues. Skipping airflow weakens stems. The fan is small but important.
Harvesting too late affects flavor. Timing matters more than expected. Ignoring temperature changes stresses crops. Rooms get hot quickly. Cold slows roots. Many rush scaling too early. One tray mastered better than ten failing. Learn slowly. Observe daily. Tiny adjustments matter. Plants react quickly. Mistakes normal. Fixing them builds confidence. Microgreens forgiving, but not careless, proof.
Over or Underwatering
Water too much, roots drown. Soil soggy, seeds rot quietly. Mold pops fast. Water too little, shoots slow. Leaves curl, stems weak. Mist lightly often. Check trays daily. Balance is tricky at the start. Some trays are dry unevenly. Bottom watering helps.
Spray bottle handy. Tiny adjustments make a big difference. Beginners notice fast. Plants react quickly. Over or under, growth tells a story. Learning comes with observation. Effort small, reward real.
Poor Lighting
Light too weak makes shoots stretch. Stems thin, leaves pale. Beginners notice slow growth. Sunlight through the window is sometimes enough. Not always consistent. LED lights help indoors. Height matters. Too close burns leaves. Too far stretches them. Timing matters. 12to 16 hours usually works.
Rotation helps even exposure. Shadows stunt growth quietly. Microgreens react fast. Watch daily. Adjust small. Light changes feel subtle but have a big impact. Tiny tweaks save trays. Energy shows in healthy shoots. Poor lighting frustrates beginners. Correcting it feels rewarding.
Wrong Seed Density
Seeds are too close to fight for space. Crowded roots tangle. Shoots lean on each other. Leaves are small and pale. Water struggles to reach all seeds. Airflow drops. Mold pops up fast—too few seeds waste space. Trays look empty. Growth uneven. Beginners notice quickly.
Spread evenly. Light touches every shoot. Roots grab medium. Mist gently. Tiny adjustments feel small. Impact is huge. Correct spacing makes trays pop green. Energy shows in healthy growth. Mistakes teach patience. Every tray tells a story.
Lack of Airflow
Air still. Leaves droop. Shoots lean. Mold creeps fast. Roots feel soggy. Trays smell damp. Beginners panic sometimes. A small fan helps. Breeze light, constant. Stems stretch firm.
Leaves stay crisp. Microgreens respond quickly. Energy feels real. Tiny tweaks matter. Every tray surprises. Growth shows patience pays. Watching shots pop excites.
Frequently Asked Questions (FAQ)
What is the Best System for Home Microgreens?
SA simpletray with an LED light works best. Easy setup, small space, fast growth. Mist daily. Energy feels real. Microgreens pop green quickly.
How Long Until Harvest?
Microgreens grow fast. Most ready in 7to 14 days. Radish sprouts quickest. Broccoli and kale take a bit longer. Watch leaves. Cut when stems firm.
Do I Need Grow Lights?
Grow lights help indoors. Sunlight works too, but inconsistent. LED lights keep leaves green. Shoots grow strong. Small tweaks improve results.
Can I Grow Microgreens Without Soil?
Yes, totally possible. Hydroponics or mats work. Paper towelsare okay for small batches. No dirt, less mess. Roots visible, growth fast. Easy cleanup. Beginners start simple.
Which Seeds Are Easiest for Beginners?
Radish, broccoli, mustard, and arugula. Fast sprouts, strong stems. Small leaves, easy to handle. Quick results keep motivation high. Beginners notice growth daily. Tiny effort, big reward.
Are Hydroponic Systems Worth It?
Hydroponics costs more upfront. Faster growth, strong stems. Less mess than soil. Nutrients controlled, roots visible. Beginners see results daily. Tiny mistakes fixable. Rewards feel real.
Conclusion
Growing microgreens at home feels simple, yet exciting. Tiny seeds transform into vibrant leaves fast. Soil, hydroponic, or hybrid, each system teaches. Mist, water, light, small tweaks matter. Beginners learn patience and see results daily. Harvest comes quickly, flavor pops, nutrition, packed. Mistakes happen, yet microgreens forgive. Windowsill, balcony, small counter, any space works.
Energy from watching shoots stretch green feels real. Start small, experiment, adjust often. Indoor gardening becomes alive. Tiny leaves, huge impact. Every tray tells a story. Microgreens make home green, fresh, and rewarding. Effort small, reward big. Fun meets practicality. Growth excites, teaches, and inspires daily.