How Do You Grow Microgreens? Complete Beginner Guide
How Do You Grow Microgreens is something people usually ask when they want fresh greens but don’t want a garden outside. Microgreens are young plants, cut early, before they fully grow. Small leaves, thin stems, strong taste. People are often surprised by how much flavor comes from something this small.
This question comes up because microgreens look easy but feel confusing at first. You see trays online, lights, soil, and sprays. It feels like there is a system you might mess up. Some think you need experience. Others think it costs a lot. Most of the time, it’s just not explained in a simple way.
This guide is made for beginners who want clear answers. No fancy setup. No strict rules. You will learn how to grow microgreens step by step, starting from seeds and ending with harvest. The focus stays on what actually works at home, not what sounds perfect on paper.
What Are Microgreens? Provide a clear explanation
Microgreens are young plants that are harvested very early. Not seeds. Not fully grown vegetables either. They sit in between. Usually cut when the first proper leaves show up. That’s it. No waiting for full size.
People often mix them up with sprouts and baby greens. Sprouts grow only in water. No soil. You eat everything, even the root and seed. Baby greens stay in the soil much longer and look like mini lettuce. Microgreens don’t follow either path. They grow in a shallow layer of soil. When they’re ready, only the stems and leaves are cut. Roots stay behind. This one detail changes how they taste and how they’re used.
The growing time is short. Some are ready in a week. Some take two. A few need close to three weeks. Radish and mustard move fast. Basil and cilantro take their time. This quick cycle makes microgreens attractive to beginners. You don’t wait forever to see results. You plant, you watch, you harvest.
Nutrition is where people get surprised. These tiny greens carry a strong nutrient punch. Vitamins and minerals stay concentrated at this stage. Taste also hits differently. Some are mild. Some are spicy. Some feel stronger than the full-grown vegetable. First-time growers usually notice this right away.
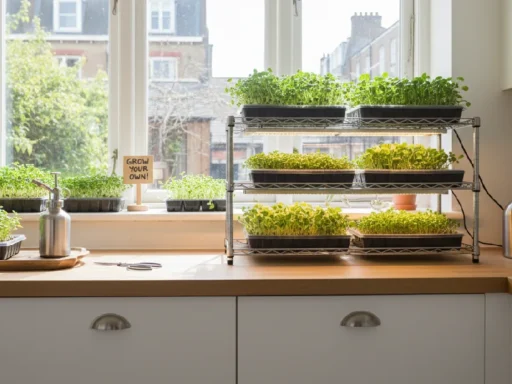
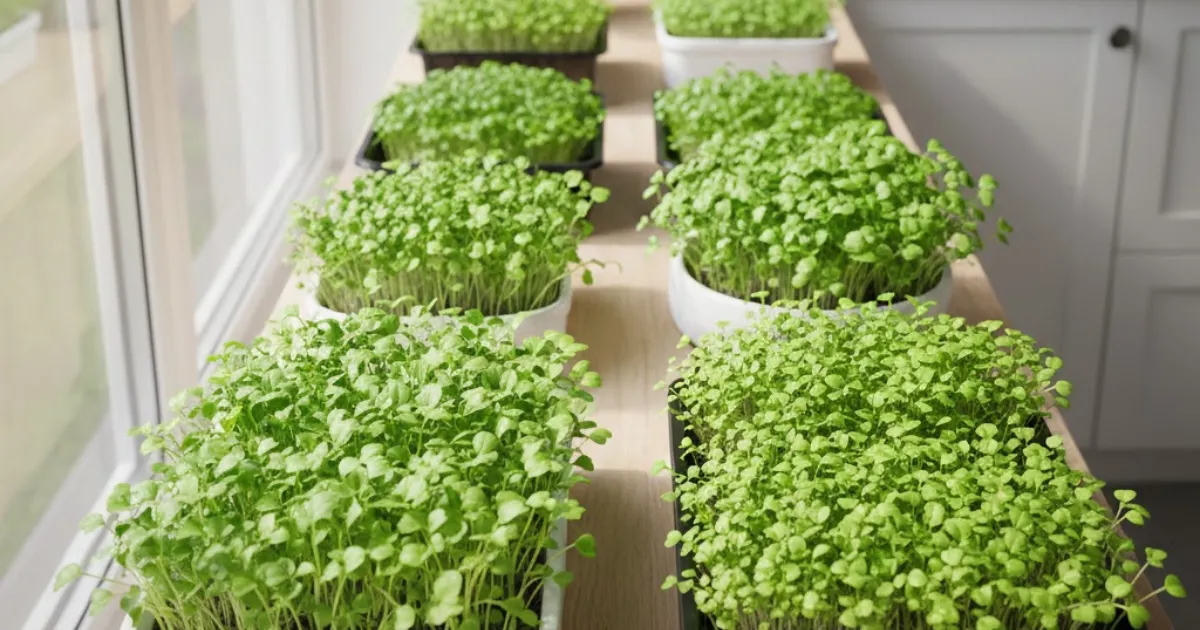
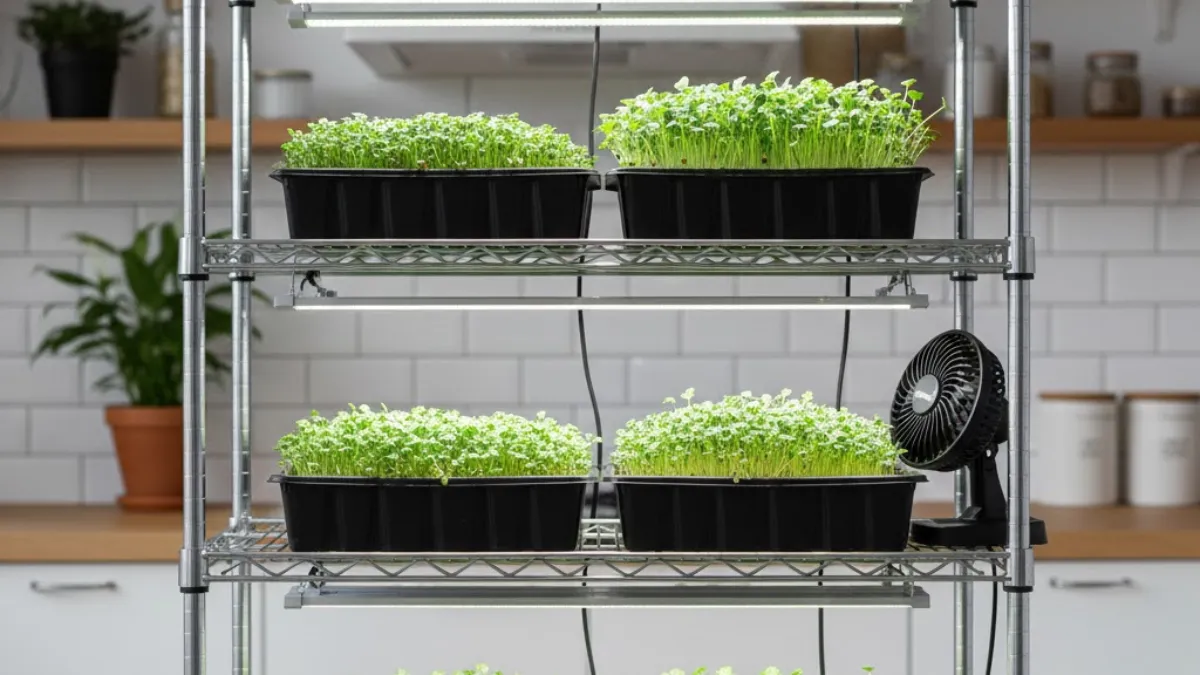
Indoor growing works best for microgreens. They don’t need deep soil. Weather doesn’t matter. You control light. You control water. Bugs stay out. That removes a lot of stress for beginners. A small space is enough. Shelf, table, or even a window corner.
Once people understand what microgreens really are, the process feels less technical. It starts to feel practical. Something you can actually do at home without overthinking.
Why Grow Microgreens at Home?
Most people pause before starting. They wonder if this is even worth doing at home. Microgreens look simple online, but doubt phir bhi aa jata hai. What if it doesn’t work? What if it’s too much effort? That hesitation is common.
Health is usually the first push. Microgreens are cut early, when the plant is still young. Nutrients stay strong at this stage. You don’t need large portions. A small handful already changes the meal. People notice the difference over time, not overnight, but it shows.
Buying microgreens from stores feels nice once. Then you see the price. Small box. Short life. Growing at home slowly fixes that problem. Seeds last longer than expected. Trays get reused. After a few rounds, the cost doesn’t feel heavy anymore. It becomes normal food, not something special.
Freshness works differently when you grow them yourself. You cut only what you need. No waiting. No fridge guessing. No wondering how long they’ve been sitting there. You decide everything. Water, light, timing. That control makes people feel more confident about what they eat.
Space is rarely an issue. Microgreens don’t ask for much. A shelf works. A table works. Even a quiet corner does the job. Apartments are fine. You don’t need soil bags lying around or tools taking over the room.
No gardening experience is required. That fear usually disappears after the first tray. Microgreens grow fast. Mistakes don’t last long. You try again within days. That’s why many beginners stick with it longer than expected.
For most people, growing microgreens at home isn’t about being perfect. It’s about doing something small that actually works. Once you see them grow, the doubt feels unnecessary.
What Do You Need to Grow Microgreens? (Complete List)
Most beginners think growing microgreens requires a long list of supplies. It usually doesn’t. The setup is small.
A few basic items, used the right way, do most of the work. Once this part is clear, the rest feels easier.
Growing Trays
Trays are where everything starts. There are two main types. Trays with holes and trays without holes. Both have their place. The tray with holes is for growing. Water drains through it. The tray without holes sits underneath and holds that water.
Many people use standard 10×20 trays. Not because it’s a rule, but because they fit almost anywhere. Shelves. Tables. Under lights. They’re easy to manage, especially when you’re just starting. A two-tray system is common. One tray inside another. Water goes in the bottom tray. Moisture moves up to the roots. Leaves stay dry. This small detail helps avoid issues and keeps growth more even.
Growing Medium
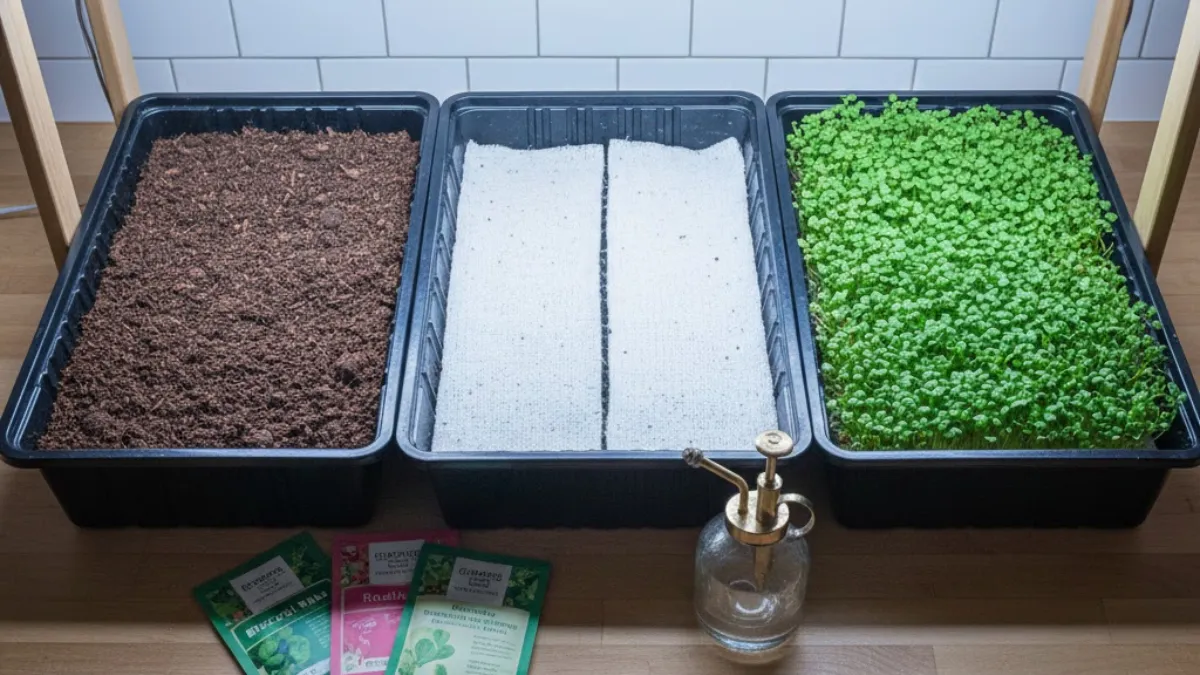
Microgreens don’t need deep soil. A thin layer is enough. Regular potting soil works fine as long as it’s light. Heavy soil causes problems and slows growth.
Coco coir is another option. It’s made from coconut husk. Clean. Light. Holds moisture well. Some people prefer it because it feels less messy and more consistent. Grow mats are also used. Hemp or fiber types. They’re simple and clean, but they dry out faster. Not everyone sticks with them long term, but they do work.
Seeds
Seeds matter more than most beginners expect. Always choose seeds meant for microgreens. They’re selected for indoor growing and close spacing.
Treated seeds should be avoided. Those are designed for outdoor farming. Indoors, they can cause issues.
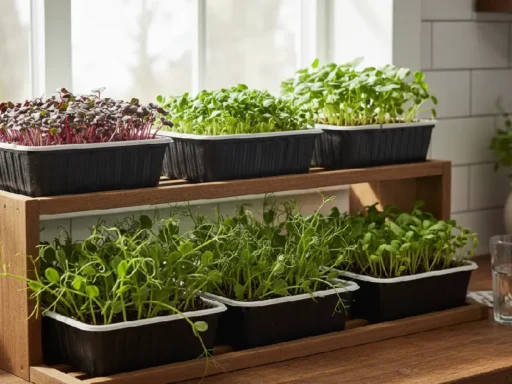
Good beginner seeds include radish, broccoli, mustard, peas, and sunflowers. They grow fast and handle small mistakes well.
Light Source
Sunlight can work if you have a bright window. The problem is consistency. Light changes with the weather and seasons. LED grow lights give steady results. Same light each day. Less heat. Easy to place in small spaces. That’s why many indoor growers end up using them.
Watering Tools
Watering doesn’t need special equipment. A spray bottle works well at the start. It keeps seeds moist without washing them away.
Bottom watering becomes useful later. Water stays below. Roots take what they need. Leaves stay dry, which helps overall growth. Once these basics are in place, growing microgreens stops feeling complicated. It turns into a simple routine. Set it up once, then repeat.
How Do You Grow Microgreens Step by Step
This is the part most beginners actually care about. Not theory. Not definitions. Just the real process, from an empty tray to something you can harvest. Growing microgreens is simple, but each step matters. Miss one, and results feel off. Follow them in order, and things usually work out.
Step 1 – Prepare the Growing Tray
Everything starts with a clean tray. It sounds boring, but skipping this step causes problems later. Old soil bits, dust, or leftover moisture can invite mold. Wash the tray with plain water. If it’s been used before, a light scrub helps. No need for harsh chemicals. Let it dry or wipe it down.
Next comes soil. You don’t need much. A shallow layer is enough, usually around one to one and a half inches. Spread it evenly. Don’t press it down hard. Roots like loose space. Packed soil slows things down.
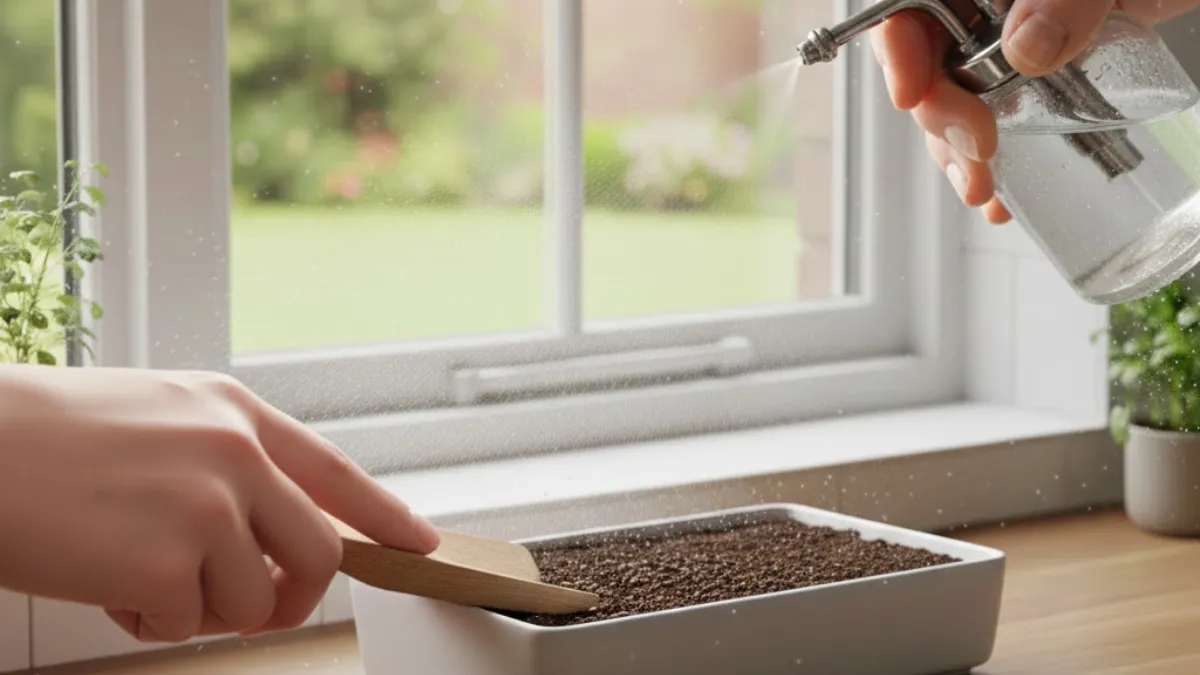
Once the soil is in, level it gently with your hand. Small bumps are fine. Perfection is not required. After that, moisture matters. The soil should be damp, not soaked. Use a spray bottle or gently pour water and let it absorb. If water pools on top, it’s too much.
Touch the surface. It should feel moist, cool, not muddy. This sets the base for seeds to settle properly. Rushing this step often leads to uneven growth later. A few extra minutes here save trouble later.
Step 2 – Sow the Seeds Correctly
This step looks easy, but it’s where many beginners go wrong. Seed density matters. Too few seeds waste space. Too many cause overcrowding. When seeds compete, growth suffers. Stems stay thin. Mold risk increases.
Hold the seeds in your palm and sprinkle slowly. Try to spread them evenly across the surface. No big piles. No empty patches. It doesn’t need to look perfect, just balanced. Some seeds are small and tricky.
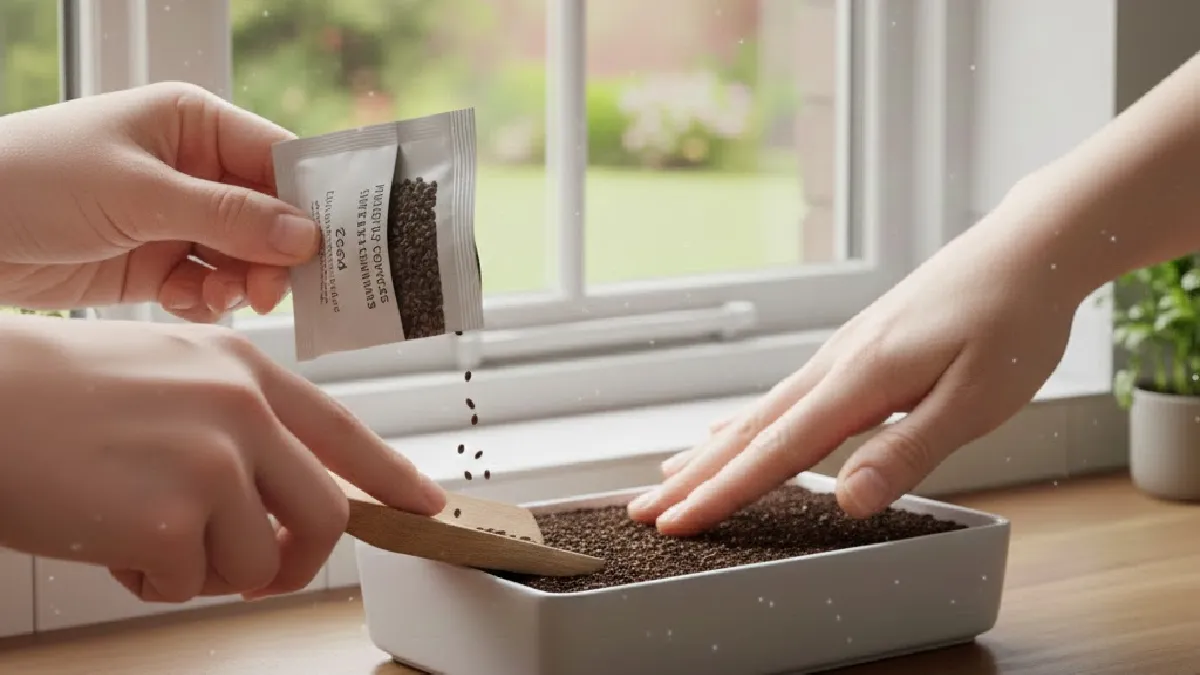
Take your time. Once seeds are spread, press them lightly into the soil. Use your fingers or a flat object. Don’t bury them. Just enough pressure so they make contact with moisture below. Seeds sitting loose dry out faster.
After pressing, mist lightly again. This helps seeds settle. Avoid pouring water directly at this stage. Seeds can shift, clump together, and ruin spacing. This small detail affects how straight and even your microgreens grow.
Step 3 – Germination (Blackout Phase)
After sowing, seeds need darkness. This phase is called blackout. Darkness signals seeds to germinate properly. Without it, some seeds struggle to push roots down.
Cover the tray with another tray or a lid. No light should reach the seeds. At the same time, airflow shouldn’t be completely blocked. A loose cover works better than a sealed one.
Most seeds stay in blackout for two to four days. Radish and mustard are quick. Basil takes longer. You’ll know it’s time to uncover when seedlings push up and start lifting the cover slightly.
Not all seeds need blackout. Peas and sunflowers benefit from it. Some herbs don’t require a full blackout, but beginners usually keep it simple and use it anyway. During this phase, check moisture once a day. Soil should stay damp. Not wet. Germination is quiet, but it’s doing important work under the surface.
Step 4 – Light Exposure & Placement
Once seedlings come up, light becomes critical. Remove the cover and place the tray under the light immediately. Delays here cause stretching. Long, weak stems are a sign of poor light. If using LED grow lights, keep them close. Around 2 to 4 inches above the plants works well. Too far, and microgreens grow tall and thin. Too close, and heat stress appears

Light duration matters. Aim for 12 to 16 hours per day. Consistency is more important than exact timing. Set a routine. Plants respond better to stable patterns. Watch how they grow. If stems lean heavily toward the light, it’s not enough. If leaves stay small and pale, adjust the distance. Light fixes most growth issues faster than anything else.
Step 5 – Watering Microgreens Properly
Watering is where balance matters most. Too little dries roots. Too much causes mold. Early on, top watering with a spray bottle works fine. Keep the surface moist without flooding it. As plants grow, bottom watering becomes better. Add water to the bottom tray and let the roots pull it up. Leaves stay dry.
Mold risk drops. Growth stays more even. Check trays daily. Sometimes twice in warm rooms. Soil should never smell bad. If it does, watering is off. Yellowing leaves or slow growth also signal problems.
Overwatering signs include soggy soil, algae, and fuzzy white mold. Reduce water immediately and improve airflow. Most watering issues come from trying to help too much.
Step 6 – Monitoring Growth Daily
Microgreens grow fast. Daily checks matter. You’ll see clear stages. First stems. Then leaves open. Then color deepens. This is when adjustments help most. Watch height. If they stretch, bring the lights closer. If leaves curl or dry, check moisture. Small tweaks early prevent bigger problems later.
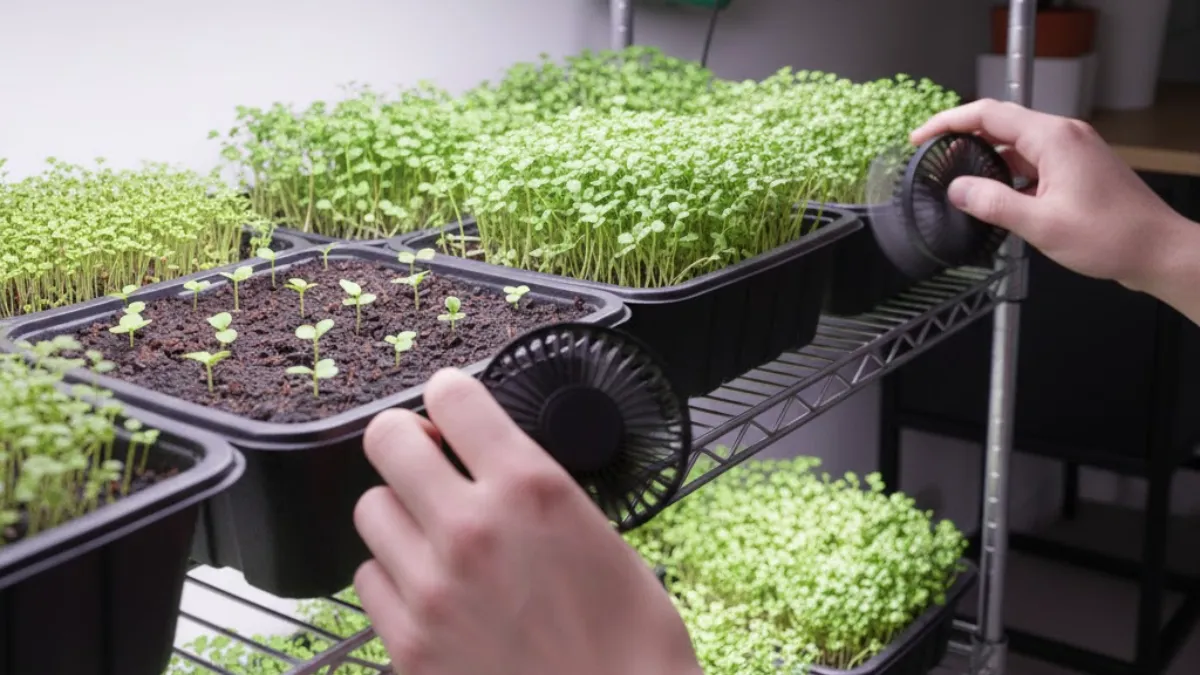
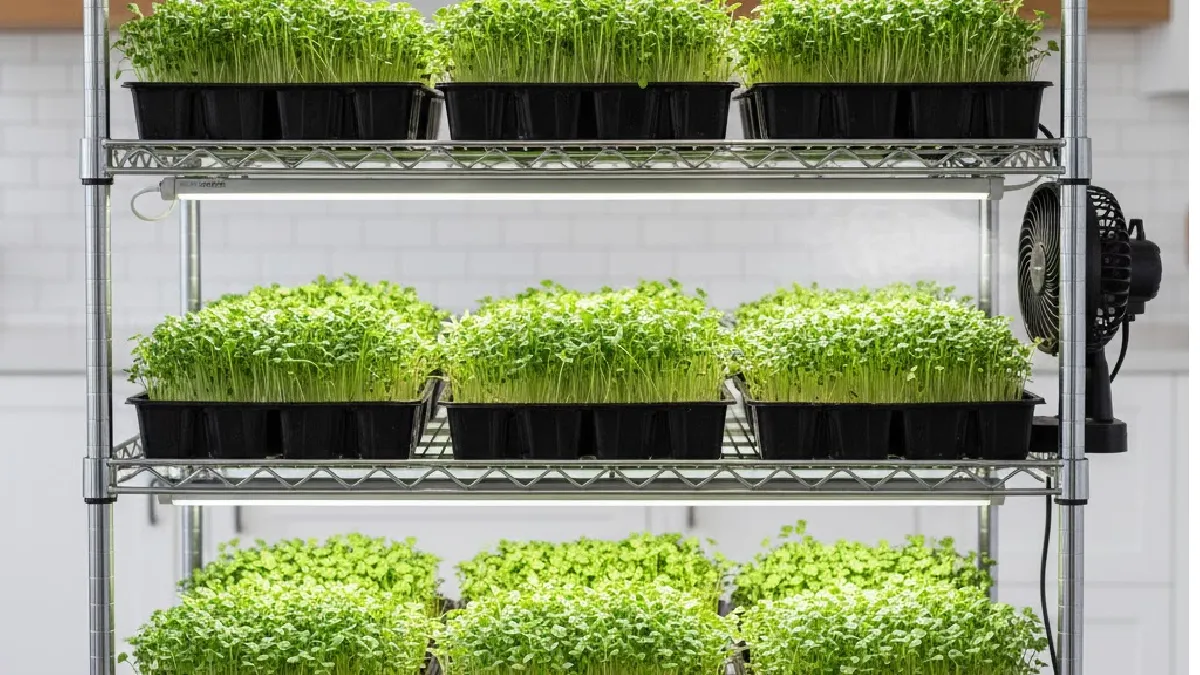
Air circulation helps more than people expect. Still air encourages mold. A gentle fan nearby improves strength and reduces moisture buildup. No strong wind, just movement. This daily habit builds confidence. You stop guessing. You start understanding what the plants need. That’s when growing microgreens stops feeling technical and starts feeling natural.
Best Microgreens for Beginners
When someone starts growing microgreens, seed choice makes a big difference. Some varieties grow smoothly even if you make small mistakes. Others don’t. Beginners usually enjoy the ones that grow fast and don’t act sensitive over every little thing. That’s why these microgreens are often recommended.
Radish
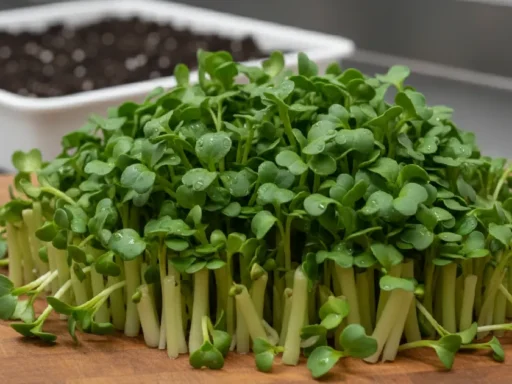
Radish microgreens are usually the first success story. The taste is sharp, slightly spicy, and you notice it immediately. They grow quickly, often ready in about a week. That fast growth helps beginners stay interested. Difficulty stays low. Even if watering isn’t perfect or the light isn’t ideal, radish still grows. That’s what makes it reliable.
Broccoli
Broccoli microgreens are calmer in flavor. Mild, clean, nothing aggressive. They take a little longer, around 8 to 12 days. Still reasonable. Difficulty is low to medium. They like steady moisture and decent light. Once that routine settles, broccoli grows without much drama. Many people choose it more for health than taste.
Pea Shoots
Pea shoots feel different from most microgreens. The taste is fresh and slightly sweet, with a crunchy bite. Growth takes around 10 to 14 days. Difficulty sits somewhere in the middle. Seeds need soaking, and spacing matters more. They don’t rush, but they’re not fragile either. With enough water and light, they do fine.
Sunflower
Sunflower microgreens are thick and juicy. The flavor is nutty, almost heavy compared to others. They usually take 10 to 14 days to harvest. Difficulty is medium. Seeds are big, which makes sowing easy, but airflow matters. Too much moisture causes problems. When conditions are right, they grow strong and satisfying.
Mustard
Mustard microgreens are bold. Spicy, noticeable, not shy at all. Growth is fast, often within a week. Difficulty stays low. They behave a lot like radish. Good light, simple watering, and they take off quickly. Beginners who enjoy strong flavors usually like mustard.
These microgreens give beginners confidence. You see growth fast. You learn quickly. Mistakes don’t feel permanent. Once these become familiar, trying new varieties doesn’t feel risky anymore.
How Long Do Microgreens Take to Grow?
People usually ask this right away. How long before you can actually cut and eat them? That’s fair. No one wants to wait forever. Microgreens work because the waiting time is short. Most trays finish somewhere between 7 and 14 days. Some move faster. Radish and mustard don’t waste time.
You see them pushing up within days, and they’re ready soon after. Others take it slow. Peas and sunflowers sit there for a bit, then suddenly catch up. Herbs stretch the timeline even more, which is why beginners often skip them at first.
Seed choice changes everything. Even when trays look similar, growth speed isn’t the same. Radish grows thick and quick. Broccoli takes a little longer but stays consistent. Pea shoots need soaking, so the clock starts earlier than people expect. Sunflower feels slow at first, then grow strong once it gets going.
Indoor temperature matters more than it seems. A normal room works fine. Not cold. Not hot. When the room stays cool, growth slows, and germination drags on. When it’s too warm, things speed up, but problems appear. Weak stems. Mold. Uneven patches.
That’s the advantage of growing indoors. You control the space. Timing becomes predictable. After a few trays, you stop counting days. You just look at them and know they’re ready.
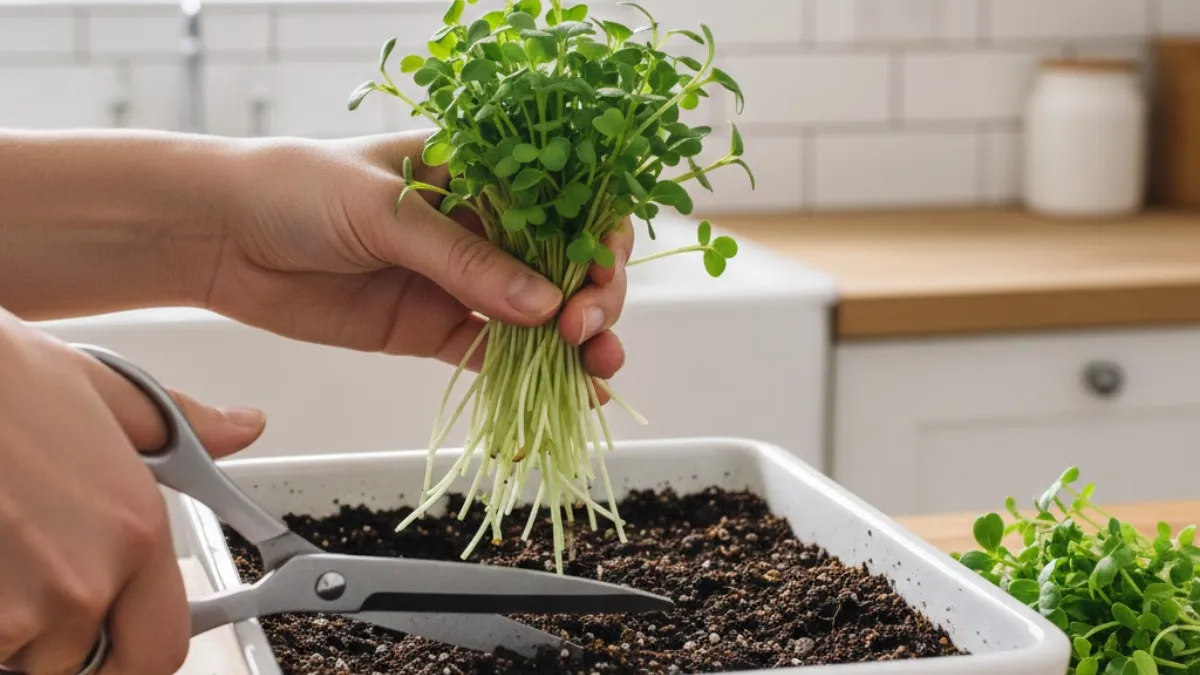
How to Harvest Microgreens Correctly
Harvesting is the part where all your work shows results. Timing matters. Most beginners miss it. Microgreens are ready when the first true leaves appear. Not the tiny seed leaves. The slightly bigger ones. Cut too early, and the flavor feels weak. Cut too late, and the stems get tough. Watching them daily helps you catch the right moment.
Scissors are best. Simple kitchen scissors do the job. Hold the tray steady. Snip stems just above the soil. Don’t pull. Pulling messes up roots, dirt gets on leaves, and cleaning becomes annoying. Clean cuts make microgreens neat and ready to eat instantly.
Yield improves with small tricks. Don’t overcrowd the next tray. Water properly while they grow. Strong stems, fuller leaves. Rotate trays under the light if some lean. These tiny adjustments make a big difference. After cutting, rinse lightly if needed, pat dry, and store in a container for a few days.
Once you do it a few times, it becomes natural. You start seeing the right size, right color, the moment the flavor is strongest. Harvesting stops being technical. It becomes quick. Satisfying. Almost addictive.
How to Store Microgreens After Harvest
After all the work, storage matters. Microgreens are delicate. Handle them wrong, and they get limp fast. First question: wash or not? Some rinse lightly under cool water. Some skip it completely. If you rinse, pat gently with a paper towel. Too much water ruins leaves. The fridge is best. Cool, steady spot. Not the door, not near smelly foods. Microgreens pick up odors easily. Keep them somewhere stable.
Containers help a lot. Any airtight box works. Line it with a paper towel. Place microgreens on top.
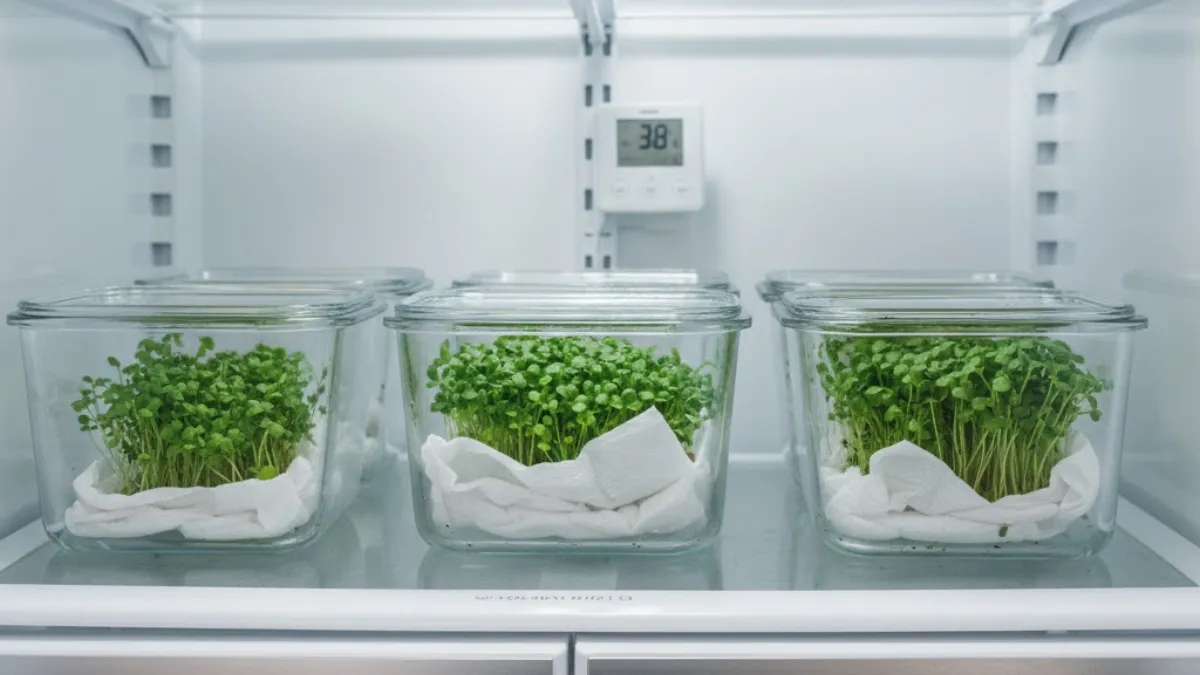
Another towel if needed. Paper soaks up extra moisture. Keeps leaves crisp. Mold risk drops. Simple trick, big difference.
Shelf life is short. Usually 5 to 7 days. Fast growers like radish or mustard may fade sooner. Delicate herbs may last a little longer. Check daily. Pull out any wet or yellowing bits. Keeps the rest fresh. Once you get used to this, storing microgreens becomes second nature. You can grab handfuls for sandwiches, salads, or garnishes anytime. Less waste. More flavor. And every tray you grow feels worth it.
Common Microgreens Problems & Solutions
Even beginners face problems. Microgreens look easy, but things can go wrong. The good news most issues have simple fixes. Knowing what to watch for saves frustration.
Mold
is the first culprit. It usually appears when the soil is too wet or the airflow is poor. White fuzz on leaves or soil means you’ve overwatered or covered trays too tightly. Fix it by letting trays breathe.
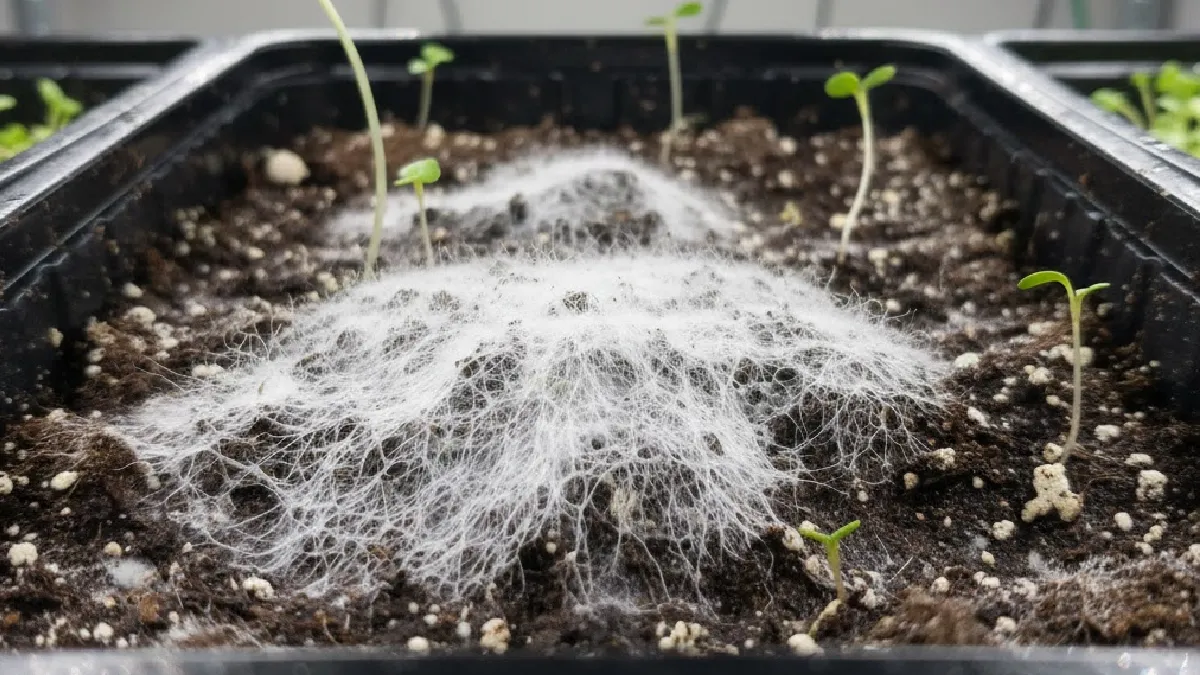
Use bottom watering instead of spraying too much on top. Make sure trays aren’t packed together. Mold hates air.
Leggy microgreens
happen when the light is weak or too far away. Stems stretch, leaves stay small. Fix? Bring your light closer or increase the hours.

Sunlight works too, but indoors it’s inconsistent. LED grow lights solve this fast. Rotation helps too.
Yellow leaves
Often, it means nutrient or water stress. Sometimes seedlings sit too long without light, or the soil dries out unevenly. Check moisture, check light.
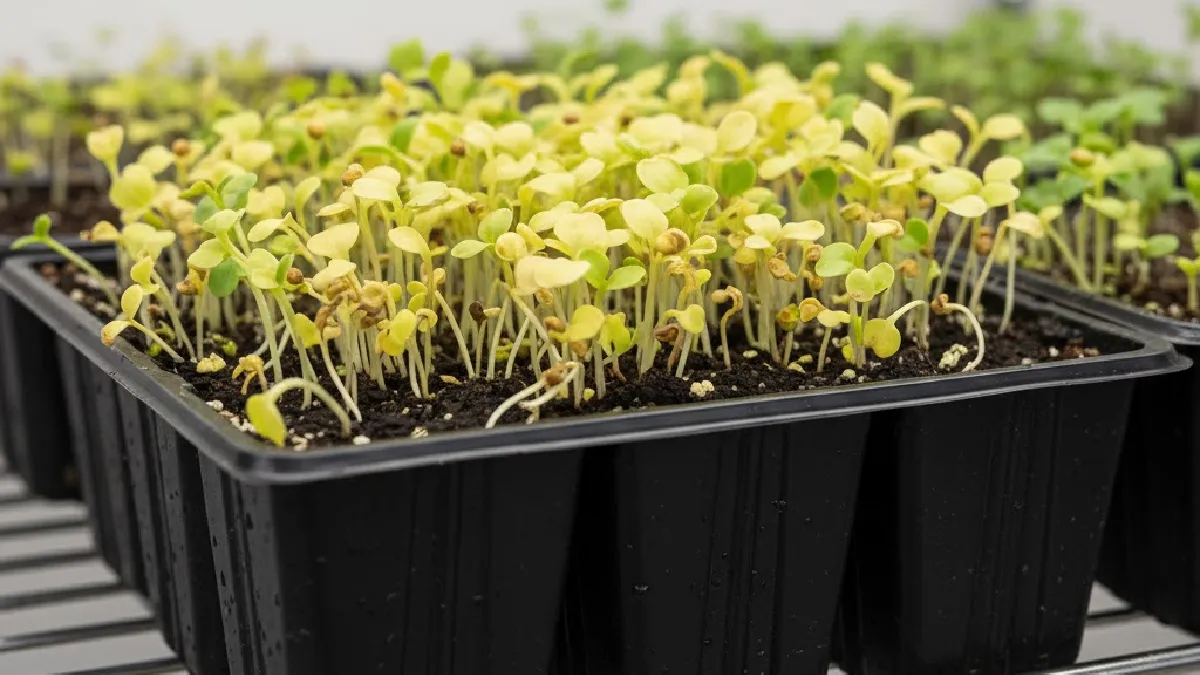
Pull out the yellow bits if they spread. Next tray, adjust watering and light timing.
Uneven growth
happens for many reasons. Seed density is too high. Water is not distributed evenly. Light hits some plants more than others. Quick fix: thin seeds carefully, rotate trays, spray evenly, and keep lights consistent. Over time, you notice patterns and trays look uniform.
Bad smell
usually comes from stagnant water or decaying leaves. Soil too wet, or the trays are left covered. Solution: remove soggy leaves, let trays air out, and avoid excess water. Clean trays between rounds. Smell usually disappears once conditions stabilize.
Most of these problems aren’t permanent. Microgreens are forgiving. They grow fast, and mistakes correct themselves next round. Daily checks help. Even 5 minutes per day spotting issues saves entire trays. Learning to read your plants is part of the fun.
Once you know the signs, troubleshooting becomes second nature. Mold, yellow leaves, uneven growth, none of it feels scary anymore. You start understanding each tray, each seed, and each leaf. That’s when microgreens stop being intimidating and begin being a hobby you actually enjoy.
Indoor vs Outdoor Microgreens Growing
Microgreens can grow indoors or outdoors. But honestly, indoors is easier for most beginners. You don’t worry about rain, wind, or bugs. Temperature stays steady. Light can be controlled. You see results fast. Outdoors It’s more like gambling. The sun comes and goes. Soil may dry out or flood. Insects and mold show up more often.
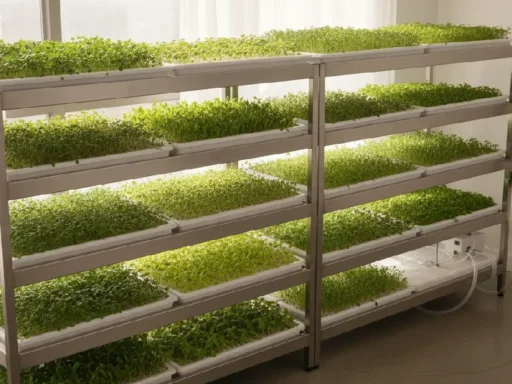
Indoor growing fits small spaces. Shelves, tables, windowsills, anything works. You can adjust light, water, and airflow. Mistakes don’t ruin everything. The outdoors needs a bigger space. You have to watch the weather. Winter or summer slows growth. Too hot, too cold, growth suffers.
Some people make a comparison table in their minds. Indoors: light steady, temp stable, pests low, small space okay. Outdoors: sunlight changes, temp varies, pests are high, need more room. But the point is, indoors gives beginners control. You get confidence. You see seedlings push up, grow strong, and stay healthy.
Outdoors can be fun once you know what you’re doing. But for first-time growers, it’s stressful. Plants can flop or die for reasons you don’t see. Indoors lets you experiment safely. Mistakes are small. Learning happens fast. That’s why most beginners start indoors, then maybe try outdoors later if they want.
Conclusion
Growing microgreens at home is easier than it looks. Quick recap: pick simple seeds, use a tray, keep it light and moist, and just watch them grow. That’s basically it. Beginners can do it without fancy tools. Start with one tray. Just one. Focus on learning how seeds sprout, how leaves react to light, and how soil or coir holds water. When that first tray succeeds, confidence comes naturally. After that, more trays or varieties feel easy.
Don’t stress over mistakes. Microgreens forgive small errors. Every tray teaches something. You’ll notice growth, flavor, and color change every day. It’s satisfying. Give it a try today. See what grows. Comment about your first tray, share with friends, or check our related guide for more tips. Simple, fun, and fresh, your kitchen can be a mini farm.