Grow Microgreens Indoors: A Complete Step-by-Step Guide for Beginners
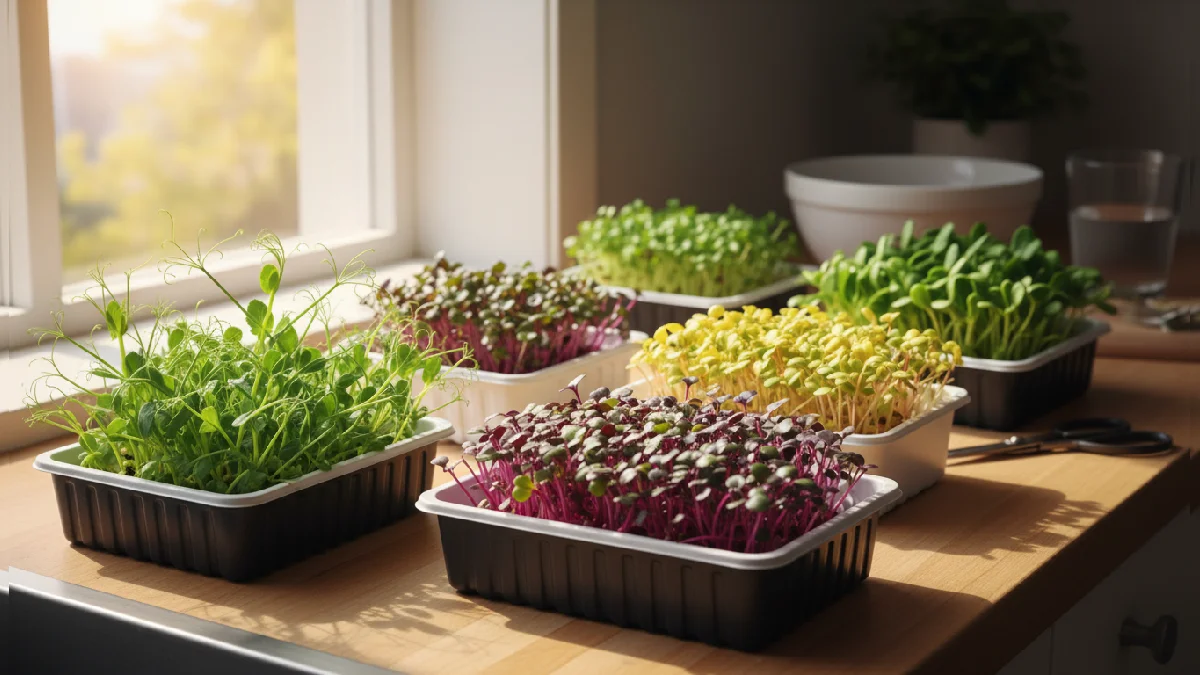
Growing microgreens indoors feels alive. You grab tiny seeds, shallow trays, and soil. Mist gently. Place trays near the window or LED light. Days pass. Tiny green shoots pop. Leaves are small, taste strong. Nutrition-packed. Beginners notice energy from fresh greens. Mist too much, roots rot. Too little, seeds dry. Rotate trays sometimes. Watch leaves stretch.
Kitchen corners turn lively. Harvest comes fast. Cut above the soil. Eat fresh. Every tray surprises. Microgreens are teaching slowly. You learn by doing. Care feels real. Space is small, cost is low. Indoor gardening becomes fun. Results motivate beginners. Every batch feels new. Small effort, big reward. Energy hits fast. Growth is exciting daily.
Introduction to Growing Microgreens Indoors
Growing microgreens indoors feels fun. You don’t need a garden. Just a small tray on a shelf. Seeds go in. Soil stays moist. Light hits gently. Days pass. Tiny green shoots pop up. Beginners smile watching them grow. Leaves are small. Flavor hits strong. Nutrition stays high.
Indoor growing works any time. Weather doesn’t matter. Kitchen corners slowly turn lively. Mistakes happen. Plants teach fast. Each day shows tiny changes. Microgreens indoors become a routine. Fresh food stays close. Energy from growth feels real.
What Are Microgreens?
Microgreens are tiny plants. Harvested early. Usually one to three inches tall. Leaves are small, but the flavor is strong. Nutrition stays intense. People love them for crunch and taste. Different from sprouts. Sprouts grow in water. Microgreens need soil or mats. Roots anchor below. Leaves reach up fast. True leaves appear quickly.
Growing them feels alive. Easy to start at home. Seeds go in trays. Water lightly. Light hits leaves. A few days later, green pops up. Fresh, tiny, powerful. Every tray surprises. Beginners notice change fast. Energy from growth feels real. Microgreens make meals bright. Small effort, big reward.
Microgreens vs Sprouts vs Baby Greens
Microgreens, sprouts, baby greens. They seem the same, but they behave differently. Microgreens grow in soil or mats. Roots stay hidden. Leaves pop fast. Flavor hits strong. Nutrients stacked. Sprouts live in water. Stems are long and fragile. Eat quickly. Nutrients mild. Watching them is fun. Baby greens grow big. Full leaves.
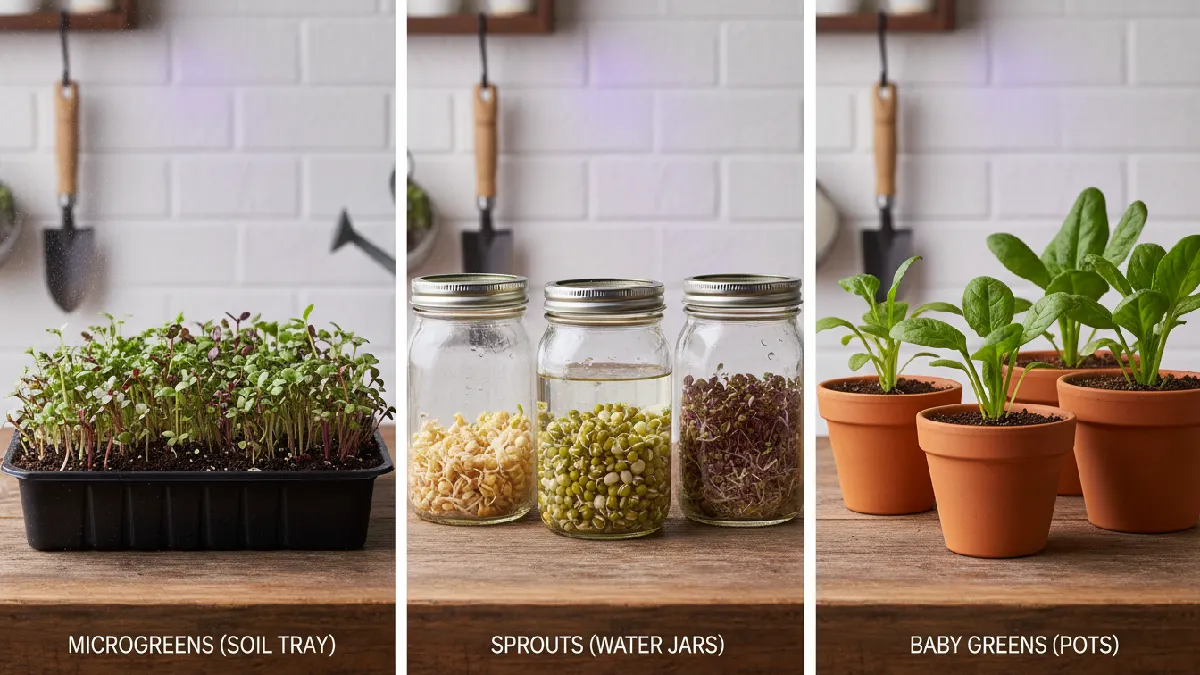
Taste soft. Growth slow. Needs space. Microgreens excite beginners. Tiny trays fill fast. Roots grab soil. Every bite feels alive. Sprouts surprise daily. Baby greens wait longer. Choosing depends on taste, space, and patience. Growing teaches fast. Each type has charm. Energy from greens feels real. Every tray tells a story.
Nutritional Benefits of Microgreens
Microgreens pack a punch. Tiny leaves, huge nutrients. Vitamins A, C, and K stacked. Antioxidants high. Minerals dense. One handful gives more than you think. The body reacts fast. Energy feels lighter. Digestion smoother. Meals feel fresh. Beginners notice changes. Salad bites crunch. Smoothies glow. Sandwiches pop.
Compared to mature greens, microgreens hit harder. Taste sharp, nutrition intense. Every tray surprises. Growth excites. Eating feels alive. You realize tiny greens make a big difference. Leaves soft, flavor is strong. Simple habit, huge impact. Homegrown microgreens give control. Fresh every day, clean, safe, alive.
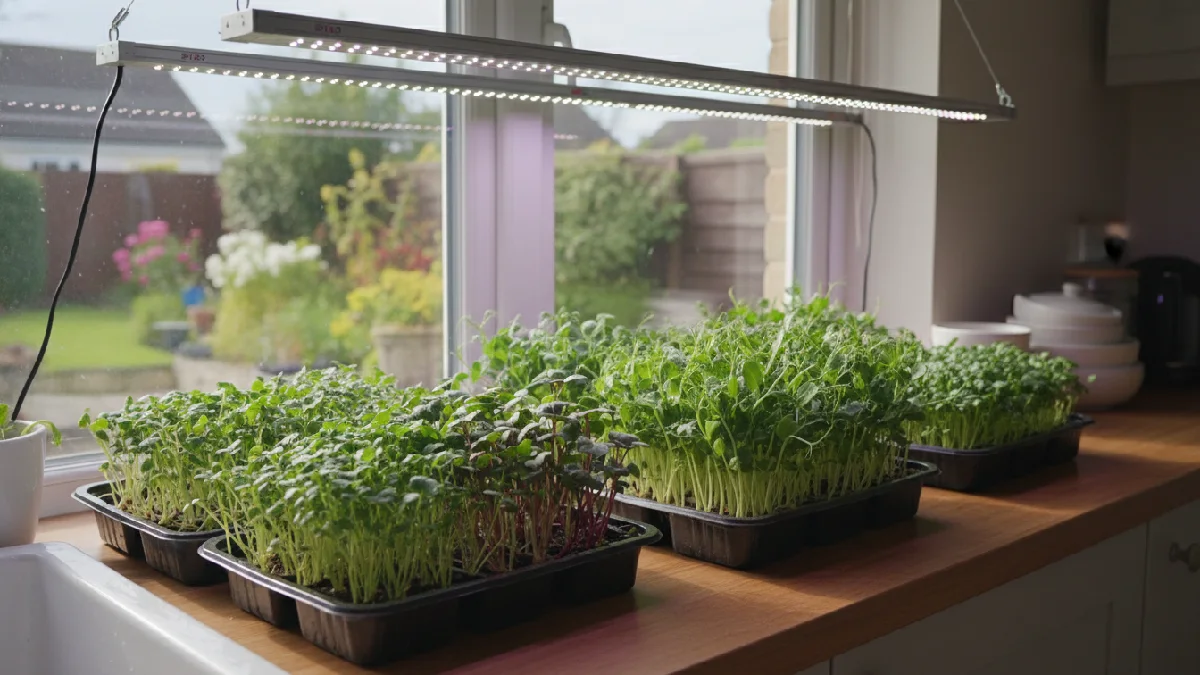
Why Grow Microgreens Indoors?
Indoor microgreens are easy. Space small? No problem. Apartment, balcony, even kitchen counter works. No garden needed. You control everything. Light, water, temperature. Harvest comes fast. Leaves are fresh, green, and packed with vitamins. Taste sharp. Energy feels real. Winter, summer, rain, doesn’t matter.
Indoors, growth never stops. Beginners notice fast results. Cost low. Seeds are cheap, trays are reusable. Effort small, reward big. Watching tiny shoots pop is exciting. Home feels alive. Every tray surprises you. Indoor growing makes microgreens personal. You see every change. You feel every leaf. Small space, big impact.
Perfect for Small Apartments and Urban Homes
Small spaces don’t stop you. Kitchen counters work. Windowsills catch sunlight. Shelves hold trays. Apartments feel alive with green. Microgreens don’t need big gardens. No backyard? No problem. Tiny leaves grow fast. Roots grab soil. Watching shots pop excites. Energy hits quickly. You feel proud of harvesting daily. Urban life stays hectic.
Microgreens slow it down. Fresh leaves on sandwiches. Salads vibrant. Even a tiny tray changes the vibe. Beginners notice quick results. Trays are easy to move. Light reaches all plants. Air circulation is simple, space, and fun. Microgreens indoors fit city homes perfectly. Every small corner becomes productive. You smile daily, watching growth.
Year-Round Fresh Greens at Home
Microgreens don’t wait for seasons. Winter, summer, rainy days, it’s all the same. Trays stay indoors. Leaves pop bright green. You check them daily. Growth surprises. Energy feels real. No need to buy wilted store greens. Cut and eat fresh. Vitamins stay intact. Meals feel lively. Even small trays produce fast. Beginners love seeing results every week.
Light, water, patience, enough. Leaves stretch toward the LED or the sunlight. Tiny shoots show life. Flavor stays strong. No long storage. No mystery chemicals. Home feels alive. Every day brings a small harvest. You feel proud feeding the family greens you grew yourself. Indoor growing makes fresh easy.
Cost-Effective and Beginner-Friendly
Growing microgreens at home doesn’t break the bank. Seeds are cheap. Trays reusable. Soil or mats are affordable. Water costs almost nothing. Small effort, big reward. Beginners notice results fast. No expensive equipment needed. You start with a kitchen corner.
Every tray teaches something. Harvest comes in days. Energy feels real. Store-bought greens cost more, fade faster. Homegrown stays fresh. Every seed counts.
Mistakes happen, but learning is free. Small spaces work fine. You experiment with varieties. Taste is better. Nutrition stays high. Watching sprouts pop feels exciting. Confidence builds naturally. Indoor microgreens are friendly for wallets and skills. Effort feels satisfying. Every tray gives pride. Growth surprises often.
Best Microgreens to Grow Indoors
Not all microgreens are equal indoors. Some pop up fast. Others take a little patience. Beginners usually start with easy ones. Radish shoots sprout quickly. Broccoli leaves are dense and green. Pea shoots climb a bit. Sunflower grows strong and tall. Flavor changes with types.
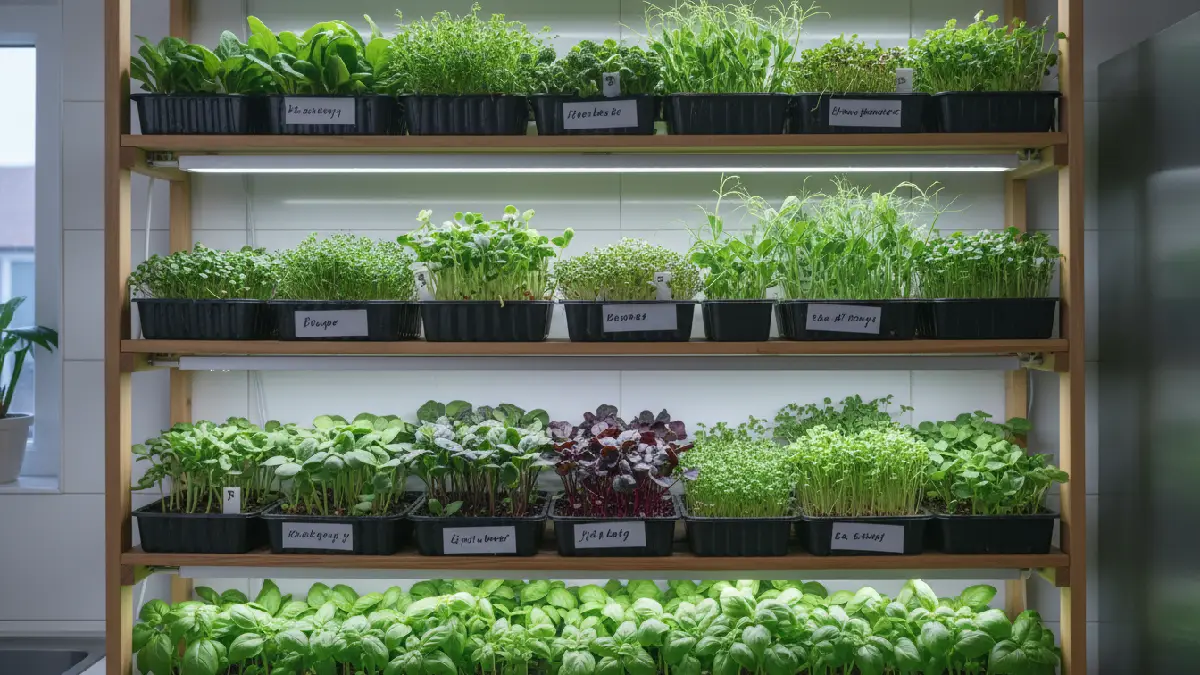
Kale adds mild crunch. Beet brings color and sweetness. Basil smells amazing, tastes fresh. You mix and match. Every tray tells a story. Energy feels alive watching growth. Indoor conditions matter. Light, water, warmth. Tiny leaves carry big nutrition.
Some microgreens need attention. Others are forgiving. Beginners smile seeing trays fill. Harvest comes fast. The kitchen feels lively. Each day, something new pops. Experiment often. Tiny leaves, big impact. Growth teaches patience and joy.
Easy Microgreens for Beginners
Starting with simple microgreens makes life easier. Broccoli sprouts are dense, leaves are small, taste mild but fresh. Radish shoots grow fast, slightly spicy, and pop up quickly. Pea shoots climb gently, tender stems, leaves soft. Sunflower microgreens take a bit longer, with thick stems and crunchy leaves. Trays fill fast. Watching them grow excites beginners. Energy feels real.
Care is simple. Mist lightly, keep light even. Roots grab soil quickly. Leaves reach up naturally. Tiny adjustments matter. Harvest comes soon. Each tray teaches something. Growth surprises daily. The kitchen feels lively. Eating fresh feels rewarding. Every bite small but powerful. Home-grown greens change routine. You notice little differences fast.
Flavor-Rich and Specialty Microgreens
Some microgreens aren’t just healthy. They punch flavor, too. Kale leaves tiny, earthy taste. Vitamins stacked. Adds depth to salads. Beet sprouts are sweet, stems reddish. Color pops onthe plate. Leaves soft, crunch slight. Basil microgreens smell fresh. Flavor is slightly sweet. Perfect for sandwiches and pasta. Toss a handful anywhere. The kitchen smells alive.
Every bite surprises. Beginners notice taste changes fast. Energy feels real. Trays fill quickly. Growth excites. Tiny leaves make meals special. Experiment often. Mix colors and textures. Each tray teaches something. Flavor and nutrition together. Home feels lively. Every dish looks bright. Growth feels natural. You watch, you taste, you learn.
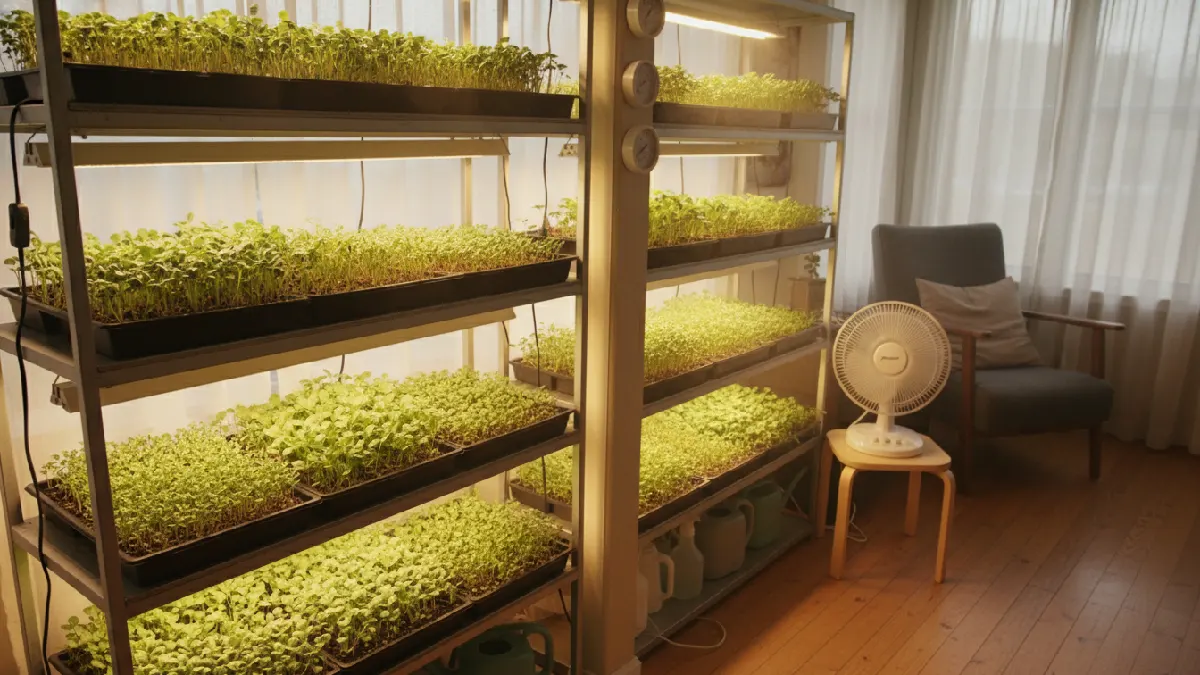
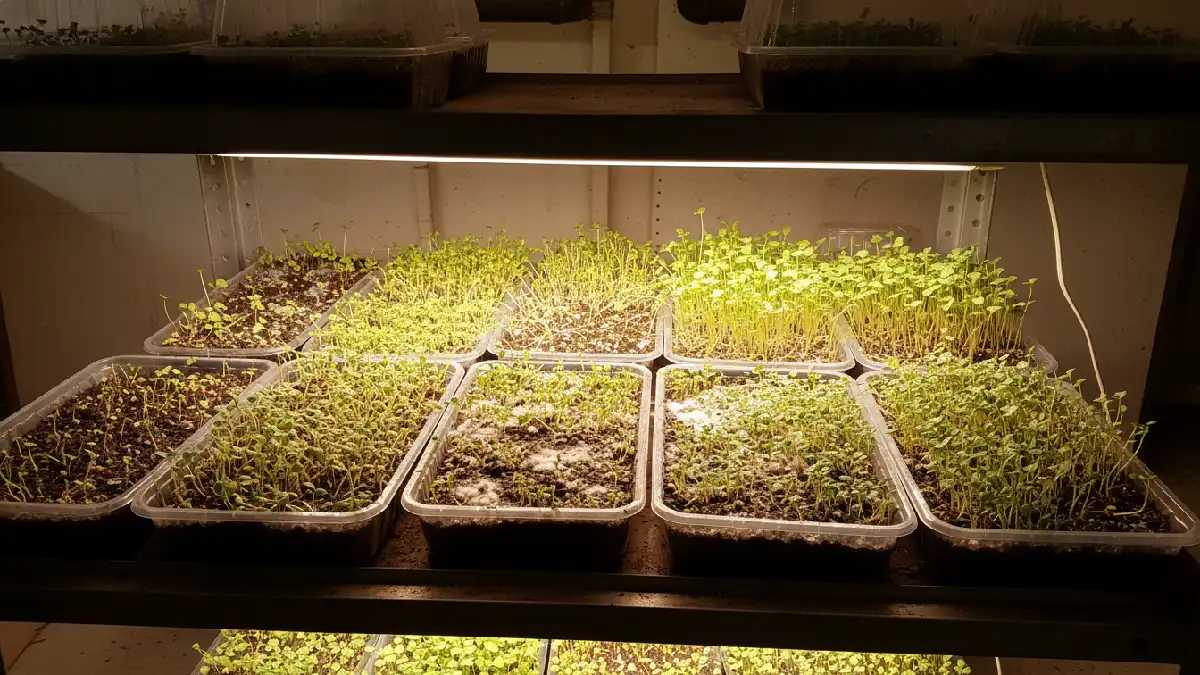
What You Need to Grow Microgreens Indoors
Growing microgreens indoors needs simple stuff. Trays, soil, seeds, water, light. Nothing fancy. Trays shallow work best. Soil or cocopeat holds roots. Seeds, food, grade, non-GMO preferred. A spray bottle helps with misting. LED lights or sunny windows give energy. Fans for small air circulation. Each tool matters. Beginners often skip small details.
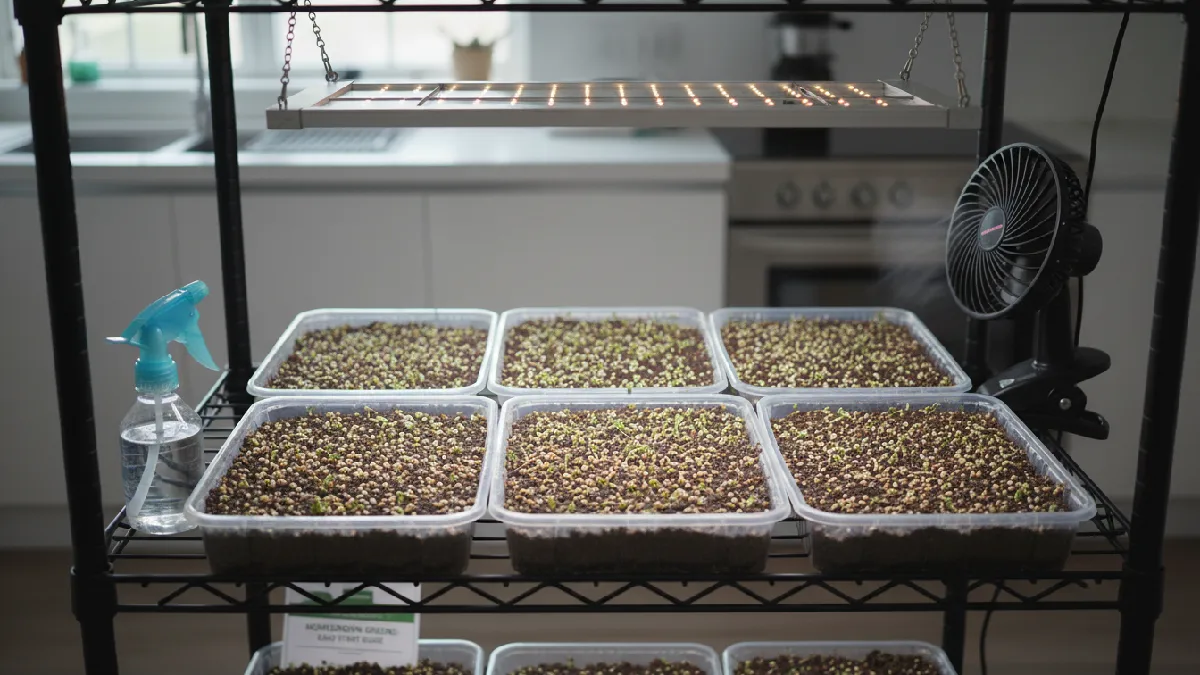
Tiny mistakes slow growth. The setup feels cozy. You watch tiny shoots pop. Energy from leaves feels real. Every tray teaches something. Tools stay simple, care stays easy. Microgreens indoors need patience, not a big space. Kitchen corners are enough. Small effort, fresh reward daily. Growth excites beginners fast.
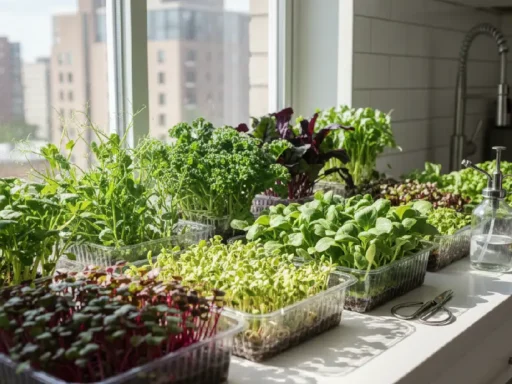
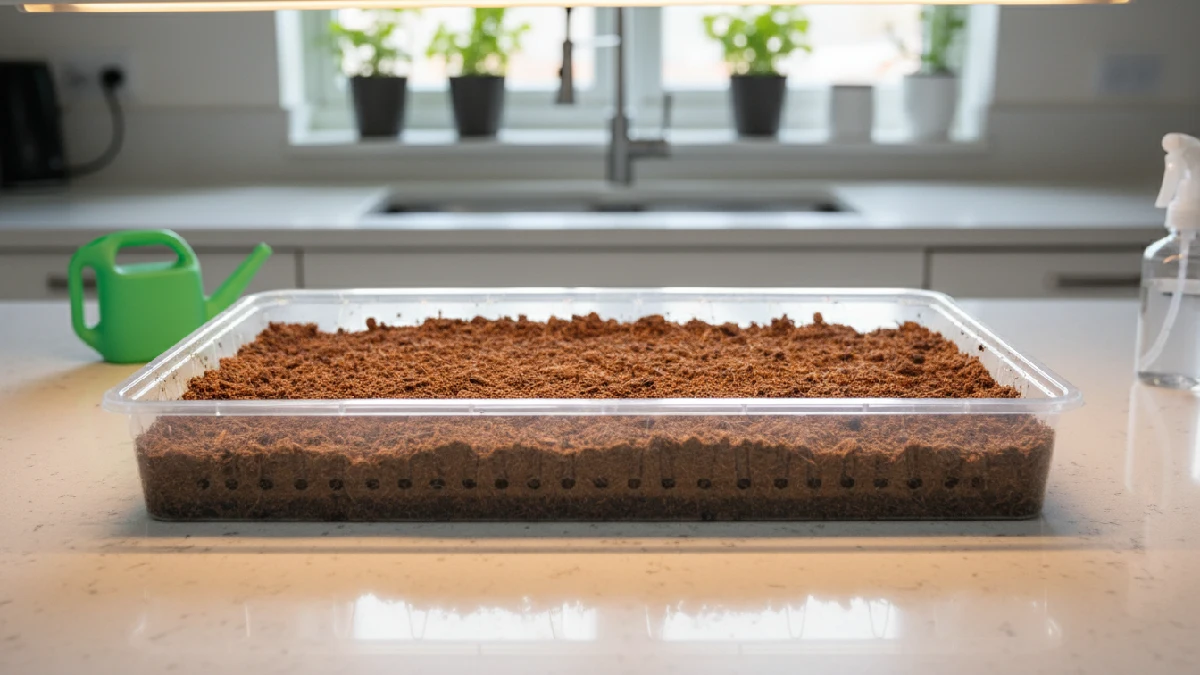
Choosing the Right Trays and Containers
Trays are more than just containers. Shallow ones, about 1to 2 inches deep, work best. Plastic, metal, or bamboo, anything clean. Drainage matters. Roots hate standing water. Holes keep soil happy. Size depends on space. Windowsill or kitchen counter, small trays fit. Bigger trays give more harvest but need care.
Line edges lightly if soil spills. Reusable trays save money. Beginners often pick the wrong size, and growth suffers. Each tray holds a story. Watching seeds settle is satisfying. Trays aren’t just tools; they start the microgreen journey. Energy from tiny shoots popping makes all the prep worth it. Clean trays. Healthy plants, simple joy.
Best Soil and Growing Medium Options
Soil is where it all begins. Organic potting mix works best. Light, fluffy, holds moisture. Cocopeat is soft, easy for tiny roots to grab. Seeds sit cozy, roots spread fast. Hydroponic mats work too. No soil needed, water wicks slowly. Leaves stay firm, shoots pop evenly. Beginners often overwater cocopeat.

Mist lightly, keep it moist, not soggy. Each medium has its vibe. Soil smells earthy. Cocopeat feels soft. Mats look clean. Pick what fits your style. Energy from the roots’ grabbing medium feels real. Every tray teaches something. Tiny changes matter. Microgreens react fast. Watching them grow is addictive.
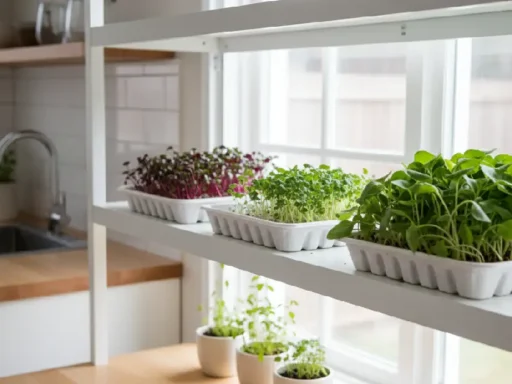
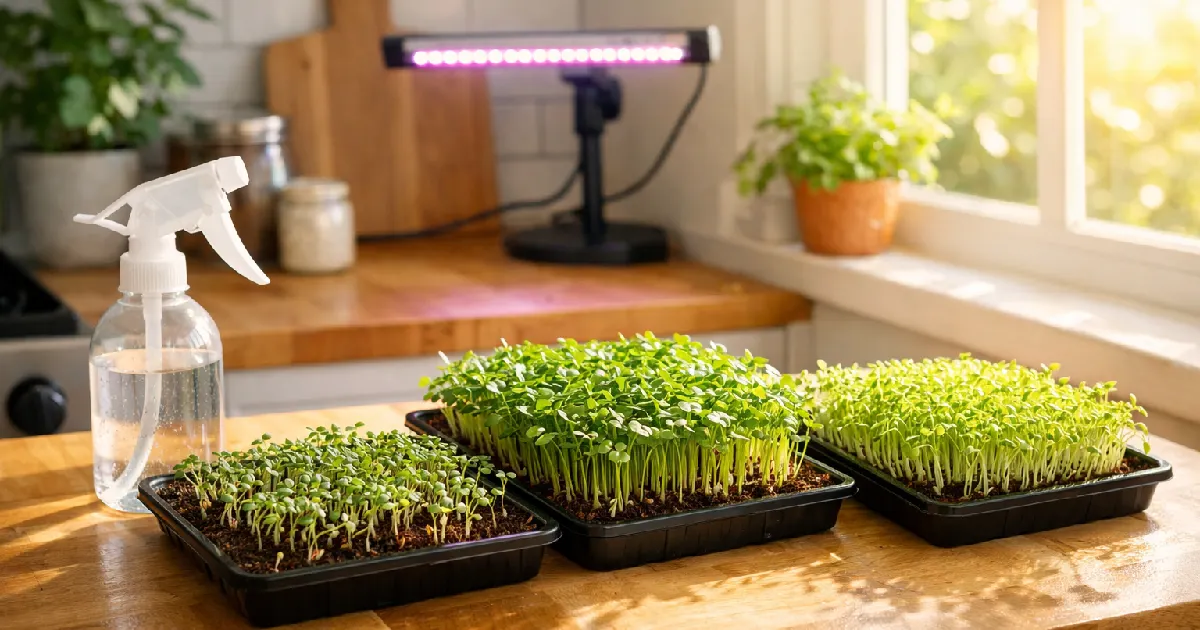
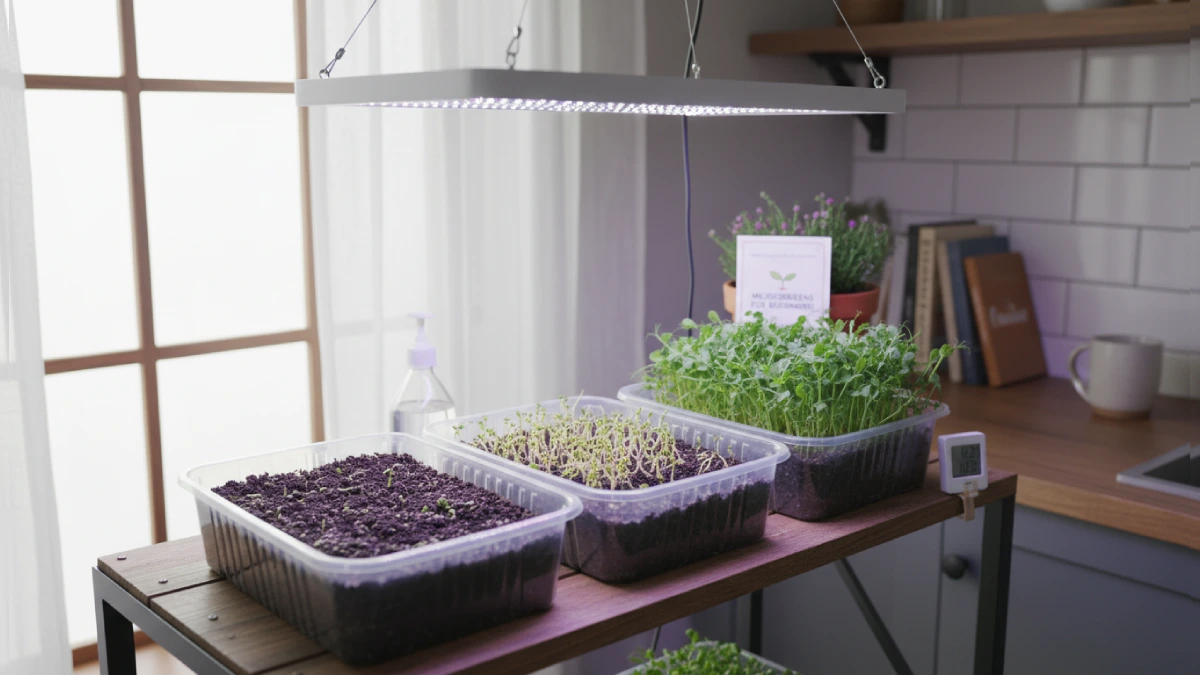
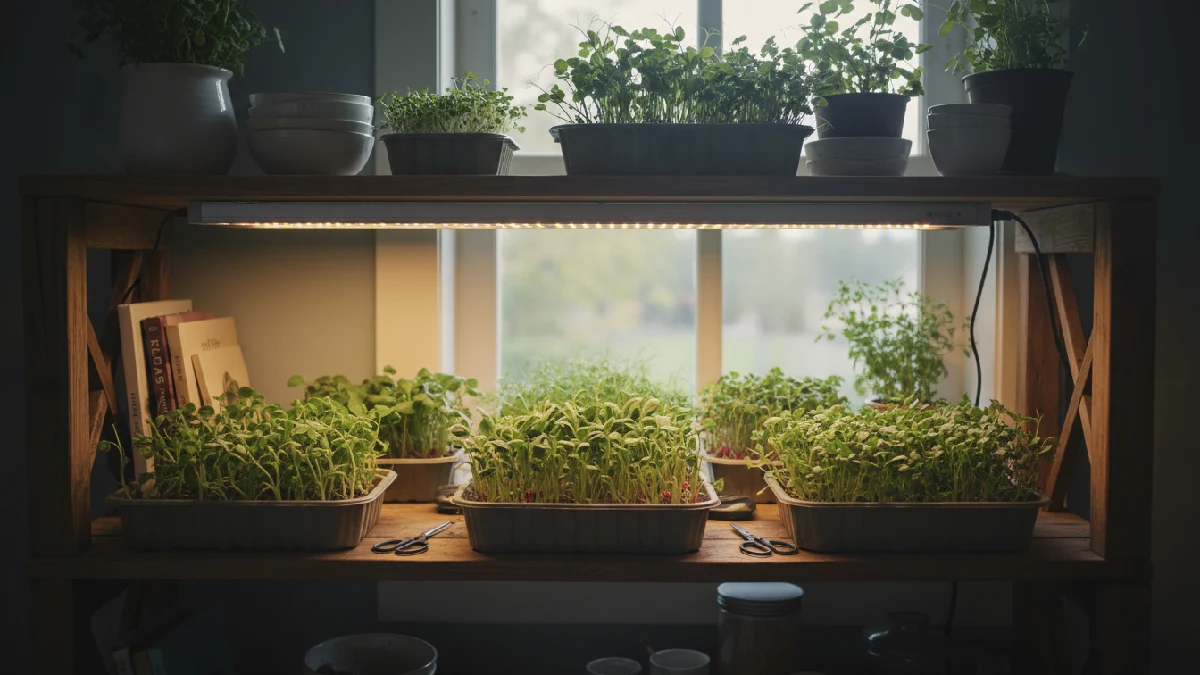
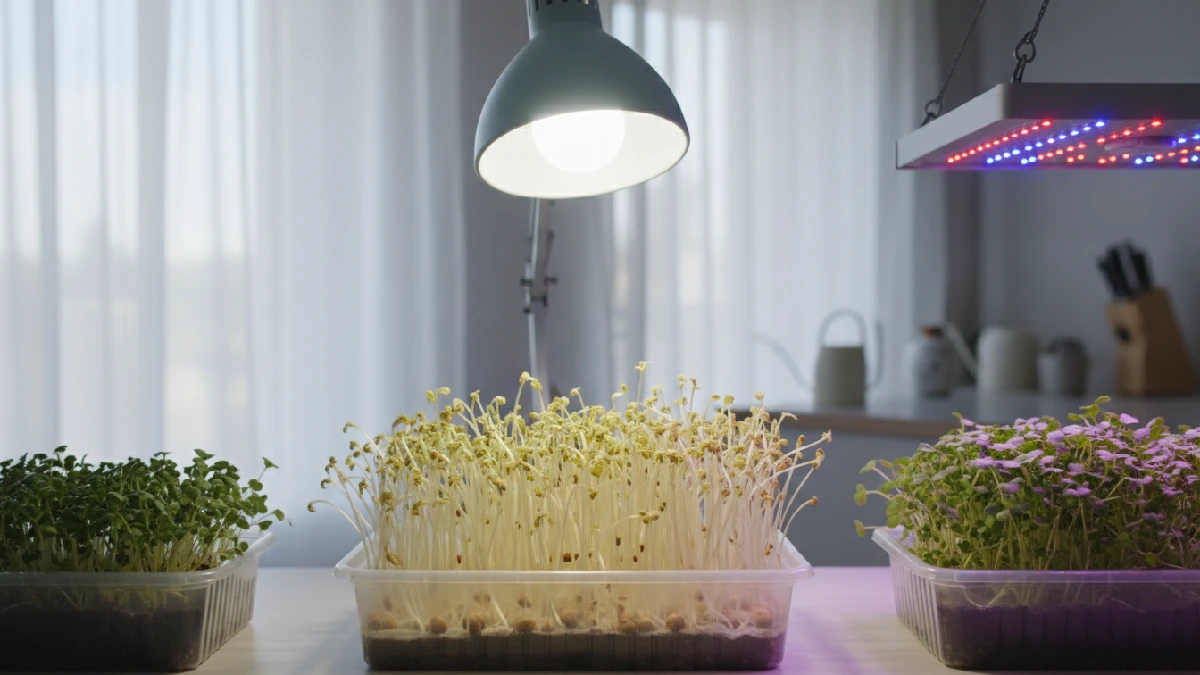
Lighting Requirements for Indoor Microgreens
Light makes microgreens alive. Sunlight works fine. Place trays near a bright window. Leaves stretch naturally. Growth feels lively. Indoor spots are sometimes too dim. That’s when LED grow lights help. 12 to 16 hours of daily work is best. Color spectrum matters. Plants respond fast. Rotate trays occasionally. Every leaf gets light.
Tiny adjustments make a difference. Too little light makes stems thin and weak. Too much heat burns leaves. Beginners notice it immediately. Microgreens react quickly. Energy from light feels real. Watching them pop green is exciting. Care feels rewarding. Each tray tells a story. Every day brings small surprises. Growth is never boring.
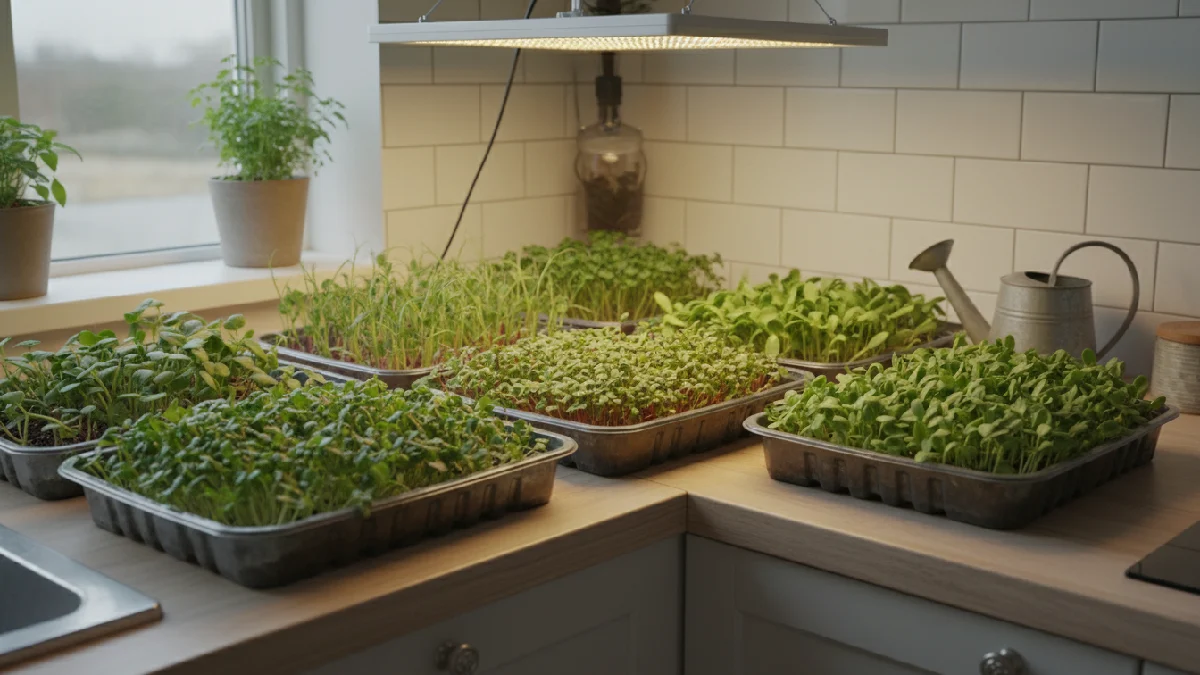
Watering Tools and Accessories
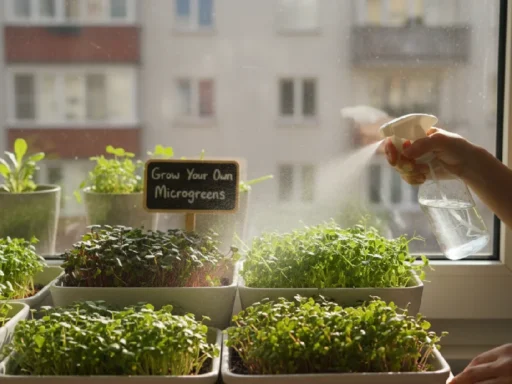
Watering microgreens needs care. Spray bottles work best. Mist gently. Soil stays moist, not soggy. Roots grab water slowly. Plants react fast. Bottom watering works too. Trays hold a small amount. Seeds wick moisture up. Leaves stay healthy. Overwatering kills roots. Tiny mistakes matter. Cups or small pitchers help.
Avoid puddles. Plants show what they need. Beginners learn quickly. Energy from growth feels real. Every tray surprises. Watching tiny shoots pop up excites me. Care feels simple. Tools matter less than attention. Every day teaches something. Microgreens respond to small touches. Growth feels alive.
How to Grow Microgreens Indoors (Step-by-Step)
Growing microgreens indoors is fun. You grab a tray. Fill it with soil or cocopeat. Spread seeds nicely and evenly. Mist lightly. Roots grab the medium fast. Energy feels alive. Put the tray in the light. Sun works. LED works too. Rotate sometimes. Leaves stretch. Mist daily. Not too much. Roots hate soggy soil.
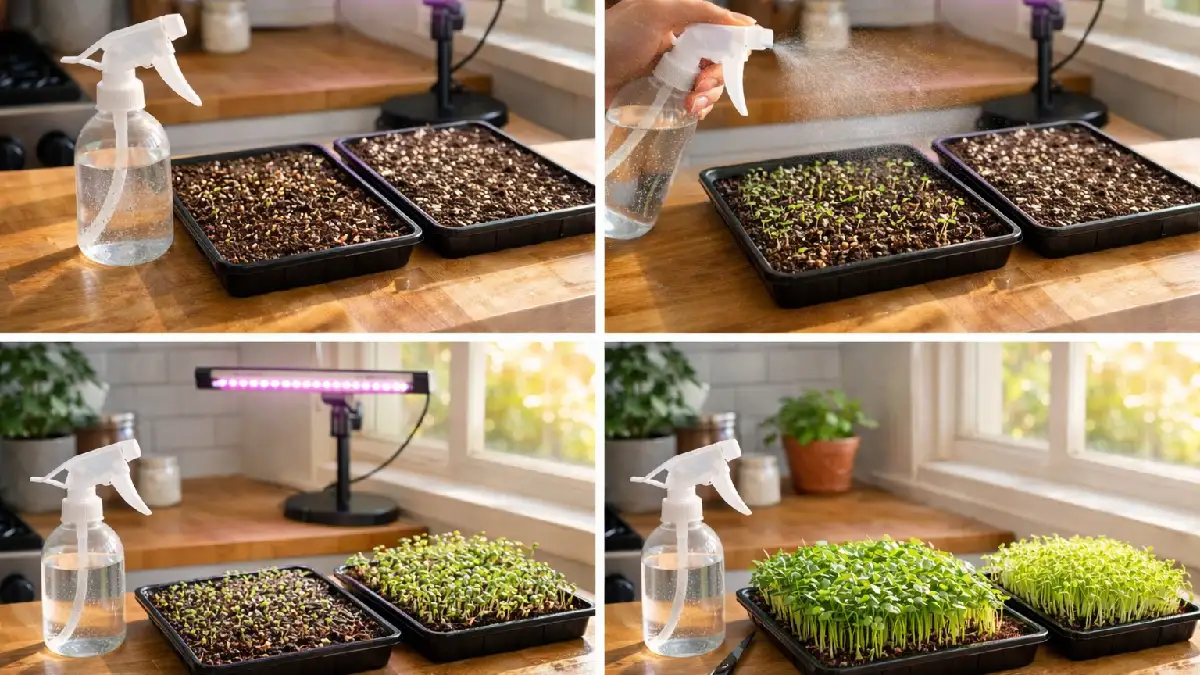
Keep the temperature around 18- 24°C. A small fan helps air move. Mold stays away. After a week or two, true leaves show. Grab scissors. Cut above the soil. Leaves are bright green. Eat fresh. Each tray teaches patience. Beginners notice little wins. Kitchen corners turn lively. Repeat steps for the next batch. Every harvest excites.
Step 1: Prepare the Tray and Growing Medium
Pick a shallow tray. Plastic or metal works fine. Drainage holes matter. Fill 1to 2 inches with soil or cocopeat. Spread evenly. Roots grab the medium easily. Mist lightly. Don’t overwater. Seeds need a cozy bed. Line edges gently to keep soil in place. Tiny adjustments make a difference.
Beginners notice quickly. Tray ready. Energy feels real. Watching soil settle gives a small thrill. Leaves will pop soon. Every tray tells a story. Preparation sets the tone for growth. Care feels rewarding. Kitchen corners start looking alive. Small effort, big result.
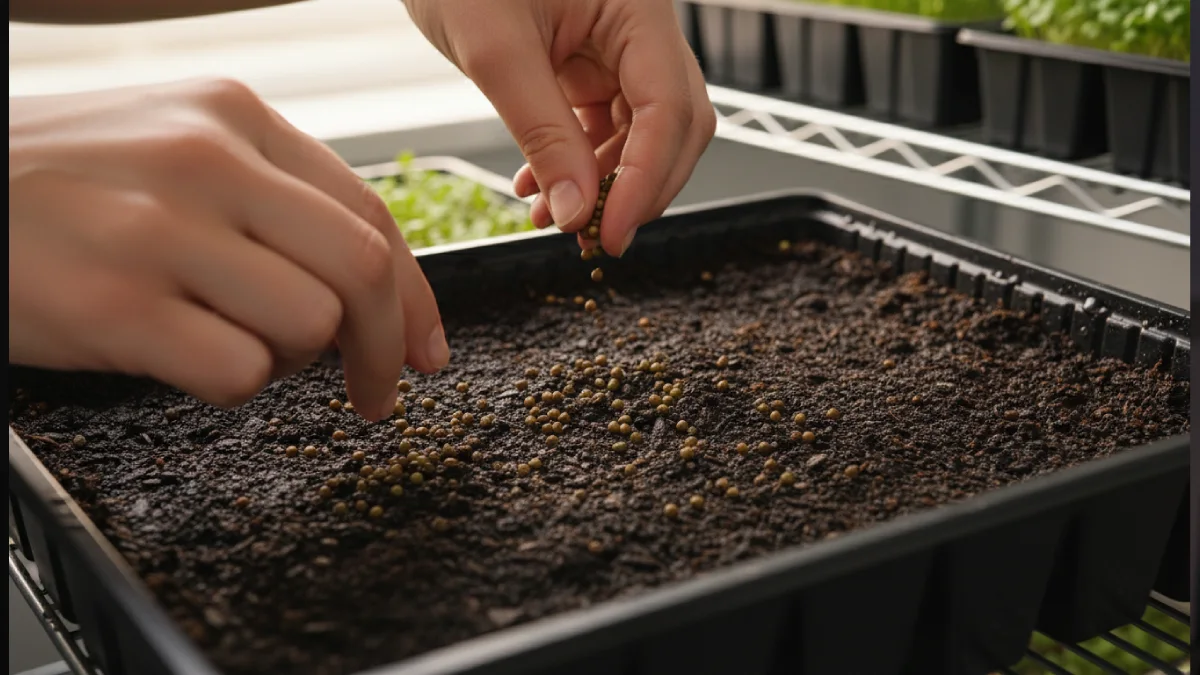
Step 2: Sow Microgreen Seeds Correctly
Take your seeds. Spread them evenly over the tray. Hands careful, not too rough. Crowding kills growth. Roots need space to grab. Some seeds like a thin soil cover. Others stay exposed. Mist gently after sowing. Water enough, not too much. Tiny seeds settle quickly. Energy feels alive as sprouts wait underneath.
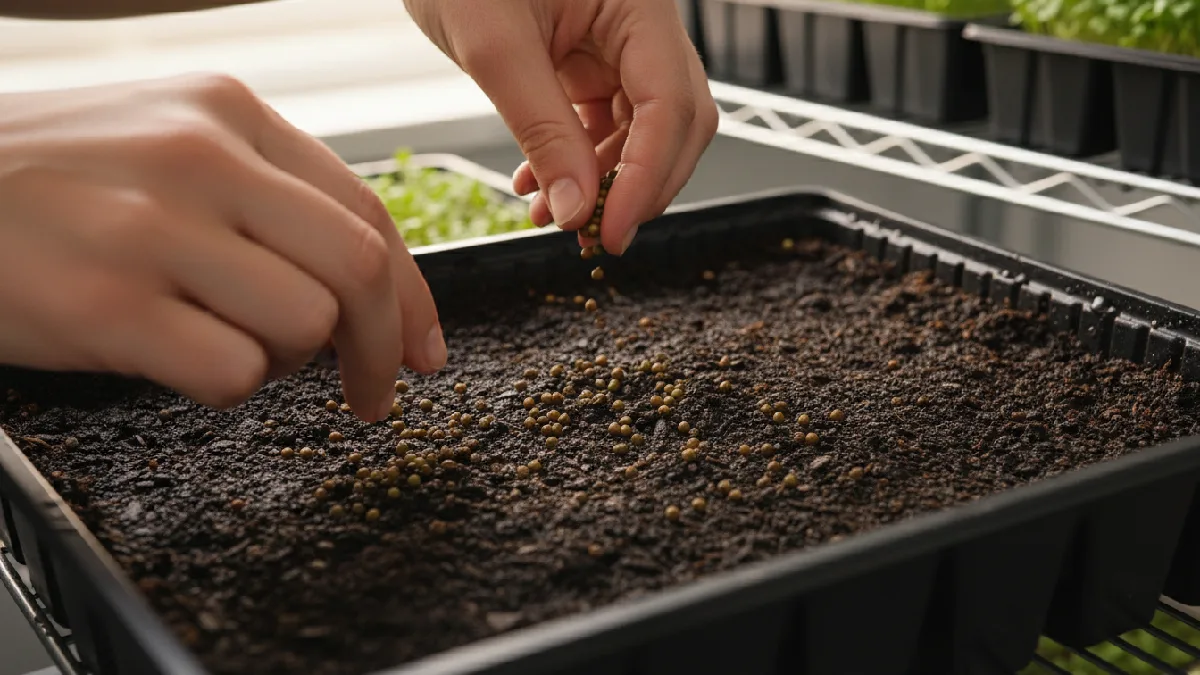
Beginners notice small changes fast. Every tray reacts differently. Watching seeds sit there gives a strange excitement. It’s slow but real. The leaves pop soon. The kitchen corner starts turning green. Care feels natural. Patience pays off. Every tray teaches something.
Step 3: Germination and Blackout Period
Cover the tray. Keep it dark first few days. Seeds need quiet. Soil stays moist, not soggy. Tiny shoots wait underneath. You check daily. Mist if needed. Roots start grabbing soil. Energy feels alive. Some seeds swell fast, some slow. Beginners are often. Darkness works like magic.
Leaves hide, but growth happens. After a few days, remove the cover. Light hits them. Tiny green shoots pop up. First leaves peek out. Excitement hits. Care feels rewarding. Every tray tells a story. Growth surprises daily. You notice small changes. Patience shows results.
Step 4: Providing Proper Light Indoors
Place trays near the light. Sunlight works if the window is bright. Leaves stretch naturally. Growth feels lively. Indoor spots sometimes need help. Use LED grow lights 12to 16 hours daily. Color matters. Leaves stay firm. Growth spreads evenly. Rotate trays now and then. Every plant gets light.
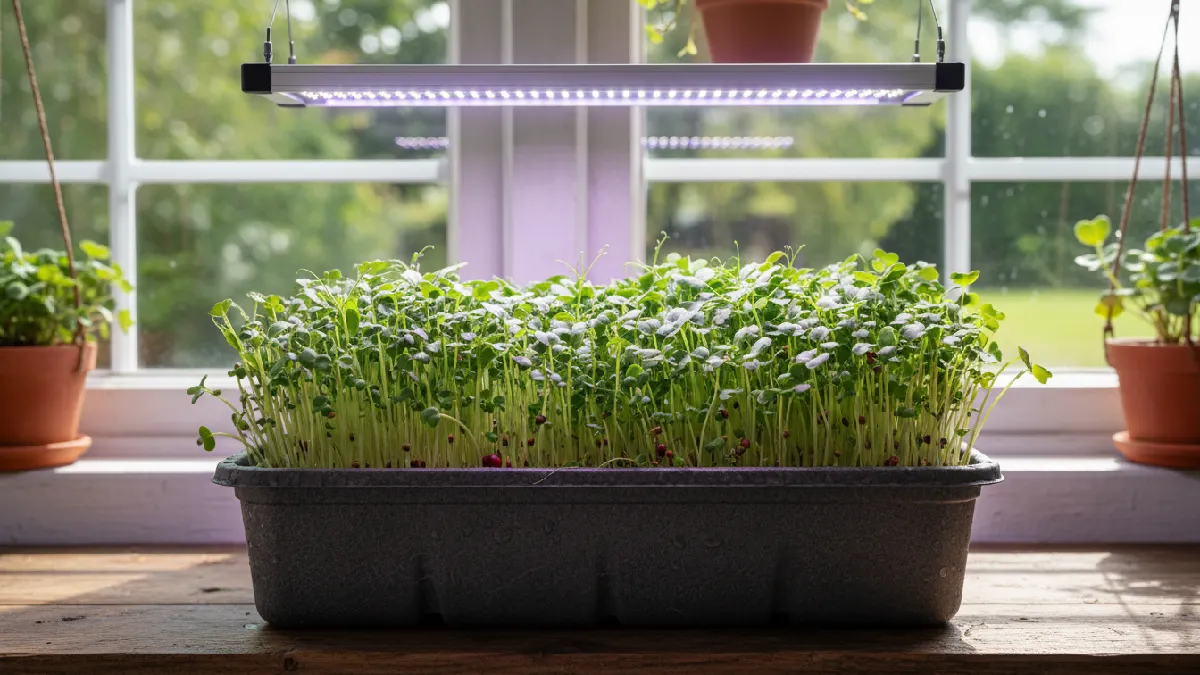
Tiny adjustments make a big difference. Beginners notice changes fast. Energy from light feels real. Trays look alive. Plants react quickly. Watching them pop excites. Care becomes rewarding. Growth surprises daily. Every leaf tells a story. Plants respond. Kitchen corners turn green.
Step 5: Watering Microgreens the Right Way
Watering matters. Mist gently. Soil stays moist. Roots drink slowly. Leaves react fast. Overwatering kills plants. Bottom watering works too. Trays hold a small amount of water. Seeds wick moisture up. Roots happy. Plants healthy. Beginners notice change fast. Tiny adjustments matter. Check trays often.
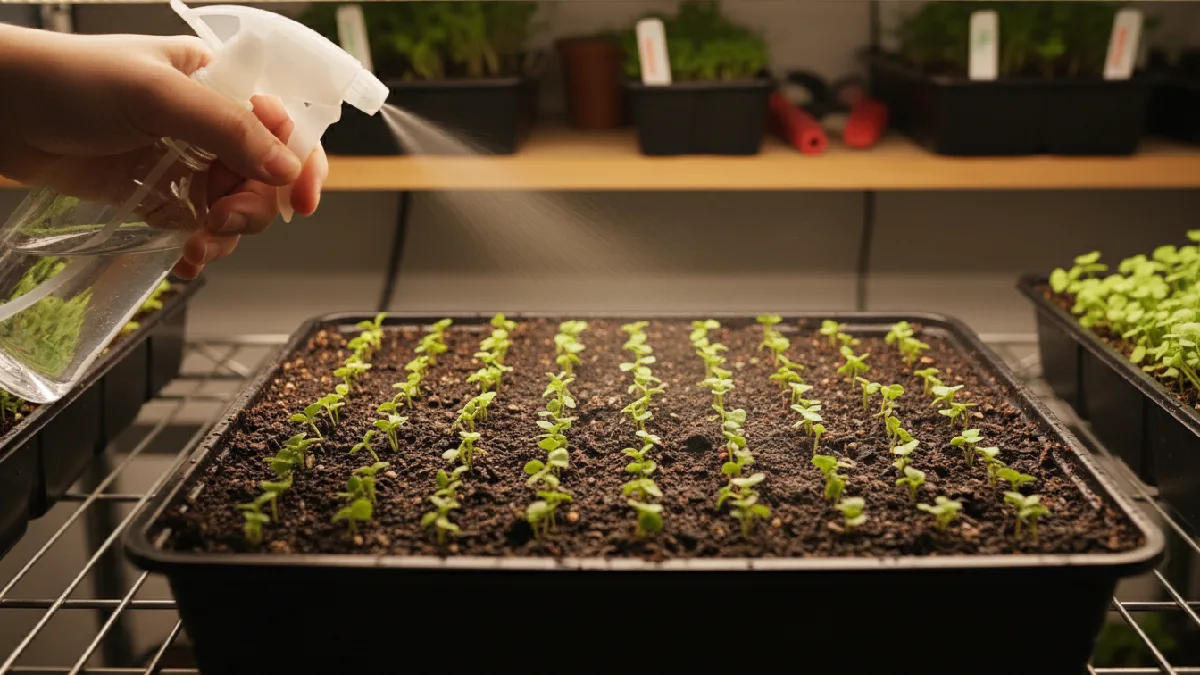
Soil is never soggy. Plants tell you what they need. Watching tiny shoots grow excites me. Every tray surprises a little. Energy from growth feels alive. Leaves stay strong. Care feels natural. Growth reacts quickly. Kitchen corners feel lively. Each day shows progress. Microgreens respond to touch and water.
Step 6: Maintaining Temperature and Air Circulation
Microgreens like warmth. Keep indoor temp around 18, 24°C. Too cold slows growth. Too hot burns leaves. Roots grab soil slowly. Airflow matters. A small fan works fine. A gentle breeze keeps leaves firm. Prevents mold. Windows open sometimes. Avoid drafts that shock plants. Humidity moderate. Mist lightly if dry. Soil stays cozy.
Plants react fast. Beginners notice subtle changes daily. Tiny adjustments help. Trays feel alive. Growth looks steady. Energy from air and warmth feels real. Every tray responds differently. Watch closely. Plants tell you what they need. Care becomes satisfying over time. Microgreens grow happily. You feel proud watching them stretch.
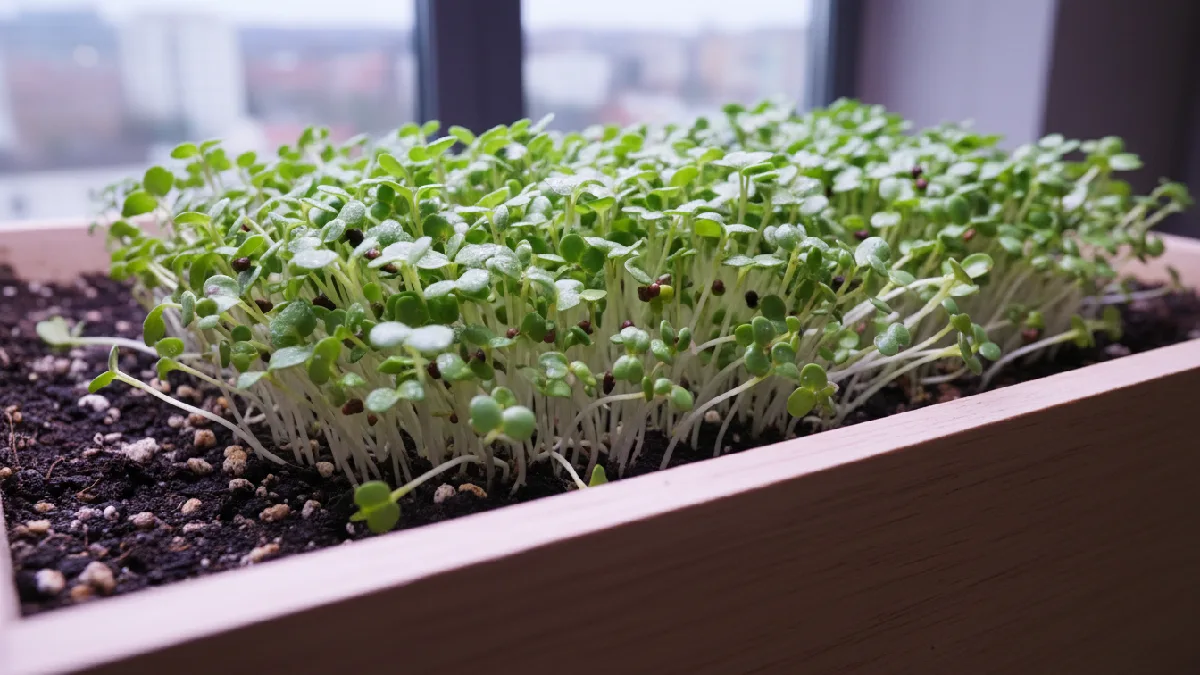
Step 7: When and How to Harvest Microgreens
Microgreens are ready fast. Usually 7to 14 days. Look for the first true leaves. Leaves are bright green. Stems firm. Grab scissors. Cut above the soil. Don’t pull roots. Keeps the tray clean. Eat immediately for the best taste. Rinse gently if needed. Store in an airtight container in the fridge.
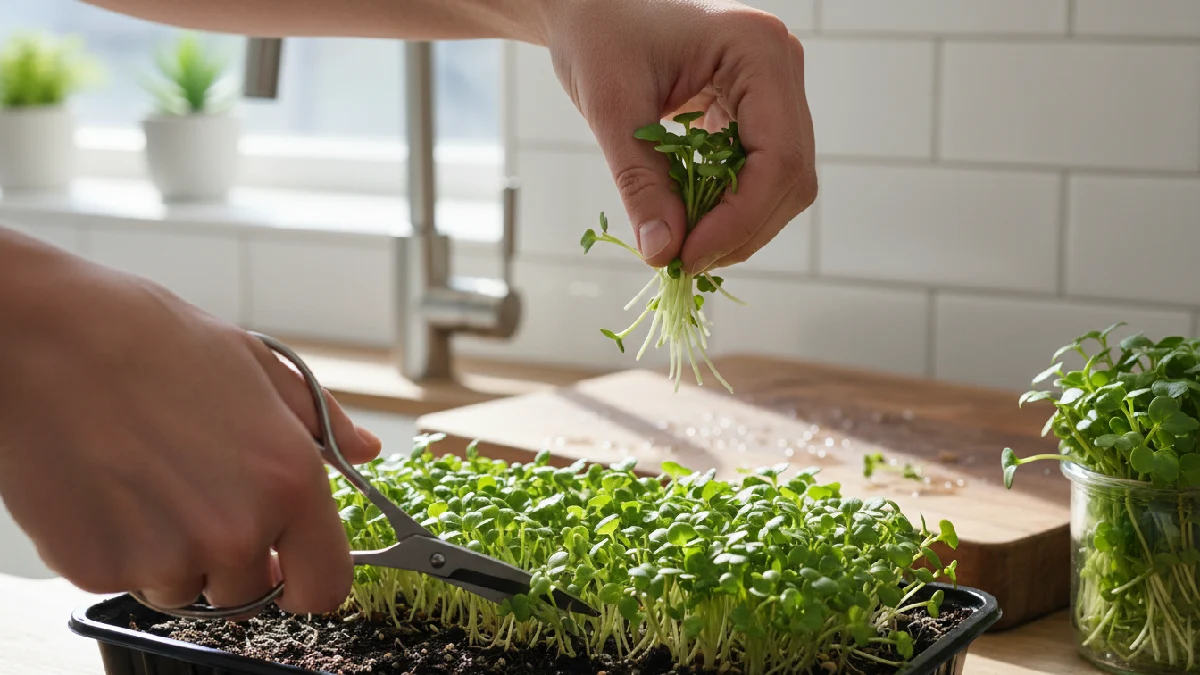
Use within a few days. Some varieties regrow a bit. Pea shoots sometimes surprise. Radish, sunflower rarely. Harvest feels rewarding. Beginners enjoy seeing tiny leaves turn into food. Every tray teaches. Energy from fresh greens hits quickly. The kitchen looks alive. Tiny effort, big reward.
Common Mistakes to Avoid When Growing Microgreens Indoors
Growing microgreens sounds simple. People mess up fast. Water too much, roots rot. Soil is soggy, leaves droop. Mold shows. Seeds are too close; they choke each other. Growth slows. Light weak? Stems stretch weirdly. Trays in dark corners stay sad. Dirty trays bring bacteria. Leaves yellow, smell off.
Old seeds? Nothing pops. Water too little? Seeds dry. Beginners freak out. Tiny tweaks help. Check trays daily. Move them for light. Mist just right. Clean trays always. Microgreens bounce back. Watching sprouts grow excites me. Every tray teaches. Mistakes cost lessons. Care brings fast results.
Overwatering and Mold Issues
Microgreens die fast if there is too much. Soil stays soggy. Roots can’t breathe. Mold pops up quickly. Leaves curl, turn yellow. Beginners panic sometimes. Mist the soil gently. Don’t pour. Trays need holes for drainage. Air should move around plants.
The small fan works fine. Check every day. Pull out any moldy sprouts. Plants bounce back fast. Energy from green leaves feels real. Watching tiny shoots survive excites me. Care feels simple. Growth surprises often.
Insufficient Light Exposure
Microgreens stretch when the light is weak. Stems thin, leaves pale. Growth slow. Beginners worry. Trays need sun near the window. LED lights work too, 12to 16 hours. Rotate trays sometimes. Every plant gets light.
Leaves stay firm, green. Plants respond fast. Energy from growth feels real. Tiny adjustments matter. You notice changes daily. Watching leaves pop bright excites. Care becomes rewarding. Growth surprises often.
Overcrowding Seeds
Seeds packed too close struggle. Roots tangle. Leaves are small and weak. Air blocked. Mold appears faster. Beginners often make this mistake. Spread seeds evenly. Give each seed space. Soil or mat needs room.
Tiny leaves pop healthy. Growth looks lively. Energy from trays feels real. Watching sprouts stretch is satisfying. Every tray tells a story. Small effort, big difference. Plants react quickly. Care feels simple. Growth surprises daily.
Poor Hygiene and Reusing Dirty Trays
Dirty trays ruin growth. Old soil holds bacteria. Mold spreads fast. Leaves curl, roots rot. Beginners forget cleaning. Wash trays with warm water. Soap works fine. Dry completely. Reuse only safe trays. Seeds sit cozy. Growth feels steady. Tiny leaves pop healthy.
Watching trays thrive excites. Plants react quickly. Every batch teaches something. Energy from microgreens feels real. Care seems simple. Small steps prevent big problems. Healthy trays, happy plants. Growth surprises daily.
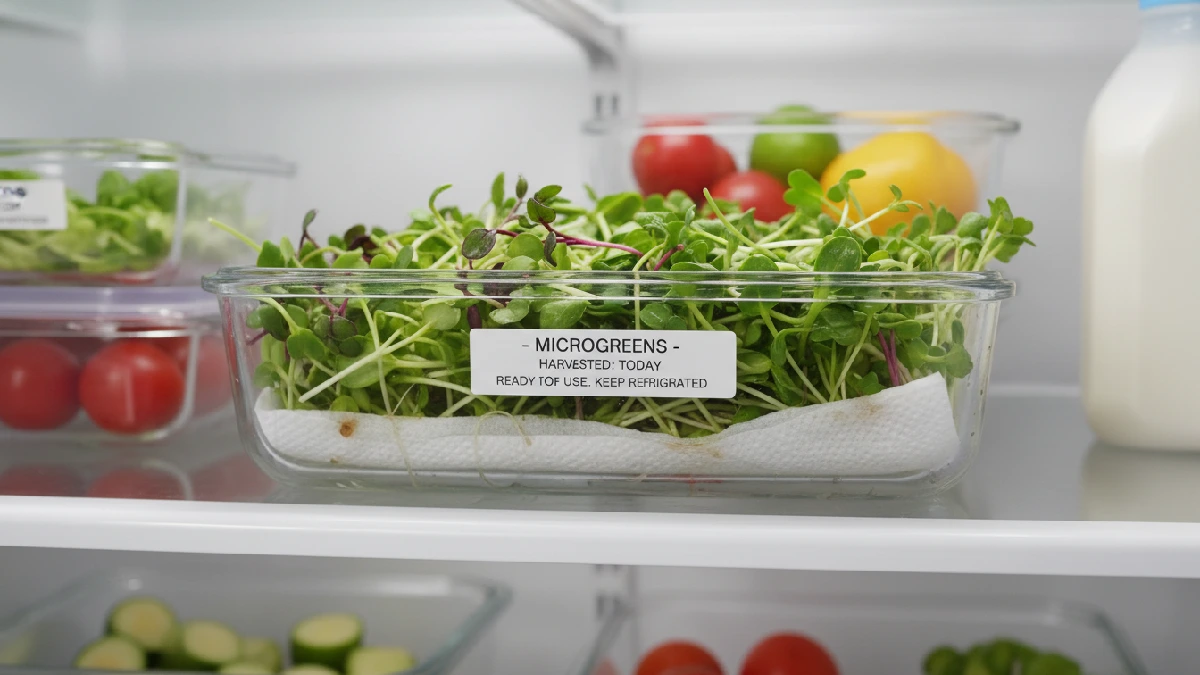
How to Store and Use Homegrown Microgreens
Homegrown microgreens stay fresh if stored right. Rinse gently. Pat dry with a paper towel. Airtight container works best. The fridge keeps them crisp for up to a week. Check daily. Leaves wilt fast if damp. Small mistakes ruin trays. Using microgreens is fun. Sprinkle on salads.
Toss into sandwiches. Blend in smoothies. Add to soups or omelets. Tiny leaves give big flavor. Color pops on plates. Meals feel alive. Beginners notice the difference immediately. Every bite tastes fresh. Growth surprises daily. Energy from plants feels real.
Best Ways to Store Fresh Microgreens
Storing microgreens is tricky but simple. Rinse gently. Pat dry with a paper towel. Use airtight containers. The fridge works best. Temperature matters. Too cold? Leaves curl. Too warm? They wilt. Layer carefully. Don’t crush tiny leaves. Keep moisture low. Excess water kills them fast. Check daily. Remove bad leaves.
Microgreens last up to a week. Herbs like basil are shorter. Rooted types like peas survive longer. Label trays if needed. Freshness stays. Nutrition stays strong. Every handful still pops color. Beginners notice. The kitchen smells green. Tiny leaves are ready anytime. Energy feels alive. Easy, practical, natural.
Simple Ways to Use Microgreens in Meals
Microgreens wake up your meals. Salads get crunch, color, and pop. Sandwiches feel alive. Tiny leaves hit hard. Smoothies work too. Blend kale, radish, spinach. Add a bit of milk or fruit. Taste changes fast. Soups? Just toss it on top. Basil, cilantro, and arugula make plates bright. Every bite surprises.
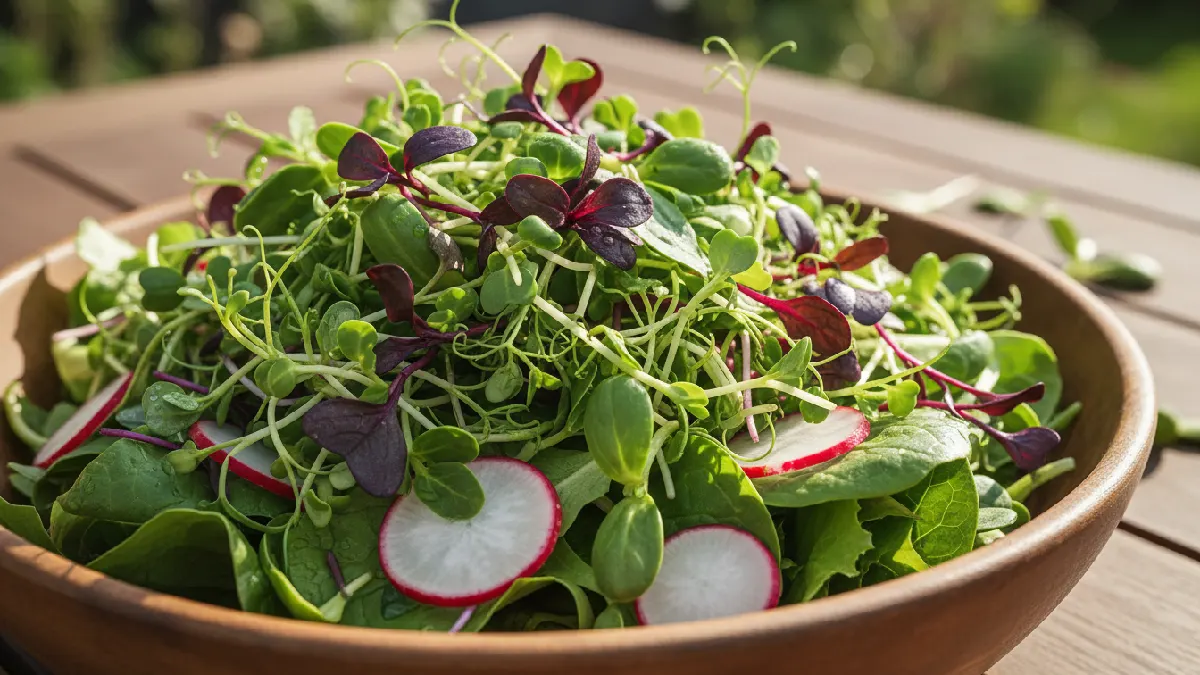
Mix radish spicy, sunflower crunchy, and pand eas soft. Colors mix. Flavors shift. Meals feel playful. Beginners notice small changes. Tiny greens make cooking fun. Homegrown microgreens beat store stuff. You see, freshness matters. It’s simple. You eat. You smile. Every meal looks different. Energy feels real. The kitchen feels alive.
Frequently Asked Questions About Growing Microgreens Indoors
How Long Do Microgreens Take to Grow Indoors?
Microgreens grow quickly indoors. Most varieties finish in 7 to 14 days. Radish pops faster. Sunflower slower. Watch true leaves appear, then harvest feels right.
Do Microgreens Need Sunlight or Grow Lights?
Light is needed. Sunlight near a window works fine. Grow lights help indoors. Give around 12to 16 hours daily. Leaves stay strong, color stays bright.
Can Microgreens Be Grown Without Soil?
Yes, soil is optional. Cocopeat, grow mats, and even hydroponic setups work. Roots just need support and moisture. Leaves still grow healthy and clean.
What Is the Best Season to Grow Microgreens Indoors?
Season doesn’t matter indoors. Microgreens grow all year. Winter, summer, rainy days. Control light and temperature. Fresh greens anytime feel amazing.
Are Indoor Microgreens Safe to Eat?
Indoor microgreens are safe. Eat daily if you want. Wash gently. Keep trays clean. A small handful is enough. Nutrition is high, leaves stay fresh.
Conclusion:
Growing microgreens indoors feels natural. You don’t need a large space or expensive tools. A tray on the counter works. Seeds go in, light hits, shoots rise. Watching them daily builds excitement. Beginners learn fast. Small mistakes happen, plants still grow. Fresh greens are available all year. Flavor feels stronger.
Nutrition stays fresh. Meals look brighter. Energy feels real. Indoor growing gives control over what you eat. Kitchen corners turn green without effort. Harvesting feels satisfying. Each batch teaches patience. With steady care, anyone can grow clean microgreens at home and enjoy the whole process.