
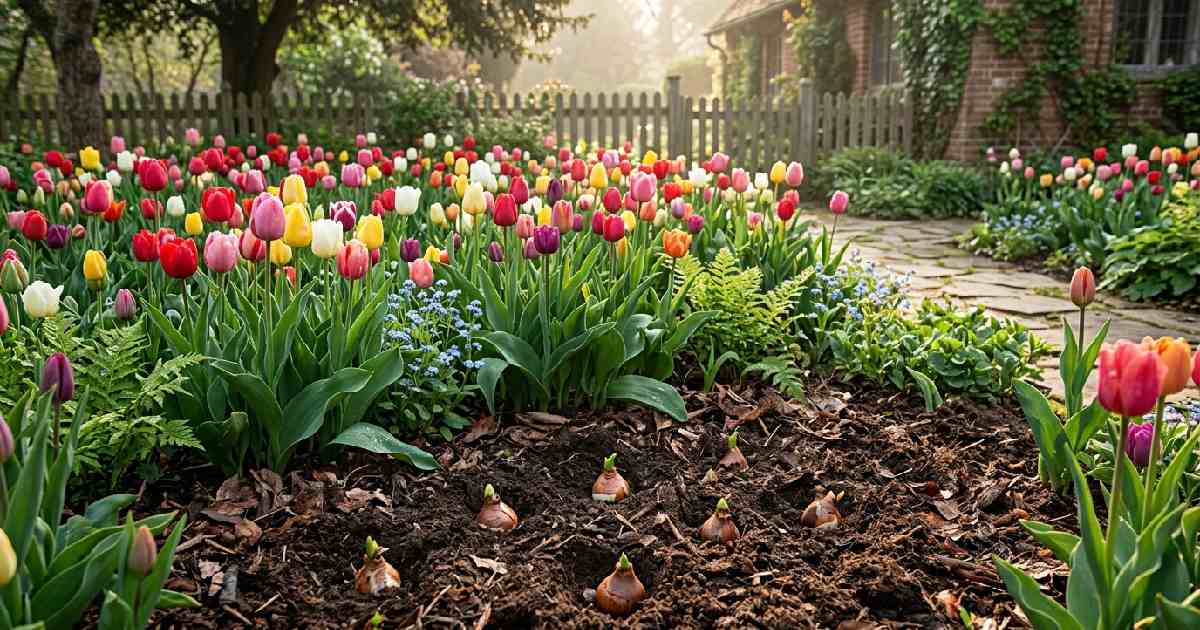

There’s something kinda magical about tulips. You shove a plain, papery bulb into cold soil, and then you pretty much forget about it for months. Then one spring morning, it’s like BOOM, a bright burst of color shows up where there was just bare dirt. Learning how to plant tulip bulbs feels like a small trick, but really it’s mostly timing plus a few simple steps done right, no big secret. Once you know how to plant tulip bulbs the right way, that little burst of color shows up like clockwork every single spring.
Most tulip issues trace back to one of two things, planting at the wrong time, or planting at the wrong depth. Fix those two first, add decent drainage and a sunny patch, and honestly tulips are one of the easier bulbs to grow. They don’t really complain much once they’re in the ground.
This guide goes through everything: picking solid bulbs, choosing the best spot, planting at the right depth and time, plus caring for them through the season so they return, looking good again, maybe even better next year.
Why timing matters so much with tulip bulbs
Getting the timing right is kinda the biggest factor in whether your tulips pop up strong in spring. Tulips aren’t like most garden plants you tuck in when it’s already warm. They actually need a cold stretch first, like they just won’t get the memo any other way.
Why tulips need a cold period
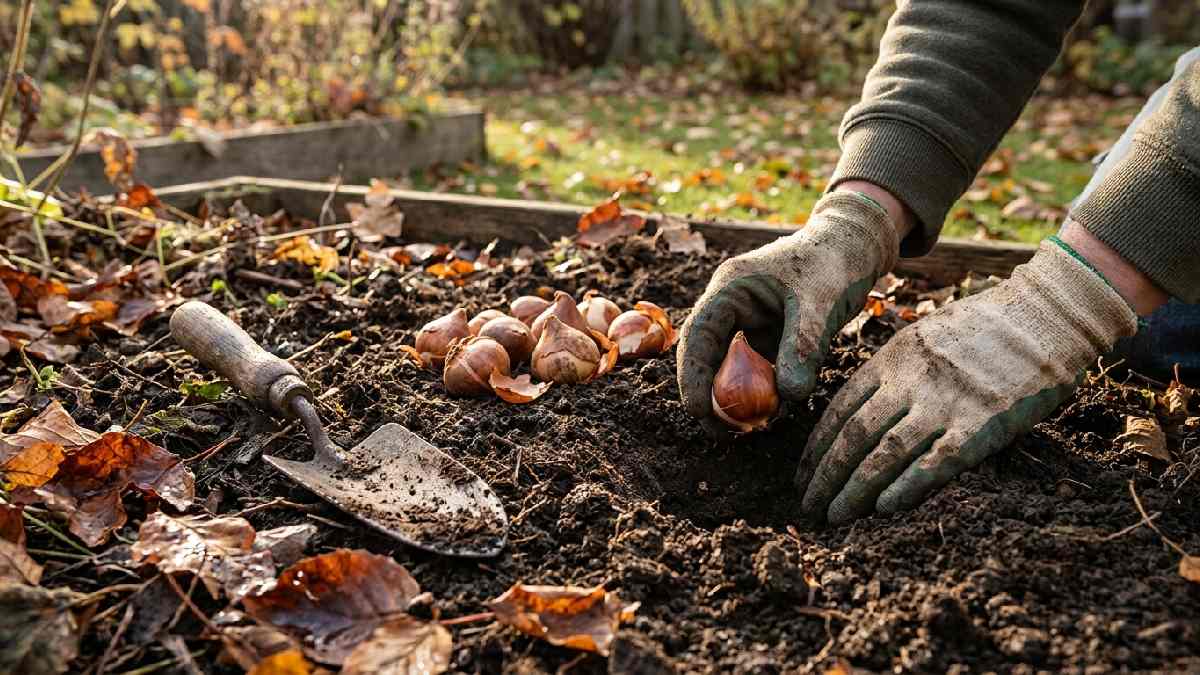
Tulip bulbs go through something called vernalization. Fancy term, but it basically means the bulb needs cold temps to trigger the changes that lead to blooming. Without enough cold, usually eight to sixteen weeks below about 45°F, the bulb might not bloom at all, or it gives you a short, weak stem, and the flower looks small. That’s why tulips get planted in fall instead of spring. The winter chill has to happen first for the bulb to do its thing.
The best time to plant in fall
As a general rule, how to plant tulip bulbs about six weeks before the ground freezes down solid where you live. That’s usually around September through November, but it shifts depending on your climate. In cooler northern regions, you can start as early as September. In milder areas, you might not plant until late November, or even stretch into December.
Soil temperature is usually a better clue than the calendar, though. Once the soil at planting depth drops to about 55°F or cooler, and stays there, it’s a good time to get bulbs in. A basic soil thermometer helps a lot. Or just check what your local extension office recommends for your area; they’re often pretty spot on.
What happens if you plant too early or too late
If you plant too early, while the soil is still warm, bulbs can rot or sprout way too soon, then they burn energy they’ll need later. If you plant too late, after the ground is frozen hard, you can’t dig deep enough, and the bulbs don’t get a chance to build roots before winter really locks in.
If you miss the ideal window, though, it’s still worth planting if the ground stays workable. A late-planted tulip might bloom later, or show a slightly shorter stem, but it’s rarely a total loss.
Choosing the right tulip bulbs
Not all bulbs are equal, like at all. Starting with good ones can change the whole outcome. A little attention at the garden center, or when your mail-order bulbs arrive, pays off months later.
What to look for in a healthy bulb
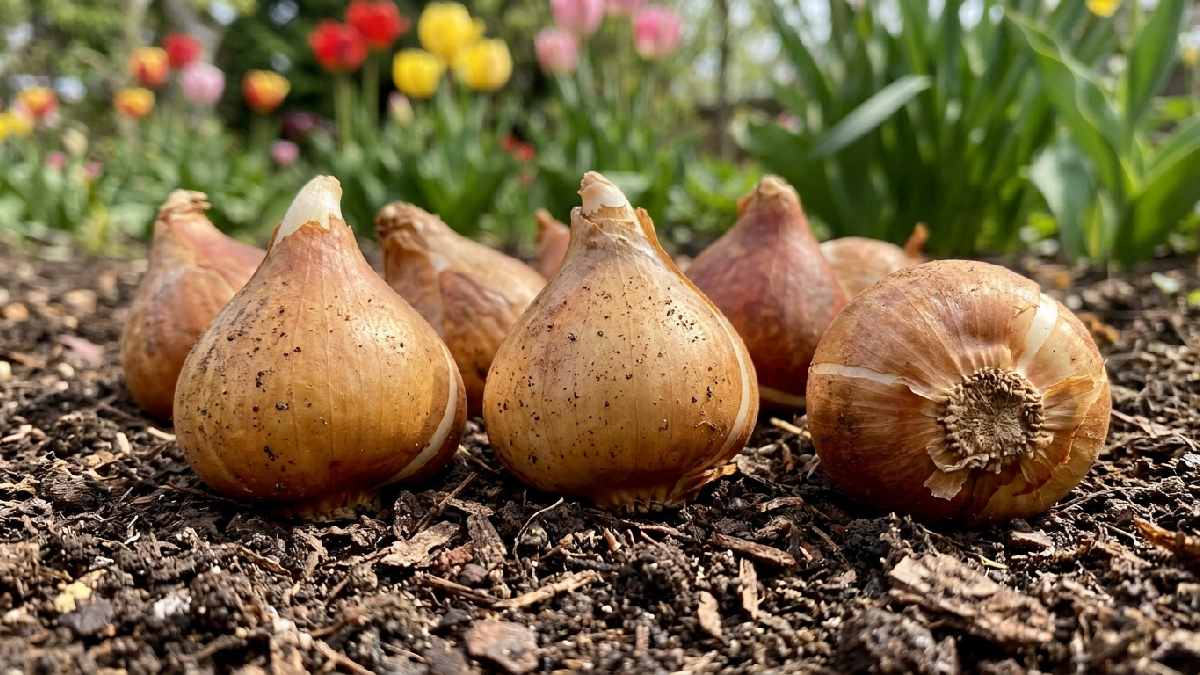
A healthy tulip bulb should feel firm and kind of heavy for its size, like a small solid onion. Skip anything soft, mushy, or unusually light. Those can be signs of rot, or that the bulb has dried out too much already. The papery outer layer, called the tunic, can have small tears and that doesn’t automatically mean trouble. Just avoid bulbs with visible mold, deep cuts, or soft spots, you know, the “not right” ones.
Bigger bulbs usually win here. Larger bulbs store more energy, and they tend to make bigger, sturdier flowers in the first year compared to smaller bulbs of the same type.
Choosing varieties and bloom times
Tulips bloom at different times in spring based on variety. Planting a mix of early, mid, and late types stretches the bloom window out over several weeks, instead of everything flowering then fading in one quick burst.
Early-season types, like Darwin Hybrids or single early tulips, often start blooming while the air still feels chilly. Mid-season types, including a lot of Triumph tulips, usually hit a few weeks later and often have sturdy dependable stems. Late-season types, like parrot tulips or double late types, finish out the show, and they can bring more dramatic ruffled petals.
Buying from a reliable source
Order bulbs from a reputable nursery or garden center, that part matters. Buy as early as you realistically can in the season. Popular types can sell out quick, and bulbs stored too long in a warm place can lose vigor before you even plant. If you order online, confirm they ship around the right planting time for your region, not super early and not late late.
Picking the best location to plant tulips
Where you plant really matters, like nearly as much as when. Tulips have pretty clear preferences. If you match what they want, you get a much better chance at strong blooms, and they’re more likely to come back in future years.

Sunlight requirements
Tulips want full sun. Usually that means at least six hours of direct light daily. A spot that’s sunny in spring works fine even if it gets shaded later in summer, since tulips do most of their growing and blooming before the tree canopy fills in, if you’ve got nearby trees.
Soil and drainage
Pretty much the biggest soil thing for tulips is drainage, like really, if the soil stays wet then these bulbs just sort of rot. Try not to plant in those low spots where water collects after rain. If your yard is more on the soggy side, raised beds, or even containers, you know, they let you control water movement way better than just putting them straight into the ground.
Tulips usually like soil that’s slightly acidic, drifting toward neutral, think pH 6 to 7. They do best with loose soil that drains well, not heavy clay that holds onto water like it has no plans to let go. If you work in compost in the planting area before you set the bulbs, you get improved drainage and nutrients at the same time.
Spacing and companion stuff
Tulips often look nicer as little clusters, rather than random single bulbs. A tight group of color tends to read better from far away, than separate stems dotted around. Odd-numbered groups, like 5, 7, or 9 bulbs, usually feel more natural, instead of those tidy even-number rows that look kind of forced.
Also think about what’s nearby growing, because tulip foliage fades fast and looks messy after blooming. Planting around perennials that “fill in” when tulip leaves start fading can hide that awkward moment, hostas, daylilies, that kind of deal.
How to plant tulip bulbs, step by step
Once you have decent bulbs and a spot that actually makes sense, planting is pretty quick. You don’t need much besides a trowel or bulb planter and, honestly, patience.
Step 1: Prepare the soil
Clear weeds and junk from the spot, then loosen the soil to at least ten to twelve inches deep. This deeper prep really matters more than most people assume. It helps roots grow deeper and improves drainage well below where the bulb sits. If your soil is low on organic matter, mix in compost or well-aged manure here.
Step 2: Dig to the right depth
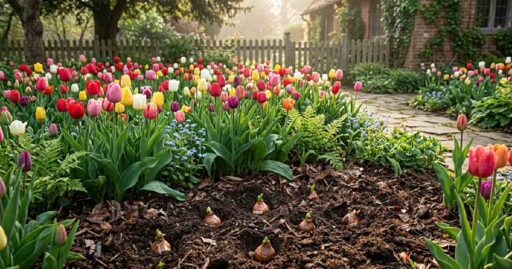
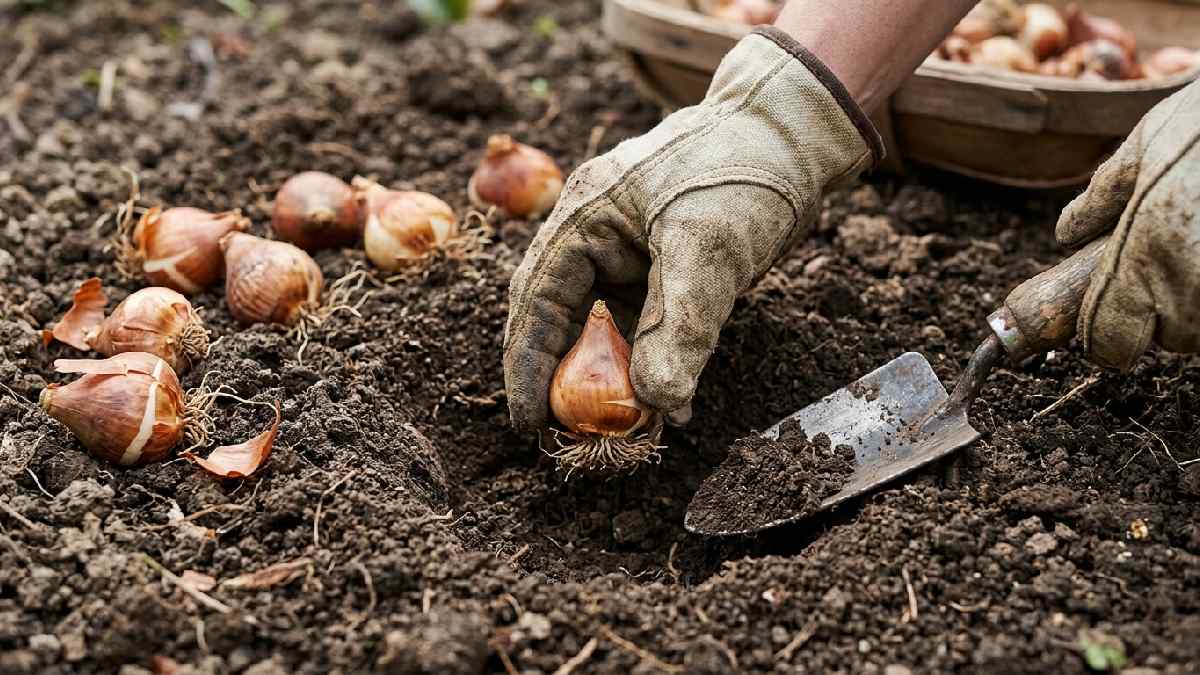
A good guideline is to plant tulip bulbs about three times as deep as the bulb is tall, measured from the base to the soil surface. For most normal bulbs, that equals roughly six to eight inches deep. Planting too shallow exposes the bulbs to temperature swings, and animals are more likely to dig them up. Planting too deep can delay blooming, or make it weaker, depending.
Step 3: Position the bulb correctly
This part trips up a lot of first-timers. Tulip bulbs go pointy end up, with the flat, or slightly rounded end down. The pointy tip is where the stem and leaves will emerge. Put it in upside down, and the plant has to spend energy bending around to get going, which can delay bloom or dull it.
Step 4: Space bulbs appropriately
Space bulbs about four to six inches apart. If you pack them closer, you get a fuller, more dramatic display. If you spread them wider, each plant has more room and nutrients, which can lead to slightly bigger blooms. For a more natural-looking cluster, dig one larger hole for several bulbs, instead of separate holes for each.
Step 5: Cover and water
Backfill with soil, and firm it gently, not like you’re building a road. Water the area thoroughly right after planting. That first watering matters because it settles the soil around the bulb and removes air pockets that might dry the roots while they’re forming.
Step 6: Mulch for protection
Add a two- to three-inch layer of mulch over the planting area. It helps regulate soil temperature during winter. It also cuts down on those freeze-thaw cycles that can heave bulbs upward. Straw, shredded leaves, or bark mulch all work fine.
Caring for tulip bulbs through the season
Tulips are pretty low fuss once they’re planted. Still, a few simple habits through fall, winter, and spring make a real difference in whether they come back in later years, not just once.

Watering after planting and through winter
After that initial watering, tulips usually don’t need extra water through fall and winter in most places. Rain and snow often cover it. If fall gets unusually dry, a deep watering now and then helps bulbs form roots before the ground freezes.
Watering and feeding in spring
Once growth starts in spring, keep soil lightly moist, but not soggy. Especially during dry stretches. Use a balanced slow release bulb fertilizer when shoots first emerge. It gives the plant a lift heading into bloom. Avoid high nitrogen fertilizers. They tend to create more leafy growth and fewer flowers, kind of the opposite of what you want.
Deadheading spent blooms
When flowers fade, snip the dead bloom off just below the flower head. Leave the stem and foliage in place. This stops the plant from channeling energy into seeds, and redirects it toward rebuilding the bulb for next season.
Leaving the foliage to die back naturally
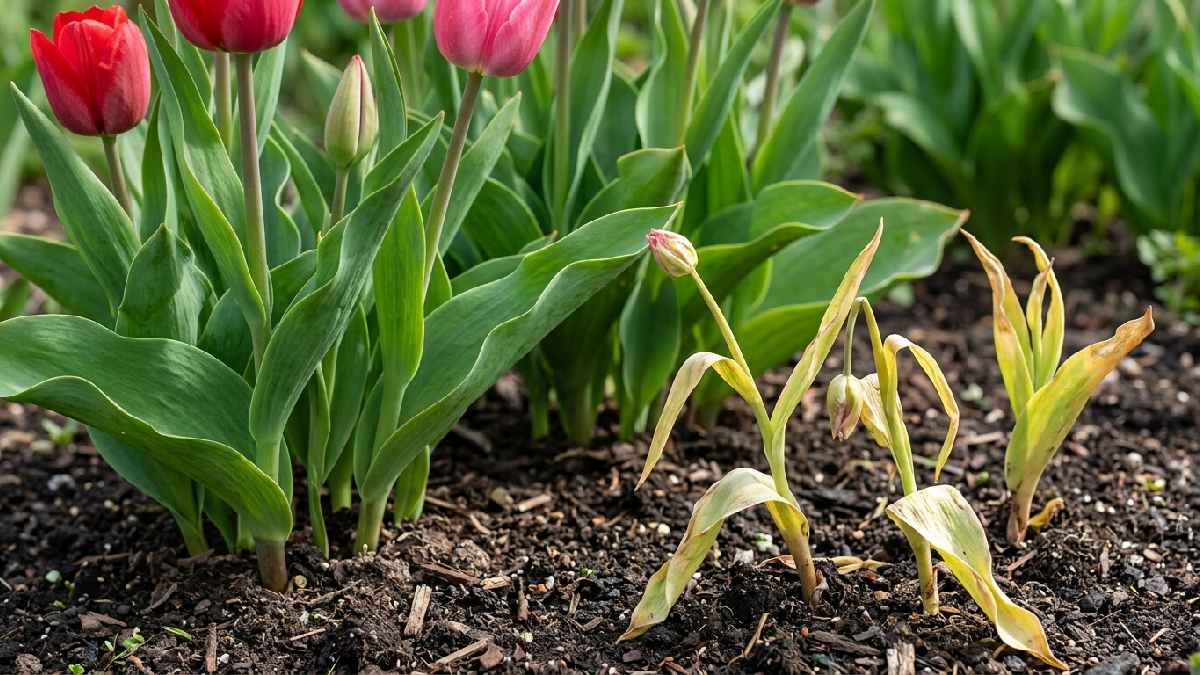
This is where most people mess up. The leaves look untidy when they yellow, and you’ll want to tidy them up early, but don’t. Wait until the foliage turns yellow and dies back on its own, usually about six weeks after blooming ends. During that time, the leaves photosynthesize and send energy back down into the bulb. Cutting early can seriously weaken next year’s bloom, and sometimes the bulb just won’t flower again at all.
Growing tulips in pots and containers
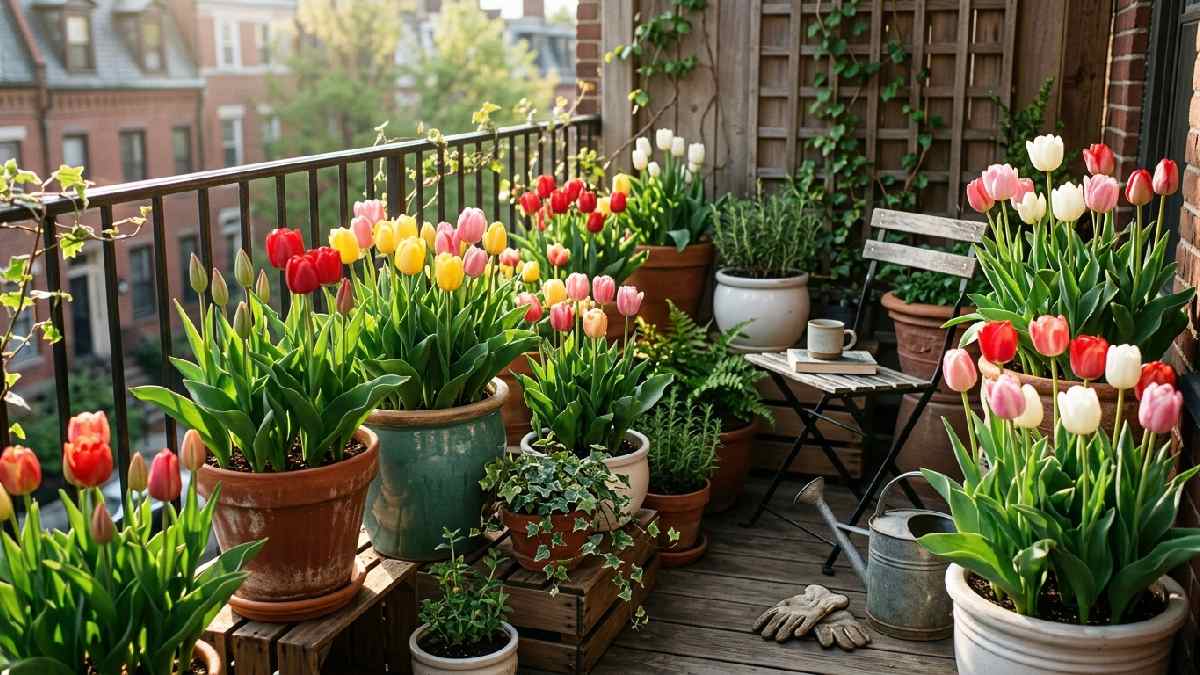
Not everyone has garden beds, and that’s totally fine. Tulips do well in containers, so they’re great for patios, balconies, or anywhere space is tight.
Choosing the right container
Go with a pot about eight to ten inches deep with drainage holes that actually drain. Tulips can rot in containers just like they can in the ground. Terracotta and ceramic pots both work. Unglazed terracotta dries faster though, so expect more frequent watering.
Planting depth and spacing in pots
Use the same general planting depth, around three times the bulb’s height. In containers you can space bulbs closer than you would outside, because you aren’t dealing with long term spreading. Bulbs can even touch slightly in a container, and it typically won’t cause any problems.
Protecting potted bulbs through winter
Container soil can freeze and thaw faster than in-ground soil, because there’s less insulating mass hanging around the roots, and it feels like the temperature swings more. In colder spots, move potted bulbs to an unheated garage, shed or another sheltered corner for the winter , just not a basement that stays too warm. If you really don’t want to lug the pot, sink the whole container into the ground for a bit, then dig it back up once spring shows up. And if moving it feels annoying , wrapping the pot in burlap or bubble wrap gives extra protection, kind of like a little cozy blanket.
Protecting tulip bulbs from pests and animals
Tulip bulbs are , honestly , kind of a snack for quite a few critters, which is annoying after all that planting work. A small bit of prevention goes much farther than you’d guess.
Squirrels, chipmunks and rodents
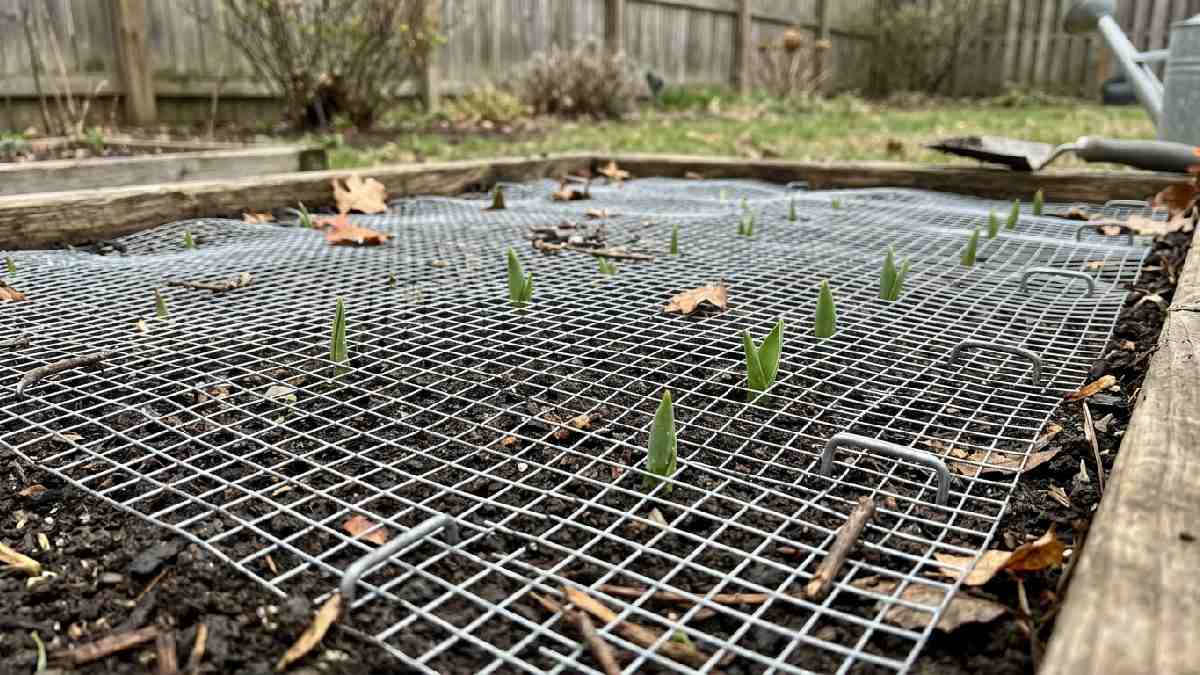
These are probably the main troublemakers. They dig up bulbs soon after planting, sometimes within hours if they spot disturbed soil. Laying chicken wire or hardware cloth over the planting area, pinned down at the edges , blocks a lot of digging while the plants push up through the mesh. Also, remove bulb wrappers, paper bits and any planting scraps, because the scent can pull them in and then they’ll go hunting by smell.
Deer and rabbits
Deer and rabbits usually go after the budding foliage and blooms, not the bulbs themselves. Repellent sprays can help , but they usually need reapplying, especially after rain, because the effect fades. Physical fencing around beds that they keep targeting is also pretty solid. And quick side note, daffodils are toxic for most of these animals so they rarely bother them. It can even help to mix tulips with daffodils , since the daffodils kind of “warn” the area, and browsing drops.
Voles and underground pests
Voles dig tunnels under the surface and can eat bulbs from below, so you don’t always see obvious damage up top. Using wire cages around the bulbs, or lining planting holes with hardware cloth, creates a barrier that keeps voles from reaching the bulbs, while stems still grow through the mesh without too much trouble.
Common problems when growing tulips
Even with good planning, tulips can throw a few common issues at you. It helps to know what usually causes the problem, then what to do next.
Bulbs rotting in the ground
This is almost always drainage, or planting in soil that stays wet longer than it should. If you’ve had rot before , try raised beds, mix grit or coarse sand into the soil, or choose a location that drains better for future plantings.
Blind bulbs that don’t flower
When a bulb only makes leaves and no blooms , people sometimes call that “being blind”. Usually it means the bulb didn’t get enough cold exposure, or it was planted too shallow, or it got weakened because foliage was cut back too early the year before. Smaller, younger bulbs are also more likely to stall during that first season.
Weak or floppy stems
Floppy growth often comes from too much nitrogen fertilizer, not enough sunlight, or bulbs that were already kind of depleted when you planted them. Getting full sun and switching to a bulb-specific fertilizer that’s lower in nitrogen usually helps the next year.
Tulips not returning the following year
A bunch of modern hybrid tulips, especially the flashy ones, are bred more for a huge first-year show than for coming back reliably. Over a few seasons, even with careful care, they can slowly lose vigor. If you want dependable return bloom, try species tulips and some Darwin Hybrid types, because they tend to naturalize better and come back stronger than the glossier hybrid strains.
Forcing tulip bulbs indoors for winter blooms
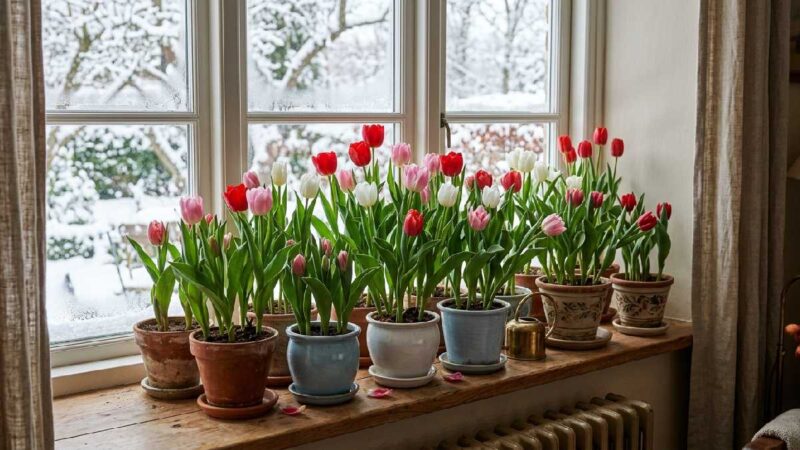
Forcing is a clever method where tulip bulbs are tricked into blooming indoors weeks, or even months, earlier than outdoor tulips normally flower. It’s a popular little project when you want something bright on a winter windowsill.
How forcing works
Forcing basically speeds up the cold period that tulips need, then shifts them to warmth and light so they bloom on your timing instead of the weather’s. Pot up bulbs in fall like you would for normal containers, using a well-draining potting mix. Then give them the cold period on purpose, using a refrigerator, an unheated garage, or some other cold-but-not-freezing spot, for ten to sixteen weeks depending on the variety.
Moving bulbs into bloom
When the cold period ends and you see pale shoots, move the pot to a cool, bright place first. Don’t drop it straight into a warm, sunny window right away. A gradual shift, about a week or so, helps the plant adjust without getting too stressed. After that settling step, move it to warmer, brighter conditions, and blooms typically show up within two to three weeks.
Tips for successful forcing
If you can, choose bulbs that are sold specifically for forcing, since not every type behaves the same through the process. Smaller, early-blooming bulbs usually force more consistently than huge late-season types. Keep the soil lightly moist during the cold period, because bulbs that dry out completely while forcing often won’t bloom properly.
Design ideas for planting tulips in the garden
Beyond the basics, thinking about layout and color can turn a plain tulip bed into something that looks actually planned and finished.

Color combinations worth trying
Using single-color drifts of one variety usually looks bolder from a distance than scattering lots of colors at random, which can end up feeling a little chaotic in the bed.
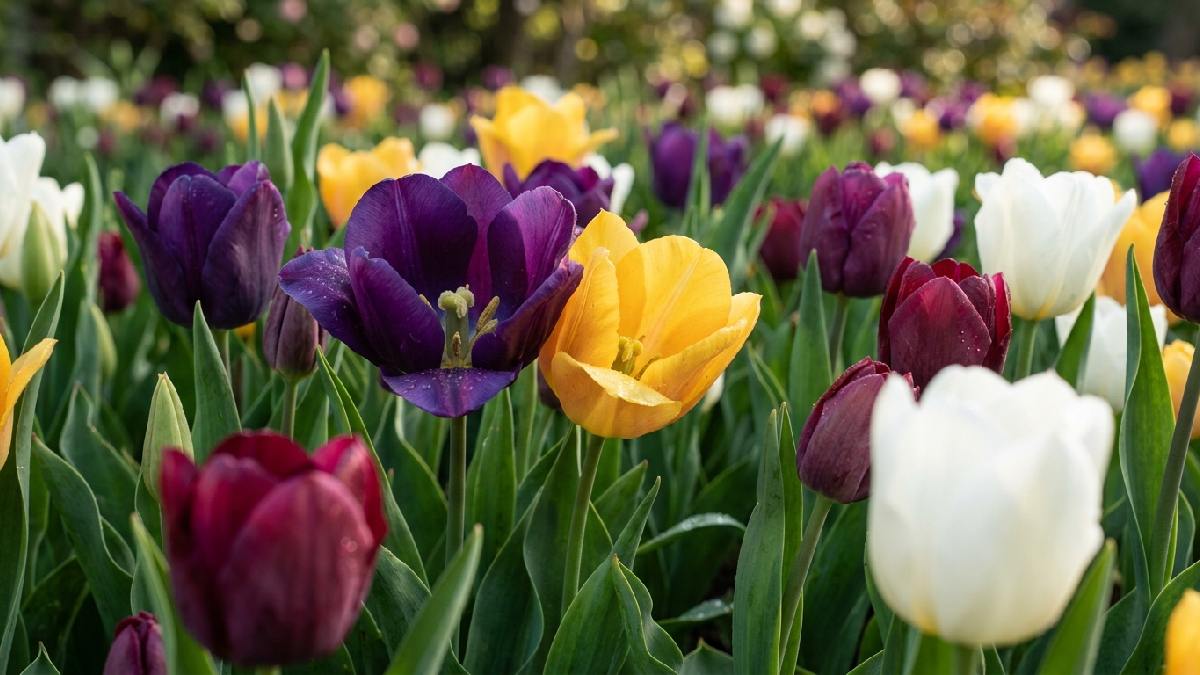
If you want variety, stick to two or three colors that play well together, instead of trying every shade you can find. Deep purple or burgundy tulips paired with bright yellow or white ones give strong contrast that still reads nicely across a yard.
Layering bloom times for a longer display
Plant early, mid, and late-season varieties in the same area to stretch the bloom time, so when one group fades, another wave starts. This takes a bit more planning when you’re buying, because you’ll need to check bloom time labels, but the payoff is weeks of color instead of one short burst.
Pairing tulips with other spring bulbs
Tulips are kinda great when you put them near other spring bulbs, like daffodils, hyacinths, and yes, grape hyacinths too. They seem to push up at slightly different times, so the whole bed doesn’t feel all flat; you get that extra pop in color, and even the shapes feel more alive.
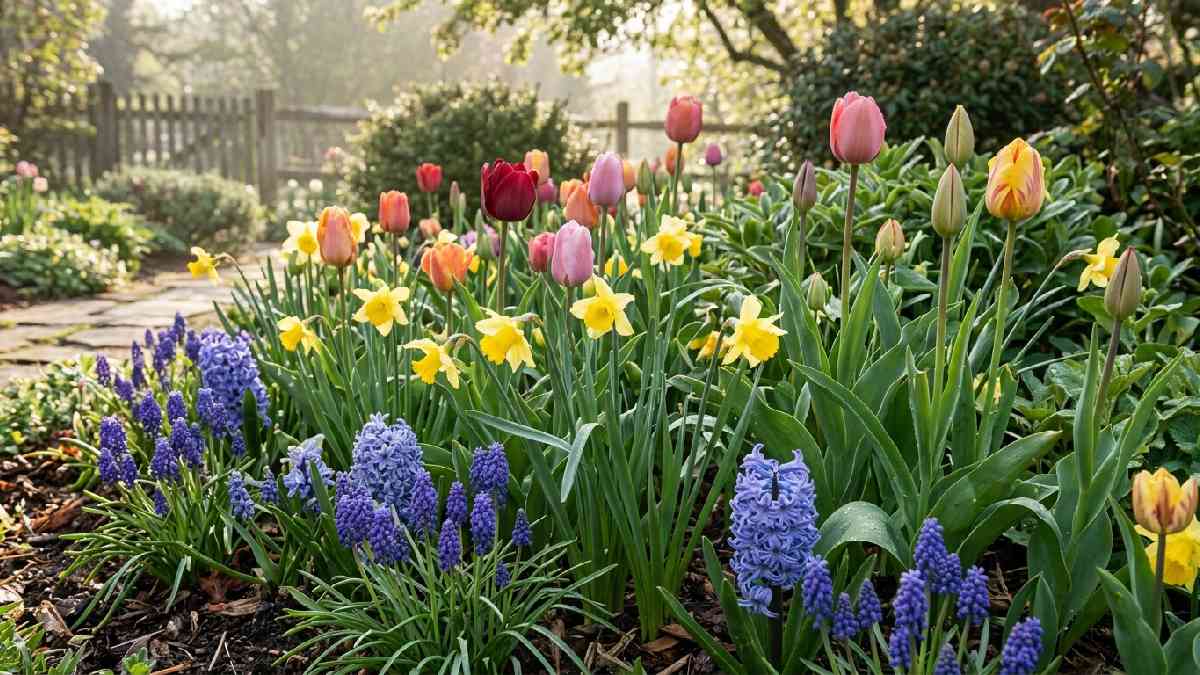
Some folks even stack the bulbs in the same hole: daffodils go deeper… tulips in the middle depth, then smaller bulbs like crocus sitting up close to the surface. People call it bulb lasagna planting, which sounds honestly a little silly, but it saves space and still gives you a nicer looking arrangement without too much fuss, or, with less extra work.
Frequently Asked Questions
No schema found.C0nclusion
Honestly, getting tulip bulbs to work well is mostly about a few details handled right. Nail the fall timing, plant at the proper depth, pointy end up, and you’re already ahead. Pick a sunny spot with good drainage, then let the leaves fade on their own after the blooms. It’s not overly complicated once you’ve done it one time, and the payoff is that sudden burst of color after a long gray winter, which makes all the effort feel pretty small.
Start with solid quality bulbs from a dependable source, plant when your climate says it’s time, and don’t rush to “tidy” the foliage too early in late spring. A bit of patience on that last step matters more than almost anything else on the list. Stick with the basics, and you’ll be more likely to get a tulip display that looks great right away, while still giving yourself a real shot at coming back for more seasons too.