Growing Microgreens: The Ultimate Beginner’s Guide
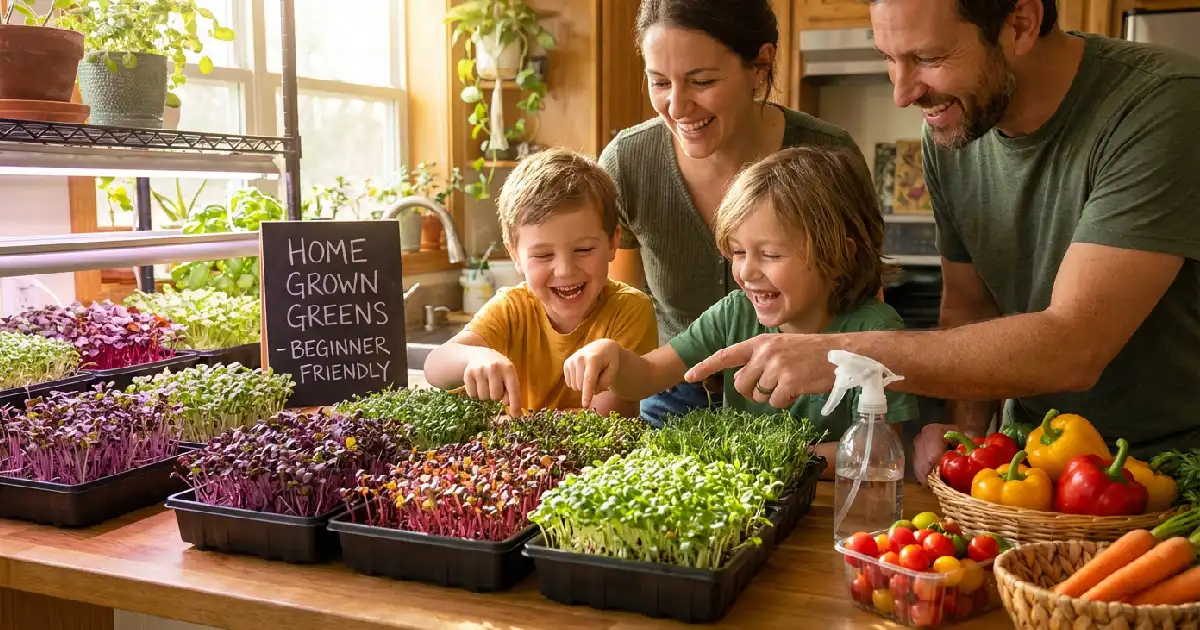
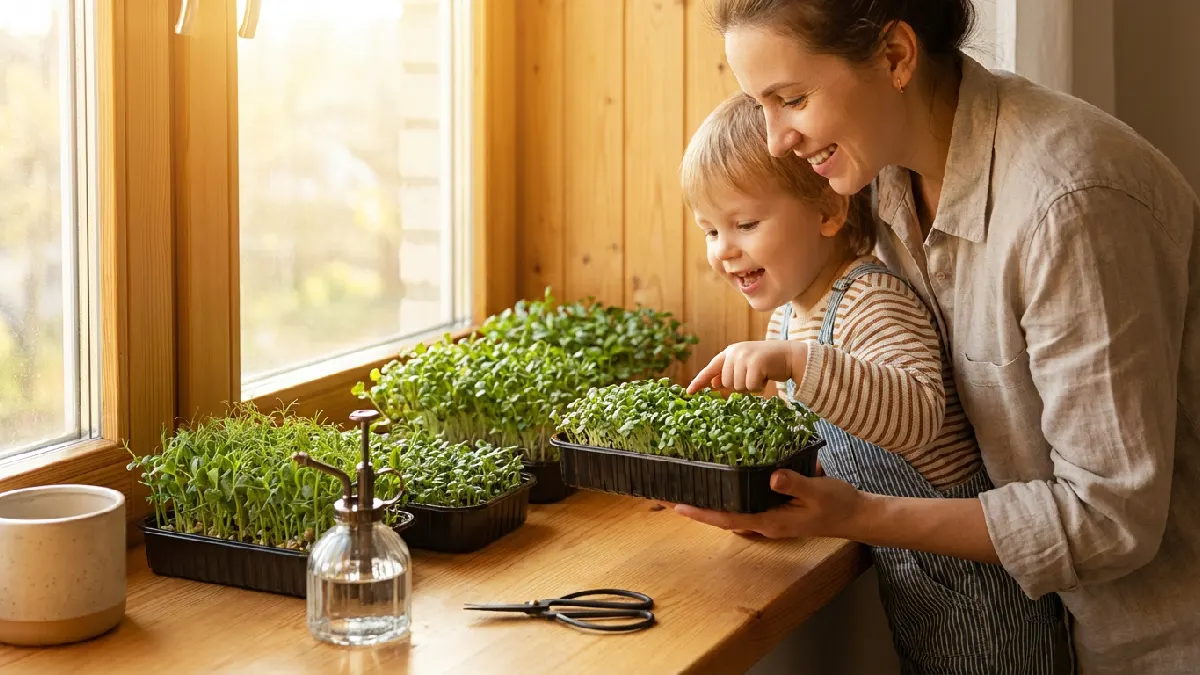
I started small. A tiny tray by the window. Seeds scattered lightly, Broccoli, radish, kale. Leaves popped quietly. Some mornings are fast. Some mornings are slow. Patterns appeared naturally. Watered lightly. Sunlight or LED helped. Tiny roots stayed hidden. Indoor gardening felt simple. No backyard, no big tools. Each tray taught me small lessons. Leaves stayed fresh.
Meals tasted alive. Kids peeked often. I harvested scissors, close. Nutrition packed in tiny leaves. Vitamins high. Minerals stayed strong. Microgreens added color and crunch. Salads, sandwiches, smoothies, each bite felt fresh. Little effort daily. Big reward weekly. Growth taught patience. Indoor gardening became fun. Tiny wins appeared every day. Watching them stretch was calming. Life quietly unfolded in trays.
What Are Microgreens?
Microgreens are tiny plants. Small stems, little leaves. Bigger than sprouts. Smaller than full veggies. Eat the whole thing, stem and leaf. Taste fresh. Crunch light. Grows fast in trays. Soil or mats work fine. Indoor gardening works. No backyard needed. Window light is enough. LED works too.
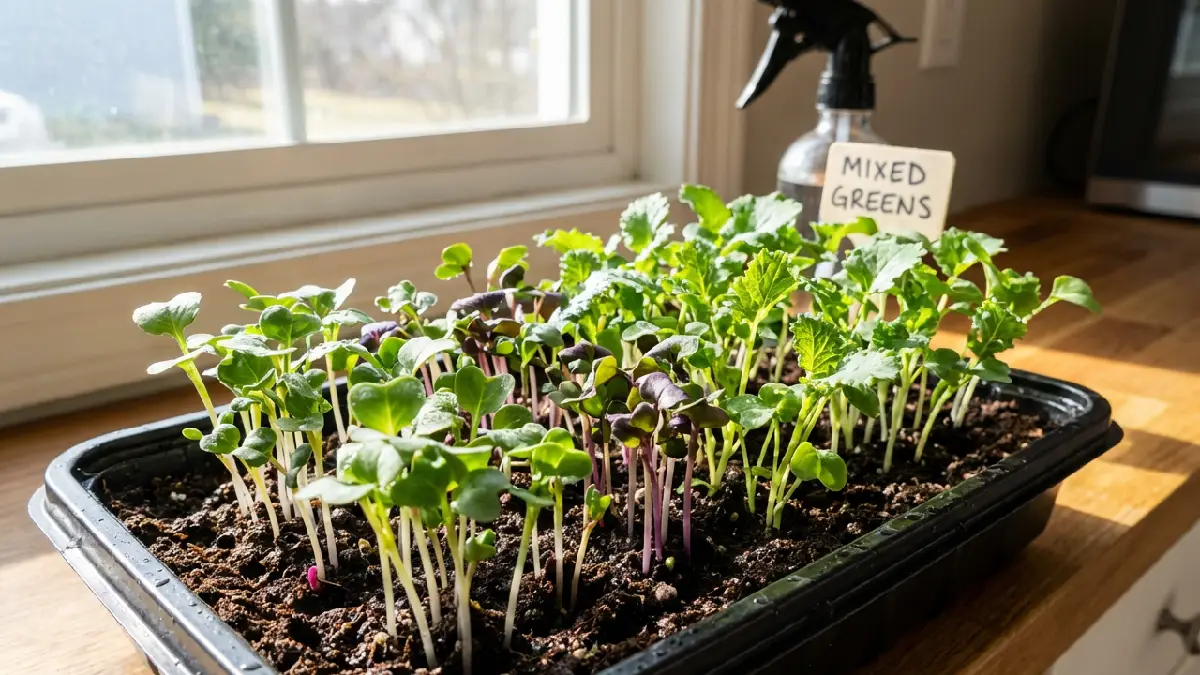
Water lightly every day. Leaves pop up quickly. Fun to watch. Kids enjoy it. Beginners feel proud. They make food lively. Salads colorful. Sandwiches fresh. Smoothies boost nutrition. Vitamins stay high. Minerals inside leaves. Simple to grow. Little effort. Big reward. Tiny greens, big impact.
Difference Between Microgreens, Sprouts, and Baby Greens
Sprouts come first. Seeds soak, then sprout. Eat the whole seed and shoot. Very tiny. Grows in water mostly. Fast, 2to 7 days. Crunchy, sometimes spicy. Microgreens grow next, small stems, tiny leaves. Eat stem and leaf. Soil or mats work. 7to 21 days to harvest. Taste stronger than sprouts. Colors pop on the plate. Fun to watch grow.
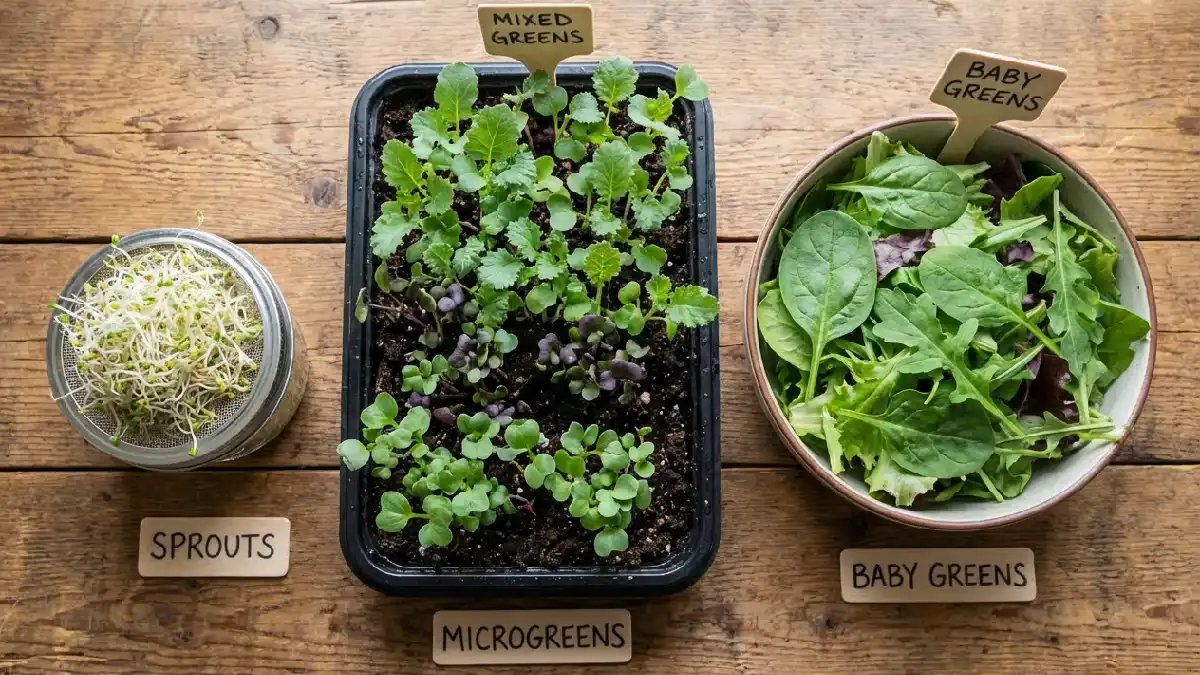
Baby greens are bigger. Leaves grow full. Stem longer, tougher. Take weeks to grow. Mostly in the garden or big pots. Eat mostly leaves. Tender but requires more effort to grow. Microgreens feel like the sweet spot. Easy, fast, colorful. Leaves crisp. Seeds sprout quietly. Watch patterns daily. Indoor gardening works perfectly.
Nutritional Benefits of Microgreens
Microgreens are tiny but strong. You bite, flavor pops. Vitamins hit fast. Every leaf feels alive. Some mornings I watch them, green and crisp. Makes me want to eat more. They help the immune system. Energy comes easily.
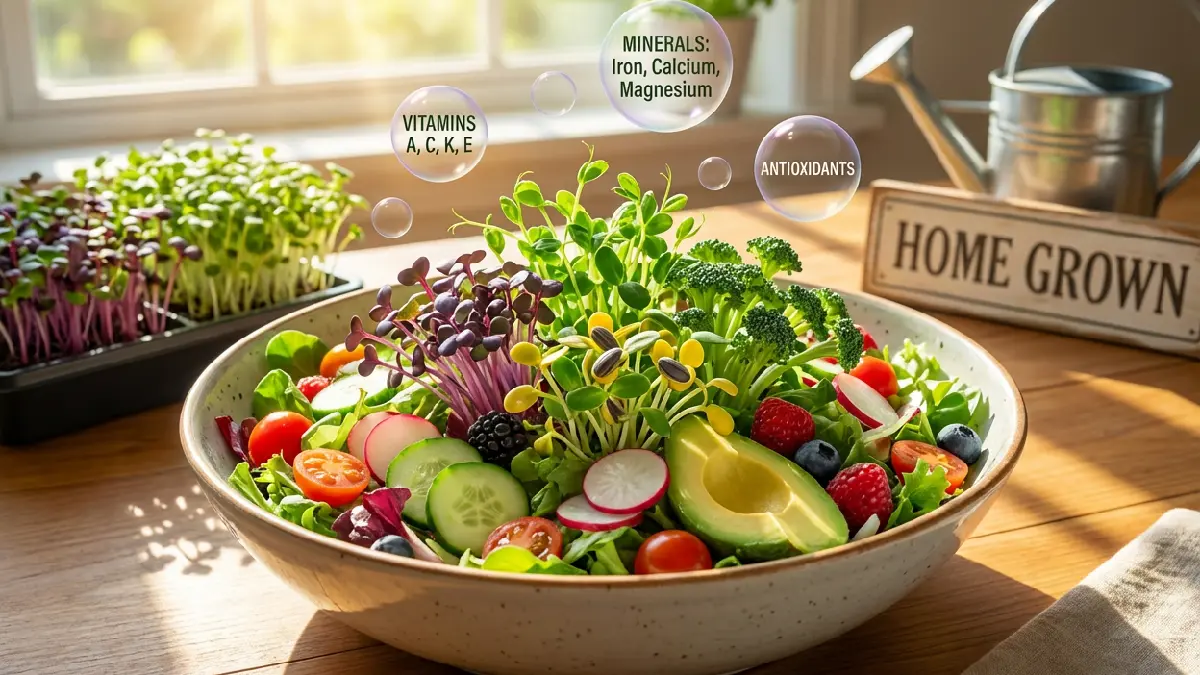
Digestion feels lighter. A small tray gives so much food. You don’t need big portions to feel good. Colors look happy. Red, green, yellow. Plates suddenly bright. Kids ask to taste. Even adults get surprised. Home, grown feels different. Every meal feels fresher.
Why You Should Grow Microgreens at Home
I started small. Just a tray by the window. Seeds scattered lightly. Leaves popped fast. Tiny patterns appeared daily. No garden needed. No big tools. Just sunlight or LED light. Soil is damp, mist gently. Meals felt fresh. Kids peeked often. Tiny wins every day. Microgreens save money. No need to buy from the store.
Vitamins stay high. Flavor stays strong. Easy to grow indoors. Quick harvest, 7to 14 days usually. Each tray feels alive. I watched radish and broccoli leaves stretch slowly. Patterns formed naturally. Indoor gardening became fun. Daily care simple. Tiny effort, big reward.
Fast Growth and Quick Harvest
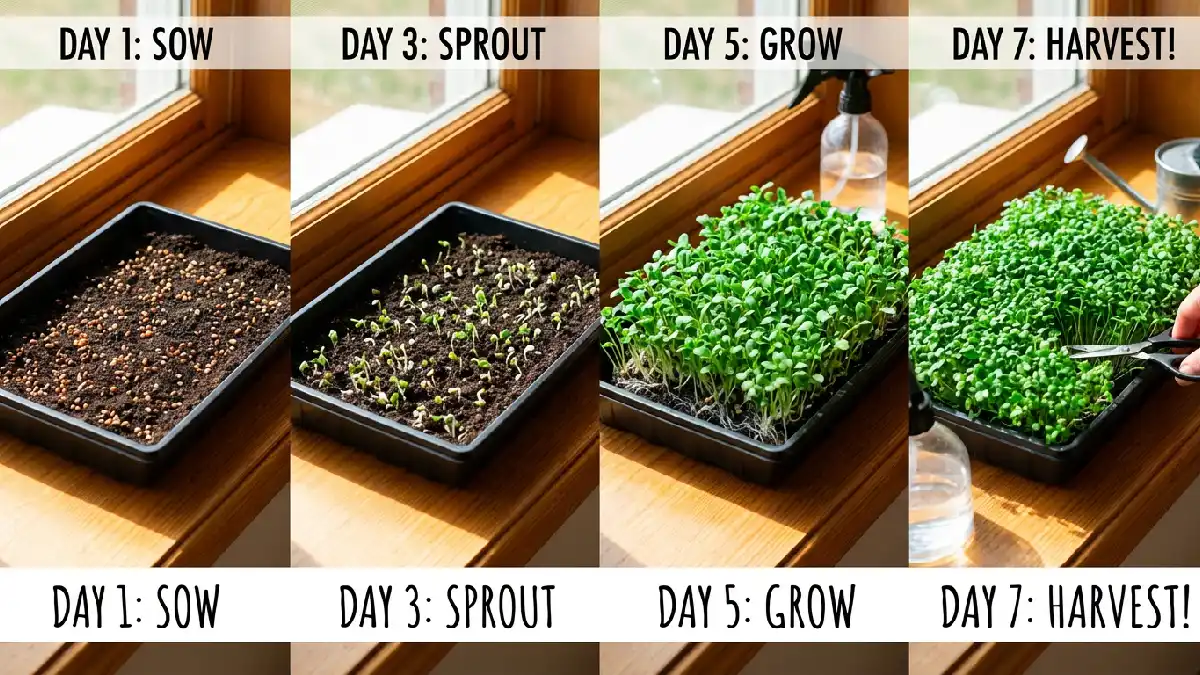
Microgreens grow fast. a week or two. I remember planting radish seeds. Tiny green shoots popped in five days. Exciting. Leaves stretch upward quietly. You watch patterns form daily. Some days, growth feels slow. Some days it surprises you. Harvest comes soon. Tiny effort, big reward.
Harvest carefully with scissors. Cut above the soil. Roots stay hidden. Leaves stay fresh longer. Sprinkle on meals immediately. Crunch stays crisp. Vitamins stay high. Indoor gardening feels alive. Daily habit forms naturally. Kids love watching growth. Confidence builds with each tray.
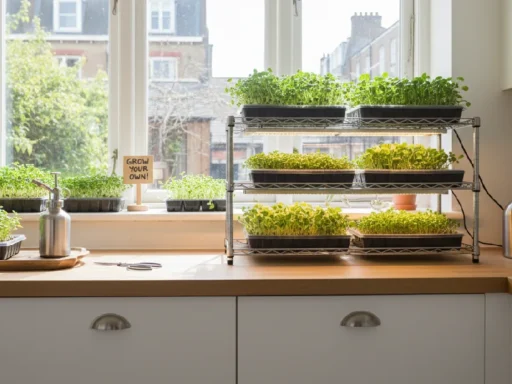
Space Efficiency for Indoor Gardens
Microgreens need little space. A small tray fits on a counter or windowsill. I stacked two trays once. Worked perfectly. Leaves grew straight. Light reached all corners. Tiny effort daily. Indoor gardening feels calm. You notice patterns slowly. Some days, growth seems fast. Some days, almost nothing changes.
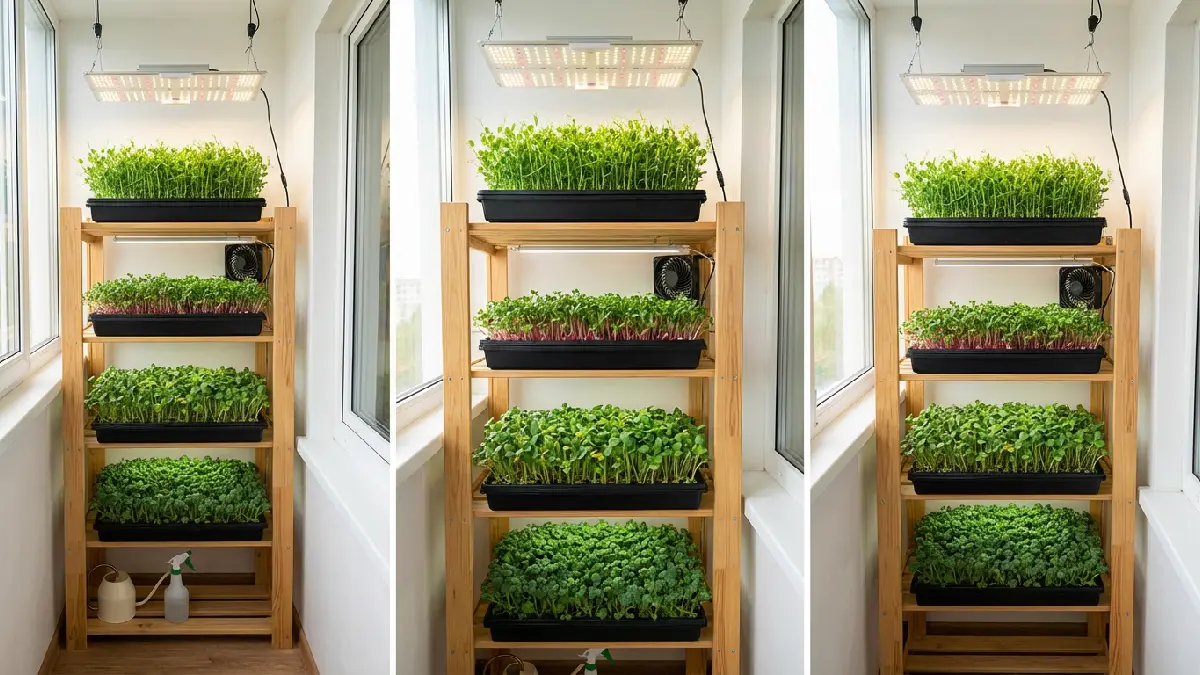
Stackable trays save even more space. Balcony corners work. Kitchen shelves work. No big garden needed. Tools and media come in a kit. Everything fits neatly. Harvest feels satisfying. Kids peek daily. Nutrition stays high. Tiny greens teach habits. Each tray gives small wins.
Cost-Effective and Nutrient, Dense
I bought one small packet of seeds. It lasted weeks. The tiny tray grew mustard fast. Broccoli followed. Leaves were crunchy. Flavor strong. Meals felt fresh. No big garden needed. Even a shelf worked. Money saved, time saved.
Nutrition stayed high. Kale and radish are packed with vitamins. Sunflower leaves added crunch to sandwiches. Each tray showed patterns quietly. Little daily effort, big reward. I watched stems stretch. Microgreens taught small lessons. Eating felt alive and healthy.
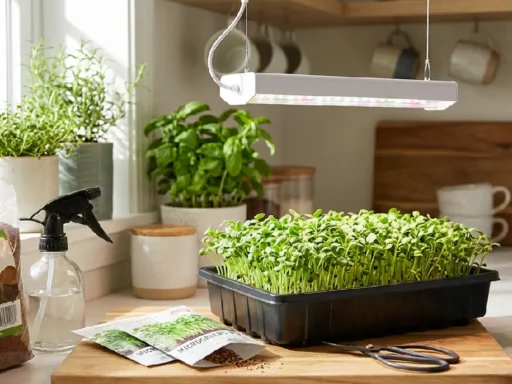
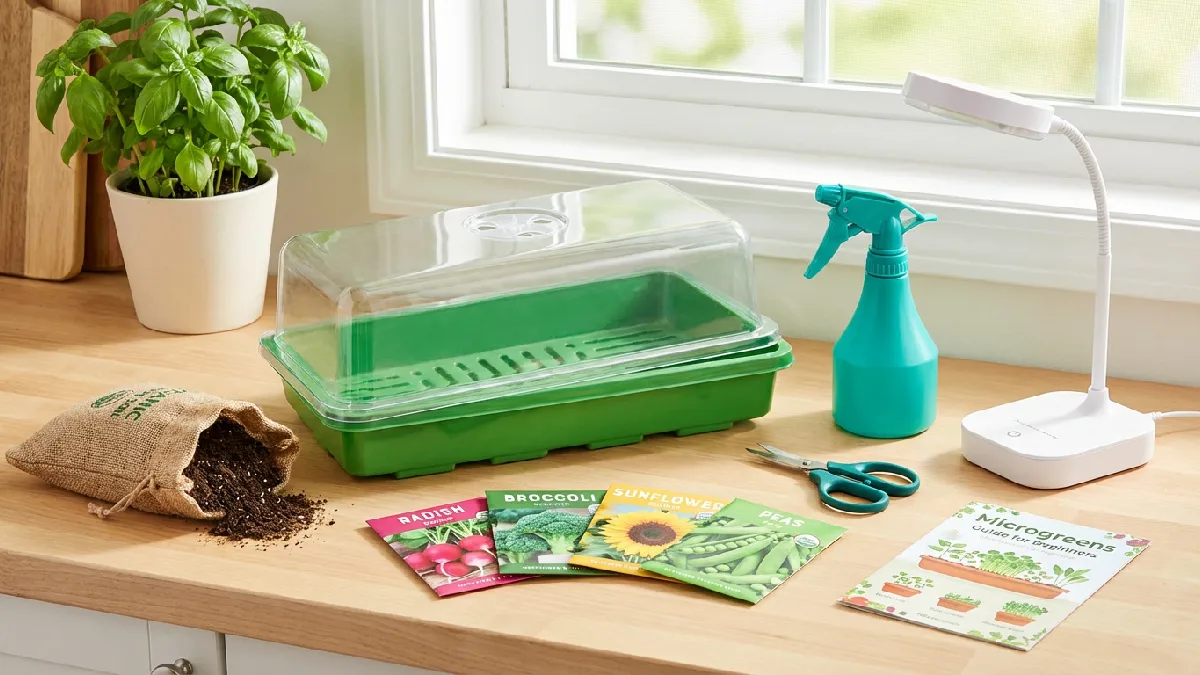
What You Need to Start Growing Microgreens
I opened my first kit. Tray, seeds, medium, all ready. No confusion. Tiny tray fits anywhere. Soil stays damp. Mist lightly. I sprinkled radish seeds. Broccoli seeds next. Leaves popped quietly. Some mornings are fast. Some mornings are slow. Patterns appeared naturally. Daily check became fun.
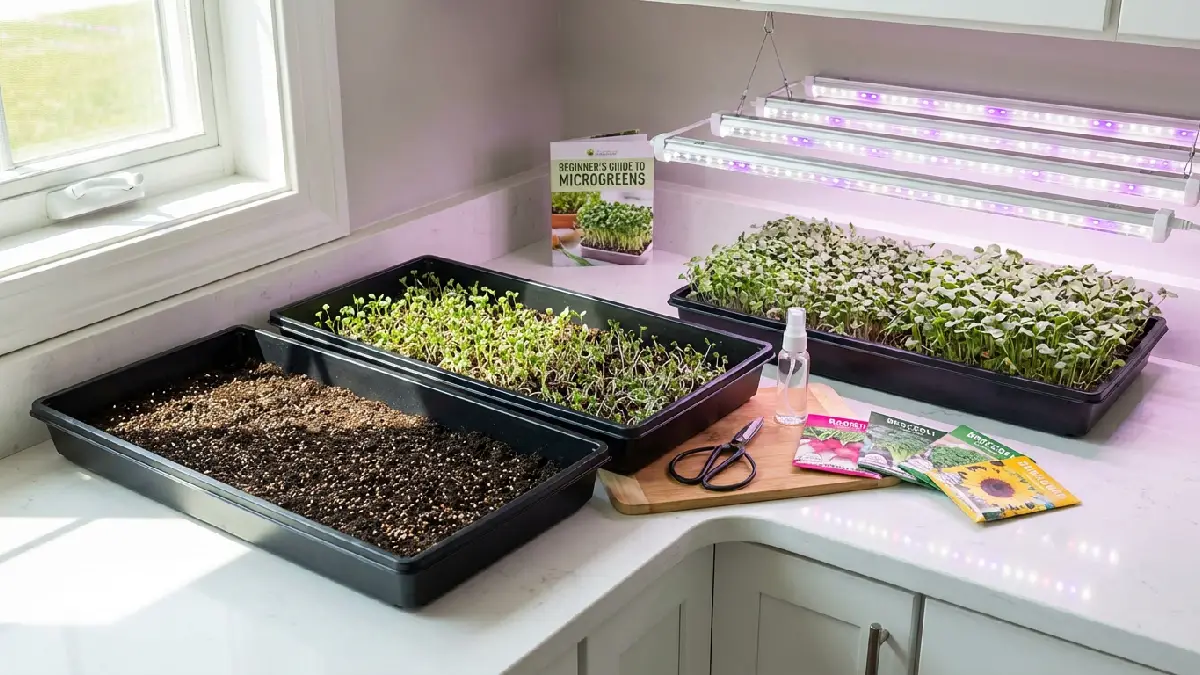
A spray bottle helps. Water lightly. Roots stay happy. Light from a window or an LED. Stackable trays save space. Scissors for harvest. Kids peek often. Each tool teaches a small lesson. Microgreens feel alive. Indoor gardening is simple. Tiny effort daily, big reward later. Every tray tells a story.
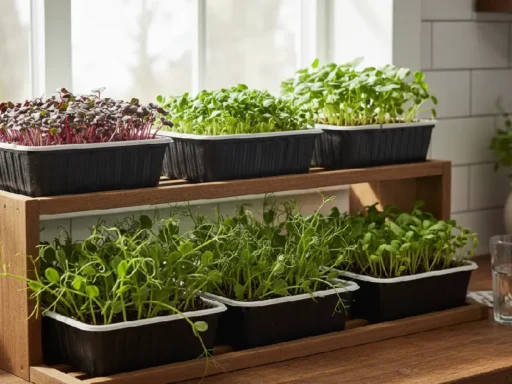
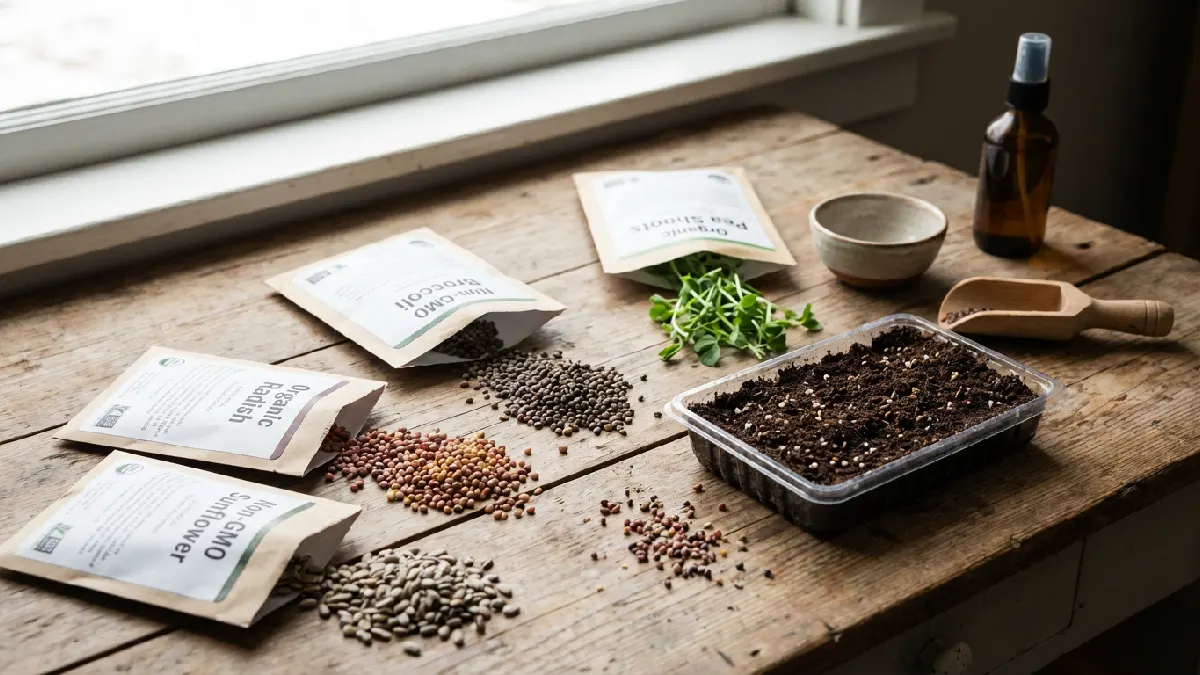
Seeds, Choosing the Right Varieties
Seeds are the start. Radish grows fast. Broccoli is mild. Peas are sweet. I once tried mustard. Leaves popped quickly. Tiny spice in meals. Sunflower adds crunch. Each seed tastes different. Some days, growth feels fast. Some days are slow. Tiny patterns appear daily. Organic seeds work best.
Non-GMO is safer. Check labels carefully. Tiny effort daily. Spread seeds evenly. Don’t crowd. Roots grow quietly under the medium. Harvest carefully with scissors. Leaves go in salads, smoothies, and sandwiches. Growth teaches patience. Kids notice colors. Indoor gardening feels alive.
Growing Trays and Mediums
Trays matter. Shallow works best. I used a small plastic tray once. Holes for drainage helped. Soil stayed just right. Roots grew quietly. Leaves popped evenly. Tiny effort daily. Fun to watch. Patterns appear naturally. Kids loved checking daily.
Medium holds water. Soil, cocopeat, and hydro mats all work. Don’t pack hard. Seeds need air. Mist lightly each day. Some days, growth feels fast. Some days are slow. Tiny tray fits anywhere. Indoor gardening feels calm. Leaves stay crisp. Meals taste fresh. Daily wins appear quietly.
Step-by-Step Guide to Growing Microgreens
Start small. Take a tray. Fill with 1to 2 inches of soil or cocopeat. I tried a tiny tray once. Spread seeds evenly. Mist lightly. Tiny leaves wake up slowly. Some days, growth feels fast. Some days, almost nothing. Check daily. Patterns appear quietly. Indoor gardening feels calm.
Move the tray near sunlight oran LED light. Keep soil damp. Rotate sometimes. Leaves grow straight. Harvest carefully with scissors. Only take what you need. Roots stay hidden. Tiny effort daily. Meals taste fresh. Kids peek daily. Growth teaches patience. Nutrition stays high.
Step 1 – Choose the Best Seeds
Seeds matter more than I thought. Bought some cheap ones once. A few days later, nothing sprouted. Learned fast. Choose seeds labeled for microgreens. Organic is better. Untreated seeds are safer. Tiny seeds, big results sometimes. Each type tastes different. Radish is spicy. Broccoli mild. Pea shoots are sweet. Sunflower nutty.
Check the packet carefully. Spread evenly later. Don’t crowd. Seeds wake up slowly. Some days, growth feels fast. Some days, almost nothing. Patience teaches a lesson. Sprinkle on medium gently. Mist lightly. Watch roots hide below. Leaves pop up quietly. Indoor gardening becomes alive. Each tray feels like a small adventure.
Step 2 – Prepare Your Growing Tray
Tray matters. I picked a small, shallow one once. Cleaned it first. Holes for drainage help. Fill 1to 2 inches with soil or cocopeat. Don’t pack it hard. Seeds need air. Mist lightly. Tiny droplets fall quietly. Roots stay hidden but strong. Leaves grow straight. Some days, growth feels fast. Some days, it’s almost nothing. Check daily. Patterns appear slowly.
Stack trays if space is tight. Windowsill works well. Sunlight reaches leaves gently. LED lights help indoors. Tiny effort each day. Fun to watch. Kids peek often. Tray stays steady. Soil stays damp. Meals taste fresh. Nutrition stays high. Indoor gardening feels alive. Each tray teaches small lessons. Growth feels calm and satisfying.
Step 3 – Sow the Seeds
Open the seed packet slowly. I spilled seeds once. Learned fast. Sprinkle them evenly across the tray. Not too close. Seeds need space to breathe. Press them gently with fingers. No deep pushing. They sit quietly on the surface. Mist lightly. Tiny drops settle in. Everything looks still. Growth already started, though.
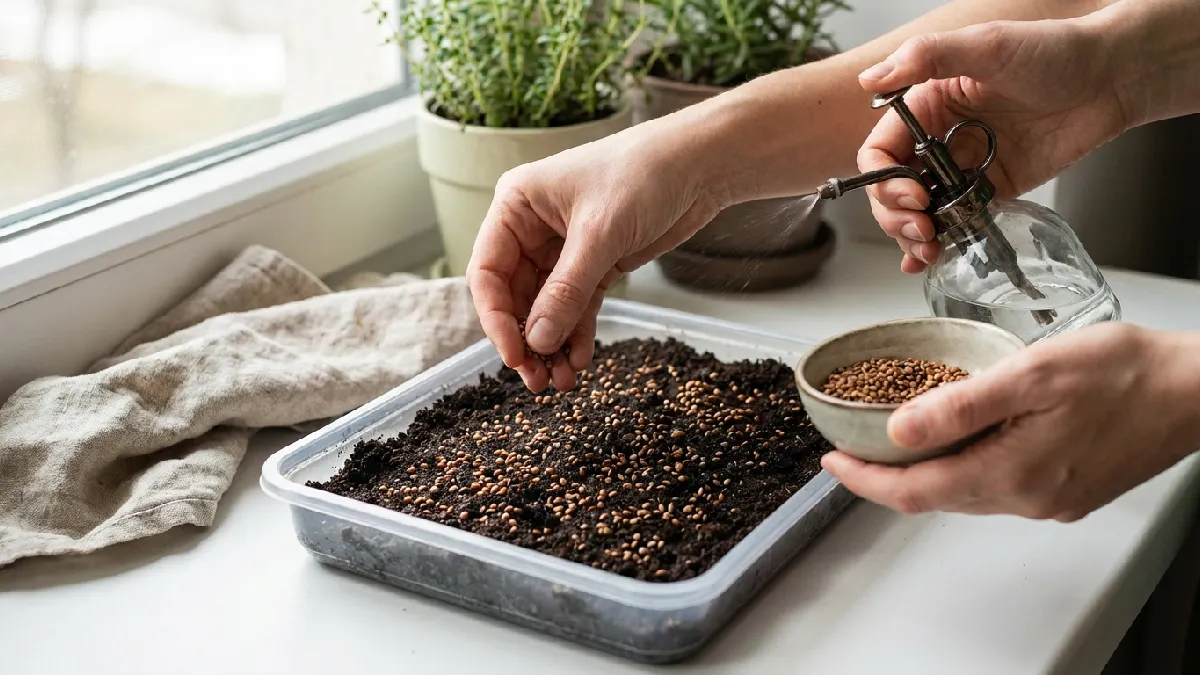
Place the tray back in its spot. Nearthe window or under the light. Seeds rest calmly. Some days, you see movement. Some days nothing changes. Don’t panic. That part is normal. Keep misting once or twice daily. Roots begin working underneath. Leaves will push up soon. Patience grows with them. Indoor gardening starts feeling real.
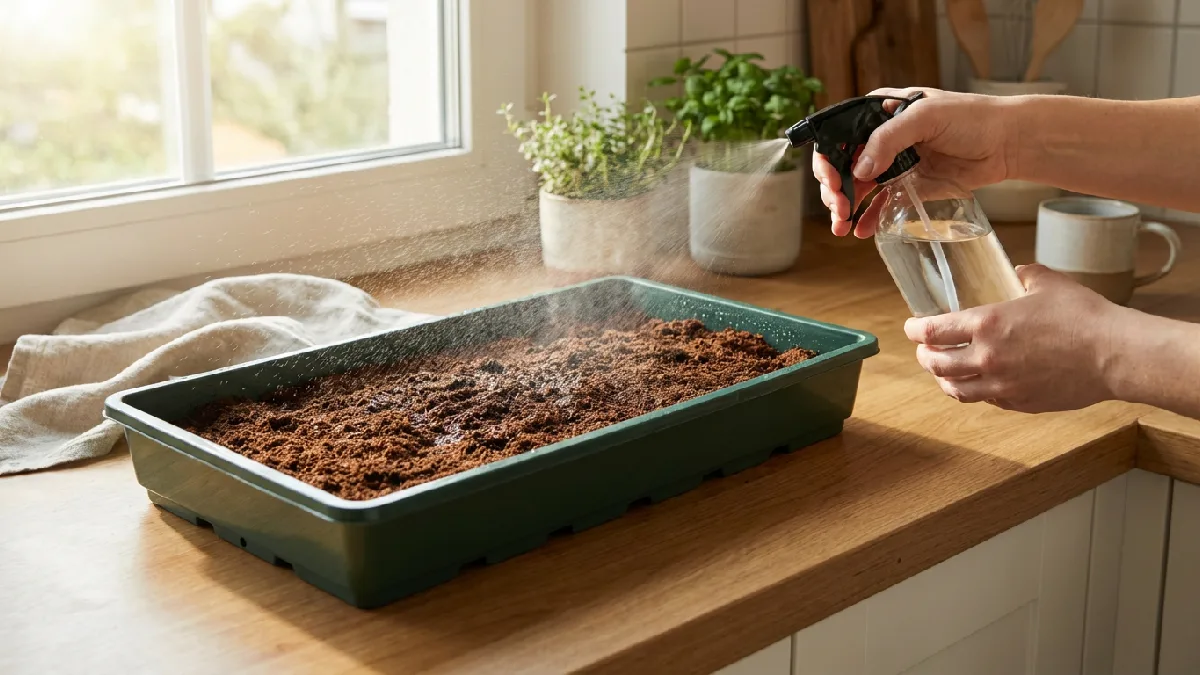
Step 4 – Water and Light Conditions
Watering feels simple, but matters a lot. I overwatered once. Learned slowly. Keep the medium damp, not wet. Mist gently over seeds and soil. Tiny droplets settle in corners. Roots drink quietly underneath. Some days the soil looks dry. Some days it stays dark. Check with fingers. That helps more than guessing.
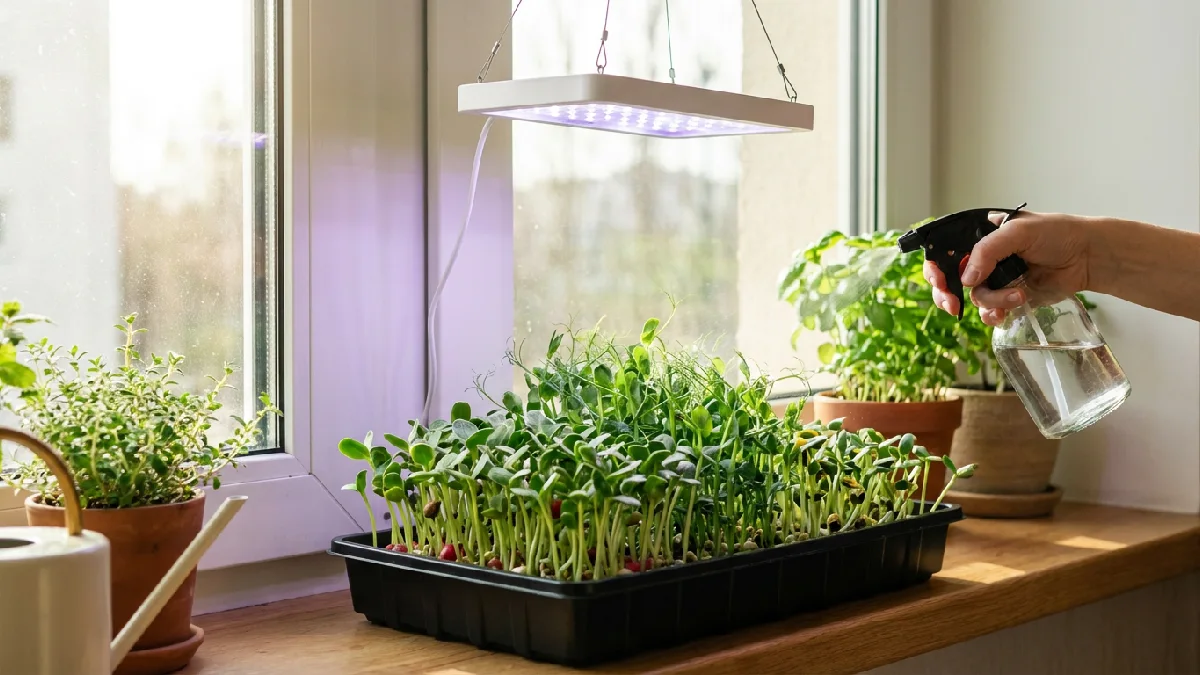
Light guides the growth. Sunlight near a window works fine. Morning light feels soft. Leaves stretch toward it slowly. LED lights help when the sun is weak. Place the tray under a gentle glow. Rotate the tray sometimes. Stems grow straight. Colors turn bright. Growth feels calm. Microgreens respond without noise. Indoor gardening becomes routine, almost relaxing.
Step 5 – Harvesting Microgreens
Harvest time feels exciting. I wait a little too long sometimes. Use clean scissors. Cut just above the soil line. Roots stay behind. Leaves stay fresh. Do it gently. The tray looks neat after cutting. Colors pop more. Smell feels stronger. Some days, harvest feels quick. Some days you slow down and enjoy it.
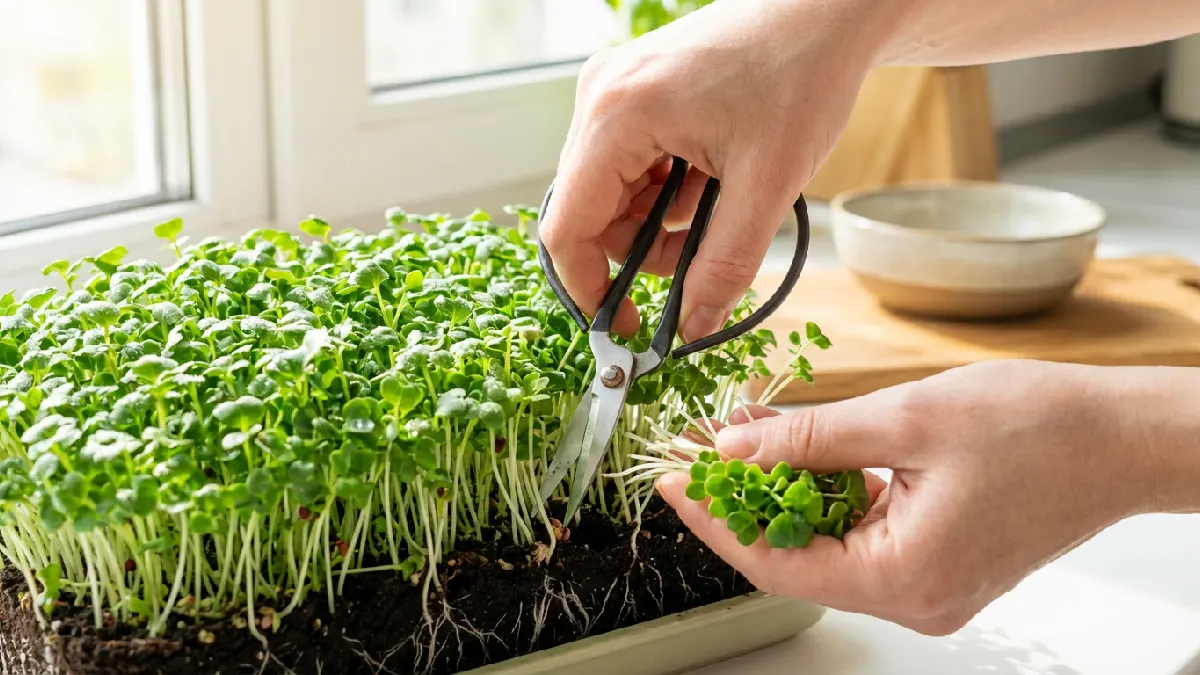
Harvest only what you need. That keeps leaves crisp. Use them right away in meals. Salads taste brighter. Sandwiches feel alive. Store extras in a container. The fridge helps short time. Check the tray again the next day. Growth cycle ends here. The new batch starts soon. Indoor gardening feels rewarding. Tiny effort turns into fresh food.
Common Mistakes & How to Avoid Them
I made mistakes at first. Overwatering was one. The soil got soggy. Leaves turned soft. Mold appeared fast. Tiny tray suffered. Learned to spray lightly. Daily check became a habit. Patterns appeared naturally when care was right. Low light caused trouble, too. Leaves stretched tall. Stems thin.

I moved trays near the window. LED helped indoors. Crowded seeds slowed growth. Airflow mattered. Open window, small fan. Mold stayed away. Seeds spread evenly. Roots stayed happy. Microgreens responded quietly to care. Every tray taught lessons. Little effort daily, big reward.
Overcrowding Seeds
I packed seeds too closely once. Leaves grew unevenly. Tiny sprouts struggled. Roots got tangled. Growth slowed. Some leaves stayed small. The tray looked messy. Learned to spread seeds evenly next time.
Water lightly. Mist gently. Give space to each seed. The tiny tray works better this way. Air moves freely. Leaves pop healthy. Patterns appear naturally. Daily check became fun. Microgreens respond quietly to care. Little effort, big reward.
Overwatering or Underwatering
Watering feels tricky at first. I drowned a tray once. Thought more water means faster growth. Soil stayed heavy. Roots suffocated slowly. Leaves turned soft. Underwatering feels the same bad. Soil dries out. Seeds pause. Growth looks stuck. Balance matters more than amount. Keep the medium lightly damp.
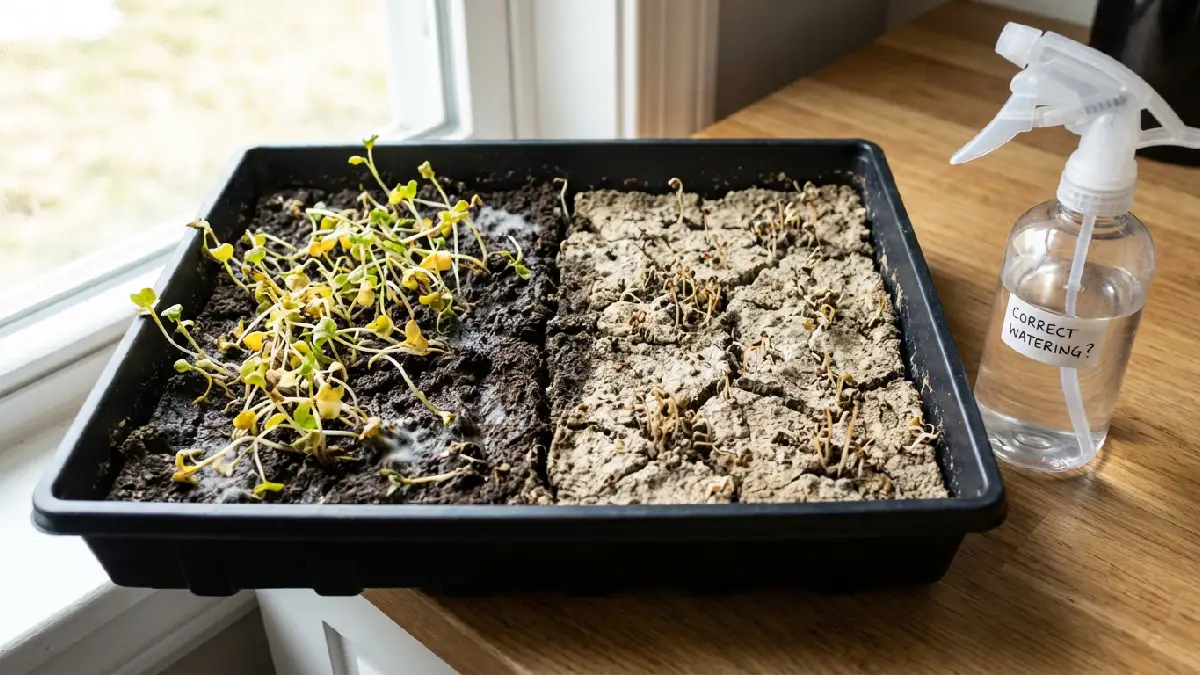
Use fingers. They tell the truth. Mist gently. Don’t flood the tray. Bottom watering helps sometimes. Roots drink at their own pace. Leaves stay firm. Color looks fresh. Growth feels steady. Water becomes a habit. Tray starts responding quietly. Gardening feels less stressful, more natural.
Poor Light Exposure
I ignored light once. Tray sat in the corner. Leaves stretched thin. Color faded slowly. Stems leaned toward the window. Growth looked weak. Some sprouts grew taller than others. Leaves didn’t pop as expected. Plants need enough light. Not too much. Not too little. Move the tray closer to the sunlight.
Or use LED lights indoors. Rotate sometimes. Stems stand straight. Leaves turn bright. Tiny roots grow quietly under the medium. Plants respond fast when the light is right. Indoor gardening feels calm. Small habits like this teach patience. Harvest looks healthier. Growth feels alive.
Mold Issues
Mold appeared once on my tray. White fuzz everywhere. The leaves looked sad. I overwatered. Air didn’t move. Soil stayed damp too long. Tray smelled funny. Roots were fine underneath. Mold just took over the surface. Now I keep trays clean. Mist lightly. The small fan blows air slowly.
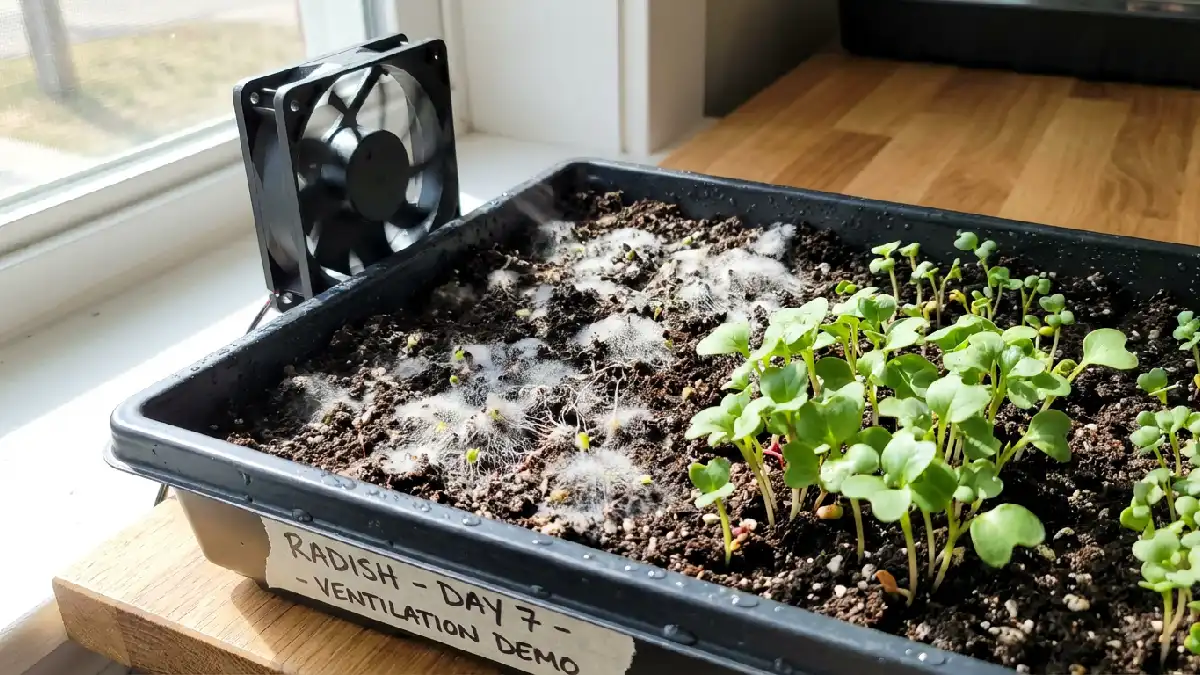
Don’t crowd seeds. Let leaves breathe. Remove the affected ones quickly. Medium stays damp, not wet. Mold slows down, then stops. Growth comes back healthy. Tiny changes save trays. Gardening feels easier. Patterns appear naturally over days.
FAQs About Growing Microgreens
How Long Does It Take to Grow Microgreens?
Radish sprouts in 7 days. Broccoli and kale take 10to 14 days. Some trays grow faster. Some slower. Daily check shows tiny changes. Harvest when leaves look full and healthy.
Can Microgreens Grow Without Soil?
Yes, hydro mats work. Coconut coir is also fine. Roots sit quietly. Water lightly. Leaves push up fast. Indoor gardening feels calm. Tiny trays handle it well. Growth seems alive. Some days are slow. Some days are fast.
What’s the Best Light for Microgreens?
Window light works fine. Morning sun is best. LED grow lights help indoors. Rotate trays sometimes. Leaves stretch evenly. Tiny roots stay hidden. Microgreens respond quietly. Colors stay bright. Growth feels steady.
How Often Should I Water Them?
Mist leaves gently daily. Keep medium damp. Not soggy. Roots hate puddles. Bottom watering works too. Check the tray every day. Tiny droplets reach all corners. Leaves stay crisp. Growth feels calm.
Can I Regrow Microgreens After Cutting?
Some types regrow slowly. Radish is usually done. Pea shoots may sprout again. Cut carefully above the soil. Roots stay hidden. Water lightly. Leaves push up again. Daily check helps. Patterns appear naturally. Indoor gardening feels alive.
Conclusion
I started small, just a tiny tray by the window. Seeds scattered lightly, Broccoli, radish, kale. Leaves popped quietly. Some mornings are fast. Some mornings are slow. Patterns appeared naturally. Watered lightly. Sunlight or LED helped. Tiny roots stayed hidden. Indoor gardening felt simple. No backyard, no big tools. Each tray taught me small lessons. Leaves stayed fresh. Meals tasted alive. Kids peeked often. I harvested scissors, close.
Nutrition packed in tiny leaves. Vitamins high. Minerals stayed strong. Microgreens added color and crunch. Salads, sandwiches, and smoothies, each bite felt fresh. Little effort daily. Big reward weekly. Growth taught patience. Indoor gardening became fun. Tiny wins appeared every day. Watching them stretch was calming. Life quietly unfolded in trays. Microgreens made my kitchen feel alive. Fresh food, tiny effort, happy heart.