
How to Grow Microgreens at Home
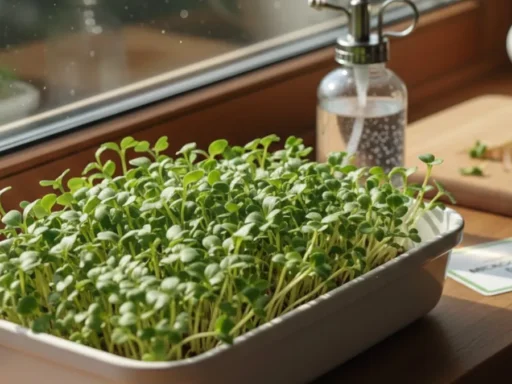
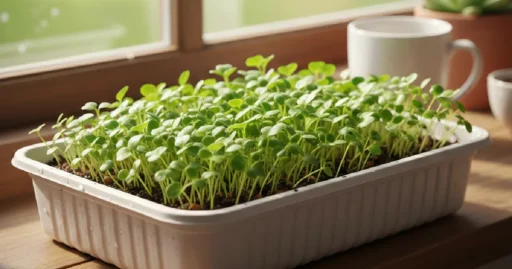
I wanted some greens at home. No space, no garden. Grabbed a tray, poured some soil. Sprinkled radish and pea seeds. Sprayed a little water. Left it by the window. Days went by. Tiny shoots appeared. Sometimes I forgot to water. Still, they grew. After a week, I cut them for my salad. Tasted fresh, crunchy. Felt good eating something I grew myself.
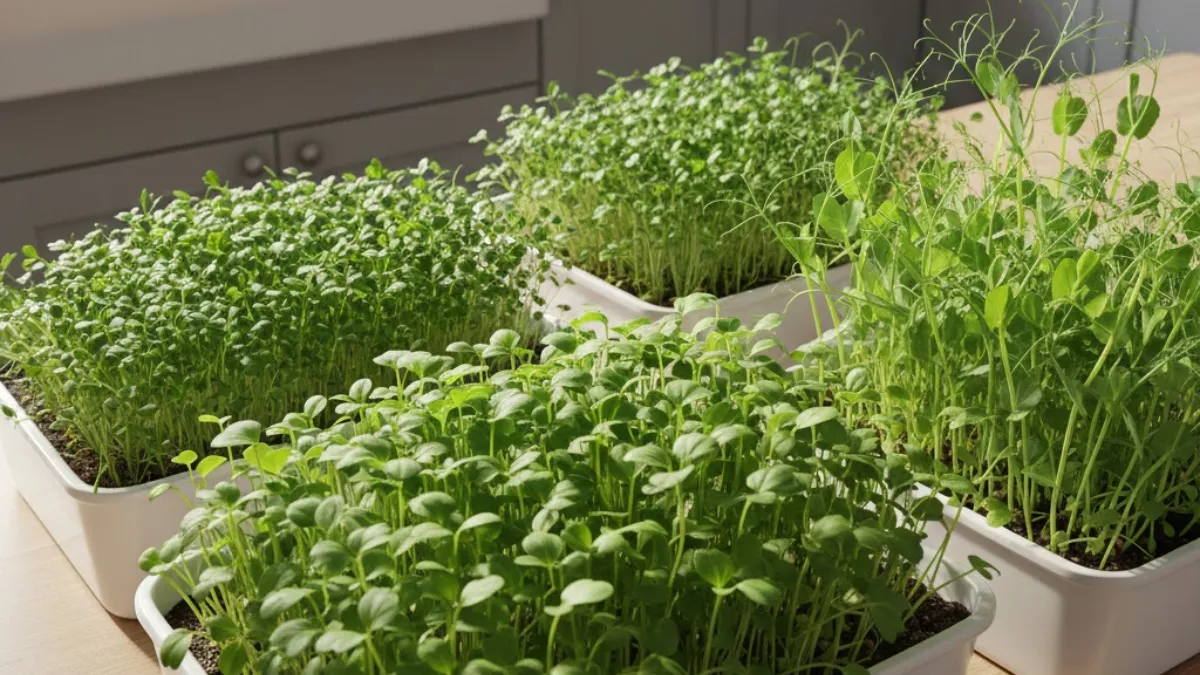
So, I was curious about these tiny greens. Picked up a tray, just from my kitchen, and poured some soil in it, sprinkled radish and pea seeds. I suppose I didn’t think much; I just wanted to try. Days passed. Tiny shoots appeared, so small but lively. They are called microgreens. People love them because they are easy, healthy, and fast. No garden needed.
Well, I kept the tray on my windowsill. Sprayed water now and then. Sometimes forgot. Still, they grew. You can do it indoors, really. Ready in a week or two. Beginners, don’t worry, no special skills needed. Eating something you grew yourself? Feels good. Fresh, crunchy, simple.
What Are Microgreens?
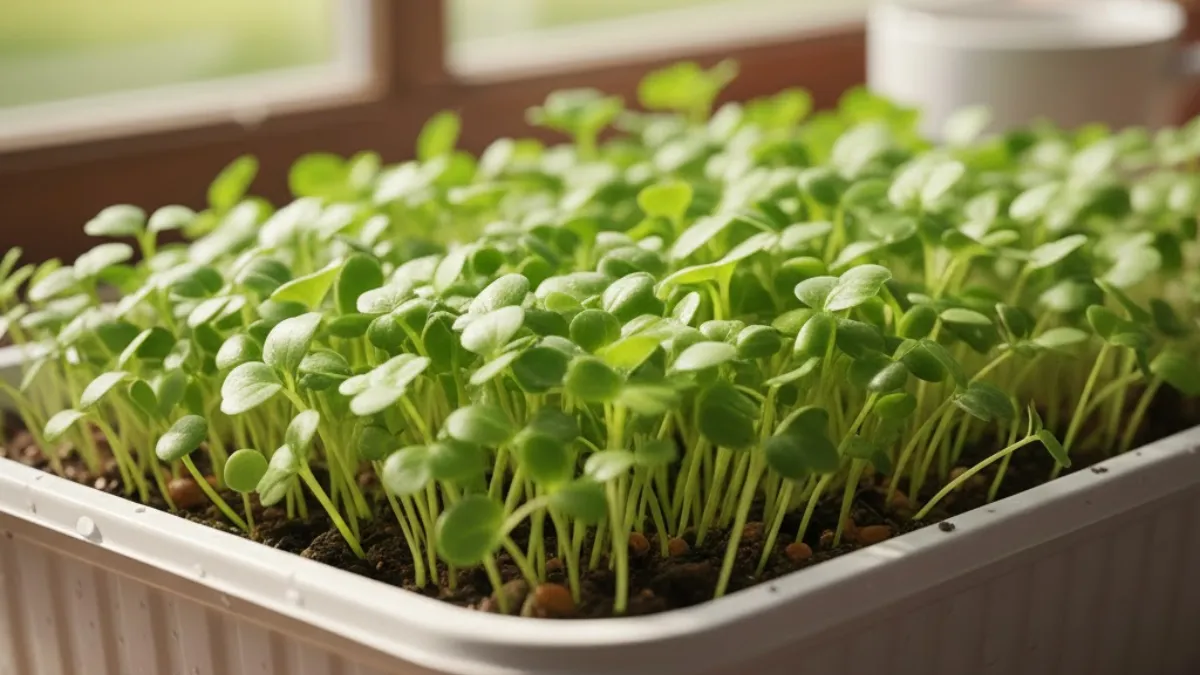
Okay, so microgreens, right? They’re tiny little plants. Just sprouts, but somehow, they feel alive. I grabbed a tray once, dropped some seeds in soil, and didn’t think much. Days later, little green shoots popped up. Crazy how small they are, yet packed with something. People grow them at home because, well, they’re fast, easy, and kinda healthy too. No garden needed, no fancy tools. Just water, a tray, sunlight, patience, I guess.
Tried radish first, then peas. Tiny, fragile, but surprisingly tasty. Sprinkling them on toast, salads, and sandwiches felt good. Beginners can do this, seriously. Watching little shoots turn into food is kinda fun
And the best? In less than two weeks, you’ll get fresh greens. Small tray, small effort, but it feels like a tiny win every time.
So, microgreens are tiny little plants, just young shoots. I guess the first leaves that pop out after the seed opens. People mix them up with sprouts all the time. Sprouts are just germinated seeds; eat the whole thing. Microgreens, when you cut the stems and leaves, feel fresher and stronger. Tried radish once, kind of blew my mind. Small but flavorful.
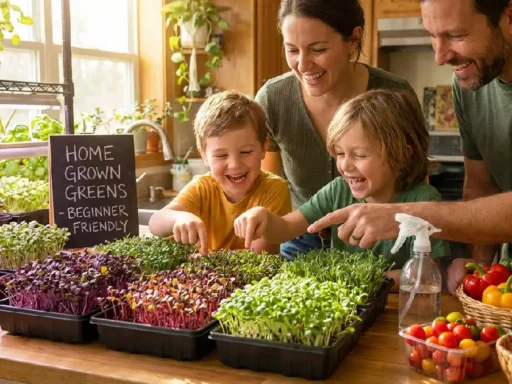
Harvest usually happens when those first leaves appear. Could be a week, could be two. I throw some in salads, smoothies, eggs, or just on sandwiches. Sometimes I stare at the tray, tiny shoots, but kind of beautiful. Beginners can totally grow these indoors. Tiny effort, quick results, healthy, and honestly, fun to watch grow.
Benefits of Growing Microgreens
Well, growing microgreens at home, you know, it’s kinda fun. I mean, you just sprinkle seeds in a tray, wait a few days, boom, tiny green shoots. Feels good seeing them grow. They’re healthy too, like really packed with vitamins. I throw them on eggs, salad, and sometimes sandwiches to make them taste fresh. Crazy how tiny plants can do that.
Also super easy, even if you never gardened before. Windowsill, counter, anywhere works. You water a bit, watch them slowly pop up, kind of relaxing. Tastes way fresher than store stuff. And I dunno, it’s satisfying eating something you grew yourself. Tiny effort, little tray, big win.
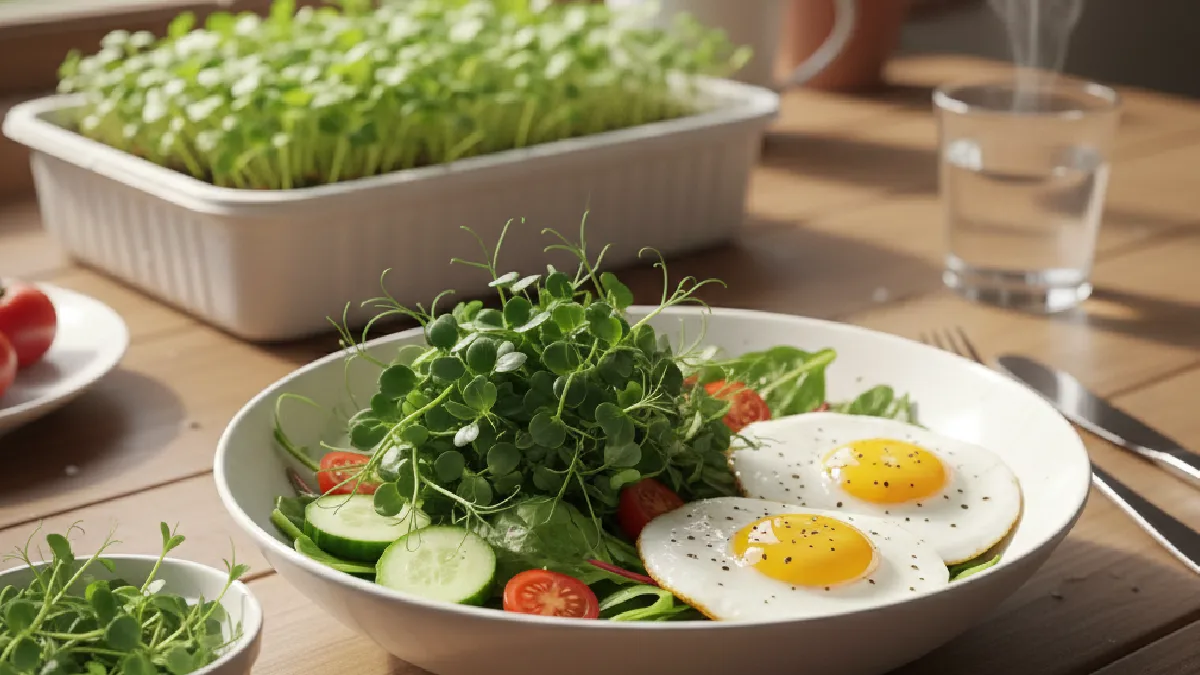
Okay, so microgreens are tiny little plants, but wow, full of stuff your body needs. Vitamins, minerals, you know, the good stuff. I just sprinkle them on my eggs or salad, feels fresh, not like store greens. No chemicals, none of that nonsense. Just grown at home, feels kinda satisfying.
And, honestly, it saves money too. Tiny tray costs a few bucks, but you get greens for days. I grow them on my windowsill, year-round, even in winter. No big garden needed. Small kitchen? No problem. Just water, wait, watch them pop up, it’s weirdly fun. Eating them feels like a tiny win every time.
What You Need to Grow Microgreens
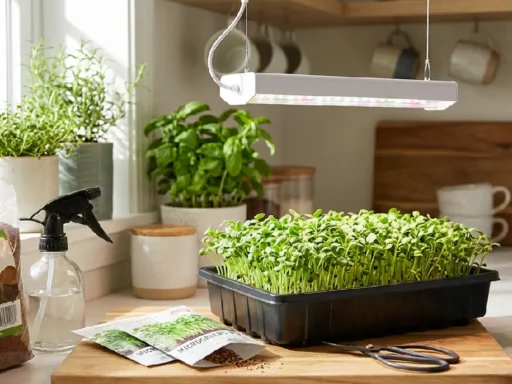
Grabbed a tray from my kitchen. Poured some soil. Sprinkled radish and pea seeds. Sprayed a little water. Left it near the window. Tiny green shoots appeared after a few days. Felt kinda cool. No garden needed. Windowsill works fine. Even a small counter is enough. A bit of sunlight or a grow light, that’s it. Super simple.
Watering is tricky sometimes. Too much, they rot. Too little, they dry. I messed up a few times. Still, they grew. Watching them slowly pop up became a small daily joy. Seeds matter too. Radish, broccoli, peas, sunflower all easy for beginners. In a week or two, the shoots are ready. Tiny greens, fresh and healthy, straight from home.
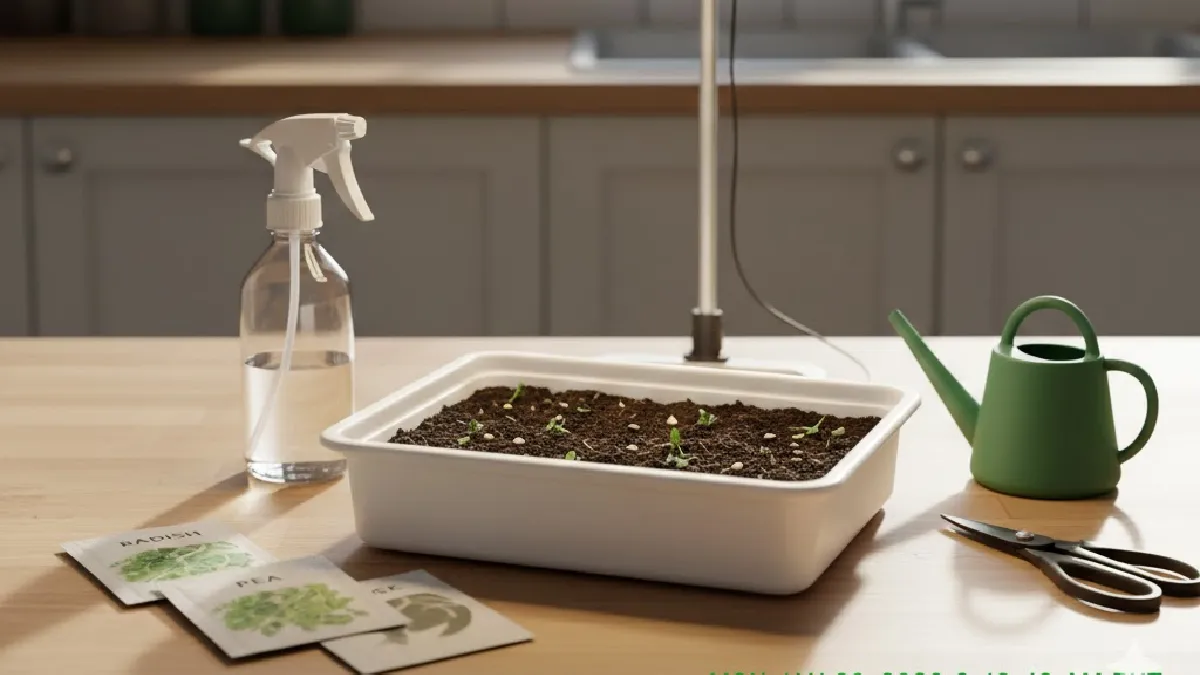
I started by picking the seeds. Radish, broccoli, peas, and sunflowers are just a few to try. Spread them evenly over the tray. Tiny little things, but full of potential. Next, I grabbed a shallow tray. Nothing fancy, just enough depth for the soil or mat. Small kitchen trays work perfectly. I filled it carefully, trying not to make a mess.
Watering was simple. A spray bottle worked best. Misted the seeds lightly, enough to keep them damp. Too much and they might rot, too little and nothing happens. Learned that the hard way. Light matters too. I kept the tray near a sunny window. Sometimes used a small grow light when the sun wasn’t enough. Tiny shoots slowly turned green, growing steadily. Watching them pop up, honestly, satisfying.
Step-by-Step Guide to Grow Microgreens
I guess the first thing I did was grab a tray. Poured some soil in, nothing fancy. Sprinkled radish and pea seeds all over. Sprayed water lightly, you know, just to keep them damp. Left it near the window some sunlight hit it in the morning. A few days later, tiny green shoots started peeking up. Kinda fun to watch.

Then I kept checking every day, spraying a little water when needed. Made sure they got enough light, sometimes moved them around. Didn’t need a garden or anything big. In about a week or two, they were ready. Snipped them carefully, threw them on my salad. Crunchy, fresh, home-grown felt like a small victory.
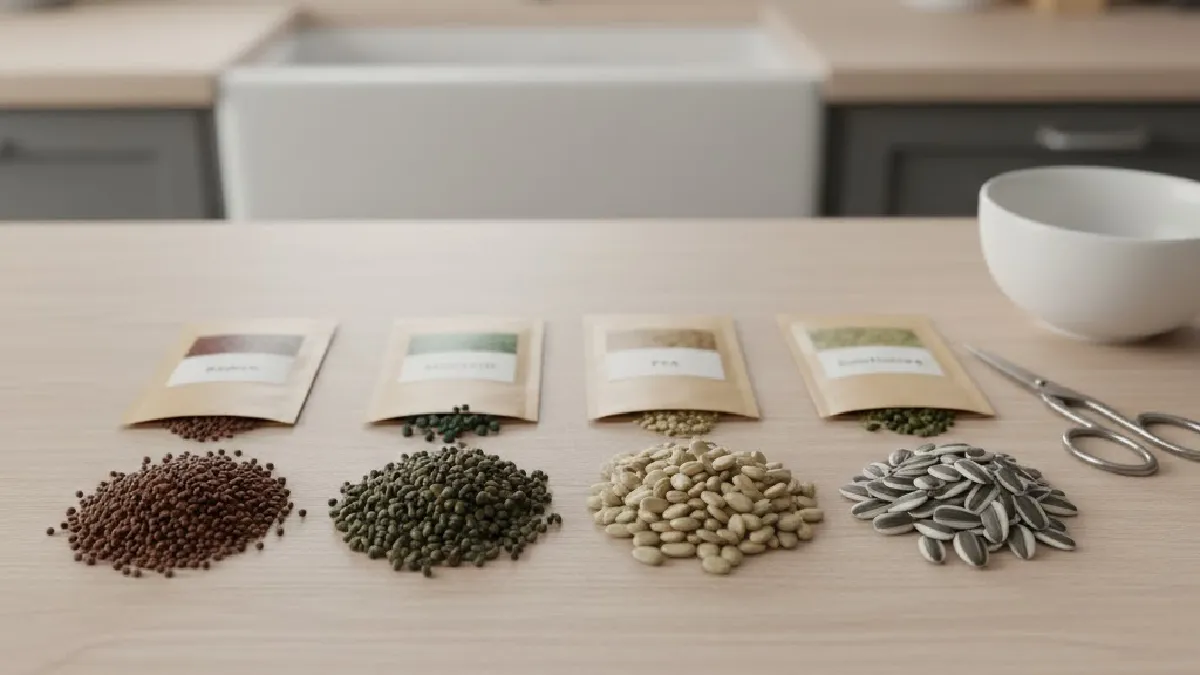
Step 1 – Choose the Right Seeds
I guess I started with radish and peas first. Broccoli and sunflowers worked too. Just picked whatever seemed easy. Spread them a bit messy, didn’t worry too much. Beginner seeds are forgiving anyway.
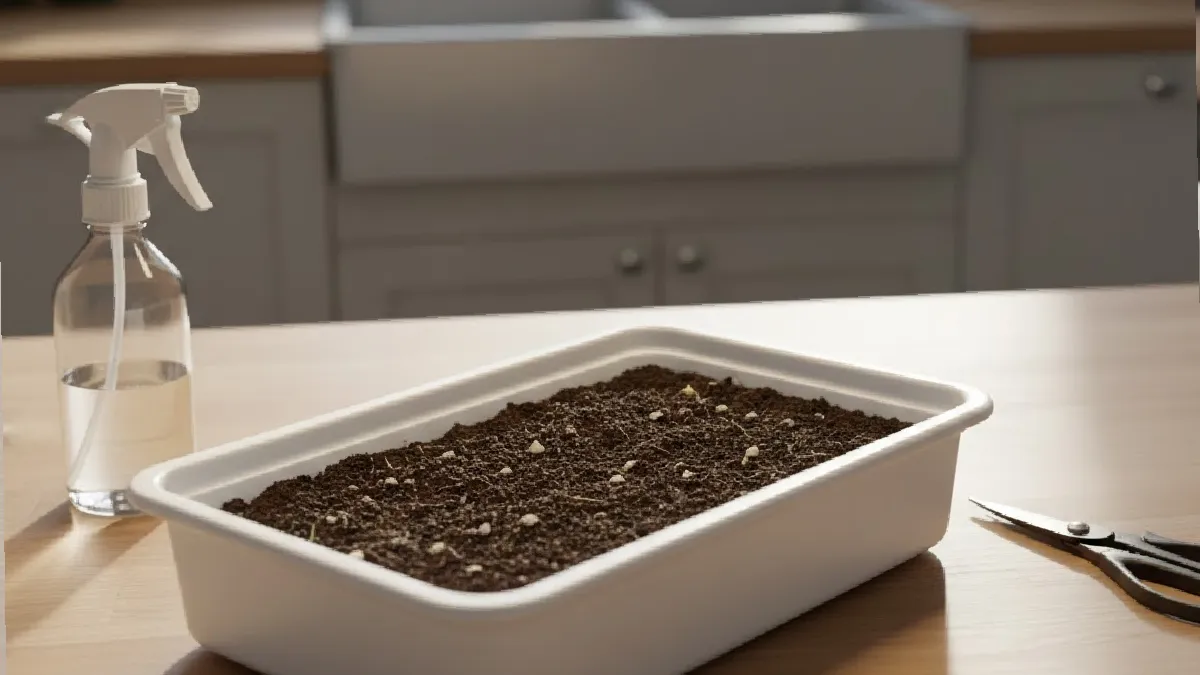
Step 2 – Prepare the Growing Tray
Grabbed a shallow tray, added soil. Moistened it lightly. Not too much water or it’ll go soggy. Just enough so seeds can sit and start sprouting. Felt kinda fun doing it messy.
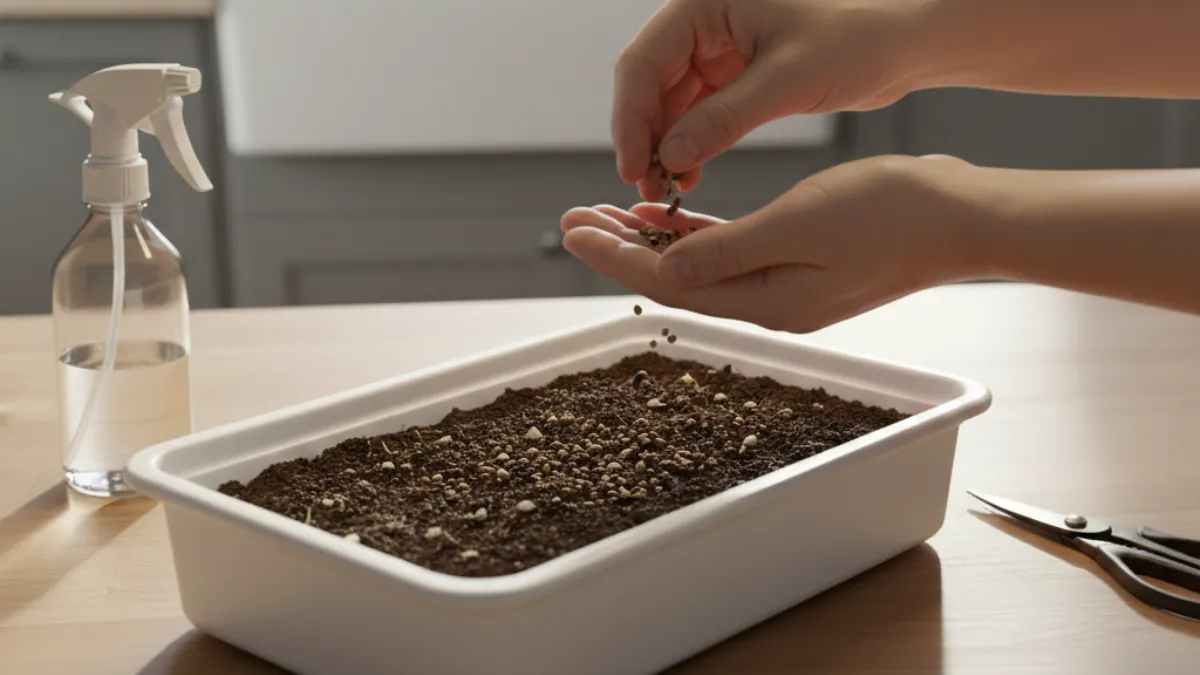
Step 3 – Sow the Seeds
Sprinkled seeds over the tray. Didn’t plant deep, just on top. Tried to spread them evenly, but didn’t stress. Some landed funny, but still grew fine.
Sprayed water gently, tiny mist. Covered tray loosely for germination. Peeked every morning, little shoots started poking out. Felt excited.
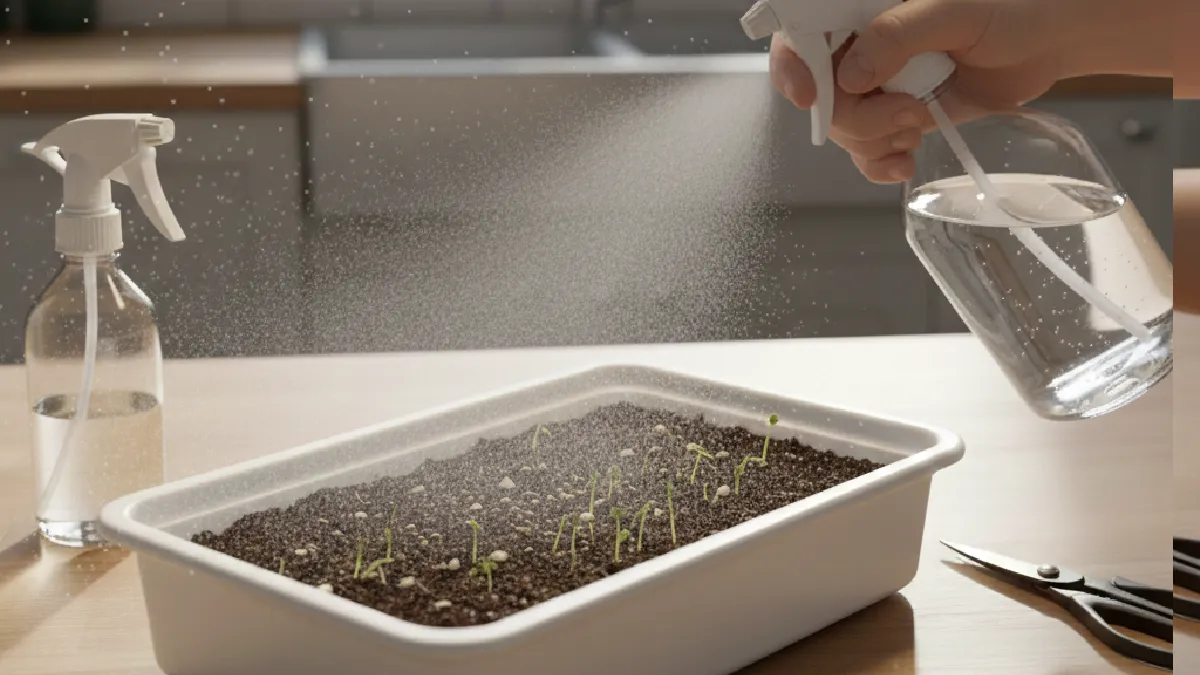
Step 5 – Light and Growth
After they sprout, remove the cover. Placed near the sun, sometimes used as a grow light. Watched them slowly turn green. Misted when the soil looked dry.
Step 6 – Harvesting
First leaves appeared in a week or two. Snipped carefully with scissors just above the soil. Tossed in salad. Crunchy, fresh, tiny win. Felt good eating something I grew myself.
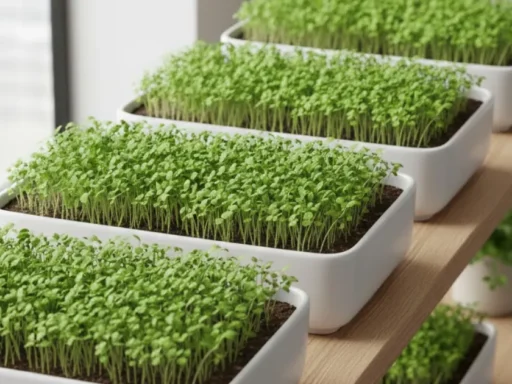
Soil vs Hydroponic Microgreens
Soil method I tried first. Took a tray, poured some soil, sprinkled seeds radish and peas. Sprayed water lightly, not too much. After a few days, tiny green shoots peeked out. Felt kinda cool watching them grow. Soil is forgiving. Even if you forget once, they usually survive.
Hydroponics is different. No soil, just water and nutrients on a mat. Looks clean, almost like a mini lab, but tricky at first. I messed up the water levels a few times. Learned to check daily. Once they sprouted, they looked fresh and healthy.
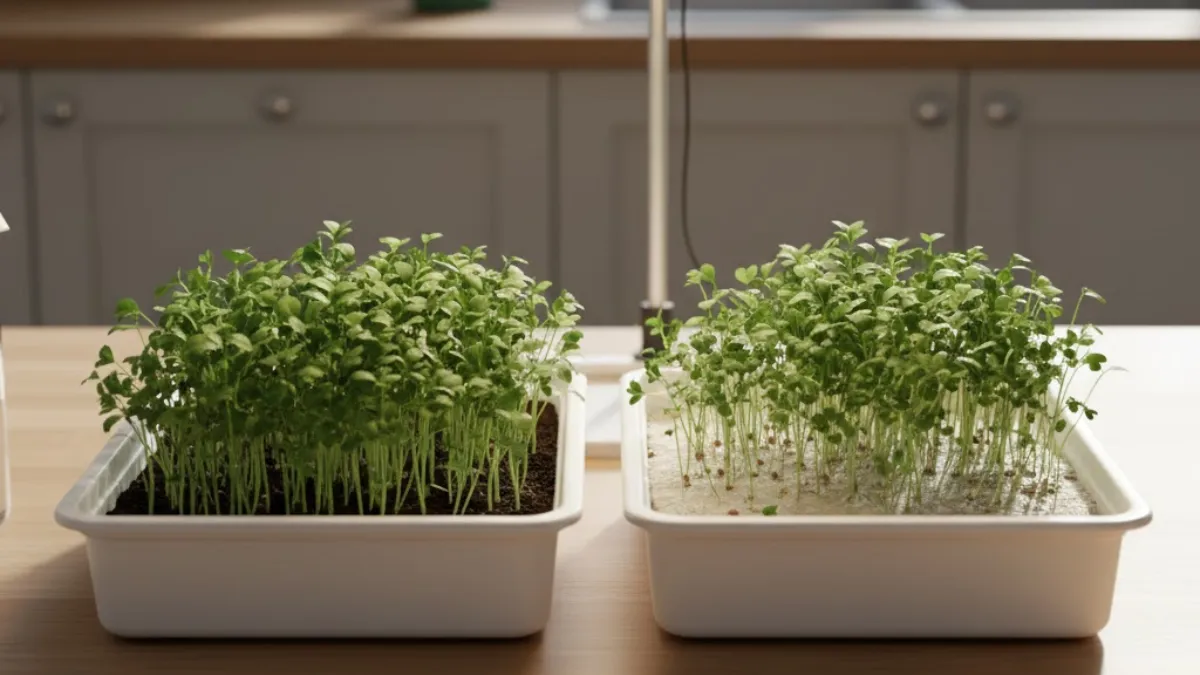
Both have pros and cons. Soil is easy, forgiving, tastes slightly richer, and feels natural. Hydroponic grows faster, looks neat, but mistakes hit harder. I tried both, honestly, and soil felt less stressful at home. Hydroponics is fun if you want faster growth, but it takes more care.
For home use, soil wins for me. Small setup, low stress, works in tiny spaces. Cutting the first harvest feels satisfying. Tiny effort, fresh greens, and the pride of eating what you grew yourself feel good.
Common Mistakes When Growing Microgreens
Overwatering
This one happens a lot. I did it too at the start. More water feels like more care, but it’s not. Soil stays soggy, seeds struggle, and sometimes mold shows up. Microgreens don’t need swimming pools. Light mist is enough, that’s it.
Poor Airflow
Air matters more than people think. When trays sit in a closed corner, things go wrong fast. Stems get weak, leaves look dull. I learned to just keep them near a window or open space. Nothing fancy, just fresh air moving around.
Too Little Light
Without enough light, microgreens stretch out and fall over. Long, thin stems, pale color. I’ve seen this many times. Sunlight near a window works fine. If not, a basic grow light helps. They don’t need blazing light, just steady light. Using Regular Seeds Instead of Microgreen Seeds
Regular seeds can work, but results are unpredictable. Some don’t grow evenly, some taste odd. Microgreen seeds are cleaner and meant for dense sowing. After switching, growth felt smoother. Less stress, better harvest.
How Long Do Microgreens Take to Grow?
Most microgreens grow faster than people expect. Usually, it takes around 7 to 14 days. Some trays come up quicker, some a little late. Temperature, water, light… all of it matters a bit. But overall, you don’t wait long, and that’s why beginners like growing them.
There are fast-growing types too. Radish, mustard, and arugula grow really quickly, sometimes ready in about a week. Peas and sunflowers are slower and need more time. Broccoli sits somewhere in between. Every seed grows at its own pace; not all trays behave the same.
They’re ready to harvest when the small leaves open properly. Color looks fresh green, and stems feel stronger. I usually cut them with scissors just above the soil. Waiting too long changes the taste, so cutting them on time feels better and cleaner.
Best Microgreens for Beginners
Radish microgreens are usually the first ones I tell people to try. They grow fast, sometimes too fast, honestly. You plant them, and a few days later, green shoots are already there. Even if watering isn’t perfect, they don’t complain much. Taste is sharp, fresh, and you feel like, yes something worked.
Broccoli is calmer. Not rushing, not lazy either. Growth stays even most of the time. I’ve noticed beginners don’t struggle much with it. Leaves come out clean, flavor stays mild. You can throw them into almost anything, sandwich, a salad, whatever feels right that day.
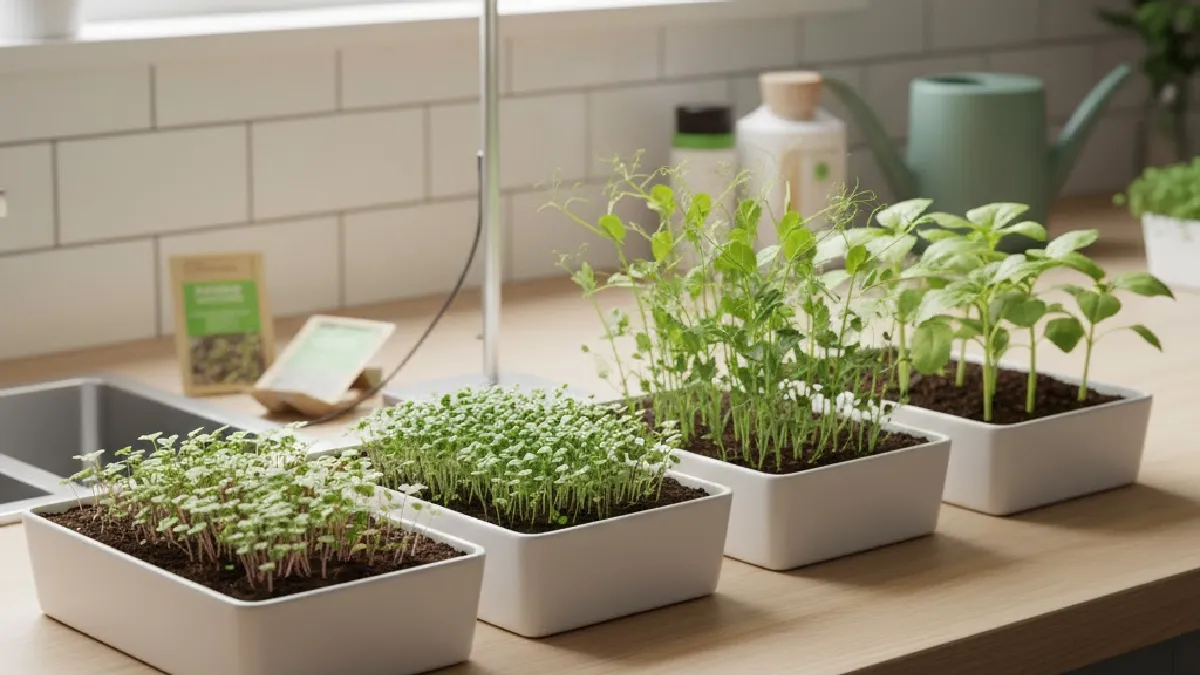
Pea microgreens take their time. Shoots are thicker, stronger, and not fragile. They need a bit more space, so don’t overcrowd them. Once they start growing, they don’t stop easily. Slightly sweet taste, very crunchy. Feels more filling compared to others.
Sunflower is another easy one. Seeds are big, easy to handle, no stress while sowing. They like water but not flooding. When they grow, you can actually see progress daily. Crunchy texture, fresh smell, good harvest. Beginners usually enjoy growing these the most.
Frequently Asked Questions
Yes. I did. Not perfect sunlight. Just a small light nearby. They still grew. Slow sometimes. But alive. Total darkness, no. Light chahiye, kisi bhi form me. I don’t follow the schedule. I look at the soil. Dry? I spray. Wet? I stop. Simple. Too much water ruins things fast. Learnt that the hard way. I eat them often. Not every meal. Small amount. Fresh only. If a smell feels weird, I don’t eat. Common sense works better than rules. Yes. Inside the room. Any month. The weather outside doesn’t matter much. Light on. Water sometimes. That’s it. They keep growing.Can I grow microgreens without sunlight?
How often should I water microgreens?
Are microgreens safe to eat daily?
Can microgreens be grown year-round?
Conclusion
Growing microgreens is not hard. I just grab a tray, sprinkle seeds, and spray some water. Tiny green shoots pop up in a few days. No garden needed. No fancy tools.
Beginners will like it. A few mistakes don’t matter. Tray fails? Try the next one. Learning is quick. Each tray teaches you something new.
Health is nice too. Fresh greens, no chemicals. I cut them before eating. Crisp and clean. Feels good to eat what you grew yourself.
Money matters. Store packs cost more. Seeds at home last longer. One packet gives many trays. Cheap, simple, and satisfying.
Start small. One tray. Watch it grow. Mist a little water. See how it goes. If it works, good. If not, try again. Tiny effort, fresh food, little win.